Team Fortress 2

Team Fortress 2

209 ratings
Beg of tricks: exploring the full potential of the most powerful weapon in MvM
By palerider
Notorious for its high rate of fire and marvellous firepower, the Beggar's Bazooka is widely regarded as the best Soldier primaries in MvM. But how much potential does this weapon really have? When and where does its limits meet cold numbers? This guide will (hopefully) reveal the myths of this familiar yet strange weapon.
   
Award
Favorite
Favorited
Unfavorite
Intro
It’s nothing fresh to know that the Beggar's Bazooka is one of the more popular weapons among MvM veterans, especially in advanced/ expert mann-up missions.

However, being an avid mann-up player and a heavy user of the Beggar's in MvM myself, it’s acutely rare to see players, even ones with convincing amounts of tours, use this weapon anywhere close to its full potential. So, I’ve decided to take another deep look into the Beggar's Bazooka, and uncover the might of the most powerful weapon in MvM.

Warning: expect a lot of numbers. Those who have a deep fear related to math, feel free to jump straight to TL;DR.
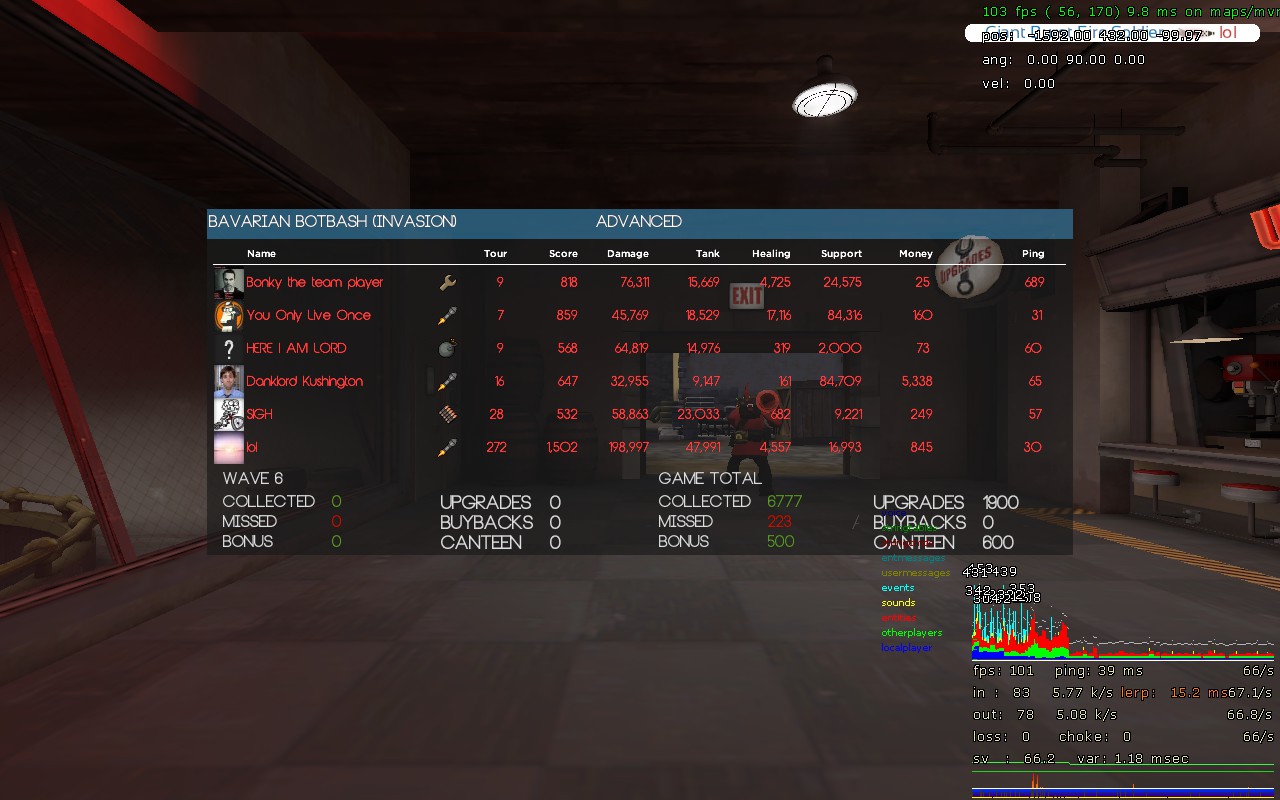
Avid, you say? Who are you?
MvMLobby[mvmlobby.com]
Self explanatory
The boring basics
I'll try not to make this guide into another one of the many that teaches you to tap fire the Beggar's and equip the buff banner, but I'll thumb through the basics of it just in case: max out reload and ammo cap, damage per shot, and *leave firing speed & clip size alone(back to these later); mash mouse1 (tap fire) as if you’re a sticky demoman; stand near a dispenser when deploying your banner to refill ammo, yada yada yada. Alright, moving on.

*This isn't necessarily true, but since they're the most commonly known guidelines, I won't bother correcting them just yet.
(Average) Firing rate
The most crucial aspect about the Beggar’s, the most essential attribute that makes it what it is, is its unreasonably high firing rate. Not the upgrade for clip based weapons, but rather the average rate a weapon can fire shots with reload time considered, and this is one of the two core factors that determines the average single-target damage capacity for any weapon in MvM. The other is damage per shot, which will be covered in a later section.

Being an explosive weapon, it is easier to put the Beggar's damage in perspective by comparing it to other explosive weapons. Most common of which are: stock rockets, pipes, and stickies.
The remaining weapons will not be deliberated over as they’re either too similar to stock (black box, cow mangler), or strictly downgrades/ joke weapons (liberty launcher, DH, loch-n-load, caber?).
The Scottish Resistance (ScoRes) has a slightly slower firing speed than stock, and is used in a very different manner, which we will pay no attention to as well.

Henceforth in this guide, “explosive weapons” will only refer to the following: stock RL, pipes, stickies, and Beggar's.

So how fast can the Beggar's Bazooka fire?

Here’s the table from the end of the video:
Time required to load and fire 50 projectiles (less is better):
Beggar's-max reload+firing, tap fire (scripted)
24:07
Beggar's-max reload+firing, tap fire
24:34
Beggar's-max reload, tap fire
28:35
Beggar's-maxed, fully load
29:04
Beggar's-max reload+firing, fully load
29:12
Pipes-maxed
32:15
Beggar's-max reload, fully load
34:26
Stickies-maxed (scripted)
34:49
Stickies-maxed
39:30
RL-maxed
42:30
Beggar's-max firing, tap fire
45:21
Beggar's-no upgrades, tap fire
48:58
Beggar's-max firing, fully load
59:06
Beggar's-no upgrades, fully load
1:04:48

A few (not really) quick notes:
  • 1. I mashed mouse1 as fast as I could in the video.
  • 2. You’re probably surprised to see some of the results. And no, I didn’t change the timescale or do anything peculliar.
  • 3. The timers use frames instead of centiseconds, so 30:30 would be 30.5 seconds.
  • 4. With maxed out and tap firing, the Beggar's has the fastest average firing speed out of all explosive weapons, and leads by a considerable margin. It has 134% the firing rate of the pipes, 144% of stickies, and 176% of stock rockets.
  • 5. With no upgrades at all, tap firing the Beggar's delivers 87% the firing rate of a maxed out RL. On a side note, an un-upgraded RL takes roughly 82 seconds to fire 50 rockets.
  • 6. With identical upgrades, tap firing the Beggar's is significantly faster than loading all 3 rockets.
  • 7. Maxing out reload speed boosts the Beggar's firing speed by 78%, but you can step it up a notch and get the remaining 25% by maxing out firing speed as well. Yes, it is a worthwhile upgrade, but only in late game.
  • 8. It’s also worth mentioning that even without tap firing, fully loading a maxed out Beggar's is still faster than other explosive weapons. This CAN be double-proven with a bit of math, if you add up the upgraded reload and firing time. The numbers match fairly nicely with the data from the video, except for the stickybomb launcher (even when scripted), which I cannot explain.
  • 9. I do not recommend using crutch scripts (e.g. rapid firing, ctapping, etc.), but since we're focus on potential in this guide, we'll use the time from the scripted tests for both Beggar's and stickies.

Try to have a general idea of this table as we’ll need it in later sections.
The truth behind tap firing
As aforementioned, tap firing the Beggar's brings its already insane firing speed up another notch. But why does it work?

To reiterate, the Beggar's Bazooka’s rockets are technically ‘loaded’ before the ongoing animation ends, and the player can skip remaining part of the reload animation by firing the rocket at or after this point, subtracting a sizeable proportion of the reload time from the weapon’s firing cycle, and this is what tap firing with the Beggar's exploits.

I’m not certain if this is a bug, since none of the other weapons seem to have the same feature. In fact, ‘tap’ firing with other weapons more or less reduces its firing rate, due to the longer duration of the first reload.
Damage: one of the most powerful weapons
MvM is a game about damage. In fact, compared to PvP, which is objective-oriented, MvM stresses far more on damage output: if you deal enough damage to kill all the robots, you win.

So now that we have quantified the Beggar's firing rate, how does that translate into damage?

Single target:
At the beginning of the firing rate section I mentioned that single target dps is determined by 2 core factors: firing speed, and damage per shot. And simple math deduces that dps equals the multiplication of the 2.

Now, assuming that you have the rocket specialist upgrade for soldier (duh), with damage per shot maxed out, all explosive weapons deal the same base damage on direct hit, 180, to a single target. Except for stickies, which should theoretically deal a maximum base damage of 216, but since it cannot make direct hits, and due to damage falloff, it’s often noticeably lower.

So for the sake of simplicity, we’ll assume that all explosive weapons deal the same damage (180) on direct hit.
Of course there’s also damage ramp-up for rockets at close range, and with enough heals you can deal up to 25% more than base damage, but it complicates the matter even further and it’s usually ill-advised to use explosives as a melee weapon. Also, crits/ mini-crits aren’t applied (yet).

So here’re the average dps of explosive weapons, and other typical damage weapons. I feel like I’ve complicated a simple topic way too far but whatever.
Oh and in case you don’t know, scout is a great dps class.

Weapon
DPS (Damage per second)
Minigun-maxed @ point blank
900
Shortstop-maxed @ point blank
420
Soda popper-maxed @ point blank
404
Beggar's-max reload+firing, tap fire
373
*Lvl-3 sentry-wrangled, maxed
*366
Flamethrower-maxed @ point blank
307
Pipes-maxed
279
Stickies-maxed
259
RL-maxed
212
*The sentry dps is most likely incorrect. I only used numbers from the wiki without in-game testing, and due to the poorly coded upgrades, they're probably wrong. I might make a guide detailing tank/ bot damage soon.

And if we toss in crits, phlog’s mmmph, and the buff banner:
*Backstab on giants
1953
Minigun w/ crits
1800
Beggar's w/ crits
1120
Flamethrower w/ crits
921
Shortstop w/ crits
840
Soda popper w/ crits
692
**Beggar's w/ buff deployed 80% of the time (modest assumption)
approx. 470
Phlog-w+m1+m2 on tank
460
*Getting free stabs isn’t possible unless there’s a medic facing the giant that’s drawing aggro with his uber.
**Assuming the Beggar's user isn’t the one using the buff banner.

What was that about the pyro being the best at tank killing?
Just kidding. The pyro costs far less to fully upgrade its tank damage, and is less ammo-thirsty.
Nevertheless, the Beggar's has one of the highest single target dps, even more so with crits.

Most of the numbers in this section are only based on wiki stats, and not on any tests. They're close enough to illustrate the Beggar's power, but here's a far more detailed, test-based guide by me, in which maximum dps for various weapons are closely analysed.
http://steamproxy.com/sharedfiles/filedetails/?id=426921713

Crowd control:
Being bless with a AoE(area of effect) damage ability, explosive weapons are exceptionally effective at crowd control, particularly in tight chokepoints. On top of firing speed and damage per shot, an explosive weapon’s crowd dps is also affected by its splash radius (which increases dps quadratically instead of linear; I will leave this alone as it involves more math and isn’t necessary for our conclusions). At the end of the day, a larger splash radius delivers more damage to a crowd.

By default, all explosive weapons share the same splash radius (146 HU according to the wiki). However, the rocket specialist increases the rockets’ splash radius, which gives the Beggar's (and the RL) an edge over demo weapons in terms of crowd control, complimenting its single target dps which is already considerably higher than any other explosive weapon.

To spice things up even more, the beggar's single target dps is close enough to compete with some of the highest single target damaging weapons, such as spy's knife, minigun, scout primaries, and the latters can only deal damage to one target at a time (w/o penetration for hitscan weapons).

This is usually irrelevant as most robot waves comes in small, underwhelming packs that can be taken care of with a few projectiles. However, on expert missions (e.g. first wave on Mannslaughter, 3rd/last 2 wave on Desperation), some of the later waves on advanced bigrock mission, or maybe even wave 666 (which disappointingly isn't a mann-up mission), players will encounter continuous streams of high hp robots (steel gauntlets/giants) that require a lot of damage output, and this is where the Beggar's crowd dps shines. And since these waves are often the most likely parts of a mission to crush a team, this makes the Beggar's one of the best carry weapon for harder mission.

Conclusion
We have known, through numbers, that the Beggar's has the highest crit dps on tanks, one of the highest on regular robots (with or w/o crits), and its splash radius makes it almost matchless in terms of crowd control. *The hitman’s heatmaker can be as good or even better at crowd control without relying on crits, but if you unleash crokets into a horde…ヽ༼ຈل͜ຈ༽ノ
*I was reluctant to detail the hitmaker’s damage capacity as the damage numbers from explosive headshots seems too random and inconsistent (or maybe I'm just really bad at sniper).
Versatility: the most well rounded weapon (class)
The past few sections have already shown in numbers that in terms of firepower, the Beggar's Bazooka is incredible at taking on every challenge in MvM. But there’s more.

Burst damage

On top of insane average dps, the Beggar's also has the potential to deal high burst damage by fully loading. Due to not contributing to average dps, clip size is often an upgrade that’s frowned upon, but with a few ticks in it, the player can easily fully load behind cover, then release a barrage of rockets onto mobs that would normally kill the player if faced directly, or cause problems if not dealt with quickly (e.g. giant medics). The only other class with such capability is demoman (or spy on a single giant).

Stun (rocket specialist)

Run super scouts, run!

Banners
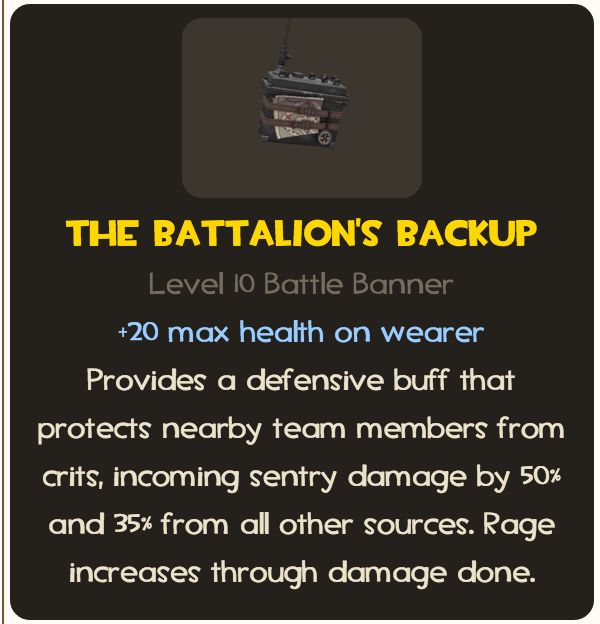
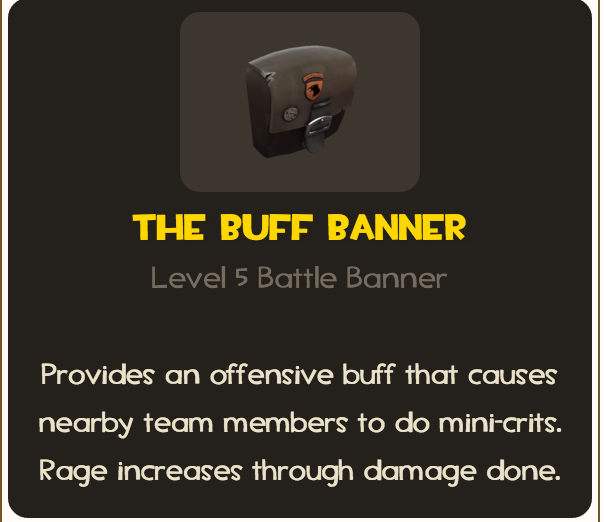
These simple items make the soldier one of the best support classes in MvM. A buff banner can boost a team’s dps just as much as a crit, a battalion’s backup can nullify all enemy crits with an additional resistance boost, and a concheror can keep a team’s health up against even the hardest hitting robots. All of these can be charged easily and deployed for the majority of the time, and the Beggar's ammo mechanism bands perfectly with them. They require no upgrades (although it helps to upgrade), meaning players can switch their support role freely as per the team’s needs.


Adaptability

A Beggar's requires only 3600 credits for the essential upgrades (full damage, 1 rocket specialist, maxed reload+ammo, 1 health on kill), and to out damage most other weapons in MvM, which is likely the amount of credits a player gets even before half-way through the mission. It doesn't necessarily cost any less than most other weapons, but at this point the player can comfortably adapt their upgrades to later waves. They can focus on damage (firing speed, crit canteens, clip size), or support (banner duration, blast/ bullet resistance), or even combine a defensive banner (conch, battalion) with aggressive damage upgrades. The possibilities are infinite, and no other weapon/ class are capable of so.
Weaknesses
I bet this is what everyone wants to know.

First of all, soldier primaries are slow starters.
There're plenty of missions that start off with merely 400 credits, and this makes even a Beggar's soldier struggle to keep up with heavy, demo, and engi at the beginning of the first wave. This will no long be a concern when there's ~1250 credits for upgrades, but it can really hurt on first waves that require a lot of damage (1st wave of mannslaughter). The player will have to play more of a support role with their banner, or choose a power class without upgrades through the first wave.

Then there're reflect pyros and deflector heavies.
They make soldier fairly unwelcome among some old school mann-up players, especially on Mannslaughter. You can avoid this by NOT shooting them blindly.

Third, projectile deviation.
The rocket specialist upgrade gives the soldier practically unlimited range, but projectile deviation encourages the player to be at close range, and makes spamming down tunnels less appealing. Shooting around corners and taking high grounds can make this lot less of an issue.
Another problem that arises is the inability to counter snipers. These little pests can chip down a team’s health across the entire map, one hardscope at a time, and the inaccuracy of the Beggar's can really set off one's fuse.

Fourt… Nope, that’s all I got.
In case you need screenshots to be convinced
Sorry, I'm really lazy
Random tricks
Situationally useful
FAQs
Q: How come the demo always top damages on mannhattan missions?
A: The mannhattan map and missions are largely biased in favor of demo and engi to begin with. It pits all the robot into a low ground, and gives the demo plenty of time to put down traps (which is exactly the reason why the 3rd and 5th wave on Metro Malice are generally considered the hardest and most obnoxious waves on the map, due to the continuous stream of robots). The same thing can be said for a lot of other mission, where the demo can just spawn camp and 'carry', just to a lesser degree.
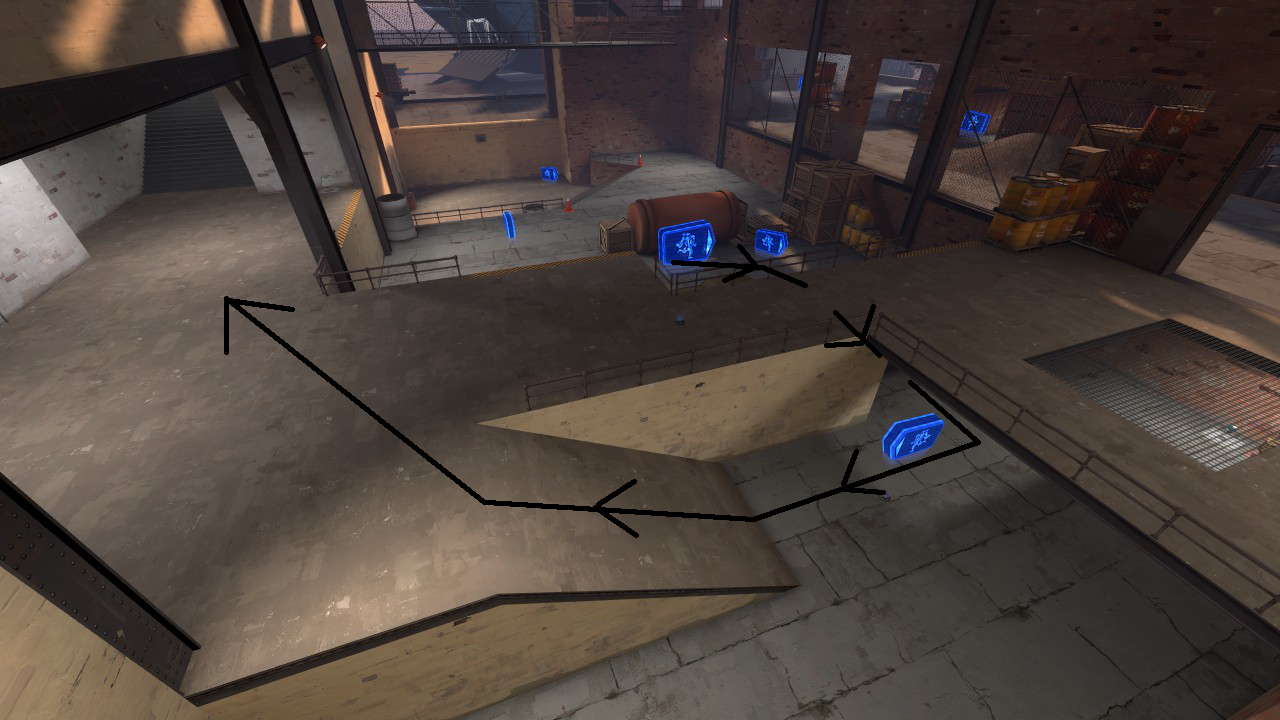
It also has a great spam-free path that the sentry buster has to walk through (screenshot) to reach the meta sentry spot, which makes it painfully easy for meds to get uber from, and just crit the demo forever, worsening the issue. The ScoRes is just an extended version of this “crit-trap-ubersaw-kaboom” cycle. It slaps me on the knee me to see how many meds cry at other players for not slowing down the buster for them, or not use them at all.

Q: Does this make demo an inferior class compared to a Beggar's soldier?
A: Not necessarily. The demo (ScoRes in particular) has a higher starting point compared to soldier, and his traps are essential for taking out threats in the starting wave(s). Still, he lacks the soldier's firepower and versatility and it better to be replaced later into the game.

Q: Is the Air Strike any better at killing tanks than the Beggar's?
A: No. The Air Strike (paired with the base jumper) only does 277 dps, and that’s assuming that you’re always mid-air, which is already a pretty far-fetched overestimation. You’re also giving up a banner, and exposing yourself to dozens of aimbots whilst floating at snail speed. That doesn’t sound fun.

Q: Can the triple/ quad soldier strat on botbash be used on every other mission?
A: If there aren’t any reflect pyros/ deflector heavies, then theoretically yes, due to the stacking of insane firepower and support ability. And it can shut down super scouts completely, which are often a major threat on expert. Outside of two cities, I've only tried it on later waves in Cataclysm & Desperation, and the results were quite promising.

Q: What are some other overpowered items in MvM? Will you do a guide on them as well?
A: Soda popper, concheror, stock minigun, rescue ranger+wrangler, heatmaker. I might make a less detailed guide for all since there’re really not a lot of depth to them.
TL:DR
TL;DW
Final words
I've put a lot of thoughts and effort in this guide, and I hope that it has cleared a lot of the myths surrounding the Beggar's in MvM, and has given you a more straightforward idea of the Beggar's full potentials. This is my first Steam guide, so constructive advice and criticisms are always welcome, and above all, hope you can come to enjoy this weapon in MvM as I do.
69 Comments
Butter 26 Jan, 2022 @ 8:10pm 
It's a well rounded analysis and tutorial, but it's a real shame some stuff is missing. I hope the video becomes available again or something.
Username017 18 Apr, 2021 @ 7:20am 
Imagine trying to skip a tutorial of all things and thinking not having a TL;Dr is gross
Miku 10 Nov, 2018 @ 1:06pm 
"Tl,dw"... gross
Onca 9 Aug, 2016 @ 4:57am 
Thanks
palerider  [author] 9 Aug, 2016 @ 3:15am 
@Original NAX [ChyZ] ARK

http://pastebin.com/y4NzDkva

put this in your cfg file
Onca 9 Aug, 2016 @ 2:13am 
I know this an old guide but can you teach me how to script the firing in the tf2 developers console? I would highly appreciate this
Nuisance_Barge 1 May, 2015 @ 3:27pm 
@Spameron75 The author isn't daft. He realizes that you need the B.A.S.E Jumper when you use the Air Strike which is why he says: "You’re also giving up a banner, and exposing yourself to dozens of aimbots whilst floating at snail speed." Based on this sentence, we can conclude that by saying, "giving up a banner" He means in favor of the B.A.S.E Jumper. Another logical conclusion we can make is that when he says, "exposing yourself to dozens of aimbots whilst floating at snail speed." He is referring to floating with the B.A.S.E Jumper. Plus, we can also conclude that he is saying that the B.A.S.E Jumper is bad because you are an easy target when the sniper bots start spawning. Read the entire paragraph and use context clues next time you make a comment.
Emivescent 25 Apr, 2015 @ 2:24am 
Allthough I do use Beggars bazoka in MvM sometimes, My favourite is Air Strike and B.A.S.E Jumper because as you said you need to constantly in the air the B.A.S.E Jumper lets you do that.
palerider  [author] 21 Apr, 2015 @ 10:49am 
@Hacked Exhale: You're absolutely right. I just consider the ability to deal burst damage reliably a strength for the demo rather than a weakness for other classes.
On a side note, a crit soldier with at least 1 tick in damage can take out uber medics just as reliably.
palerider  [author] 20 Apr, 2015 @ 9:30pm 
@Nano_: Yep. That's mine