Megabonk

Megabonk

Not enough ratings
30 Challenges and tips
By Wibiz
The 30 challenges I did for the last achievement, and some tips for them
   
Award
Favorite
Favorited
Unfavorite
Introduction
In this guide I'll be listing the 30 challenges I did, and be giving out some tips for them. I'm also aware that there already exists a guide for this exact thing, but I still need to do this for the 100% achievement guide I have, so this works as an extension of it. Take a look at the guide Arrowdfy made too, just in case you haven't already. I didn't read it before going for my 30, so I didn't notice the sheer amount of overlap the two would have. I want to apologise in advance for any repetition you might notice. Check it out here:
https://steamproxy.com/sharedfiles/filedetails/?id=3591960438
This is the 100% achievement guide. I'm doing small references to it every now and then so this is just a quick link to it:
https://steamproxy.com/sharedfiles/filedetails/?id=3579942583
Some of this information might be unverified but I tried my best to erase conjecture, but I'd appreciate any corrections you have. That's enough preamble though, now I'm going to get into the meat and potatoes.
The Challenges I Completed
Forest Tier 1
Desert Tier 1
Desert Tier 2
Forest Tier 2
.
.
.
.
.
.(Hopefully this janky-ass indentation method works on all devices lol. Sorry if it doesn't.)
.
.
.
.
As you can see, you can squeeze all 30 challenges within the two tiers, but it doesn't mean it's easy. However, what I can tell you is that if you beat all Tier 1 challenges except for AFK gaming and Pacifist, you'll already be at 20 challenges completed. From that point onwards you can choose which of the ten remaining you want to do, and you're already two thirds of the way done. In other words, you don't need to do each challenge I did, but you should definitely start there.

Now, you might be thinking that you don't want to do AFK gaming or Pacifist as one of those remaining, and you're justified in thinking that. However, once you start doing the Tier 2 challenges and repeatedly dying to the stage boss, you definitely want to do some Tier 1 challenges instead. Trust me, but more on that later.

The difference between each tier is surprisingly staggering. You go from only having to beat the first stage boss, to the second, to the final boss. Especially with challenges like "what the f*ck" or "Fragile", that surmounts to a lot of pain. Each stage acts as its own challenge, which is the reason I wanted to avoid Tier 3 challenges as best as I could. And since I have a lot to say about these, without further ado, I'm gonna start yammering.
Easy-ish Tier 1 Challenges
This is a list of the few challenges that don't really need much elaboration, or are otherwise easy to get a grasp on. If you do need further help with any of these, let me know so I'll get it out of here to a dedicated section.

[Forest Tier 1]
Turbo Mode
-96% Chest price, 5x Enemy scaling

Turbo mode is actually pretty fun. You get to pillage chests without the immediate price hike, but it does come at the cost of harder enemies. Or rather, the enemies become harder faster. If you have a character you are good at, you can definitely scale with the enemies, so I don't have a specific character pick for this. Just try to have fun with this one.

Having said that though, you could try to get a fast character to make most of the cheap chests, and try to open as many of them as you can before the enemies get too strong. Also, don't worry about the boss. I'm like 80% sure "Enemy scaling" only affects enemies, not bosses, so you're still fighting the same "weak" boss as you would at the end of a normal run on the stage. I've based that off the belief that the referred "Enemy scaling" is different from the "Difficulty" stat, which does affect bosses.

Smol Boi
0.8x Damage, 0.8x Movement Speed, 0.8x Size

This is just a meme challenge. You are smaller, weaker and slower. Nothing else is different. If anything it makes avoiding enemies easier if you get the extra speed.

Blind
"The fog becomes so thick you can't see ♥♥♥♥"

Just as the description says, you are in a permanent fog. If you've been to the Desert, you get a good idea on this blindness if you ever encountered a sandstorm. It's harder to navigate, sure, but by no means impossible. Very easy compared to some of the other challenges here.

Sticks and stones
No items allowed, rely only on your weapons and tomes! (0x Chest Multiplier)

No items, but you do get everything else. And given that you can get very powerful weapon and tome combinations, this shouldn't be an issue, especially since you just need to clear stage 1. Although it's important to note that some characters are more reliant on items than others, so you might not do well with just the one you're most comfortable with. Regardless, this is very doable.

If you haven't already, you might as well use this opportunity to unlock the Hero Sword. Just in addition to items, don't pick up any powerups or shrines, and the sword is yours. More information on that in my 100% achievement guide.

------------------------------------------------------------------------------------------------------
[Desert Tier 1]

Hyper
2x XP gain, 2x Gold Gain, 4x Enemy scaling

This is very similar to Forest's Turbo challenge. You get powerful faster, but so do the enemies. The Important difference is the XP multiplier, which allows you to get tomes, weapons, and upgrades that let you out-scale the enemies easier. And in addition to that, you get more gold as well. It's just like playing the game in 2x speed, kinda. Don't stress about this, it's very possible, and also fun.

This is also the best challenge for the Cactus unlock, which I do recommend getting if you want to go for the Pacifist challenge. Look up information on how to get it, because that achievement is not something I want to talk about in a little while.

The Floor is Lava
Lava periodically covers most of the map

Periodically, as the description says, the map gets flooded with lava. You can escape it fairly easily by just running away, or flying if you're Birdo, but the important detail is that the lava does not insta-kill you. What can happen though, is that the boss altar is super low down in the map, so you might have a difficult time with the fight, but you can also lure the boss away from it. Also none of the enemies get damaged by the lava, not that I can recall at least, so that's not way to cheese swarms.

The flooding happens very much like you'd expect. There's no simulation, it's just an animated plane that rises up every now and then, but it also does so at a fixed rate. It means that you can escape it easier by covering vertical distance faster, so shallow slopes like the dunes are harder to escape than a jump to a building roof. You can also predict the flood timings somewhat, so by your second attempt you definitely know what to do.

Swarm
2x Enemy amount, 0.75x XP gain, 1.5x Enemy speed

This might seem difficult, but the doubled enemy rate also doubles the amount of XP you get, although you do get less of it per crystal. Try to get weapons that can damage a lot of enemies at once. Piercing weapons like the bow or sniper are good, and if you're feeling brave you can go the 360 coverage route with Aura and Frost walker. Really whatever floats your boat, since you know exactly what to expect from the description alone, so it's just about execution.

Chonk Mode
0.85x Enemy speed, 2x Enemy size, 2x Enemy HP, 1.5x Enemy damage

Just like with the swarm, you get what is said on the tin on this one. Also comparatively, these enemies are slow, so even if they do deal more damage, you can run away and keep a distance fairly easily. I didn't consider this difficult, but I could also be wrong.
oh no, oh ♥♥♥♥, what the ♥♥♥♥
These are a group of challenges present in all tiers of each map. (not sure about Desert tier 3 because I haven't beaten that yet). The "oh no" school of challenges makes enemies have 1,25x more health, damage and speed, whereas "oh ♥♥♥♥" bumps that up to 1,5x in the three categories, and finally "what the ♥♥♥♥" slaps a 2x modifier on the enemy strength, health and speed.

You can see that I did the "oh no" and "oh ♥♥♥♥" challenges for all four chosen tiers, and that's simply because they're straightforward and possible to do with a little focus. It's "what the ♥♥♥♥" where it gets a harder, most significantly with the enemy speed. Especially in stage 1. You don't always have enough damage to kill all enemies, so you have this huge horde lagging behind you, and you basically can't charge shrines without being harassed.

Ultimately, I found out that it's best to treat the "what the ♥♥♥♥" challenges like you are preparing for the final swarm. The first time I picked Aegis to avoid those massive melee hits, I won the run easily, because most of my runs before that had been lost to any of the four swarms in the (tier 2) run. With the shield though, I could not only avoid damage, but also dish some damage back. It's not what you think of immediately, but it makes a huge difference.

The tier 1 equivalents are significantly easier, like I eluded to at the start of the guide. For tier 2 runs of these challenges, you always need to accomplish the equivalent of the tier 1 challenge as well as the stage 2 variant. In other words, you don't need all this prep work if you're just doing the tier 1 "what the ♥♥♥♥" challenges and below, because that's nothing compared to the upper-tier versions. You might need to get a little sweaty, but you don't need to like start min-maxing every detail. I highly recommend the Aegis though, sweaty or not.

Having said that, "what the ♥♥♥♥" on tier 2 of Desert is ruthless. Not only are the enemies more aggressive there, but you can't cleverly hop away to an elevated platform or weasel your way out of a tough swarm. That's not entirely the reason I didn't do it though, I just happened to complete my 30th challenge before I needed to consider it, so if you want to skip the Pacifist challenge for example, you can substitute it with the "what the ♥♥♥♥" on Desert tier 2. Or anything else really, like something on Tier 3, that's just the alternative I would choose.

So, in more compact terms, the "oh no" and "oh ♥♥♥♥" challenges are something you can do with relative ease on any of these tiers, but you truly need to get locked-in if you want to attempt the 2x enemy modifiers on tier 2. But, it's still the easier option since for example for tier 3 of "oh no" you not only need to do the tier 2 equivalent all again, but also beat the final boss. In comparison, I'd rather take the slightly elevated multipliers. It's also just a preference, but remember, dying to the stage 2 boss sucks far less than dying to the final boss. That's always going to be the case, at least in my biased mind.
Speedrunner, Speedrunner+
Both maps have the Speedrunner and Speerunner+ achievements. Tier 1 completions require 6m and 4m15s completions respectively, whereas Tier 2 has 14 and 12-minute runs respectively. The description also says that you will die after this timer, and that is true. As soon as the timer hits 0, you die. No dramatic warnings, just death.

Notably though, multi-stage challenges work slightly differently. The Speedrunner challenge on a tier 2 map for example will have you start off with a 10-minute timer, and your next stage will calculate how much you have left. If you spent 6 minutes in stage 1, you will start the next stage with 8 minutes left on the clock, after which you die. After you beat the stage 1 boss you'll be presented with the final swarm, but I'm unsure whether fighting that off counts against your clock. Probably safer to just pick up your XP and go. Having said that though, the initial 10-minute clock might make you forget that you're doing a speedrun in the middle of the run, so keep that in mind.

I did all my Speedrun-related challenges with my bony friend Calcium. He gets to be very fast, and if you stack his arsenal with some ranged weapons, a cooldown and a quantity tome, you get to run circles around the stage bosses melting them away often with some moldy cheese. It's just the best one for me, but I'm not saying it's the perfect pick for everyone.

The way these Speedrunner challenges played out was usually the same. I charged up on shrines, often getting a couple extra jumps for agility, with rest of the shrine offers going either into direct damage, or the speed of it. I rarely took more health unless it was directly offered in a chest, and ignored some shrines or chests to save time. Along with the cooldown and quantity tome, I would often pick the XP and luck tome for that extra speed of progress, but I could also sometimes substitute some of them with the shield and regen tome depending on availability.

Now, notably, I didn't do the Speedrunner+ challenge on Desert tier 2. This is mostly because you often get turned into a glass cannon to be able to dish out all that damage, which wasn't a viable strategy in that hostile hellscape. Most often I would die to Lil' Anubis and his ♥♥♥♥♥♥♥ lock-on death beam of imminent and excruciating doom. So, I abandoned that idea, and chose one of the lesser evils. You can go for it though if you're confident, but it can get really irritating.

The Speedrunner+ challenge on Forest tier 2 took a bit of work though too, but it was a far more enjoyable experience over all. The stage boss attacks are predictable, slower, and more forgiving. Meanwhile over in Desert you have Scorpionussy and her rain of acid needles and Anbuis with the spinning laser beams straight out of a Saw trap. You can definitely see why Desert doesn't have the "Fragile" challenges.

But overall, once you get used to playing the game a little faster, these challenges become very doable as well. They are reliant on luck of course, so you needn't beat yourself up if a run didn't work out the way you hoped it to. I don't think anyone expects you to get lucky and do these in one try, especially those tighter times. But, if you do become able to do them, you can get 4-8 challenges completed all nilly-willy, as they say. In theory.
Weird controls
For this challenge your controls are reversed. W becomes S, A becomes D, so on. Even your mouse gets inverted, which definitely takes some getting used to. Fortunately Dani just made it so that you only need to beat the first stage boss, so it's not all horrible, but this still deserves its own mention.

The way I decided to tackle this challenge was with the use of my mouse for my movement. I didn't want to re-learn my keybinds, after all. So in practice, I would face some direction, press forward (S), and I would move forwards in the direction I was facing. Once I moved my mouse, so would my character change direction. It was definitely slow, but it was a method that worked. You definitely can't do any tactical evasions, bunny hop your way across the map, or rely on movement in any kind of way.

Now, there is a way to go around this by rebinding your controls for this challenge to be the reverse of what would normally be the case, and this does include your mouse as well. This effectively makes you play as normal, but you can't make the changes in the middle of the challenge. It's entirely up to you if you want to go this route, as do remember that this would take a lot away from the challenge itself. However, if you find yourself frustrated, this is always an option.

Either way, this challenge is very possible to do. It's a nice spin on normal gameplay, and most definitely one of the 30 you should do. I did it the old fashioned way, but you can effectively "cheese it" as well. It's entirely within the bounds of the game. Whatever you choose, I wish you luck.
AFK Gaming
Don't move, and reach the final swarm. Sounds easy, right? Well, there's more to it than that, as one would expect. Now, I initially did not want to do this challenge, but like I said in the beginning I was more or less forced to do it. I kept throwing attempts at tier 2 speedruns and 2x enemy multiplier runs, only to die in some horrible way, so I wanted some reprieve. Some relaxing, you could say. And well, I don't regret it. That's one less tier 2 challenge I needed to do, and I didn't even need to touch my keyboard.

Naturally, I didn't figure out how to do this myself. I followed a very good guide made by M1lk for this, and you can find the guide here. Check it out, as I will be referencing it: https://steamproxy.com/sharedfiles/filedetails/?id=3577966860
Now, the best weapons for this are those that are well affected by size, and can hit a lot of enemies at once. I ultimately landed on Aura, Frost walker, and Chonkers, and picked Athena for the starting weapon of Aegis as recommended for the guide. There's a couple other reasons for this too, but most importantly, gathering XP.

If you try this challenge with a character that has a ranged weapon, the enemies will get killed somewhere far away, and you never get your experience to get more weapons or tomes. I suppose you could use Bush and kill the enemies manually only when they get close, but Athena is definitely easier to manage. Also any elites that run into you and die spawn their chests close enough for them to be picked up, at least the first one.

The attraction tome also plays a key role in this challenge. You're not moving, so you need to make the XP move to you, especially as you increase your death zone. This along with the size tome should be the first tome you get in the run to make it viable. And to ultimately survive, you need a method to get health back, and for that I used the regen tome as recommended by the guide. Again, this M1lk fella did some good work.

The biggest choke points in this challenge, by far, are the minibosses. They're not squishy like the other enemies, so they just run up to you and start pushing you around, dealing massive damage with each tick. I got insanely lucky with my run, Chunkham straight up pushed me into a rage powerup and subsequently died, and I managed to get strong enough for geodude. Speaking of powerups, the place where you're standing is a treasure trove of them, you just can't reach them unless you get pushed. The guide also places importance on getting pushed, specifically against a wall, but there's nothing you can do to control that.

I was able to get this on my second or third real attempt. Maybe RNGesus felt bad about my terrible tier 2 challenge attempts and let me get a freebie, but I definitely would expect it to take longer. There's a lot of luck involved in this one, but the silver lining is that you literally don't need to do anything. The first test of might is the first miniboss three minutes in, and if you fail that, it shouldn't take too long to get another run going. In theory. But, if it still fails, you can do one of the tier 2 challenges I skipped, and periodically check back in if you could get lucky with this.

I leave you with a screenshot I took of my run when I had one second remaining. It's not meant to gloat, just to give some idea of what went down.
Pacifist
Pacifist is yet another one of those challenges that spark fear into anyone who reads the description, but here I'm once again saying that it's doable. You just need the right plan in mind, and there luckily is one. And predictably, it can be found in a guide I did not make, so just like with AFK Gaming, I'll be referencing it as it's one I used, and praise be M1lk who made it. Find it here:
https://steamproxy.com/sharedfiles/filedetails/?id=3580565190
So there's actually some non-weapon-based damage options for you, but thorns is the only one you have from the get-go, and the character who has it is Athena. Alternatively Ninja can also execute enemies he evades, but I find thorns and Athena by extension to be more consistent. Other than that, there's actually not a whole lot that goes into this challenge, and it can be put into just a few sentences. (which I won't) The guide I linked has the following plan in a more detailed manner, so check it out, I'll just be yapping about it as I understood it, as usual:

So once you spawn in as Athena, you can either immediately start killing enemies by hugging them to death, or you can start smashing pots for XP. You're looking for a shield tome, because as with any thorns build, you're going to need a replenishable health reserve, and shields is by far the best way to do it. Not only do you get shields in 25 point increments from the tome upgrades, it also recharges insanely fast. That's already a lot of damage you can do without actually losing health. If you don't see a shield tome within the first minute, you should consider restarting. This much the guide I linked says, and I tend to agree. The thorns tome is a secondary priority

There's also the items that work in this challenge. The guide has a better list, but the ones I can recall now are bob that just spawns ghosts when you walk, that legendary scythe that spawns two for each kill, and moldy gloves. Also the cactus, which I was fortunate enough to find early on. Yes, the item that I had been lambasting in my 100% guide is actually useful in this one challenge. There's also Quin's Mask, but I forgot to enable it in my run. Point is, this doesn't double as an itemless run, it's just that your damage potential through them is limited.

I found luck with this thorns setup, but others have reported that Ninja works as well. You can try both to see what works better for you, but personally I was able to crank this out in just a couple of attempts. It's of course also reliant on luck, and I actually recorded my run and you can watch it below to see just how lucky I got, but it's not necessary. I believe I got the core gist through this wall of text. But again, if I didn't, check M1lk's guide. It honestly does a very good job.

Here's the video for anyone curious:
https://www.youtube.com/watch?v=fYAV5Lvmpd4
Fragile
This is not as much of a guide on how to do this challenge, this is going to be more of a rant. Apologies in advance. But so as name of it would suggest, you're hit, and you die. That's it. This includes all sources of damage, most notably fall damage, who Tony McZoom can negate. More about that in the Holy Book section in my 100% guide.

So Fragile 1 is not that difficult at all, and in fact it's the best way to get the aforementioned Holy Book. It acts like a forced reset, and it's easy enough if you're careful. But Fragile 2 just straight up ruined it for me. Not only do you need to survive stage 1 without taking damage, now you need to do it for stage 2 as well? I was very close a couple times, even died to the stage 2 boss once by falling into a red bubble while I couldn't control my descent. More often than not though a swarm comes in and suddenly you have nowhere to go. Anyway, this challenge is entirely possible, it's that very same copium that kept me throwing attempts at the wall, but I ultimately didn't succeed as you can see.

It's just unforgiving, and I mean that. I look away for literally two seconds and I smash into a zombie, I look away for 3 seconds, and ♥♥♥♥♥♥' Chunkham blasts me from the other side of the map while I was charging a shrine. One attempt I activated a challenge shrine, walked past it, and enemies spawned into me and I died instantly. Dani had no chill whatsoever while cooking this up, just absolutely maniacal.

Do you know what the worst part is? I thought I was being clever by finding item combinations. I found Za Warudo once, thought it would save me from a lethal hit as it says on the ♥♥♥♥♥♥♥ description. Guess what, that it did not do. Thought I could prevent that whole "running into zombies" issue by donning the Aegis and preventing damage that way. Guess what, that's still a hit and you die regardless. Like nooo, what's the fun in that? Man, I tried this so many times, and in the end it didn't even matter. All I have to say for myself are these complaints, hell, I might be the fragile one!

Just.. maybe don't? Don't become like me. Do the Fragile 1 challenge, that one is chill, but do not be tempted by the sweet allure of an easy challenge in the Fragile 2 challenge. 1.6x silver multiplier my ass. Anyway, rant over. Chances are if you can do Fragile 1, you can do the sequel as well. It might just need a bit more patience, concentration and a strong willpower.

Afterword
Aaand that's it. That's the 30 challenges I did, and I hope you learned something from it. I purposefully only talked about the challenges I completed as A: That's what I knew about and B: I think these might be the easiest ones to do. Again I want to re-iterate that these are just the challenges I finished, and you're free to choose your own. This is not a definitive guide for this achievement, it's just supposed to shed some clarity.

So, what do you think? I stayed up until 10am when I made this so there might be some mistakes, oversights, etc. Let me know if you have any questions, improvements, stuff like that. Good luck on the hunt!
7 Comments
Wibiz  [author] 15 Nov @ 5:42am 
You know HeroShish, I never thought about that, but I highly doubt it. Since you can't have multiple challenges active at the same time, I wouldn't think you could complete multiple at once even through other means. The challenges essentially are singular difficult runs. In the same vein completing "what the ♥♥♥♥" doesn't also complete "oh ♥♥♥♥" and "oh no" even though they essentially are the same challenge, just a bit harder. Same for the Speedrunner challenges.

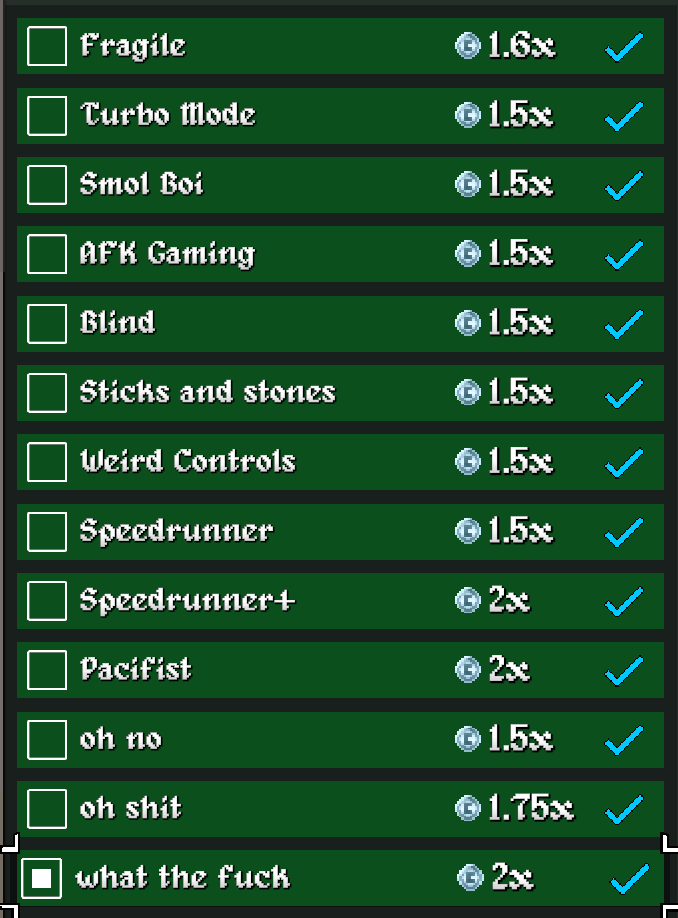
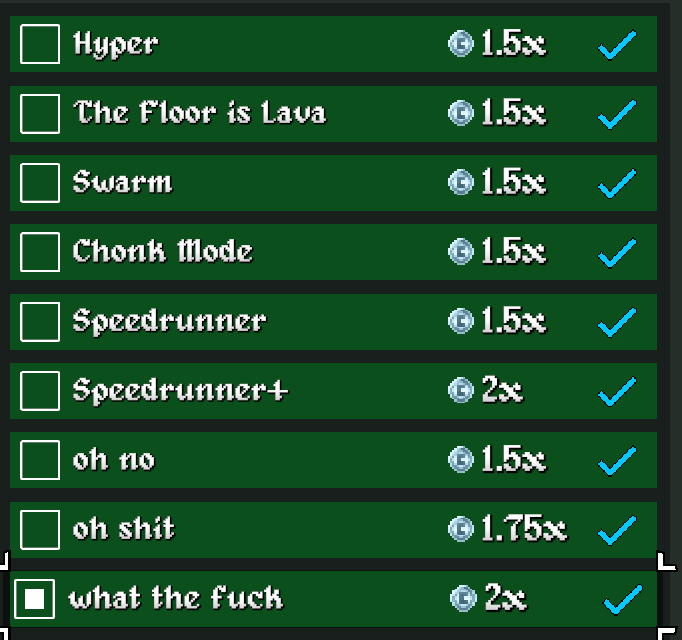
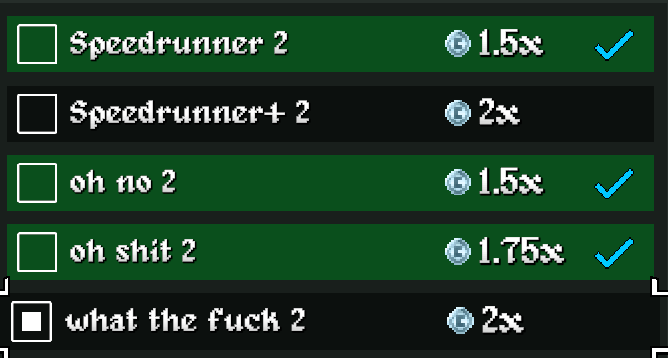
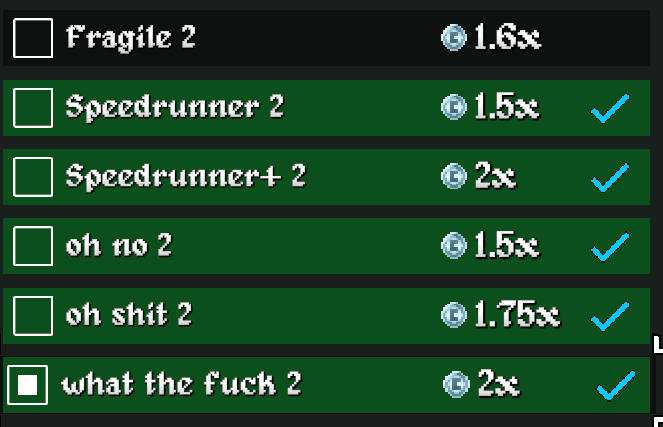
But if you want to make sure, you can test it out by completing the "what the ♥♥♥♥" challenge on Forest tier 2 before you do it on Forest tier 1. I don't have a lot of faith in this working, but it would be a sure-fire way to confirm it either way. Thanks for the question.
HeroShish 15 Nov @ 4:50am 
is it possible to just try the what the ♥♥♥♥ mode on tier three and does it complete the other challenges (for tier 1 and 2) too?
Wibiz  [author] 14 Nov @ 2:48am 
I hadn't even thought of that. I don't consider it cheating given that it's an option in the game, so I added a mention of it in the guide. Thanks for the tip
Reaper 13 Nov @ 10:03pm 
I think you can reverse the x & y of the mouse too, which makes it totally normal.

If you try changing after you've started the challenge, it won't let you, so you have to restart the game, change them, then start the challenge
Net Green 13 Nov @ 2:26pm 
Idk if this considered cheating, but I did the Weird controls challenge by changing the key binds to reverse. Still a bit confusing with the mouse but easier.
Wibiz  [author] 12 Nov @ 12:27am 
Congratz! The last ones are always the toughest, but you're definitely very close. Good luck!
MusKolon 11 Nov @ 7:30am 
Thanks for the guide,I only need to complete 2 more challenges for the achievement.:steamhappy: