Hyper Light Drifter

Hyper Light Drifter

Not enough ratings
"One Shot" Achievement Guide for Hyper Light Drifter
By Sawyer
This guide is a comprehensive walkthrough on how to get the "One Shot" achievement by completing the game from start to finish without dying.
3
   
Award
Favorite
Favorited
Unfavorite
Intro
Not a hardcore gamer?
Or maybe you think you're cool because you completed NG+, but going for One Shot is for masochists?
Think again.

With enough confidence and just the right amount of cluelessness,
even the most smooth-brained gamer can stumble into greatness.
You, too, can one-shot Hyper Light Drifter.

Goals
  • Complete the game from start to finish without dying.
    • Near-minimal requirements (16 modules + final boss)
  • Safety first
    • Prioritize not dying
    • Get valuable upgrades early
  • Speed second
    • Not wasting time, efficient pathing
    • Faster failure & retry
  • Have a plan for each challenging section

Prerequisites
  • Complete the game on normal mode
    • This enables Boss Rush mode for practicing vs. bosses
  • Keep your finished game save file
    • This allows you to conveniently practice the final boss fight

Warning: SPOILERS AHEAD!!! Beat the game on your own first!

Mind the Mechanics
  • "Plink" https://hyperlightdrifter.fandom.com/wiki/Plinking
    • Fire gun *just* before sword slash (almost the same time)
    • Very fast, extremely useful
    • Practice the timing / into and out of dash
      • Boss Rush lobby or East (Emperor Toad)
  • Pistol plink
    • 2 damage
    • Ammo-neutral (consumes 1 then restores 1)
    • Can be repeated in sequences of 3
  • Enemy attacks
    • Most basic enemy attacks and enemy projectiles do 1 damage, and briefly stun the drifter.
      Be wary of the stun "eating" your dash or attack inputs during this short window.
    • Many larger enemies perform strong or explosive attacks, which deal 2 damage AND knock you down.
      These are especially important to avoid, because other enemies can hit you before recovering from the knockdown (or chain-combo you to death from full-health).
      The best strategy for arena fights is usually to focus down these stronger enemies before you are surrounded.

Tutorial & Pregame
  • Start new game on "Standard" difficulty
  • Skip opening cutscene
    • Keyboard - type "/skip"
    • Controller - Press all face buttons and shoulder buttons simultaneously
  • Get pistol
    • Practice plinks on the dirk enemies if you haven't tried it before
  • Complete tutorial, "wake up" in the city
  • Get map and town warp pad / waypoint / "WP"

Gear Bit Map
For reference, or in case you need to backtrack (or for Shine Bright / Hoarder achievements): https://www.reddit.com/r/hyperlightdrifter/comments/90ifco/gear_bit_map/
1. North (part 1 of 3)
Goals
  • Collect 18 gear bits for upgrades
  • Get the WP and first 2 North modules


Pre-North Zone


Hug the right edge to collect 2 bits before passing north. [N05] [N06]


First Module


Climb the ladder past the NPC and break the hidden bit box on the stairs going down & right behind the tree. [N01]
After coughing by the pillars, go left and dash to the distant platform then follow the path south to find the hidden bit. [N02]
Return to the pillars and proceed north.


Hug right and kill the dirks for a combat bit. [NM01]
Climb the ladder up the building and go inside from the left to step on the switch on the right end. Go right from the building top across the platform to the bit. [N05]
Return to the main path and proceed north then east, past the view of the mountain.


Continue up the path past the vulture and 2 wolves. Go right and into the cave.
Break the hidden bit box immediately to the left. [N08]
Go up the ladder, and hug right to find the hidden bit box with the monolith. [N09]
Return to the main path and proceed north.


<Anubis cutscene>
<Pink cutscene>
Optional, but recommended: Talk to Pink (will unlock stamina regeneration gear after the 4th interaction).

Go halfway up the right stairs and onto the cliff to find the hidden bit box. [N10]
Continue up the stairs and dash to the ledge on the left. Continue north across the ledges to find the bit box. [N11]
Before returning, head south across the hidden platforms and down the staircase to find the First Module.
Tip: You can press start then quit to title once the game saves, to skip the Judgement cutscene.

Return to the main path and go north into the courtyard with 3 wolves & a health kit.
Proceed north into the large cave/building.


Second Module


Past the lone bird, fight the 4 acolytes + 1 dirk to get a combat bit. Note the health kit in the southeast corner. [NM02]
Dash west to the hidden platform from the northwest corner, then fight the 5 acolytes to get another combat bit. [NM03] (3 chips at this point)
Head south around the ledge to collect the key off the corpse.
Return to the main path and proceed north.


Head up the first staircase and drop down the south ledge to find the hidden bit box. [N13]
Go back up the stairs to face off against 6 acolytes for a combat bit. [NM04]
Note the 2 health kits at the north end, and heal to full for the next room.
Proceed north up the stairs.

Vulture Shamans
The next room introduces the vulture shamans with a relatively tough arena fight. Hide behind pillars when there are other enemies nearby, and focus them down quickly when they are alone. The ranged attacks deal 1 damage and home in on you, but can be dodged easily if you aren't too crowded. Either shoot them down while peeking from cover, or walk up to them to prompt the purple square attack (2 damage), walk around it, and burst them down. They have 5 health, so plink twice and slash a third time to kill them. Even after they die, the purple square will detonate and hurt you if you stand in range.


Enter the arena, killing the center shaman first.
In total, there are:
  • 3 shamans (center, top right, bottom left)
  • 2 acolytes
  • 2 vultures
  • 1 wolf (from bottom left)
If you left any health kits in the previous room and took damage, you can go back to fill up.
Proceed north and activate the warp pad. Head north up the stairs to the summit.


Go left and down the outer stairs (ignoring the right side for now).


Head south down the stairs and around the long building. Break the hidden bit box behind the pillar. [N14]
Dash across the gap and go south to find another bit box by a corpse. [N15]
Return to the long building and take the bridge west, then go down the elevator by the titan's hand.


Go right immediately across the vanishing tiles and through the hall for another bit box. [N18]
Return, taking the health kit if necessary before going north.
Deal with the 2 acolytes and 3 dirk riflemen in the narrow hallways (pistol is nice here), then press the switch.
Clear the room with 4 acolytes and 1 dirk rifleman to get a combat bit. [NM08] (4 chips + 2 bits at this point)
Go west through the hidden path and use the warp pad to cross the gap and find the Second Module.

We're done with the north zone for now. Warp back to the central town.
---
2. Central Housekeeping / Upgrades
Goals
  • Buy the Chain-Dash upgrade
    • Optional: Get the purple outfit
  • Collect 6 more gear bits
  • Buy the sword reflect upgrade


Chain-Dash!
By now, you should have more than 3 gear chips, so head into the dash shop on the north (northeast) side of town.
Buy the chain-dash ability (first of 3 options).


Mind the Mechanics: Dash Happy

Chain dashing is your primary movement option for the remainder of the game (and it is very fun).
Notice how if you spam the dash button too quickly, they don't chain together and it works the same way that dashing did before you bought the upgrade. But if you time your consecutive dashes properly, they are chained together in quick succession.
Dashes always move in a straight line, but you can pivot and turn to any angle between each dash. It is also much easier to accidentally dash off-screen and fall off the map when chain dashing, as opposed to using single dashes (which keep you safe on the ground if you approach the ledge at an angle).

Practice double-dashes, which require a small delay between the first dash and second dash.

Practice triple-dashes. The timing for the third and subsequent dashes is more lenient and can be input before the previous dash is completely finished. But be careful: the third and subsequent dashes unlock the ability to bonk, AKA smash into objects and walls, knocking you down for a bit. This doesn't deal any damage, but does waste time and leave you wide open for enemy attacks.

If you chain-dash four or more times in a row, the drifter carries momentum and slides for a bit in the last dash's direction before coming to a stop. This can take even longer than bonking, so long chain dashes should usually be reserved for long paths that lead to cutscenes or transitions to another screen load.

Double and triple dashes should be your primary way of moving around most spaces, as well as running away from & closing space against enemies. Default to double-dashing anywhere with trees, stairs, or tight hallways, as it is very easy to accidentally bonk on the third chain dash.

Happy dashing!


Chain Dash Champion & The Dash Eternal Achievements

Head further into the shop to the chain-dash minigame arena. Here you can be rewarded with a gear bit for completing 100 consecutive chain dashes, and the purple outfit (which doubles your stamina) for completing 800 consecutive chain dashes. Although it's not necessary, I recommend completing the full 800-dash challenge. The extra stamina can be useful for survivability, and with the right setup this is actually very easy to do (although tedious).

The setup:
  • Grab a metronome or find a simple one online (https://www.musicca.com/metronome). Set it to 235bpm and leave it on. Back in your game, mute the audio so that you can focus on the metronome and your key presses.
  • If you are using controller, set it down and use your keyboard for this part, the in-game dash type setting set to "mouse dir" (this is the default option). Hover your mouse over one of the purple squares in the middle of the arena, some distance away from the walls. These squares refill your stamina when you pass over them.
  • Using your dominant hand, and a comfortable motion, press your spacebar in sync with the metronome clicks… for almost 3 1/2 minutes straight. Most likely, this is easy to the point of boring, unless you are getting nervous about messing up. Stay relaxed and steady - you'll get it without much trouble before too long.

After 800 dashes, collect the purple outfit and gear bit from the north end of the room, then leave. [C01]

Take a moment to enter your home and equip any one of your purple outfit pieces (sword, cloak, or sycom) to get the stamina bonus.


Some More Bit Collecting

Head east out of town.


Immediately walk south and dash over the gap to the bit box. [C07]
Get the health kit if you need it, and return to town. Then, exit the town to the south.


Walk south to the breakable boxes, and break them. Step on the switch to lower the barriers, then head back north then east along the buildings to the hidden bit box. [C09]
Go south, across the bridge, then west along the narrow ledge and step on the hidden switch to activate the appearing platforms. Dash across the gaps to the west to find another bit box. [C10]
Warp back to town, then leave heading west.


Proceed west until the grass turns blueish, then head south and activate the hidden platforms by the secret icon. Dash across and collect the bit. [C11]
Continue west past the first two statues into the actual west zone.


Immediately go south under the arch through the small gap in the trees to the hidden bit box. [W01]
Now, you should have 3 gear chips again. Warp back to town.


Calm Reflections

Go to the weapon upgrades shop at the north (northwest) side of town, and buy the sword reflector ability (middle of the three options). Now, your sword slashes will automatically reflect almost every projectile in the game! This helps greatly with the east zone, which is our next target.
Exceptions:
  • rockets launched from dirk rocketeers in the south (they are destroyed but not reflected)
  • toad's exploding jars

For the rest of the guide, the gear bits are quite optional. But, many of them will be very convenient, so I will continue to include them. Further upgrades are a matter of preference - I suggest ammo expansions, health pack space, and the dash reflect ability, as these can noticeably help with boss fights and general survivability.

Head east out of town toward the first full-zone completion of the run.
---
3. East (part 1 of 2)
Goals
  • Defeat the Emperor Toad boss, activate the pylon, and get the blunderbuss (AKA shotgun)
  • Collect 4 modules
  • Collect extra gear bits along the way
With the chain-dash and reflector sword in tow, we're ready to show the east zone who's boss.


Pre-East Zone


Head to the northeast corner before the big water gap, and dash north to the grassy patch. Head west along the ledge to the bit box. [C08]
Return and proceed south past the bone pile before dashing across the platforms to the east and north. Proceed east into the real east zone.


First Module & Warp Pad


Immediately go south and dash past the pillars to find a bit box. [E01]
Return and follow the main path all the way to the right. Before leaving the screen, walk north and dash along the left side of the building to go around it along the ledges. Then reveal the series of hidden platforms that stretch all the way to the northwest corner of the screen to find another bit box. [E02]
Backtrack to the main path and continue east.


Here we are introduced to the ninja toads (2HP, throw shuriken that do 1 damage). With the reflector sword, they are no problem - get used to deflecting their projectiles, or killing them quickly up close, or shooting them down from afar.
Deal with the 3 ninjas and dash east under the aqueduct to the hidden bit box. [E03]
Continue along the main path to the titan sword, then go south. Note the health kit, then proceed down the stairs, and down the elevator.


Follow the path east until you have a short coughing fit. Continue to the bottom of the stairs then turn south and dash across the platforms to the First Module.
Proceed east through the tunnel and go up the elevator.


Dash north across the platforms to the main path. Head west to the previous screen for a quick bit box. [E04]
Proceed east along the main path to reach and unlock the warp pad.
Head east/southeast and go down the stairs to the next area.


Second Module


Head right, cough for a moment, then proceed southeast and down the elevator.


Walk into the room with 5 bomb plants and a dirk rifleman. Note the 2 health kits in the SE corner. Activate the switch and proceed west.

Plant Beasts
This room introduces the plant beasts. These enemies are scary and can ruin a run if you aren't careful. Their only attack is a fast but telegraphed dash/tackle that deals 2 damage and knocks down. Before lunging, they turn black and are immune to damage until they finish charging. With 6 health, they can be burst down with 3 pistol plinks or 1 shotgun plink. Focus them once they rise from the ground. Before they spawn, you can see their location indicated by the three small bulbs protruding from the ground like so:

Fight the enemies in the plant arena:
  • 3 plant beasts
  • 2 bomb plants
    • There are also 2 more to the left, these can be ignored, at least until the plant beasts are dead.
Proceed north past the gate.
Head east by the mossy patch on the floor to find a hidden bit box. [W07]
Then go west to the corner room with many enemies. Clear the 3 plant bombs, then dash past all the other enemies by using the disappearing platform over the water.
Note the health kit, grab the Second Module, and activate the switch to lower the barriers. Note the additional health kit, then go down the west elevator.


Third Module


Note the health kit by the elevator. Continue past the gate to another plant beast arena.
Kill the two bomb plants then clear the arena fight.
Enemies in order:
  1. plant beast (northwest side)
  2. dirk rifleman (far west side)
  3. plant beast (east side)
  4. 3 dirk rifleman (northwest, southeast, and far east)
  5. plant beast (northeast side)
Clear the arena and grab the combat bit. [EM01]
Go west then north to find the hidden bit box behind the shelves, and note the health kit.
Go south through the 1-key door.


Go west, slash the little flower and dash to the distant platform to find a hidden bit box.
Return and head south to the fire trap room.
Kill the lone bomb plant then face off against an enemy swarm on the next platform:
  • 4 dirk riflemen
  • 3 bomb plants
  • 3 dirks
Use the pistol and sword reflector judiciously. Play it safe rather than rushing in or past them. Snipe the bomb plants ASAP to keep them out of the corner with cover.
Continue across the additional platforms south, past 3 more riflemen to find the Third Module.
Head back to the plant beast arena room, go north and up the elevator.


Boss & Fourth Module


<Anubis cutscene>
Dash on the platforms along the right side of the building to find a bit box. [E13]
Continue north.
<Pink cutscene>
Optional: Talk to Pink (recommended).
Continue to the northeast side of the building and proceed north to the main hub.

Activate the switch to lower the barriers, then enter the 3-module gate.


The game introduces bomber toads, but you can ignore these two.
Walk left past the flame trap along the wall/ledge. Go south to find a bit box. [E22]
Continue to the north end of the room and go east to a small arena fight with 2 ninjas and 2 bomber toads. Clear them and walk to the south end of the room to find a bit box before advancing east. [E23]


Dash east along the bottom of the rooms, past all the enemies, then north up the staircase to leave.


Head north to the edge of the platform to trigger arena enemies to spawn on the platform you just walked past. Go back and fight:
  • 3 ninjas
  • 3 bomb plants
Go west and down the stairs into the building.


Unlock the path and hug right to find the exit.


Activate the switch on the right to unlock the path, then go back, south, and east along the path.
Returning to the large platform, there is another set of enemies:
  • 3 toad bombers
  • 6(!) bomb plants
  • 1 ninja
Clear the toad bombers to unlock the path, and proceed all the way north to the boss door.
Before going in, head west then south to pick off some toad bombers and a ninja to get a quick combat bit. [E28]
Break the normal-looking crates to reveal another gear bit. [EM05]
Go back to the boss door and note the 2 health kits along the building before going inside.
Wait for the game to finish saving, then quit to title to practice the boss fight in Boss Rush mode.
4. East (part 2 of 2)
East Boss / "The Emperor" (Toad)
https://hyperlightdrifter.fandom.com/wiki/The_Emperor

Fight the boss repeatedly in the Boss Rush mode until you are comfortable/confident. I like to ensure I can beat the respective boss three times in a row, without much trouble.

For this boss in particular, you can stand just left of him and attack repeatedly - he will continuously slam the ground in response, but you will be out of the attack's range:


When ready, go back to your story mode and do the fight for real.

Defeat him and collect the 3 combat bits. (4 chips & 1 bit at this point)
Go north, activate the pylon, then proceed along the path and collect the blunderbuss (AKA shotgun).
Walk out the door and dash across the platforms to collect the Fourth Module.


Mind the Mechanics: Big Shot

Unlocking the shotgun GREATLY improves our damage output and ability to kill bosses quickly and easily. For the rest of the game, shotgun plinks are going to be the best way to burst down strong enemies and bosses, and will one-hit kill enemies with as many as 6 health points, when done at point-blank. Damage falls off dramatically if there is distance between the drifter and the enemy, so walk all the way up to the enemy and aim directly at them before shooting.
  • Shotgun plink
    • Fire gun *just* before sword slash (almost the same time)
    • 6 damage at point-blank
    • Practice the timing / into and out of dash
    • Ammo negative (consumes 1 shot, restores 1/2 shot)

There is a long cooldown on the shotgun fire, preventing you from repeated plinks like we can do with the pistol. However, switching weapons with the weapon swap button TWICE (off the shotgun, then back onto the shotgun) will cancel this cooldown and allow you to repeat the shotgun plink as soon as the sword slash is over.
  • Repeated shotgun plink
    • Fire gun *just* before sword slash (almost the same time)
    • Immediately after, press weapon swap button twice
    • Repeat
This can be done comfortably on controller and keyboard with the default layouts. Practice in the lobby or against the East (toad) boss or Summoner (second south boss) in the boss rush mode (fully loaded only).
With the ammo expansion (from full ammo), you can do this up to 10(!) times on a single target (more than enough) before running out of ammo.


Housekeeping

Warp back to town and get the now-accessible bit box, north of the east exit.
Purchase some upgrade(s). My recommendation is 2 of the following:
  • Shotgun ammo
  • Health kit space
  • Pistol ammo
Or, save them for the dash reflect after we finish the north zone.

Warp back to the north zone.

---
5. North (part 2 of 3)
Goals
  • Collect the 3rd and 4th modules
  • Defeat the boss and activate the pylon
  • Collect extra gear bits along the way


Third Module

Walk up the stairs to the summit.


Walk east and north to get the Third Module then proceed south down the stairs.


Fourth Module


Continue south along the path, down the ladders, and through the 3-module gate.
Go down the elevator.


Walk around the stairs, and dash across all the center platforms, ignoring the enemies. Dash north past the 2 shamans, down the east staircase, and proceed north.


Clear the arena, using your new shotgun plink to one-kit kill the shamans. If needed, refill your ammo by killing the slimes.
Enemies:
  • 2 shamans
  • 3 acolytes
  • A bunch of slimes
Clear the arena and grab the combat bit. [NM11]
Head south from the left side of the room to find the hidden Fourth Module.
Proceeding north, there is a health kit in the container before the hallway.


Path to the Boss / "The Library"


Walk up the stairs through the library. Note the health pack in the NW corner of the first section with bookshelves.
Note another health kit in the NE corner of the second section with bookshelves.
In the third section with bookshelves, in the middle aisle, there is a hidden path off to the west.
Proceed south down the hidden path to find another warp pad. Take it and break the books to find another bit. [N21]
Walk east through the hidden hallway by the green patch of floor (note the health kit), and head south into the adjacent room for yet another bit. [N22]
Warp back and follow the same hidden path north to find a health kit, bit box, and warp pad under some books. [N23]
Take the warp pad and fight the four acolytes to receive a combat bit. [NM12]
Drop down from the high bookshelf ledge and continue east, after the staircase and past another health kit to a room that leads outside, with yet another health kit. Walk east and outside to find the mountaintop bit box. [N24]
Return to the library and proceed north to the boss door. Note yet another health kit in the crate by the door.
Enter the door, wait for the game to finish saving, then quit to title to practice the boss fight.

6. North (part 3 of 3)
North Boss / "The Hierophant" (Bird)
This boss can be very challenging if you haven't learned its patterns and attacks. The main strategy we will use is shotgun plinks up close, dashing away and back in to avoid the purple explosions.

https://hyperlightdrifter.fandom.com/wiki/The_Hierophant

The boss' patterns are predictable, but the exact behavior has a lot of small elements of randomness. Understanding the patterns will help a lot.
  • The beginning is always the same. He starts in the center and immediately uses the vortex trail (snake-style / centipede-style) moving purple explosions. If you dash up to him, the explosions will have to 'turn' 90 degrees twice to turn back around to reach you (they can't toggle between 2 spots 180 degrees apart). Then he will use the targeted 'x' or '+' 5-tile purple explosions (random between the two) called cross vortex. These can be visually reacted to, simply dash out once in the gaps. If you safely can, dash back in to get some hits right afterward. Sometimes, this is dangerous because the centipede explosions are protecting him.
    • Immediately dash in and get 2-3 shotgun plinks. Dodge the vortex trail and cross vortex. Go back to get another couple hits if it's safe. You can also switch to pistol to get off a few easy shots from a safe distance, or just walk around and wait to follow his warp.
  • He will warp to one of the corners of the room. If you were standing to his right when he was in the center, he will warp NW or SW. If you were standing to his left, he will warp NE or SE.
    • Immediately chase him down and get some damage in. You can get 3 shotgun plinks if you followed him very quickly, but if you take too long he will already retaliate before you have an opening.
    • He will use the same attacks from the intro. Sometimes, he will have 2 active vortex trails following you at the same time. The corner can be very dangerous, so don't be afraid to back up (triple-dash) toward the center, heal if necessary, and shoot the pistol at him if the close-quarters is cluttered with explosions.
    • After some time, he will warp again. If you have done enough damage, he goes back to the center instead of continuing between corners.
  • After some time, he will warp back to the center, then summon 4 vultures (one in each corner of the room). The vultures will charge you as soon as you are in range. He will then proceed with some more attacks.
    • As soon as he warps to the center, get back on top of him, right in the middle of the room and get some hits in. This way, all four vultures charge you at the same time, allowing you to kill all of them (and even hit the boss) with a single slash/plink. Time your response to hit them all together when they rush in. Otherwise, they will desync and be much more likely to survive a while, hit you, and distract you from the boss.
    • While attacking him in the center, alternate between walking to his left and to his right. This will cause him to take extra time "deciding" which corner to warp to.
  • He will warp back to another corner, repeating the cycle.

Dodging "+" cross vortex:


Dodging "x" cross vortex (barely):


Some other notes:
  • If the vultures are desynced or you left them alive, it is best to stay safe: dash away, heal, and keep your distance from them and the explosions. They will likely get blown up by the vortex trail as both are following you around, then you can re-engage. You can also pick them off quickly with the pistol when you have any opening.
  • Once the boss is down to 70% health, the cross vortex attack gains additional range. This doesn't affect the strategy at all - dodge once in one of the four safe directions before re-engaging quickly.
  • Once the boss is down to 40% health, he replaces the cross vortex attack with the striped vortex attack. This targets every other row, or every other column, from one cardinal direction to the opposite, all the way across the whole room. It is actually easier to dodge, and leaves him open for attacks longer, so getting him to 40% health is very helpful. Look at the closest corner of the room to see which direction they're coming from ASAP. If they are coming from the far side of the room instead, you have lots of time to position yourself in between two of the incoming rows or columns.
    • You can also hold your ground and dodge with good timing, rather than trying to position yourself between the squares. For this, just stand still and look toward where the explosions are coming from. As soon as the closest one that won't hit you (2 tile-spaces away) explodes, dodge toward it. This will move you off the dangerous square safely, if you were standing on one. If you weren't, well then there's no need to move at all.
    • Notice the squares on the floor are considerably smaller than the exploding vortex squares, so don't use them to count the space. The square pattern of the rug in the center of the area IS the same size as the vortex squares. The width of the boss is also a good estimate for the square size, as is the width of the gated spectating areas on the right and left of the arena.
  • Triple-dashing is the fastest way to disengage/re-engage, and transports you nicely between the center and any corner. Double-dashes are also good (sometimes all you need) but don't create as much space when running away. Single dashes will barely outrun the vortex trails. Four+ dashes waste time sliding to a stop, but can still be a good disengage.

Striped vortex, in the corner you can see it is coming from the closest side (right). In this picture it is 2 tile-spaces away, so the drifter needs to move either left or right by one tile-space.


When ready, go back to your story mode and do the fight for real.

Defeat the boss and collect 3 bits.
Optional: grab the gun (it can't plink)
Head north up the stairs and activate the pylon.


Housekeeping

Warp back to town and purchase some upgrade(s). My recommendation is any of the following you don't have:
  • Shotgun ammo
  • Pistol ammo
  • Dash projectile shield
  • Health kit space

Leave the town west to begin the next zone.
---
7. West (part 1 of 2)
Goals
  • Collect 4 modules
  • Defeat the Hanged Man (tanuki) boss and activate the pylon


First Module


Head all the way through the pre-zone to the west zone, as we already collected the lone gear bit.


Cross the bridge and go SW and down the elevator to find the First Module.
Return and proceed west.


Second Module


Optional gear bits (not very risky, but tedious):
  • Head north past the bushes to fight a horde of dirks and get a combat bit. Take care not to get surrounded. [WM1]
  • Go all the way to the NW corner up the stairs, noting the health kit. Then go east through the hidden path in the trees to the NE corner for another bit. [W02]
Head west past the skeleton, up the stairs, and across the gaps. Proceed west.


Head west through the ribs, past wolves (note the health kit in the NW corner), then east along the north edge.
One more dog appears by a doorway-shaped clearing in the woods north.
Head north into the clearing and around the left side of the house. North of the house is a bit box. [W06]
Return south to the path and go down the elevator. Go south through the building and out.

The door locks and you are in a combat arena. You can clear the enemies for a combat bit [WM02], but it's much faster and easier to skip the arena completely by walking straight south into the tree to the right of the barrier:

Either way, proceed south.

Crystal Knights

The next room, and the rest of the west zone are home to many crystal knight enemies. While intimidating, they are easily taken care of by one point-blank shotgun shot (they have 5 HP). You can also walk up to bait their lunge, then simply walk or dash away; they will whiff and you have plenty of time to punish (two pistol plinks and a third slash, for example). One thing to note is that the lunge can reflect bullets. Also, they are able to dodge bullets, so don’t waste your ammo shooting them down from afar. They are also very slow, and only do 1 damage.


Pass the crystal knight to the southeast, through the narrow clearing. Continue past another knight, and engage 2 more along with 2 wolves in an arena. Head west after the barrier to find another wolf and knight pair.
Activate the switch to lower the barriers.
Find a bit box immediately south, guarded by 2 dirks and a wolf. [W08]
Find another just north along the path back east. [W07]
In the SE corner by the pink containers,2 dirks and a wolf guard a hidden path east behind the large tree.
Pass through, defeat the 3 crystal knights, and collect the Second Module.

Return to the beginning of this area, just north of the narrow clearing.
Head west along the main path, stopping briefly to kill the initially-trapped crystal knight for a gear bit. [WM03]
Pass two more crystal knights and exit the area west.


WP & Third Module


Continue west and unlock the WP.
Head west up the steps then turn south through the hidden path. Activate and dash across the hidden platforms, then go south down the stairs.
This dark room might be called "The Doghouse". Proceed through the bushes and past 5 wolves. Note the health kit next to the pillar. Head east toward the module and 4 more wolves will appear, 3 in front and one behind you.
Defeat them and collect the Third Module.
Warp back to the pad and proceed west to the next area.


Fourth Module


Head west across the crystal trap and southwest to the group of 5 dirks. Kill them to get a combat bit [WM07]
Continue to an arena with many dirks and crystal knights. Once again, you can quickly and easily skip the arena by walking south into the tree just to the right of the barriers.


Head south, dash across the gaps, and go down the elevator by the Raccoon Hermit.


Head south, break the exploding pink container, and activate the switch.
Proceed west along the new path then north past the first crystal obstruction.
Break the boxes to reveal a floor button. Step on it and go back south to the 2nd gate for a bit box. [W31]
Proceed north through the crystal hallway.
After jogging east, continue east through the hidden hallway to find the Fourht Module before proceeding north.
Continue north to the gated cell. Activate the hidden platforms to the west and follow the path to a bit box. [W32]
Return, following the path to the elevator and take it up.


Path to the Boss


Watch the wolves die to the crystal trap (kill any lucky ones), then proceed north past the crystal brute/golem into the next area.


Head north.
<Coughing scene>
Go up the ladder, activate the switch, and continue north.


Proceed west across the bridge and see Anubis head north. Follow him to find Pink.
Optional: Talk to Pink.
Take a short detour southeast and go through the hidden path to find a bit box. [W14]
Return to Pink and go north through the 3-module gate.


Head straight west, past the enemies to the next area.


Again, head west (and slightly north) past the enemies to the next area.


Head west past the crystal trap & crystal obstruction to find a room with a health kit and a bit box. [W23]
Return, then head north to the boss door. Note the health kit along the way, and a health kit by the door hidden in the brown crate.
Walk through the door, wait for your game to save, then quit to title to practice the boss fight in the Boss Rush mode (fully-loaded, so you have the shotgun).
8. West (part 2 of 2)
West Boss / "The Hanged Man" (Tanuki)
https://hyperlightdrifter.fandom.com/wiki/The_Hanged_Man

The west boss tends to give people the most trouble, but the fight is made much easier with the shotgun, reflector slash, and chain dash. The main strategy will be using shotgun plinks at close range in between his sword slash combos, and anytime he runs to a corner to summon. Also, reflecting all three of his bullets after the crystal shockwave attack. The fight triggers when you walk (or dash) up past the crystal-trapped knight in the southwest corner of the arena. If you run out of ammo, resort to regular attacks or killing the summoned knights until you have some again.

Immediately, he runs up and opens with his main attack, a series of two sword slashes. The first slash is weak (1 damage) and the final slash is strong (2 damage + knockdown). He moves quickly during the slashes, and they strongly track your position and movement; at first it can be very difficult to dodge them without dashing far away to completely disengage. These slashes will break any crystal-trapped knights he smashes into, which will prevent him from being able to summon that particular knight later in the fight. So, it can be helpful to bait him to do this right away - though there are plenty more so only somewhat helpful.
  • Rather than running away to have him chase you, wait until *just* after he begins the first slash, and dash to his opposite side (left/right). Be sure to dash at an angle to avoid bumping straight into him.
    • Sometimes, he will jump WAY past you, and the next slash can be avoided easily by continuing to walk just out of range of the next jump (then punishing after the final slash).
    • Other times, you will get just behind him in time to avoid the hit. He will turn around when starting the next slash, and you can once again dash behind him after he starts. Take care not to dash too early, or he won't turn around - you'll dash straight into the attack.
    • If you get knocked down, he will be aggressing with the next attack soon after you get up. Disengage far across the arena and heal up before you take any more damage.

After a few cycles of slashing, he will stab the ground, dealing a strong AOE blast in a circle around him. The circle has about a 1-dash length radius.
  • When he stops moving, you have enough time to finish your plink then dash once and walk a bit or dash twice to get out of the circle's range.
Crystals burst from where he stands and spread outwards.
  • Simply walk outside of their slow and linear path.
Next, he shoots his gun three times (1 damage per), pausing a bit before the third shot.
  • Starting with a bit of distance between you, these can be reflected at him easily. Close the space as you do so, so that you can deal some extra damage after the third shot and before his next action.

Usually at this point he will run to the nearest crystal knight trapped in one of the corners of the arena and hold his sword up, freeing them. This is a good chance to follow him quickly and get some point-blank shotgun plinks on him while he's holding still. Then, he will return to his slashing sequence. Since the crystal knights are so slow, you can chain dash to the opposite side after they've been summoned. The boss will catch up with you shortly, but the knight will trail behind so you can ignore it until the slashing sequence is over.
  • Between the long pause after his 3 bullets, and the time it takes him to free a trapped knight after running to the corner, you can land 5+ point-blank shotgun plinks, taking out massive chunks of his health. If you can do this well, you don't need to worry about being as aggressive during his sword combos.

Once the boss is at 50% health, he will make 2 small adjustments to his attacks:
  • Each sword slash combo will last 3 slashes instead of 2. As before, the final hit is the only strong hit. He can cover much more distance in 3 slashes, so just running away is less effective, but dodging behind him is still a good option.
  • The circle AOE slam hits twice instead of once. In either case you should dodge out before the initial slam, so this shouldn't matter.

Practice vs. the boss repeatedly in Boss Rush. Watch some hitless videos if you need help. This can take a lot of practice but once you expect the rhythm of his attacks and patterns, it is very doable.

If you are still struggling, you can also play extra safe, running away and shooting him with the pistol, then recharging ammo on the summoned knights. But in my opinion, it is easier to succeed if you don't let the fight last long enough for more than one knight to be summoned. If you're quick, you can kill him as (or even before) he starts the first summon.

When ready, go back to your story mode and do the fight for real.

Defeat the boss and collect 3 bits.
Optional: grab the gun
Head north up the stairs and activate the pylon.
Also, break the crystals behind/ to the right of the corpses east of the pylon to find a bit box. [W24]


Housekeeping

Warp back to town and purchase some upgrade(s). My recommendation is any of the following you don't have:
  • Shotgun ammo
  • Pistol ammo
  • Dash projectile shield
  • Health kit space

Optional:
If you decided to buy the charge slash upgrade, you can win soccer ("drifters", for the Star Athlete achievement) against the small, uh, creature(?) in the southwest part of town. I don't recommend it without the charge slash upgrade, but if you do have it, you can open the point with a charge slash that will bump past him into the goal zone. Win 10 points to get a bit box. [C13]


Leave the town south to begin the next zone.
---
9. South (part 1 of 2)
Goals
  • Defeat The Summoner
  • Defeat The Archer and activate the pylon
  • Collect 4 modules

The south is a special zone that must be completed last, and has 4 small bosses instead of 1 huge one. Luckily, we only need to engage with two of them, and the first is very easy.
There is a lot more outnumbered combat than is required of the other zones, so feel free to practice these sections from previous save files. Getting comfortable with the enemy move sets and not getting surrounded will keep you alive.


Pre-Zone and Warp Pad


Proceed south through the pre-zone, as we have already collected its gear bits.


Proceed south to find Anubis, then Pink. If you talked to Pink in all three previous zones, he is dying. Speak with him one last time to receive the pink outfit, which increases stamina regeneration.
  • If you regret not speaking to him before, you can still go back to visit him in the other zones. After your 4th dialogue with him, he will die and drop the outfit.
Continue south.


Unlock the warp pad by the entrance. If you collected Pink's outfit, go home to equip it then warp back. Note that only one piece is required, so you can retain the benefits of the purple set by mixing set pieces.


West Elevator


Go southwest and down the elevator, note the health kit, then immediately downstairs to the right.

Bladebots
The underground of the south zone has several threatening enemies, the first of which is encountered here: the bladebot. They can't be easily ignored, because from a distance they will shoot 3 bullets out covering a broad angle. You can walk between the bullets, but this becomes difficult when more enemies are involved. You can also reflect the middle shot back at them and ignore the other 2 shots.
When up close, they will prepare a slash attack that deals 2 damage and is relatively fast. Still, you can pistol plink twice to kill them (4 health) before they can get it off. You can also use the shotgun, of course.
Often it's best to focus them down, but it's okay to ignore them from a distance as long as you are aware of their position and bursting down something else. Don't get caught in-between multiple of them, though.


Bladebot before and after "waking" up.


Spread of bladebot fire.


Quickly dispatch the lone bladebot and note the health kit to the right as a couple spiders harass you. Or, just run south past them to proceed.
This room can be very annoying because a boatload of spiders are going to keep dropping from the ceiling. Play patiently and back up when they fall so you don't get surrounded. Kill the initial 16 or so spiders that drop right away, along with the bladebot that approaches during the onslaught.
Continue south for just a few steps before fighting another 15 spiders accompanied by a dirk rifleman.
Activate the switch and follow the new platforms south to another platform with several enemies to take out:
  • 2 bladebots
  • 2 dirk riflemen
  • 5 spiders
Optional: Dash across the gap on the left and follow the platforms to a lone bladebot. Defeat it for a combat bit. [SM01]

Head to the south end of the room. There is a health kit past the small platform to the right. Continue south.


There are many enemies in this room, as well. Be careful, focusing one at a time and kiting so you don't get surrounded.
  • 4 dirk riflemen
  • 6 slimes, then 5 more slimes
Stay out of range from the turrets except to burst down the riflemen behind cover. There's no shame in hanging back and deflecting shots, one target at a time.
Proceed south and note the health kit in the northwest corner.
Head south then to the east across the gap as some spiders and slimes chase you.

WARNING: DEATH BLOCKS
While the rest of the room isn't necessarily difficult, all it takes is one mistake to ruin your (so far, successful) run.
Before the death blocks stand 3 dirk riflemen and 1 bladebot. Take them out with the help of the pistol &/or reflected bullets.
Optional: There is a bit to the right of the first death block, but I recommend skipping it to focus on not dying here. [S03]

Tread very carefully between the death blocks while also avoiding the turret fire. I suggest staying to the right side, using single dashes, and keeping a visible buffer of space between yourself and the blocks. I have heard of people blowing their run here. Slow and steady.
On the other side of the blocks, a group of slimes welcomes you to the door. Take them out and proceed north.


Take out the rifleman and wrap clockwise around the room. Several slimes spawn and follow you from the left side. Wait for them to catch up first if you don't want them interrupting your fight. Avoid the turret fire and clear the enemies toward the end to advance:
  • 3 bladebots
  • 1 more dirk rifleman
Note the health kit just north of the stairs, then take them down to the first boss room. Wait for your game to finish saving, then quit to title to practice against The Summoner in Boss Rush mode (second southern door from the left).


The Summoner


The Summoner is the first (and arguably easiest) of the four robot-bosses that guard the modules of the south zone.
The fight will start as soon as you grab the decoy (fake) module in the center of the room.

The strategy is simple. Once the fight starts, shotgun plink at him point-blank quickly and repeatedly until he is dead, before the fight can really start. It should take no more than 7 shotgun plinks to kill.

In case you aren't fast enough, it is helpful to have at least killed the minions/helper drones. If you take too long during the initial phase, he will fly away from you and stay out of range until all the small robots are destroyed. Meanwhile, they will be firing projectiles at you, shoot-em-up style. Limiting the bots to just 1 or 2 will make a huge difference in the ease of dodging here.
Once the bots are destroyed, he will wait around for a bit, then flash orange and charge across the screen at you, very quickly. Then, the cycle repeats. Dash to avoid his charge, and be immediately ready for more shotgun plinks to finish him off. You don't want to prolong the fight into yet another unnecessary bullet phase.

Practice in Boss Rush until you can consistently 0-phase kill, and ideally clear the fight even after messing up the initial burst.
Return to the story mode and defeat The Summoner quickly. Grab the 3 combat bits and continue north.


Grab the First Module.
Optional bit: Activate the switch, and step over to the scary titan eyes in vats. Note the health kit by the elevator. There is a bit box across some hidden platforms by the gap on the north side of the elevator platform. [S04]
Warp back to the south WP.
10. South (part 2 of 2)
East Elevator


Follow the path east and around the cliffs to find the east elevator, and go down.


Take the east path, go past 9 slimes and a turret to find a lone bladebot that provides a combat bit. [SM05]
Continue south to a short arena with 3 bladebots and some dirks. Note the health kit.
Clear the arena then continue east past the 1-module gate.

Dirk Rocketeers
https://hyperlightdrifter.fandom.com/wiki/Dirk_Rocketeer

The next room introduces rocket-launching enemies. The rockets deal 2 damage and knockdown. What's more annoying is that they home in on you, with a sharp turn radius (able to circle all the way back after you dodge them). AND they can't be reflected, but they can be destroyed with the sword (if you have projectile reflection), or shot with a bullet.

The rocketeers have a 5 HP, so it's difficult to kill them quickly from afar. But, they don't have a melee attack. Find your opening to get up close and plink them down before they can take any extra shots.


Kill the rocketeer to the north. Activate the switch and continue north across the platforms, until you reach the automated turret.
Dash west across the hidden platforms to find the Second Module.
Return to the main path and proceed east.

Optional: At the cost of being harassed by spiders, there is an obstructed bit box. Slash the switch along the east wall to remove the barriers, then get the bit box in the northeast corner.

Continue to the southeast corner, across the platforms, past the spiders and turrets, noting the health kit, and go down the elevator.


This room is huge and holds many enemies, so heal up when needed and play it carefully.
Hug the right wall, traveling north until you reach the gate. Along the way, you will face:
  • 9 dirks
  • 3 dirk riflemen
Continue north again, passing 2 more dirk riflemen and the chambers holding dirks and a drifter.
Here you will find a locked gate surrounded by turrets. Follow the path west, avoiding the turret fire (dash projectile shield is actually really nice here), and activate the switch. Note the health kit along the way.
The turrets and gate lock are disabled by the switch - head back east to the other end and go north through the previously-locked gate.
Clear the arena with 2 bladebots and a dirk, next to explosive containers.
  • Pro tip: shoot the close bladebot once to knock it slightly back, then shoot the containers. If done right, all three enemies are killed.
Note the health kit in the corner, then go west and grab the Third Module.
Backtrack to the narrow turret hall where you activated the switch, then go past the enemies (3 bladebots & 1 dirk rifleman). One bladebot drops a combat bit. [SM06]
A health kit sits past the gap on the right if you need one.
Proceed through the north door.


Head north to the small gap, break the container, and dash across the hidden platforms to find a bit box and a health kit. [S17]
Proceed along the main path east then north to the next room.


Another scary room - this one contains several leapers (https://hyperlightdrifter.fandom.com/wiki/Leaper). Take out the other enemies first if possible. Then wait for them to leap, dash out of the way, and punish with a point-blank shotgun plink + 1 additional sword slash (this will kill them as they have 7 HP).
Play carefully through the room, focusing down individual targets one at a time.
In the northeast corner, there is a health kit against the wall behind the specimen jars.
After clearing all the enemies, there is another health kit and a bit box in the southwest corner.
Proceed north and through the door that leads to the next boss.
DON'T MOVE. Wait for the game to finish saving, then quit to title to practice fighting The Archer in Boss Rush mode (rightmost southern door).


The Archer


The Archer is arguably the most difficult of the south bosses, and depending on your skillset, may be just as challenging as the North or West bosses, perhaps moreso.

As soon as you step forward, the archer kills a dirk and the fight begins. The Archer runs away from you and around the room, seemingly randomly. Occasionally it stops for a moment to fire three volleys of arrows: sometimes to one side of you, or the other, or directly at your position. These can be reflected with your sword, but are very fast. You want to dash right up to the boss and plink it repeatedly. You can use shotgun, which is faster but more difficult, or pistol (my preference) which is slower but more consistent and doesn't require the weapon swap tech. Even when not plinking, you want to be slashing at the archer as much as possible, not just to kill it but to slow it down. It gets away from you very quickly once it starts moving again, so stay on top of him and keep the pressure on, even if it means tanking a couple hits. If he gets away from you, use that time that he's already far away to heal back up.
  • Rather than plinking, you can also alternate 2 gunshots, 2 slashes (repeat). This is not faster, but does keep the archer slowed down a bit more easily, allowing you to react a bit easier, and it's still good damage & ammo-neutral.
  • Take care not to fall below 3 health. If you do, just stand away from the mines and heal.

After a few volleys, he will find a spot to stay still on the ground, and shoot devices into the air - they are proximity mines, and they fall back down onto the arena like corners of a square. Getting hit by these can mean instant loss (2 damage + knockdown). But, they can be triggered deliberately, and if you dash off of them immediately after you trigger it, you will escape the blast. AND the blast hurts the archer. So, it can be a viable strategy to path a chain dash to-and-through one or more mines; they may very well hurt the archer as he is running around erratically.
  • This is your chance to burst him down. I recommend shotgun plinks for when he's launching the mines.

Watch a no-hit run, and be thankful for your sword reflector. This boss is MUCH worse on NG+ or the naked boss rush (with no chain dash).

There's no substitute for practice. Repeat in the Boss Rush mode until you can defeat him consistently before returning to the story mode for the real deal.

Claim victory and collect the 3 combat bits before continuing north.


Collect the health pack, cough, and proceed through the hallway to the titan's heart.
Press the floor switch (don't press it twice, though!) and dash across the toggling platforms to the elevator. Take it up.


Activate the pylon (congratulations), then head to the very southwest corner of the map.
Walk along the ledge and reveal the hidden platforms to head south.
Go down the stairs to a dash challenge room.


Dash across the disappearing platforms, turning left just before the wall at the end of the room to land safely and collect the Fourth Module. The pivot to the left should be around the 11th dash if you start your chain dash just in front of the first disappearing one. Note the health pack, which will give you four more attempts before needing to warp out.

Warp back to town, we're almost finished.
---
11. Judgement
Goals
  • Complete the game without dying

Housekeeping
You should have enough chips for another upgrade (maybe two), but they also shouldn't matter much at this point, assuming you have chain dash, sword reflect, and dash projectile shield. Take your preference from what's left and proceed down the large elevator in the middle of the town.

Follow the stairs ever downward and continue through the boss door to approach the final fight. Quit to title so you can practice the boss fight on your already-completed save file.


Judgement
Strangely enough, this boss fight can be described as a slightly more difficult version of The Summoner. Although more complex, the strategy is the same. When done quickly, it is extremely easy. And when you take too long, you are punished with having to deal with the more difficult set of the boss' attacks.

Initial Fight / Attack Phases

As soon as it starts moving, start cycling shotgun plinks.
  • If you do it right and don't get unlucky (health reduced to 50%), the room goes dark (next section).
  • If you take too long, he rears back (you still have time for one more shot, then prepare to dodge), then charges forward quickly and slams into the wall. Dash perpendicular out of its path!

After the slam attack, it moves to a corner of the room, then:
  1. Sends out a bunch of small projectiles that drift outward, and
  2. Shoots a pink beam at the opposite wall and tracks it toward you for about 60 degrees of the available 90 degrees of room.
Start near the center of the room (perhaps a bit further from the boss), reflect the projectiles that approach you, then walk or dash away from the beam's initial area. He repeats this sequence a few times, then moves to the center of the arena.
During the first part, as it sends out the small projectiles, STAY AWAY from it!!! The eye has a diamond hitbox as the projectiles are being released, that will repeatedly damage you and knock you down.
  • I kid you not, I lost my second one-shot attempt to this single attack killing me from full health. That was just after I practiced beating this boss 3x in a row without getting hit too!
  • Lesson learned: don't bother attacking it during this phase (besides reflecting a handful of the projectiles). Just wait for the next part.

After the series of beam attacks, it stabs outward from the center in 8 directions. Stand just a tad left or right from above/below it, and wail on it with more attacks.

Hopefully you have done 50% of its HP by now, or it will repeat until you do. But, there's really no need to have to deal with all that.

50% Phase

The room goes dark. Dash all the way to either the left or right wall, as four crystals appear near you (one in each cardinal direction). After all four appear, walk back towards the center of the room and slash that crystal three times to break it. Dash the rest of the way across the room. The remaining 3 crystals will explode, then Judgement will burst out from the floor where a pink diamond indicates. Once it is back, burst it down again, hopefully to 25% so you can skip the rest of this phase.

If you don't get the skip to 25% phase, it will continue in the same fashion as before, but with stronger attacks.
  • The charge attack moves faster and happens twice in a row
  • There will be more projectiles that are faster than before
  • The beam travels faster than before
  • The arm stab sends two waves of arms, and faster than before

Try not to let it last so long that you need to deal with any of these.

25% Phase

Finally, the room will go dark a second time. Repeat the same setup from the 50% phase. This time for sure, you should be able to burst down the rest of its HP once it reappears from the floor. Deliver the final slash, and pause then quit to main menu so you don't have to Alt+F4 or go through the outro each time you practice.

When you are really ready, and able to survive missing the phase skip (just in case you get unlucky like I did), load up your deathless run and give it your best shot.

---

Congratulations, you just One Shot Hyper Light Drifter. Enjoy your outro, music, and credit roll after you're done coughing down the hallway.

END

Afterword
I'm the kind of player that wants to get all achievements when I find an exceptionally great game (other favorites of mine include Hollow Knight, Sekiro, and Slay the Spire). After getting most achievements, I saw "One-Shot" and thought to myself... man, that's cool as <HECK>, but probably too hard for me. Eventually, I decided to give it a try and came to find that it's MUCH more doable than I thought at first. After writing some notes and getting close, I realized I could put together a comprehensive guide for others, since there wasn't a good one already. I also considered making a video walkthrough, but decided text & pictures would be easier to follow and more accessible.

Thanks for checking out my guide! This is my first time writing a Steam guide. I hope you liked it and had fun playing this awesome game.

Please let me know if you have any feedback on the guide, or if it needs updated. I don't expect to change much, but I'm sure some formatting and editing didn't come out the way I wanted. Formatting this for the Steam BBCode was rather tedious/painful, but I was able to get most of it right.

Happy gaming!
2 Comments
ELED3L 8 Oct @ 11:08pm 
thanks, very good guide

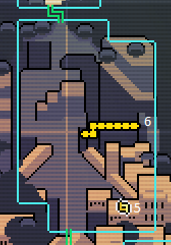
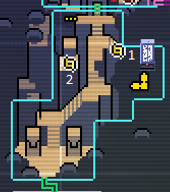
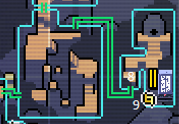
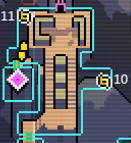
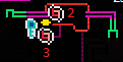
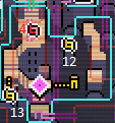
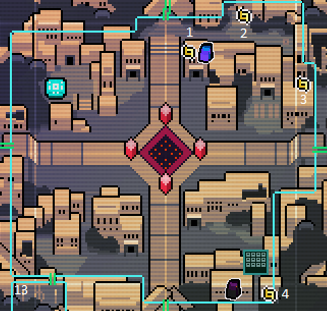
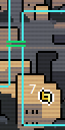
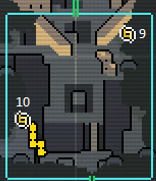
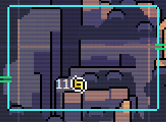
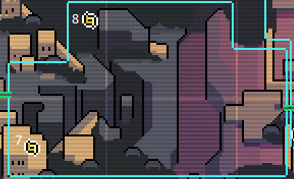
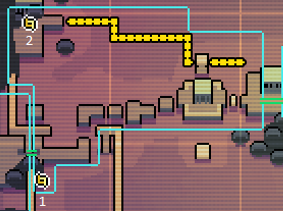
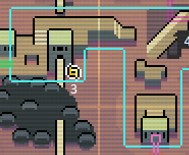
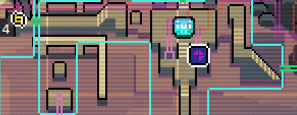
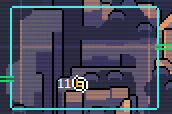
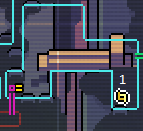
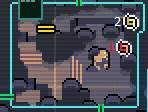
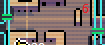
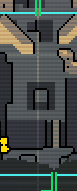
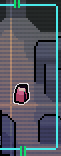
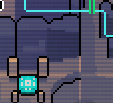
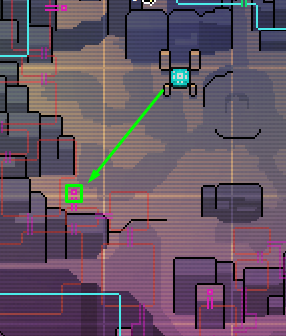
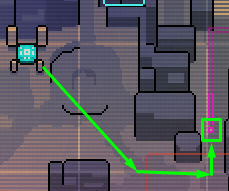
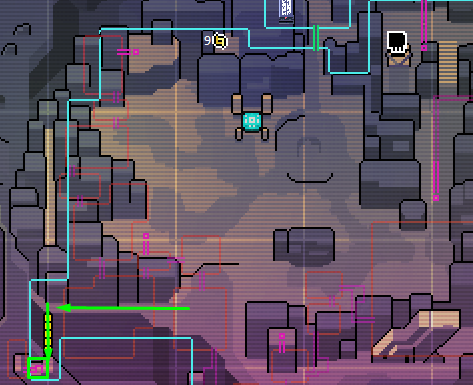
safe route with good explaining where to get the gearbits

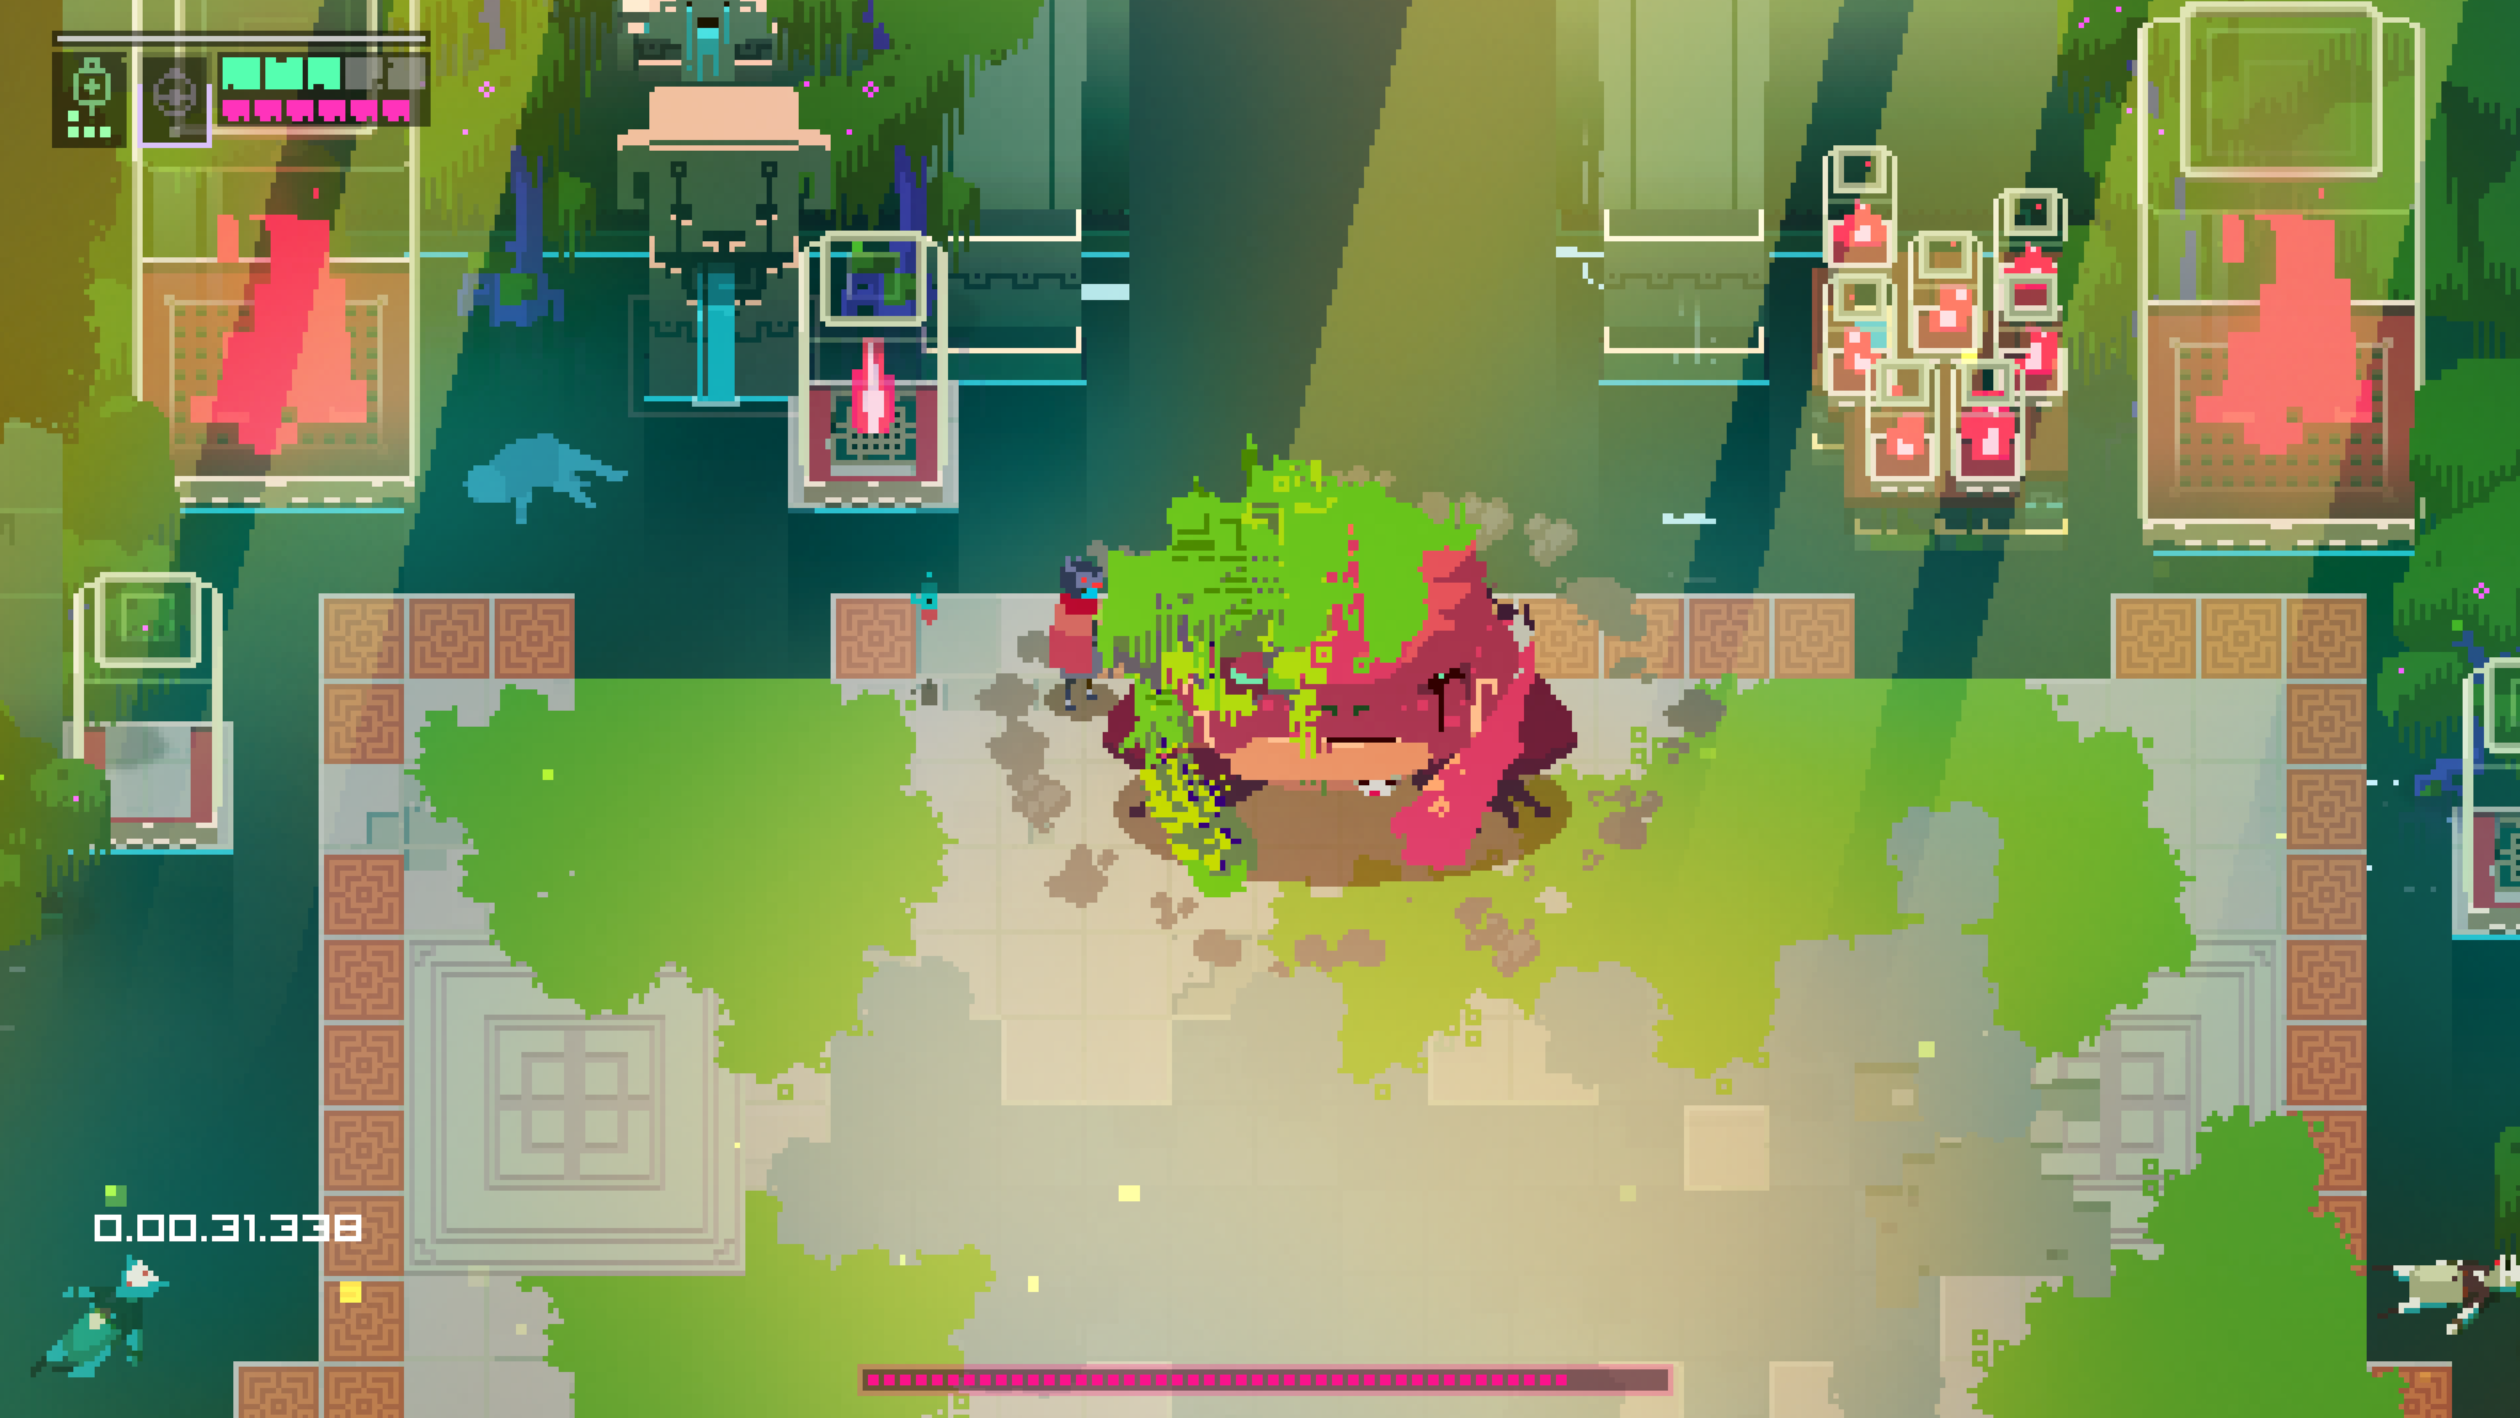
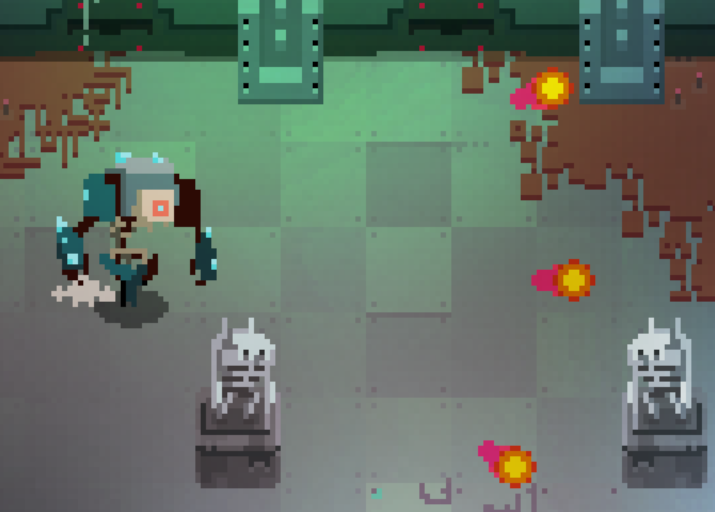
after someone beats the naked boss rush and ng+ this should be easy
Chanelifty 6 Apr @ 1:20pm 
This helped me alot! but there something i wanted to tell
(sorry if i worded some parts out wrong or if some parts doesnt make sense)
I've found a most broken trick for this achievement.
By going through C:\Users\<user>\AppData\Local\HyperLightDrifter and using whatever save file you're using for this achievement.
By saving the code and using the bitfinder web ( https://codepen.io/smrq/full/GZzMag ) to keep track of the death counter.
i copied the save code to another text document just in case i messed up.
I was able to reload by pasting the old code to the save after i died to a boss or an enemy and stay zero deaths
I was able to get this achievement even if i died to some bosses or enemies
Hope this helps