News Tower

News Tower

91 ratings
A Researcher’s Guide to News Tower
By cowswithpuns
Congratulations on your blossoming new news empire! Now let’s take all the fun exploration out of it, and tease out how the game works*.

*work in progress. Ongoing updates (thank you Devs) mean this guide will need regular re-jigging. Share your own research and findings :)

Your comments, game tips, and questions welcome!
11
2
6
3
5
2
2
   
Award
Favorite
Favorited
Unfavorite
Intro
The game
News Tower is a simulator/colony builder and resource manager. Having trouble balancing journalistic integrity with your flaming desire for a bigger building? You've come to the right place.

The basic premise of the game is a weekly (turn) cycle, encompassing the following steps:
  • Find and gather stories, managing events along the way
  • Craft articles, maps, photos and ads
  • Layout articles in your paper
  • Print this week's edition
News Tower requires a considered balance of 3 primary resources: floor space, time, and money.

Saving the game
Beware: the game only saves at certain times. These include early in the week and at the end of the week, just before you print your newspaper. This can be a bit of a pain when you need to exit early (because you lose your progress), so it's worth keeping in mind. It also makes testing things harder.

Name suggestions
Not all of us have the brain capacity to be creative! These compounds can help you jump in quickly, just add your choice of flavour:

Journal
Tribune
Press
Chronicle
Times
Post
Gazette
Star
Mirror
Observer
Record
Herald
Metro
Today
Inquirer
Review
Globe
Bulletin
Examiner
Express
Reporter
Sun
Planet
Independent


Basic production (telegraph, report, typeset, assemble)
Production
To earn revenue, you need to publish an edition of your paper each week. The only day you can do this is Sunday.

The basic requirements for publishing your paper are:
  1. Telegraphers (find leads on stories)
  2. Reporters (chase stories, makes reports)
  3. Typesetting (inputs reports, outputs text slugs)
  4. Assembling (inputs text slugs, outputs articles)
  5. Printing (design paper layout, go to press).
To support these requirements, you’ll also need to meet your employee’s needs, and maintain the building with utilities. Later you can get ancillary upgrades, such as ads or an editor (who I'm convinced is the least helpful person in the building, at least in this patch).
  1. Telegraphers (Production in build menu)
    To get a story, telegraphers find leads. They’ll search for them for a while (5–12 hours, depending on employee level and station buffs), then will alert you to the story. The telegrapher then remains on the job (unavailable) for the time the reporter is actively on the case, being freed up to resume searching once the reporter is done. Getting stories ASAP is important, because if you report on them too late, they won’t get processed in time to make it in time for printing.
  2. Reporters (Reporting in build menu)
    To get a story, reporters chase leads. Assign a reporter with the appropriate skill and they will research the story (10–48 hours per stage, depending on the story, employee level, and station buffs). Some stories require up to 3 stages to obtain. Once obtained, the reporters then have to return to the building with the story (report) and physically deliver it to the typesetter.
  3. Typesetting (Production in build menu)
    • The Typesetting Desk receives the report, plugs away at it for an age (7–18 hours, depending on the employee level, and station buffs), produces a slug text, then delivers it to the Assembly Table.
    • A fully-levelled Typesetter (5 skill) will reduce the time taken for the task by 5 hours vs a newbie (0 skill), excluding buffs
  4. Assembling (Production in build menu)
    • The Assembly Table takes a text slug or ad (5–12 hours, depending on the employee level, and station buffs), and converts it into an article you can insert into the paper.
    • A fully-levelled Assembler (5 skill) will reduce the time taken for this task by 4 hours vs a newbie (0 skill)
  5. Printing (Printing menu)
Production ratio
Because the time for each stage of production varies, you’ll want to figure out a comfortable ratio of employees in this role, with roughly similar numbers of typesetters and assemblers:
  • Due to their extended search times, you'll generally want more reporters than anyone else
  • However, because having stories as early on in the week as possible is so important (to make the print deadline and account for holdups), in practice you may also want as many telegraphers as humanly possible
  • Reporter Desks >> Telegraphers (aim for max) > Typesetting Desks >/= Assembly Desks
  • You can get away with one employee for each utilities position with a decent building setup
For example, you might start with 3–4 reporters / 3 telegraphers / 2 typesetters / 1–2 assemblers.
This ratio will change over time, with numbers depending partly on building and employee efficiency.
I aim for a final ratio of around 12 reporters, 6 (always max) telegraphers, 5–6 (or max) typesetters, 4–6 assemblers (with a good floor design you can skimp a bit on assemblers).

Other production desks you will accumulate along the way include the photography, map-making, and advertising stations.


Location where Influence Points can be spent to get more Telegraph Desks


Additional production (ads, editing, supplementary articles)
Ads
Ads provide an additional source of revenue for the paper by taking an article slot. The Sales Desk is unlocked for 2 IP at the Ad Agency (in Brooklyn), and requires a Sales Employee to operate.
Ads can be offered in a range of values, from $1,000 up to $3,000.

At the end of the week you hire the sales employee, you'll get access to the advertiser market. What you print (i.e. the number and quality of tags) dictates what you "score". Your score dictates whether you can craft an ad for a tag. Higher scores from publishing the same tags the week prior allow more lucrative ads to be crafted.

I'm still working out what this means. Presumably 4 bronze tags gives you the basic tier (the $1,000 ad).
Do higher quality tags (silver and gold) on an article with that tag also count for more score?
Do Combos of that particular tag add score, and how?

Ads can be beneficial to "fill holes" and contribute to Tag Combos, but need to be crafted by the end of the week, similar to news articles.

Crafting ads:
  • Click on an ad to see what it requires
  • A sales employee will draft the ad you select
  • Some ads also need illustrations to be completed to achieve their full value, this requires work by an Illustrator Desk (these ads do not get the "Illustration" tag, unfortunately)
  • Ads may even give you free Influence Points (the only way to identify them is to select them to have a look)!
  • I tend to make sure ads still Combo with existing articles, or they're not really worth the slot
  • Ads still require typesetting and assembling to be usable in your paper, so they will contribute to the workload of these stations


Editing (Text)
Editing can now remove negative tags during the early stages of article crafting, such as "lies", "propaganda", and "unpopular", in addition to "sloppy writing". "Old news" can't be removed.
The Editing Desk is unlocked for 2 IP at the Harrison Public Library (at Hudson), and requires an Editor to operate. While somewhat situationally useful, this update has made the Editor a valuable addition to the team.


The editor only works if you enable them when you first assign a reporter to a story. If they have already started reporting (green in the progress bar), you will have to cancel & reassign them with editing enabled.
Editing:
  • When sending a reporter to investigate a story, if it contains a negative tag you will have the option to enable the editor to remove the tag.
  • NB: you may not want to do this in circumstances where the negative tag is needed to complete a faction quest objective (e.g. "print a Censorship", given by The Mafia)
  • This will increase the time taken to produce the article
  • The editing time added is based on the Editor skill (0 skill = 12 hours, 1 skill = 9 hours), and the transport time to and from desks
  • I strongly recommend increasing environment levels by boosting comfort to eliminate the need for the Editor for "sloppy reporting"


Supplementary Desks
After recent updates, you can now content farm too! All you need is some spare IPs and a desk!
...Oh and some restraints, because your chosen reporter will shackled to their desk for the foreseeable future. Curate the type of content you want by adding Supplementary Desks for the genre/s you want, and leave your reporters to scroll reddit all day to slowly and passively generate stories for those tags. No journalism required!

- Court Report (Crime)
- Legislative report (Politics)
- Stock Index (Economy)
- Obituary (Society)
- Horoscope (Entertainment)
- Baseball Report (Sports)

[Under construction]
Graphics (close to finished)
Adding graphics
Graphics come in the form of maps and photographs (for articles) and illustrations (for ads).
Resist temptation and be sure you have adequate space and money for unlocking graphics... they're not for the faint of heart
Adding graphics to your newspaper is costly:
  1. Unlocking graphics requires multiple steps, and a lot of IPs (costing 16 IP a pop, min). Each type of graphic is unlocked in a different location, which also means you need to unlock the districts that lead up to those locations.

  2. The stations are expensive, and there is a large setup cost associated with the space, comfort mitigation and power they need. You will likely have to set up a coal generator, if you haven't already (which requires its own space and comfort mitigation, as well as a regular coal supply).
Who knew that to add a map you needed the "power overwhelming" cheat code? Not me.

Processing time
The graphics themselves are labour-heavy and time-consuming to produce, but can provide a lucrative way of adding extra value to a newspaper slot (especially with the cap on pages).
The graphics production line is:
  1. Graphic reporter (e.g. Cartographer) gathers story from map, carries it up to
  2. (photos only) Processing in the Dark Room, then transported for
  3. Processing by a Repro Camera, then it's transported for
  4. Processing at the Chemical Engraver, then it's transported for
  5. Assembling at the Assembly Desk.
This process, with added supply tasks, takes a long time (several days).
Looming print deadline? Speed things up by manually carrying graphics between stations as soon as they're done. With skilled production employees or item buffs, even graphics gathered late in the week can be added in time!

Hypothesis on how they work
My experience on graphics (theoretical / unconfirmed as yet):
  • A limited number of "graphics-enabled" stories will appear each week
  • They only show up in Globe reports the week after you obtain them, so you won't be able to use them in the same week you fork out for them
  • How many appear depends on the town location (i.e. more populated/advanced towns will host more graphic stories)
  • Once you've unlocked one report type (i.e. maps or photos), the other will also appear on the Globe, even if you don't have the tech to obtain them
  • An unlocked graphics type will spawn more often (e.g. if you have only unlocked the cartographer, they'll appear more often than anything else).
Graphics Editing
There is a separate Editors Desk for the graphics production process (presumably to remove negative tags on these stories), but I have not yet had a chance to use/test it. Let me know if you have experience with it!

Cartographer (Maps)
Once unlocked (16 Influence Points), maps can be reported on for selected stories. To enable maps to be added to stories you need space and money for:
  • A Cartographer Desk ($150) and a Cartographer to operate it
  • A Repro Camera ($2,000) and a Photo Processor " (creates noise)
  • Chemical Engraver ($1,500) and an Engraver " (creates smell)
  • Comfort (noise and smell) mitigation
  • A minimum fit out will set you back around $4,800 with comfort mitigation (excluding required space, power, and lighting!)
Draft Map (Cartographer Desk reports on a Globe story) → Halftone Graphic (Repro Camera)
→ Engraved Graphic (Chemical Engraver)
Processing times:
Maps take x hours to obtain from a story. This is reduced by z hours for each skill point, for a minimum of x hours
Processing takes x hours, reduced by y hours.

Minimum recommended equipment for enabling maps in articles.

Photographer (Photos)
Photographs are generated for some reported stories. Unlocking requires a minimum 16 IP. They require a Photographer Desk ($500), a Dark Room ($1000), access to the Repro Camera and the Chemical Engraver ($3,500 combined).
Photo Negative (Photographer Desk reports on a Globe story) → Photo (Dark Room)
→ Halftone Graphic (Repro Camera) → Engraved Graphic (Chemical Engraver)
  • A minimum fit out will set you back around $6,500+ with comfort mitigation (excluding required space, power, and lighting!)
  • Photographs take up to 48 hours (2 days) to obtain from a story
  • There is a non-linear reduction in time by skill points
    (0 skill = 48 hours, 1 skill = 37 hours, 2 skill = 33 hours)
  • So I recommend prioritising at least one skill in hiring or accessories (i.e. worth re-rolling for extra skill points)
  • Total time with processing (dark room, repro camera, chemical engraver, assembler) = several days, so...
  • Micro-managing processing from the time the reporter gets out of the cab is worth it!
    Hand delivering it to the Dark Room, then the Repro Camera, the Engraver, then to Assembly, can cut the processing time substantially.
Minimum recommended equipment for enabling photos in articles. Drag and drop items between stations to get them processed quickly!

Illustrator (Illustrations)
Illustrations are used in both high-value advertising AND in reported stories, and are unlocked for 16 IP. They require an Illustrator Desk for reporting ($150), and access to the Repro Camera and the Chemical Engraver ($3,500 combined) for processing.
Draft Illustration (Illustrator Desk either sketches from a Globe report OR an ad)
→ Halftone Graphic (Repro Camera) → Engraved Graphic (Chemical Engraver)
  • A minimum fit out will set you back around $4,800 with comfort mitigation (excluding required space, power, and lighting!)
  • Illustrations take 36 hours (1 Day, 12 hours) to sketch for reported stories @ zero skill
  • There is a non-linear reduction in time by skill points, with a min. of y hours
    (0 skill = 36 hours, 1 skill = 28 hours, 2 skill = 25 hours)
  • So I recommend prioritising at least one skill in hiring or accessories (i.e. worth re-rolling for extra skill points)
  • Illustrations take 48 hours (2 Days) to draft for $2,000 ads at zero skill (min. y hours)
  • Total time x to y hours with repro camera & engraving
Minimum recommended equipment for enabling graphics in ads.

Station specifics
Repro Camera
  • Costs $2,000
  • Photos, maps and ad illustrations are delivered here for processing into halftone graphics
  • Takes a long time - 12 hours to process at 0 skill, with each skill reducing time by 2 hours (min. of ? hours)
  • Produces a lot of noise (I recommend acoustic panels)
  • Halftone graphics will be delivered to the chemical engraver.
Chemical Engraver
  • Costs $1,500
  • Halftone graphics (for photos, maps and ad illustrations) are processed into Engraved Graphic
  • Takes a long time - 12 hours to process at 0 skill, with each skill reducing time by 2 hours (min. of ? hours)
  • Produces a lot of smell, and some noise (I recommend using tiles, vents & fans (mirrors to save on power!) in this room)
  • Empty graphics will be delivered to the Assembler to produce the completed article or ad.
Dark Room
  • Costs $1,000
  • Photo negatives are processed into Photos
  • Takes 8 hours to process at 0 skill, with each skill reducing time by 2 hours (min. of ? hours)
  • Produces a lot of smell (I recommend using tiles, vents & mirrors to save on power in this room)
  • Photos will be delivered to the Repro Camera.
Non-production stations (security, lawyer, utilities)
This section under construction

This will go through:
  • Security
  • Lawyers
  • Power
  • ...
Saving space, time, and money
News Tower requires juggling of 3 main resources, none of which are plentiful: space, time, and money. By optimising one, you can save on the others. For example, if you are frugal and precise with space, you can hire fewer staff.

NB: in the new update, we can now click and drag to move multiple items at once, making it a breeze to rearrange the tower on a whim! (hooray!)

Floor space
Space is a constant bottleneck, so be efficient. Consider these tips to optimise space, saving on time and money:
  • Typesetters should be located on the ground floor, close to the door where possible, since reporters need to access them so regularly from the ground floor (stairs are slow).
  • Assemblers can be placed on floor 1 and/or 2, with typesetters having priority on lower and more central spots.
  • Reporters and Sales Desk can be above/adjacent to these (Sales employees carry their ads to the typesetters)
  • Telegraphers and lawyers only access needs stations (food/toilet) so can be anywhere (although telegraphers do need noise abatement)
  • Utilities can be placed strategically (e.g. workbench central, washer between bathrooms)
  • NB: Kuggar has a good guide with a suggested layout that can be used as a foundation. I started writing this one before theirs uploaded!
Example late-game first and second floors.

Employee needs:
  • Food. Because stairs take so long to traverse, consider placing a food option (e.g. water cooler, but the gum ball machine is the VIP) on every level. I usually aim for the centre of the floor or next to stairs/elevator.
  • Bathrooms. Again, stairs suck. I recommend having toilets regularly spaced on floors, either a minimum or small-sized one every second floor.
    This means people will largely not have to travel far to use one (e.g. a 2-loo bathroom each on floors 2 and 4, near stairs).

  • I generally use this efficient 2-toilet setup every second buildable floor
  • This requires no power and gives a small boost to comfort
  • An exclusive (unique) painting later fits nicely and buffs comfort too
  • A single-toilet bathroom every (non-printer) floor may well be optimal for efficiency (untested)


Printer setup
You need the following modules at a minimum for a printer room or floor:
  • Input module (paper goes here)
  • 1–5 page modules (the more the merrier)
  • Output module
  • Access (door/stairs)**
In reality, this room quickly becomes a nightmare to be in for your poor mechanic, so some comfort management is advised. Acoustic panels and air vents at a minimum. Plants, clocks, acoustic wallpaper, fans etc. are better.

Only the mechanic needs access, so though entirely unrealistic I advise optimising floor layout by putting the printer on the uppermost floor of the building. They can technically go vertically, but in truth making it work is a nightmare, and not worth the exorbitant space cost.
**NB: See advanced tips for more info.


Example single-floor printer layout, with one slot remaining for the final page module.


Traversing floors
We covered optimising station and item placement with respect to stairs and how that can help streamline production. Place often-visited stations (e.g. assemblers), and items (food/bathroom) near stair and/or elevator entrances. Lower-priority stations can be shunted back to the farthest corner of the building (e.g. Lawyer; you'll likely be hand-delivering lawsuits anyway).

Mid to late game, I also like to push for elevators. They do take a lot of room (5 slots wide every accessible floor), but the savings in employee travel time is well worth it.
It makes everything faster: item repairs (which becomes a big issue late game), production chains, employees seemingly deciding they would rather use the toilet three floors above them, etc.

Floor upgrade costs
(costs updated in Photography, numbers not yet finalised)
0. Ground floor: street (no building allowed)
1. First floor: free
2. Second floor: $1,000
3. Third floor: $2,500
4. Fourth floor: $5,000
5. Fifth floor: $10,000
6. Sixth floor: $20,000 ($10k max loan, ~$15k min. cash recommended) ?
7. Seventh floor: $30,000 ($10k max loan, ~$25k min. cash recommended) ?
8. Eighth floor: $40,000 ($10k max loan, $35k min. cash recommended) ?
9. Ninth floor: $50,000 ($10k max loan, $45k min. cash recommended) ?
10. Tenth floor: $75,000 ($10k max loan, $70k min cash recommended) ?
Employees and accessory sharing
Reporter hiring
Reporters need to cover 6 different tag genres of story: crime, economy, entertainment, politics, society, and sport. You want to be able to cover any genre of story that might come up.

The more skill points a reporter has in a genre, the faster they complete their reporting task:
  • Reporters each cover 3 genres
  • Reporters can be hired with 0 to 2 points per genre (unconfirmed max 4–6 points total?)
  • Reporters can gain experience only by reporting on leads
  • They can gain up to 5 skill points per genre (excluding item buffs), so after this they're not worth "training"
  • Accessories can provide genre-specific skill-point buffs on top of this, further reducing reporting time.

Early game:
Early game focus is generally on getting articles complete on time:
  • Time is scant, so some micro-managing is required initially. Use higher-skilled reporters:
    • On longer assignments
    • At the start of the week to get through the bulk of the leads (at least initially)
  • This may include strategically refusing leads that are unhelpful at the start of the week (as these could hold up telegraphing stations)
  • This can help manage when a "hot" event pops up towards the end of the week and you need 3 people on-scene
  • When you get more telegraphers and your production speeds up (with employee experience and item buffs), you can "train" low-level reporters even on undesirable stories
Experience for reporters is very important. Sending reporters out to stories to "train" their skill, even when they won’t finish in time for this week, is valuable for this purpose. As long as it’s not stopping you from getting a good multi-tag scoop!

Prioritise having cover for each of the genres with contingency, but some planning can make the mid- to late-game a lot easier:
  • It can often be worth taking a less experienced reporter if they have the genres you prefer
  • You can swap out reporters when you find someone better with no apparent downside
  • Accessories can give 3+ extra skill points, taking even a complete newbie (0 skill) to an acceptable level
  • See Advanced Tips for more help on hiring in the future.

Accessories
Accessories are very helpful. They're cheap and they boost skills beyond the XP cap.
As a rough estimate, every point extra skill point saves you 1 to 3 hours of task time
NB: Check out advanced tips for limitations on production accessories

Every employee type has different accessories*, and sometimes it can be hard to fit them in the limited space you have to work with.
  • Accessories that go on the wall or desks can be particularly desirable, as they avoid taking up valuable floor space.
Reporters have accessories for each genre. They are inexpensive and usually worth buying, to cut back on reporting time. Using accessories can be hard to fit in when literally every block of space is useful. Never fear, we still have options!

Min-maxer? Aesthetics obsessed? No problem! Get the best of both worlds by adopting an efficient reporter sorting strategy to save on space and accessories.
Group reporters with similar genres so you can share accessories, reducing space and their purchasing cost!


Two reporters share genres and accessories to reduce space and cost (and it looks neat).

[*NB sneak a peak at Kuggar's guide for further info on using and obtaining reporter accessories]

Comfort
Comfort operates on the very sensible safeword traffic light system. Red = bad, green = good. Come to think of it, yellow is also bad. Basically you want almost everywhere to be some level of green!

Negative comfort is currently based on any of "heat", "noise", "smell", and "paper" (rubbish). Positive comfort is "general" (beauty). Negative comfort can be mitigated through some items, and buffed with others.

Employee needs:
Employees will be less efficient if their needs are not filled.
  • Food items require a steady supply of food, and regular maintenance
  • Bathrooms require a supply of paper, and regular cleaning & maintenance
  • Comfort / environment:
    • Mitigate negative paper, noise, heat, and smell
    • Make sure areas are well lit
    • Provide a positive comfort buff to work and need stations by adding decorations (e.g. plants, pictures)

Concentration
Reporters will produce stories with the "sloppy" tag (which reduces their value) when they have reduced concentration. Reporters lose concentration when their needs aren't met. This can happen where:
  • There is no bathroom or food source item to use (add a food item every floor and have multiple toilets; 2 food items and 2 toilets every other floor is ideal)
  • They can't reach an item (e.g. it's already being used or they can't path there)
  • They are located or loitering in an area with low comfort / environment
  • They lack a desk to work at (assign them to a free Reporter's Desk)
  • They glitch and get stuck (requires manual relocation)


Assembling your paper: Tag, you're it!
Making money
I enjoy balancing the need to make money with striving for “reporting integrity”, but this section mainly considers the revenue aspect:
  • Selling papers is the only way to earn revenue
  • This would be fun to expand on in the future (hint to devs)
    • E.g. introducing special mid-week mini gazettes, or pamphlets that the Sales Desk can prepare in the weeks beforehand and add as “special edition” inserts to a paper with the right theme).

Article tags
Paper revenue depends on the quality of published articles (their "Tag"), and the layout ("Tag Combos)". Each tag will sell a certain amount of papers:
  • Bronze tag (sells +1,000 papers @ $0.15, or +$150 base)
  • Silver tag (+2,000, or +$300 min)
  • Gold tag (+3,000, or +$450 min)
  • Negative tags (-500 papers sold, or -$75)
It can be worth it to triage stories, prioritising higher quality tags and multi-tag stories.
Articles containing Influence Points (IPs) can be very valuable for hunting tech.

Headline articles
Headline articles are multiplied by being placed "above the fold", so you want your most valuable articles to be headliners.
  • Front-paged headline tags are multiplied 3x (i.e. each bronze/ silver/ gold tag gives $450/ $900/ $1350)
  • Headline articles in subsequent pages are multiplied 2x (i.e. each bronze/ silver/ gold tag gives $300/ $600/ $900)
NB: Articles with Influence Points tags can be multiplied too!

Tag combos:
Adjacent (vertical or horizontal) matching tags on the same page give additional revenue:
  • +1,000 sales per combo (2 matching tags)
  • Tag combos aren't multiplied by being above the fold, so your decision about what to put as a Headline article should only consider its tags, not potential combos.
  • Matching purple (quest) and negative tags don't count towards combos
So a page with 3 articles (one article with a Politics tag plus a Society tag, one Sport + Crime, One Pol + Crime) would earn +2,000 sales on top of the base tag quality sales (Pol x2, Crime x2).

Expenses
It costs money (pre-purchased paper) to print. This cost can be reduced with a perk found using IP in [location], in the top NW of the Map.

NB: If you do not have enough paper at time of printing, you will be charged an additional emergency printing fee from your earnings. This is charged at a higher rate (+50%) compared with pre-ordering paper.
  • $200 per 100 paper (pre discount perk, base cost)
  • $180 / $160 / $140 (with 10%/ 20%/ 30% discount perks) per 100 paper
  • $300 / 100 paper (+50% emergency printing fee, charged if you run out of paper)

Paper cost
  • Each non-headline bronze tag uses a minimum of 10 paper
  • Each headline bronze tag uses min. 30 paper (front page) or 20 paper (additional pages)
  • Better quality articles use more paper, as do Tag Combos (+10, or +5 for old news TC)
Paper revenue depends on:
  • Number of pages. Extra page modules can be obtained from the Industrial City Harbour location.
    • You should add Page Module 2 as soon as you can afford (leaving enough money to pay for paper)
    • The eye-watering tech cost (Influence Points) of modules is worth prioritising. Page 3 = 16 IP, Page 4 = 32 IP, Page 5 = 64 IP)
  • Articles (blank slots waste money), or ads
    • Min. $200 for a bronze single-tag, non-headline article
    • 2x or 3x revenue for a headliner articles
    • Tag combos on the same page, (number of articles, number of different matching tags)
    • Number of tags (each article can have multiple, up to a max of ?)
    • Quality of tags (bronze, silver, gold)
  • Subscribers (your paper will gain subs over time)
  • Fulfilling quests from the Mafia, Mayor, or High Society

Stories / reports
The number of available stories to report on increases with time. This means you'll also need to obtain more production stations to handle the increase.
NB: I'm unsure if this is based on the week or the location (or a combo), and whether there is an element of randomness.
  • 6 items to research (first few weeks)
  • 7 items to research (early towns)
  • 8 items
  • ?
  • 14 items
  • 16 items
  • 20 items
  • Max items (22+?)
NB: This excludes "Breaking News", which are time-limited stories requiring 3 simultaneous reporters, but not requiring a telegrapher to instigate. These crop up mid-week. Unlocking the "hot topic" is recommended, as it increases your sales for every flaming hot tag you publish.

Collecting tags
Some stories have multiple parts where you can collect additional tags. These often require reporters covering different genres, and can also contain additional graphics.
Multi-tag stories are very valuable, as there are more chances for tag combos, and these are likely what you'll be using as headline articles. The final report segment can take much longer to report (e.g. 2 days), so it is worth preferencing a higher-skill reporter for these tasks.

Removing tags
There may be instances where you do not want a later segment of the story, e.g.:
  • It contains a tag that is banned by a faction quest that week
  • It is unobtainable by you currently, e.g. a photograph
  • You think you won't get the whole thing published in time (and need it this week)
In this case you can "close the line" early on the telegraph (once you've finished reporting on the desired tags), and the story will be complete without the later segment.
There might also be times where you want to "cancel" a collected report from a story, e.g.:
  • It contains banned tags
  • It's holding up the production line for an important story, and you're likely to use it
In this case, you can bin the report (cancel item) from the printing bar

Quests
  • The Mafia, Mayor and High Society are unlocked in succession, and you gain their approval by successfully completing quests
  • It is almost always worth it to complete accepted quests, even if it means you can't use an amazing multi-tag article that week. They give generous IP, which can be used to buy helpful tech.
  • Matching their demands with compatible map locations (towns) can be effective at helping complete quests
  • Make sure you don't select a quest and town with incompatible quest requirements
  • Completing a town on the first try nabs you 1 extra IP

Publishing
  • Articles can be used the next week with a small penalty from being "old news"
  • Articles with other maluses (e.g. sloppy reporting) also have a small penalty, the editor's desk can negate debuff tags (except old news)
  • Outside of specific faction quests, I have not experienced any issues with publishing lies or propaganda (edit: pre-Photography update, TBD). It'd be interesting if there was a change for legal action or a boost in sales.

This section is under construction with specific numbers largely still unknown. Contributions welcome :)


Tutorial start
If you start a new game and select "Yes" to "Do you want an introduction?", you will play the "tutorial start" of the game, which has more help prompts and differs slightly in the early game.


Tutorial limitations
Starting out in the Tutorial also means that some features are initially locked until the game lets you access them. For example, initially:
  • Available reporter stories are artificially limited
  • You can't hire extra reporters
  • You can't build a 2nd printer page module (which is true for several weeks)
This means early revenue potential is severely restricted. So don't feel bad if you struggle early on!

In saying this, it is still recommended new players use the tutorial to familiarise themselves with the game's mechanics.

Interestingly, in the tutorial start, you also receive less money to initially build with. These factors make the tutorial start actually a harder and slower start, in my opinion. Which is ironic, considering that if you're doing the tutorial, chances are you are a less experienced player and might require more help!

Week Zero (October 1929)
Not much you can do besides follow the prompts. You'll end the week:
  • With 3 stories (1 pre-prepared)
  • Using 50 out of your 250 paper
  • Selling 5,000 papers and earning $750
  • Having $8,660 in the bank (which will go quickly), before earnings and expenses, netting $9,210.
Week 1 (November 1929)
Still following the prompts, you'll throw out some broken stuff (sad to lose the medium plant), buy a sweeping station, and clean up a bit.
You're limited in what else you can do besides:
  • Add an extra floor ($1,000) and stairs ($75)
  • Move one of the downstairs doors to section off the printer room, and stash any extras
  • Add a telegrapher & reporter desk, and add accessories to desks
  • Research up to 4 stories:
    • Including the first two-part, double-tag story!
    • And the first Tag Combo
    • There is 1 more story than you need, which I recommend getting anyway (for experience and flexibility next week)
  • Earn $1,350 from selling 9,000 papers with 3 bronze tags & 1 tag combo, using 90/100 paper... Somehow you lost some of last week's leftover supply? There's a thief in the building!
  • Net $1k to leave you with $5,385.
Week 2 (December 1929)
You'll then be introduced to the Map, select your first District (location). You'll be introduced to District requirements, comfort, employee comfort levels ("condition"), and comfort items.
  • This week you get more autonomy, and can get an extra Telegrapher, Typesetter, Assembler and Reporter(s)!
  • I'd also recommend flinging some comfort decorations around the place
  • I personally like to hire all available reporters and only keep the 4 that have matching specialities. Mean? Yes. Efficient? Also yes.
These reporters contain 2 pairs that share the same 3 specialities, or 2x 2x3s.


This week:
  • You get 6 stories to report on
  • You can report, typeset, and assemble all these in time for Sun printing, but can't add a second printer page :(
  • Where possible, preferentially use higher skilled reporters and/or those with item buffs; 1 level = 3 hours faster (9 vs full 12 hours)
  • I recommend 2 typesetters & 2 assemblers
  • You'll need to build a food item (water cooler/s), bathroom/s, and add bins at worker stations
  • You'll need to order extra paper (min 100 for $200) to avoid paying the Emergency Fee
  • Fulfil the District requirements (i.e. make sure to print at least 1 of each designated Tag)
  • You will earn less (no double tag article), and pay more (more employees), so don't be surprised if money is tight after this week
  • I recommend using a matching item from last week for a lil extra money (for plants and clocks!).

    You get slightly more money matching tags (Tag Combo bonus), even with the Old News penalty.

    Initial 2-floor setup
    For a visual guide on what you can do at this stage, here's a Week 2 build:
    Early-game tutorial example setup.

    Week 3 onwards (Jan 1930–)
    As well as unlocking new locations, this week you'll be introduced to your first faction (The Mafia) and their optional objectives. These are recommended as the IP bonuses are valuable, as long as they don't conflict with a District goal.

    From here, you can choose which District to visit (which complements the Mafia goal). I normally head south, aiming towards the Industrial City Harbour and the Radio Tower, since these have important tech.

    This week:
    • Gives you 6 stories again, but...
    • Gives access to a second Printer Page, yay!
    • Requires building another floor, which
    • Requires a sizeable loan (interest scales, so try not to take more than say $5k)
    • Allows you to substantially increase your revenue
    • Gives you more freedom

    Hopefully this covers the core mechanics. If you fancy more advanced tips, feel free to check out the rest of the guide (it's still under construction so sections are a little chaotic, sorry).
Campaign start
Feeling overwhelmed? This section might take some guesswork out of things when you're starting out. NB this was crafted prior to the Photography update, so may be out of date.

This section will vary if you follow the tutorial, as things will be locked until it gives you access.

Advanced layout tips for set up
Starting out you are allocated $15,000 in initial funds (thank you privileged upbringing!). This is enough to get you set up with all the basics, without the need for any loans. This setup can last you at least the first few weekly cycles.

With careful management, you can collect, typeset and assemble all available reports in time for printing that week. Aim to have enough stories to fill up your pages.
Loans are expensive and limited, I recommend them only if they're going to immediately increase your income (e.g. they will result in adding another page to your paper that week).

"Economy budget" week 1 layout
For the first week, you will receive 6 reports that need to be processed into stories. If you're struggling with money (or if the devs introduce a harder difficulty), you can run a very lean operation in week 1.

You'll likely need to pay for:
  • One floor upgrade, 1 stairs and 1 wall with door [$1,225 total]
  • Printer input, page modules (2 recommended), output [$3,500 total]
  • 4 strategically-placed lights, 4 acoustic panels, 1 vent
  • Production stations and 4+ staff to fill them:
    • 3 Telegraphers and globe accessory
    • 2 Typesetter stations
    • 2 Assemblers
  • 4 Reporter Desks and staff (+2 with globe accessories)
  • 11 trash bins (one for each desk) and 1+ water cooler
  • Environment abatement (acoustic panels for telegraphers, heat and noise abatement for outside printers)
  • Any "extras" you like (bathroom, clocks, plants, production staff, etc.)
If you use this starting out, you'll have lots of funds left over. The downside to this is that you will need to pay for more in week 2 to get the basics set up (extra floor, bathroom, utility stations, etc.).

(Basic setup for week 1 ($4,150 remaining). Optional stations/items can be purchased week 2+.)

"Advanced start" week 1 layout
If you're a confident player, you can make the most of your budget by pre-planning for some of those optional week 1 "extras".

You can afford:
  • Two floor level upgrades ($1,000 + $2,500), 2 stairs, 2 walls with doors
  • Production stations and staff (min. hiring all initial 4 available to start with*)
    • 3 Telegrapher stations (+2 globe accessories)
    • 2 Typesetters (*if you don't have enough production staff to fill them all yet see "Juggling" section)
    • 2 Assemblers (")
  • Reporter stations and staff. I recommend all initial 4 to start with**, and the available accessory (globe) for the appropriate desks
  • Bathroom (something look odd in the example below? Yup, an extra mirror in the toilet cubicle works better at getting rid of smells than an extra vent...)
  • Utility stations, excluding Resupply [Optional week 1; if you're not confident save these till week 2, or as the need comes up]
  • Printer (input, 2x page modules, output)
  • Extra paper (if you can afford it; never enough paper!) [Optional week 1, the max you will use is 100]
  • Comfort / environment items (lights, passive noise, smell, heat abatement). Some items may require unlocking.
  • 1+ strategically-placed water cooler, and all the plants and clocks you can afford!
(Week 1 "advanced start" ($160 remaining). Utility stations can be filled as needed, since they aren't needed in week 1.)

Juggling your production workers
*Juggling workers is unnecessary, but can save you re-roll costs ($100).
  • Only 4 production staff are available at the start (without a re-roll)
  • On Monday, fill the 3 telegraph stations and one typesetter
  • Each telegrapher will notify you and wait for reporters to gather stories on 2 reports each (up to 6 stories available in Wk 1)
  • You can move your telegraphers to vacant production stations (typesetters first, then fill assemblers) when they're finish
  • This allows you to gather, typeset, and assemble all 6 stories in time for production on Sunday with only 4 production staff.
(Cheaping out and saving money in the first week by moving workers from Telegraph duty to Typesetting and Assembling once they've finished their duties. Not recommended for sane people.)

What not to pay for
  • Skip utility stations and staff in week 1. Utilities can be placed down the road (when they become necessary), just make sure you have the funds available when this happens
  • Skipping the Resupply station is recommended until you have spare income. In the early game it's easy (and often preferable) to move paper and food to where they need to be
  • Avoid expanding staff and flooring unless you're not maxing out your newspaper income (e.g. not collecting all stories in time) or it'll help boost that income (e.g. place extra page modules)

Early paper earnings
Selling papers is the only way to earn money, so having enough paper to print the max you can sell is absolutely vital.

  • With 2 printer page modules and all 6 stories in your paper, in your first week you can earn $2,000 from selling papers
  • Take note of how much paper you use (your first week will likely use 100)
  • Each week aim for a buffer of paper on top of last week's usage (+60-100%)
  • When you get paid, the first thing you should do is buy this week's paper (probably more than you think you need) and deliver it to the printer
  • There is no way to know a) how much paper you used last week, or b) how much you will use this week, until you have all your stories ready and lay them out (that I've found)
  • How much paper you need is based on a number of factors (including # of pages, tags, hot topics, etc.)
  • Because of these factors, it is difficult to save money for printing till the end of the week, so
  • Swallow the frog and buy this week's paper first thing!

(Example week 1 paper income utilising all stories. Based on an economy start)

NB: with your remaining profits in week 2, I recommend getting another water cooler for level 2, an extra typesetting desk, missing utilities/production staff, comfort and environment boosts, and 2 more reporters with desks.
Reader perception
Look, I'll be honest, Perception is not super intuitive. This was a pain in the patoot to work out, and involved more screenshots than I'm comfortable admitting. I'm fairly confident I've worked it out. By doing all this, I hope my pain can ease some of yours!

Perception
Perception is a measure of your reputation, simulated by where your newspaper fits on a sliding scale between Informational, Moderate and Sensational. It is used to ascertain whether you will gain subscribers from an unlocked District. Certain articles and their layout position will influence your perception (designated by arrows), moving your newspaper on the scale.

Articles that influence perception are all slots on the front page, and all headline articles slots on subsequent pages (indicated by arrows in layout mode). Perception is handled when you publish your paper, at the end of Sunday.


Articles in these positions on each page will influence the perception of your paper

How it works
Each week, available district readers (i.e. potential subs) will subscribe to your newspaper if they line up in the "green" section of the perception scale. If you venture into the "red" section, those subs will unsubscribe, as your content no longer interests them.

From my testing, it seems:
  • The District's potential subscriber population (Pop) is represented by the number of tags/figures (e.g. 2 tags = 2 pop available)
  • You convert potential subscribers (subs) into actual subs over time (each week)
  • Pops are converted from the boxes on the perception bar
  • When you conquer a District, you add their pop to your perception bar, making them available for later conversion
  • The District Pop is added to the box your paper sits when it's published that week
  • You convert pops that fall in range of the green boxes (I'm going to call the range of green the umbrella)
  • You can influence the width of the green umbrella by making the paper cheaper or more expensive (see Newspaper price)
  • How many you can convert from each box depends on the position in the umbrella (from 1 to 3 per box)
  • 1 converted sub pop = 100 new subscribers.
Perception deep dive (because I'm a nerd)
The way it seems to work:
  1. When you print, the game checks whether this week's perception matches (e.g. moderate last week and this week) [NB: I am not confident about this part, it's an interpretation of dev comments]
  2. If it does, it awards you last week's converted subs according to the umbrella that week
  3. It then adds this week's gained District Pop to your perception bar, to the box based on the perception of the newspaper this week
  4. How many District Pop are added is based on how many of the objectives (District tags) you fulfilled (i.e. if you collect all 4 tags, you get +4 Pop)
  5. Then it shifts the bar one place towards this week's perception
  6. The newly-added potential subs become available for converting in later weeks (if they land in a green umbrella)


Newspaper price
At this stage of the game, you gain the option to set the price of your newspaper, which influences how wide the perception bar, or the "green umbrella", is:
  • $ = $0.13 (green bar is 5 boxes wide; middle box will give you +3 sub pops)
  • $$ = $0.15 (green bar is 3 boxes wide, middle box = +2 sub pops)
  • $$$ = $0.17 (green bar is only 1 box wide, +1 sub pop)


You can gain sub pop from any box in the green. How many you convert from each box depends on the price of the newspaper (i.e. width of the bar), and how central to the umbrella the box is.

This nifty feature allows you to sacrifice upfront sales with a view to obtaining subs that might lean slightly away from your newspaper's reputation (perception). The obvious downside is that money is tight in this game (especially early game), and each District Pop gained is only +100 subscribers, or +$130/$150/$170.

Notes on perception
You do not need to keep playing the same district, as their pop gets added to your bar when you complete the district the first time. After this, it is available for conversion each week as long as your umbrella covers the box.

At this stage there is no benefit to maintaining a position on the scale except for converting potential subs to actual subs, but in the future the devs have hinted at there being long-term implications for having a certain reputation (e.g. sensational).


Every district has its own "wants" (in terms of the perception) and potential sub population.
Quick basic tips
  • Pausing is vital. Pause:
    • At the start of the day to set up
    • When you get a new lead alert
    • When it’s time to create the layout and print, etc.
  • The game will automatically pause when it's the last opportunity to print, so don't unpause it accidentally!
  • Stations (e.g. Typesetting Desk) are only active when the employee is there or on the job. This means that significant delays can happen if employees are filling their needs or stuck. It’s important to streamline things as much as possible to reduce this risk.
  • Most stations can produce paper waste, so I generally give each desk a waste paper bin.
  • Items ("accessories") are key. The buffs you get from “accessories” will boost stats, which saves on time:
    • Where money permits, use desk and wall accessories to manage comfort and recover staff concentration
    • Plants and clocks are cheap; be generous with those and limit ugly areas, and you’ll never have a problem with sloppy articles
    • If you manage comfort, staff can’t really lose concentration unless they get stuck or you use the boost button (late-game tech)
  • Employees that get stuck can be relocated manually
  • Make sure you have enough paper going in to print! Money is often tight, especially early game
  • Printing papers is your only method of getting more money, so it’s imperative to have enough to do a full print run. 40 paper = 4000 newspapers. Never enough paper…
  • Doors and stairs are slow. Streamline operations by limiting the need for employees to traverse these. Most rooms don't need doors.
    • Doors on bathrooms and the printer room are important though!
Quick advanced tips
I love plants, but I'm a wannabe min-maxer by heart, so here are some advanced tips. Share your own!

This section is a bit eclectic since other sections are being expanded on, and now also contain advanced tips within them.

Accessories
Comfort:
  • Clocks are OP for comfort. Nothing like a looming deadline to get you motivated?
  • Early on, small pot plants are your friends!
    • Placing these in gaps on the floor and desks gives a small comfort boost, which can help combat staff maluses and raise concentration back to full over time
    • You can put them on all desks and most stations, they even go on top of printer modules :)
    • Medium plants are great for single space empty floor tiles
  • Add plenty of comfort items around your needs points (toilet, food), and around your utilities stations to avoid employees losing concentration
Happy superman; 1 employee is sufficient for my 7-story building

Production:
  • Once your typesetters and assemblers are max level (5 white skill points), there doesn’t seem to be any benefit to using the metal slug trolley! There is a minimum process time of 7 hours for typesetters, and 5 hours for assemblers.

Loans
  • Loans can be helpful, but as they only go up to a max of $10k with a scaling interest rate to boot, so out of necessity they should be used sparingly
    • Since purchasing new floors is hideously expensive, unfortunately saving up most of the cash is the only option for later floors
    • NB: I hope this changes in future patches and we have the option of investing in tech that: a) reduces the interest rate, and b) ups the loan cap. This seems realistic; more earnings mean a safer investment, and if I have $40k in cash already, it makes more sense that the bank would be more willing to lend me $15–20k.
Influence points (IPs)
  • Influence points are precious, so prioritise efficiency and money-saving tech
  • E.g. telegraph stations, printer pages, security, lawyer, elevator, paper and food discounts
  • You can boost IP gain from reporting using the headliner multiplier, sometimes drastically!
You can prioritise IP over income to get all the print modules earlier by using IP stories as headliner articles.

Ya'll got any more supply?
Okay, I know I said if you're short on space you can pack up your poor supply person and give them the boot, but the opposite is also true! If you've got spare room, extra supply stations will help move millions of paper each week, and passively speed the production chain.

Click and drag
In the new update, we can lasso a group of items and move the whole batch at once! Super easy, S-tier feature.

Adding a new floor and relocating your printing setup is easy with the ability to click and drag groups of items.

Click and carry
As an all-powerful being, you can pick up and move objects and people to your heart’s content. This is a super handy tool, especially in the following situations:
  • At times when space is precious, do away with things like the Resupply station & employee entirely, and just move paper and food yourself! Save space, save money (staff cost and feeding them), save time (reduce load on staff needs).
  • Restocking printer paper. You can never have enough paper!
  • To "click and carry" (instead of drag), place an order, click a box once to select and again to move it, hold it anywhere over the printer input module itself or the paper input slot, and click to add it (without needing to click-drag)
  • This also allows you to add extra paper at the last minute if needed. Tedious but effective…
  • Restocking food (food is expensive, so min-maxing food allocations can be necessary)
Oh no, something vital is broken! Give the mechanic a hand and drag them to where they need to be, and they’ll fix it faster than having to take the stairs/lift.
  • Side note, a mechanic could be the hardest-working, least ‘optional’, individual employee. Pamper them a little to ensure the whole business runs smoothly:
    • Place their station in a good spot on a central floor (this is the only employee that requires access to all floors)
    • Make their station nice. Give them some plants and decorations, get the wall accessory when available. They’ll spend time in low comfort areas, so having nice clocks, plants, etc. around them when they’re on standby can recover the loss quickly.

Speeding up article production
  • Transport time kills production times. Employees will often leave their desks to deliver items, which wastes time. By doing the grunt work for them and carrying items between stations yourself, you can run a very fast and lean production line for articles
    • Micro-manage the graphics production process by taking the raw film/illustration/map from the reporter and deliver it straight to the relevant production stations. By carrying each item between stations when they're ready (+/- Dark Room > Repro Camera > Chemical Engraver > Assembler), you can cut the production time literally in half!
    • This also applies to articles; if you're having trouble getting things printed in time, try routinely clearing out typesetters desks manually. By doing the distribution job of delivering to the typesetters and then to assemblers from Wed on, you can have all articles ready to print by Sunday morning (even multi-stage stories with graphics)
  • Grabbing a report straight from the reporter and delivering it to the typesetters for them frees them up to send them out again too, bonus!

"Old news" cheese
If you have quest-banned tags on some juicy stories, there's cheesy way to avoid the "old news" tag if you want to use them the following week. Simply wait to send your reporter until the final segment of the story will be reported after Sunday. Just make sure the item won't expire before you get to it.

Edit: players have stated that the story can be reported and partially through the production stages for this to work. So as long as the article isn't ready to print, it will avoid the debuff tag [unconfirmed].


If a story won't complete until the following week (reporting +/- production stages), it will not contain the "old news" tag when it's finished!

Printer room cheese
Entirely optional, but sometimes you need to squeeze whatever juice you can get so things don't go up in fiery flames.
**The only time the printer needs to be accessed is for repair. This means you can actually entirely seal off (no door/stairs) access for most of the week.
This allows the following min-max tactics:
  • Using a wall instead of a door will save on noise spill, and swap it out for a door only when the mechanic needs access, saving on some noise-proofing costs and preventing people from walking through unnecessarily and getting grumpy.
  • Skimp on lighting! Well, less so the cost of lights, they’re cheap; it’s more power that’s precious. You can get more wiggle room on this by saving some power cap by manually moving lights into the room only when the printer needs maintenance.
Handling events
Adverse events
Cheese adverse events and trivialise them, or at least save yourself some headache with these sneaky strats.

Lawsuits
Before you get a lawyer, you just have to pay them when they expire. Boo!
Once you get the Lawyer's Desk, it's smooth sailing. As soon as the lawsuits drop, click & carry them straight to the lawyer’s desk. The (beloved by me) lawyer can start on them immediately, working through more of them before time runs out. With this method, one lawyer & full (available) desk accessories, you can get away with not paying a cent.

Security guards
I like having a permanent installation (1 initially, up to 6 end game, when I'm wealthy), but you can boost those numbers when an adverse event pops (i.e. mobsters or protesters):
  • Buy or re-place stored backup security stations and hire guards for the days when needed, saving on space and staff needs. Fire them before the end of the day like the ruthless publisher you are and save on their wage too ;)
  • I also like to hire Supply employees with Security skill, this way I can just swap them over to the booth for the event.

Mobsters
When these guys spawn, immediately give your security guards a leg up. Makes a scary event feel like swatting flies, it's quite satisfying!
  • Place down your stashed security booths and swap in some guards (you'll need multiple guards because there's a cool-down timer for each boot to the butt)
  • Pause and carrying them (dragging) straight to the ground floor. They’ll start giving people the boot immediately, and you can get away with almost no interruption to business!

Protesters
When these guys spawn, they block returning reporters from entering the building. This can wreak havoc on your production time. Again, your security guards are on the job. They can escort protesters out one by one. But we have another trick up our sleeve too!
  • Once again, security guard delivery straight to your door. Uber Beats?
  • Now your reporters are trapped... but their stories aren't. Grab their reports straight from their inventory and drop them into the Typesetter's Desk. This speeds up the process, and frees the reporters up for their next assignment.

Risk of injury
This event is the pits. I had it 7 times, only dodged once, and had 5 serious injuries (7-day timer where the employee’s unavailable!). Apparently it’s random, and that’s just “bad luck”… but I just don’t trust it anymore.

When I see this event, I just sacrifice an unimportant (i.e. low-level employee) to it, and hope for the best (you can even hire someone just for this, lucky them!).

Notes on the ritual sacrifice:
  • If your sacrificial lamb gets injured (taking one for the team!), you can then safely send a good employee on the assignment, BUT
  • If your lamb does NOT get injured when you send them, it is not safe to swap them out for the good employee, as this will re-trigger the injury check roll
  • So, if the sacrificial reporter survives the injury check, I'll let them finish the report, even if they're slow (they earned it)

Risk of Boycott
This event was introduced with the Photography update. When it springs, you have a chance to lose ad clients. This means you're not allowed to print the boycotted ads that week (2 for intermediate, all 6 for severe). Situationally quite damaging. There's no way to cheese this one, even if you've produced your beautiful, illustrated $3k ad and it's ready to go, you won't be able to print it. You can use it next week though.

Advanced map hunting
Advanced map techniques

[WIP]
Advanced reporter examples
[This section is a WIP]

Advanced reporter hiring techniques
**Why be creative when you can be efficient! Make things straightforward by hiring reporters who share the same genre specialities. No mess, no fuss!
  • If you can, hire reporters in pairs that share the same 3 genre specialities
  • Setting up desks and accessories are so much easier when they share the same item buffs
  • Save money, save space by squishing them in like sardines with their "News Conglomerate Approved" decorations and accessories shared by the pair!
  • Sometimes I have the first 4 + 2 reporters come in neat 2x 3 speciality pairs (covering all genres), which makes min-maxing their accessories so much easier!
  • Hire reporters with compatible genres, and suck all the fun out leave nothing to chance!
  • I have tried hiring them in both 3x and 4x genre pairs (i.e. 3 to 4 reporters with the same 3 genres). The downside to this is that you have a hot topic or are focusing on a few genres, all your reporters will be busy at the same time, and unavailable for stories that crop up. For this reason I recommend a variety of pairs of reporters who share 3 genres.

...Feed your inner control freak and embrace the neurotic Cows hiring strategy! Still to come…


Employee Traits and Skills
Employee Traits
[Under construction]

Personality traits


Trainable traits


Employee Skills
More skilled employees do their jobs quicker. Investing in accessories that buff skills and giving employees opportunities to raise their experience is worthwhile.

[under construction]

Reporters
Reporters benefit from skills in a non-linear fashion.
For a 1 day report:
0 Skill = 24 hours, 1 Skill = y hours, 2 Skill = 16 hours
3 Skill = y hours, 4 Skill = 13 hours, 5 Skill = 12 hours
6 Skill = 11 hours, 7 Skill = 10 hours, 8 Skill = x hours
9 Skill = y hours, 10 skill = x hours.

For a 1 day, 12-hour report:
0 Skill = 36 hours, 1 Skill = y hours, 2 Skill = 25 hours
3 Skill = y hours, 4 Skill = 20 hours, 5 Skill = x hours
6 Skill = 17 hours, 7 Skill = 15 hours, 8 Skill = x hours
9 Skill = y hours, 10 skill = x hours.

For a 2-day report:
0 Skill = 48 hours, 1 Skill = y hours, 2 Skill = x hours
3 Skill = y hours, 4 Skill = x hours, 5 Skill = y hours
6 Skill = 23 hours, 7 Skill = y hours, 8 Skill = x hours
9 Skill = y hours, 10 skill = x hours.

Telegraphers

Typesetters

Assemblers
YouTube playlists
Recommended playlists
I really enjoy watching playthroughs of games. If you do too, you might enjoy watching one of these playlists. I watch a lot of YT gaming and am extremely picky. For me, it's like spending time with a friend. I prefer easy-going, friendly creators that aren't afraid to admit and learn from their mistakes.

My top pick
DeepSpaceMatt might be my favourite channel on YT at the moment, he's a gem. He's such a genuine, friendly, and well-spoken person with quality videos. He covers indie titles so his channel is minuscule, but despite that, he still posts a vid every day. His News Tower playthrough is great and got me to buy the game, and I would love others to find him!

Learn with them
ChubbyPanda is brand new to the game and still learning (hoping he makes it a series). However, he's nice to listen to (Aussie), does really well to explain his thought processes, and is just enjoyable to watch, even when he goofs up. His channel is small, but deserves to grow. Check out his Big Ambitions playthrough if you prefer more experience in a game (he's the reason I bought that one).

Experienced players
You can't really talk about simulation games on YT without mentioning Katherine of Sky. She's a prolific YTer who has covered News Tower extensively. She has a supercut vid of her Photography update playthrough, which could be fun to watch along while playing.

If you have someone you've found, please let the rest of us know!
19 Comments
axios2006 9 Jun @ 1:06pm 
Thanks for the guide! Just a note: I asked in the official Discord server about save mechanics, received this reply: "That has since been changed. It autosaves before you send a newspaper to print but you can save whenever you want besides that."
Römsen 8 Feb @ 12:40am 
great work!
jsc 23 Dec, 2024 @ 5:15am 
wow
Tobykinns 10 Dec, 2024 @ 9:18am 
This is one of the longest guides I've seen of this game so far, and it's not even complete yet. Well done! Thank you for the tips and explanations. Subbing to the thread and looking forward to more updates.
Rubos 23 Sep, 2024 @ 11:39am 
FYI: you can use ads as headline article too for multiple ads revenue :3
Beloega  [developer] 3 Sep, 2024 @ 8:26am 
<3 awesome!
nosedigger 1 Sep, 2024 @ 2:32pm 
This is what I call a "definitive guide to". Kudos to the writing and the work put in it.
cowswithpuns  [author] 4 Jul, 2024 @ 7:35pm 
Thank you so much!

Sorry it's taking so long to cover the new content. I think people might've been disappointed in that, but it requires starting over with a brand new save.

Thanks Oskatat, starting to add your points in slowly, as I get to them in game. Had no idea the photographers would be so slow! Hmm.
CatMcGregor 4 Jul, 2024 @ 9:18am 
Great write up, thank you. I've used it extensively. :)
Oskatat 22 Jun, 2024 @ 7:43am 
editors can be used to get rid of negative story tags already there on the map, like 'lies', 'unpopular' and 'propaganda'. Gotta check the box when you assign your reporter, can't send it to the editor afterwards. Situational useful when you have a task like 'don't print propaganda' and the best stories of the week have the tag.

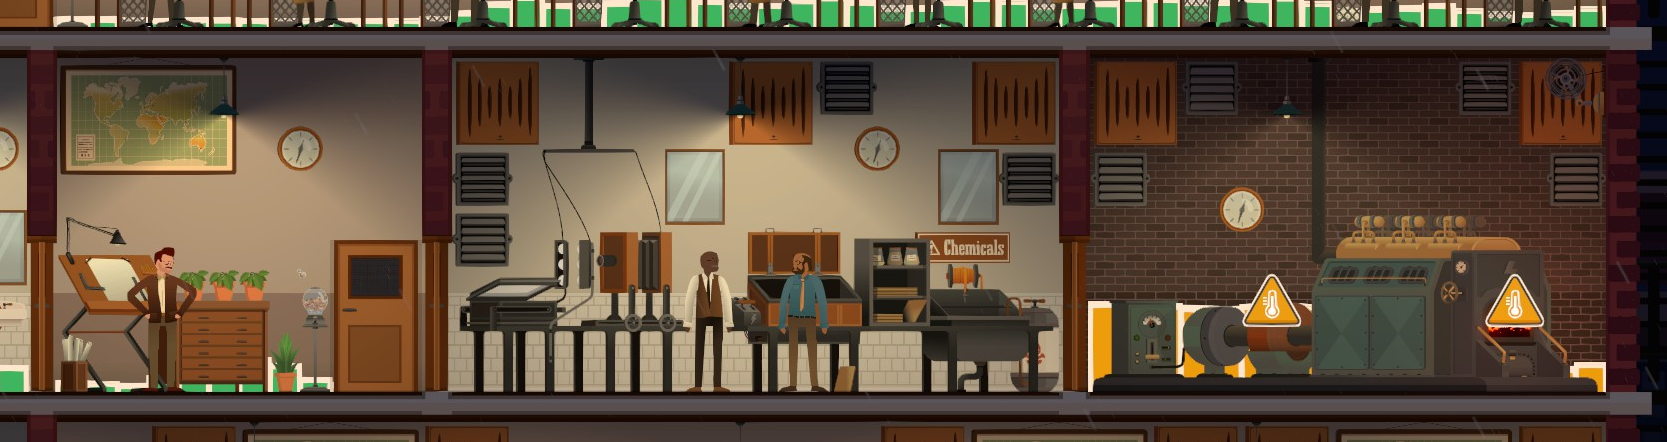
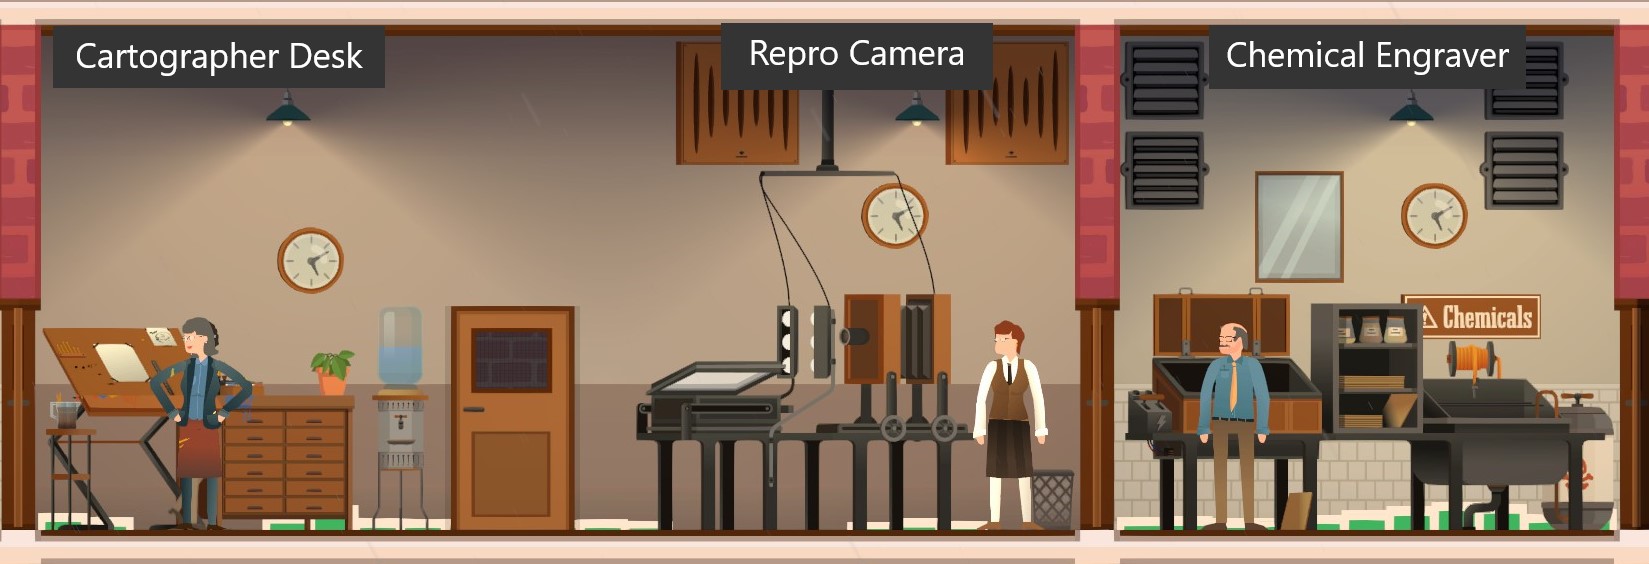
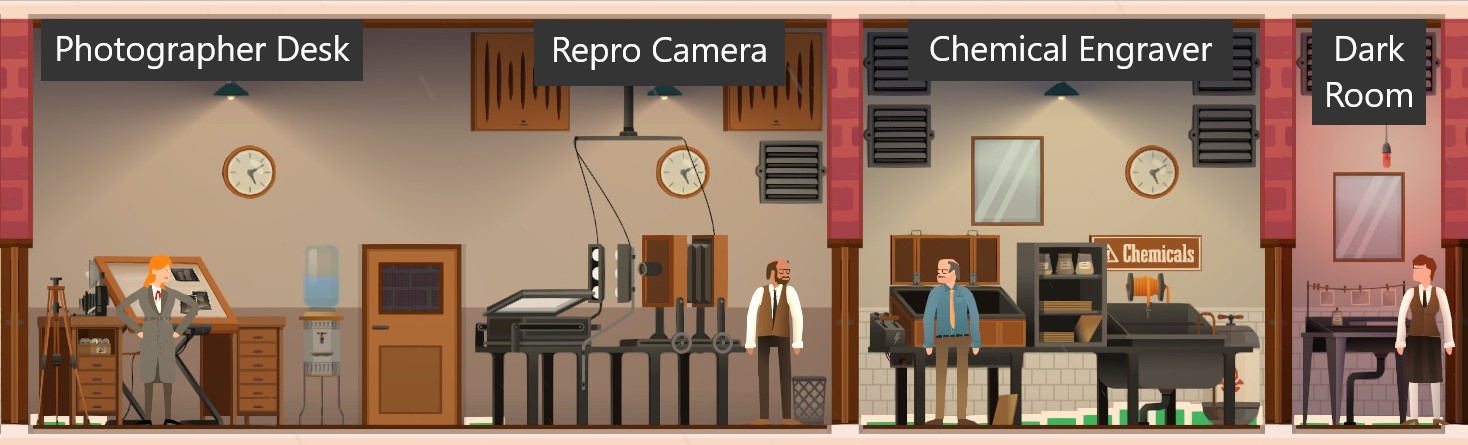
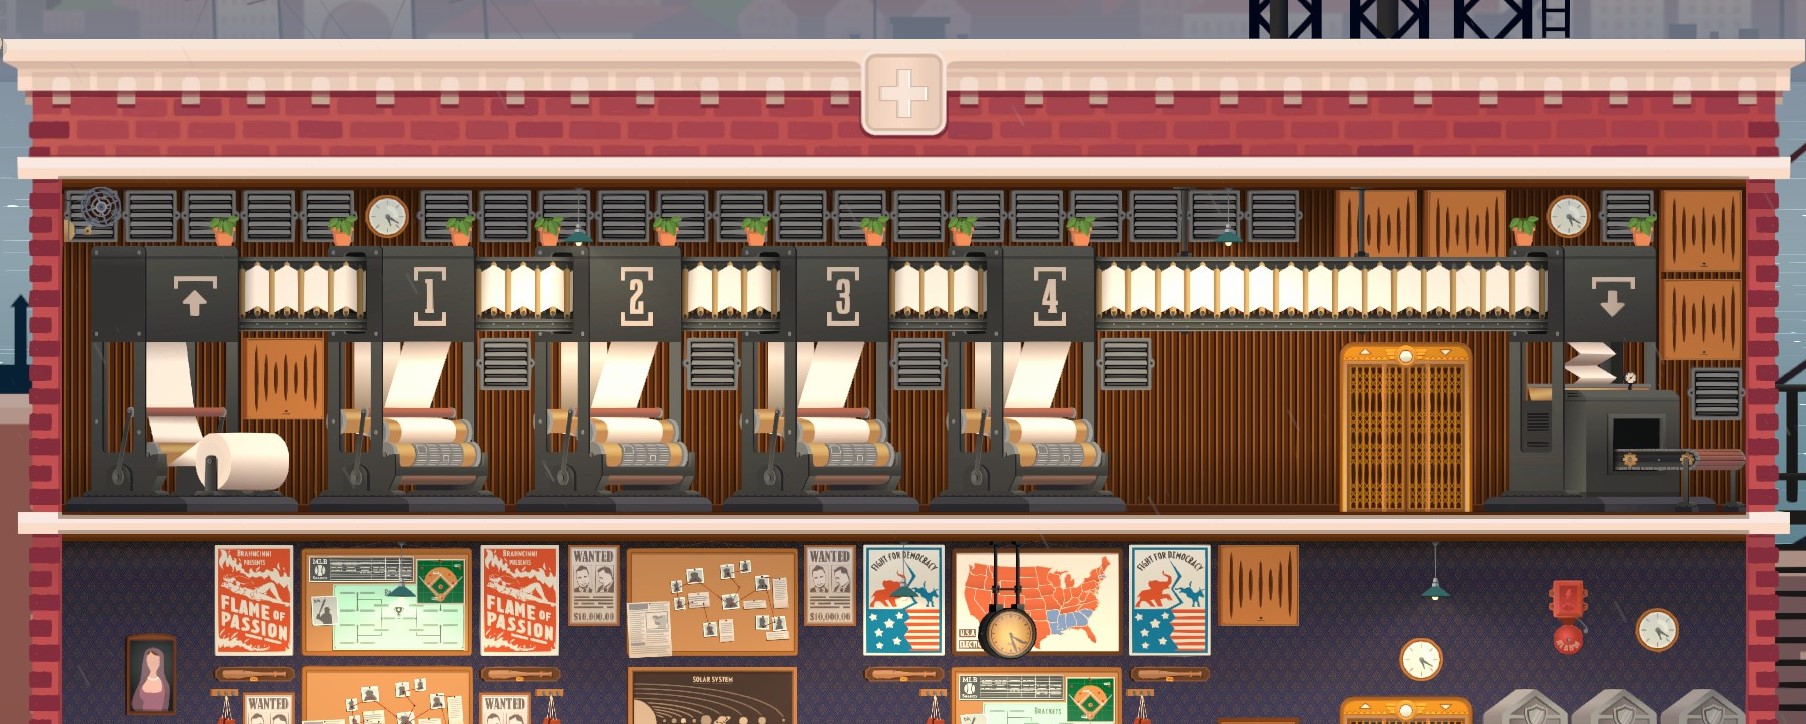
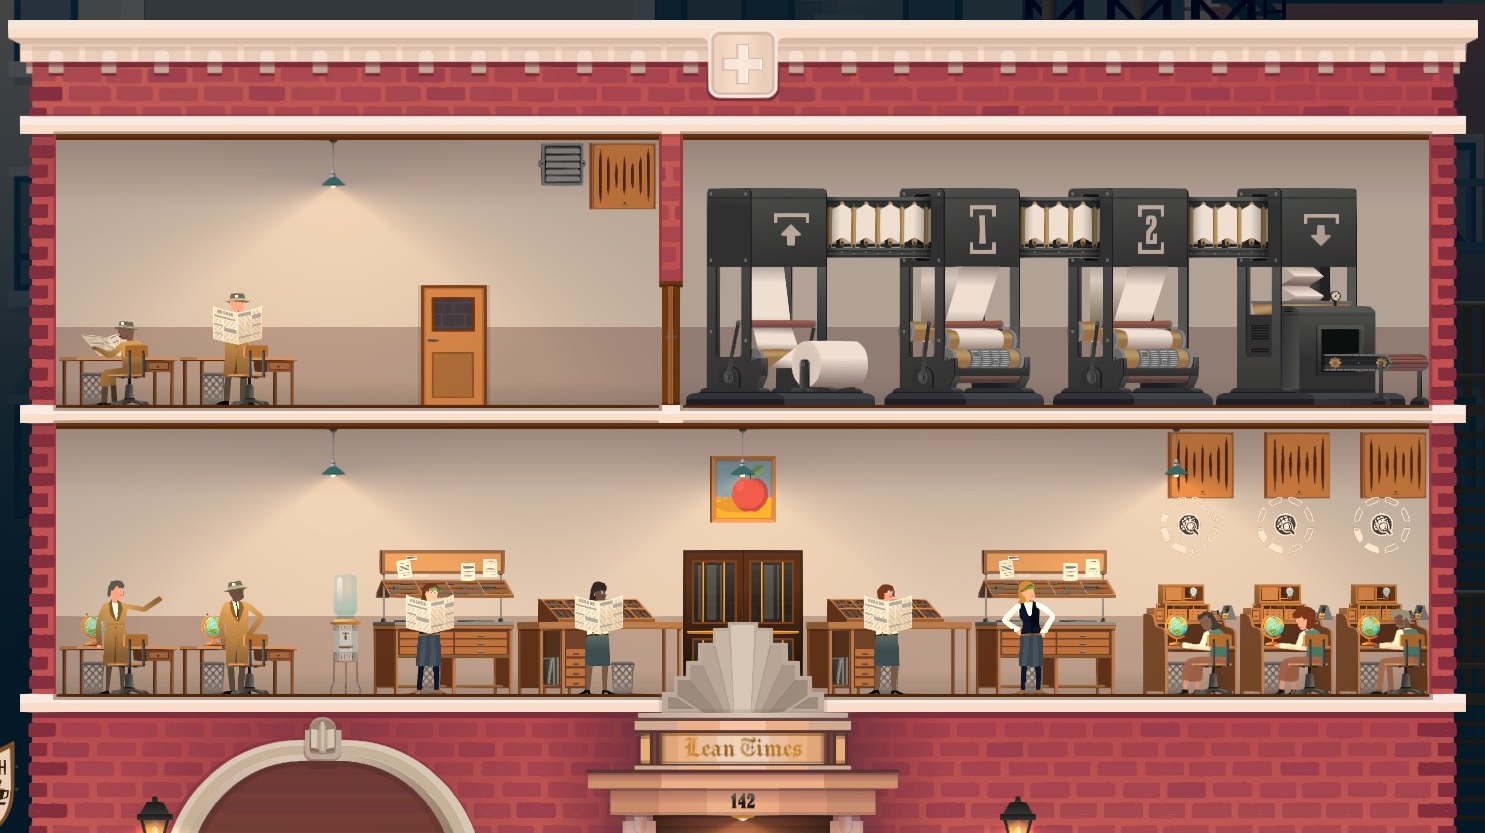
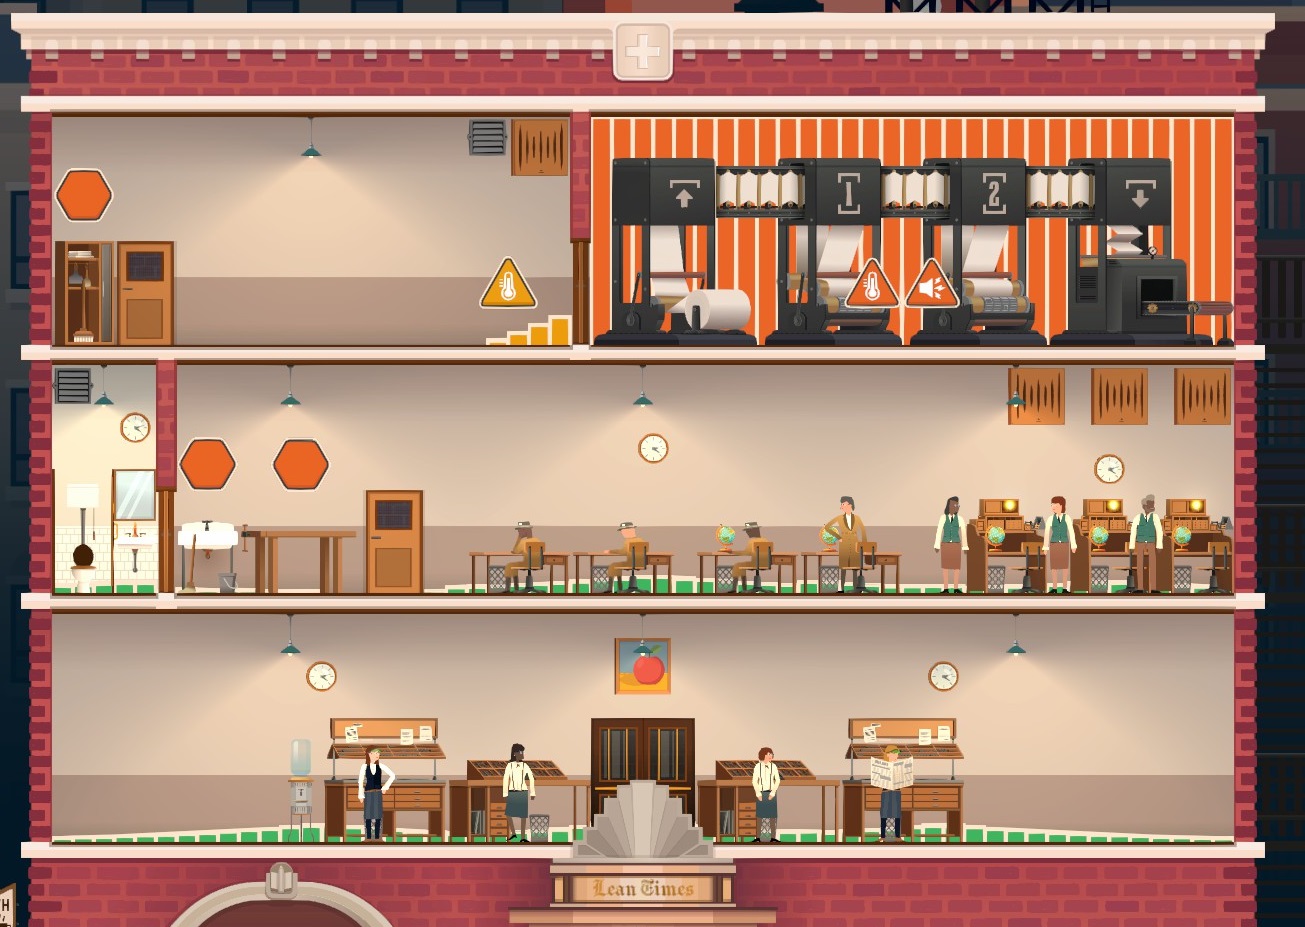
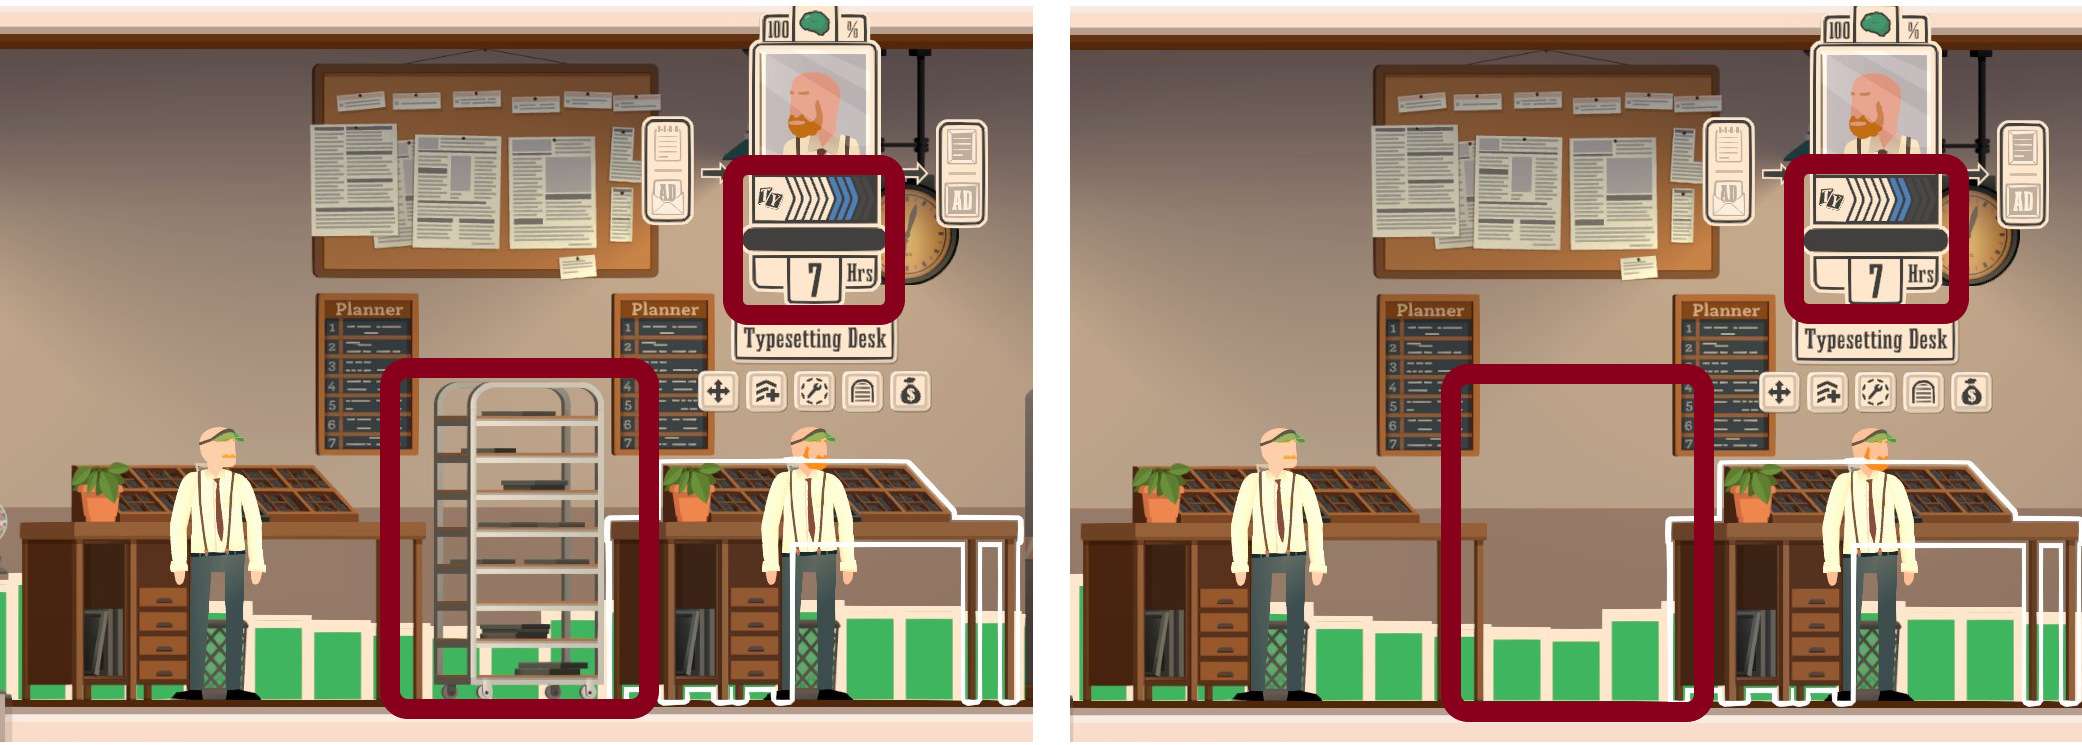
Photography chain goes photographer - dark room - repro camera - chemical engraver
Illustrations go from illustrator - repro camera - chemical engraver
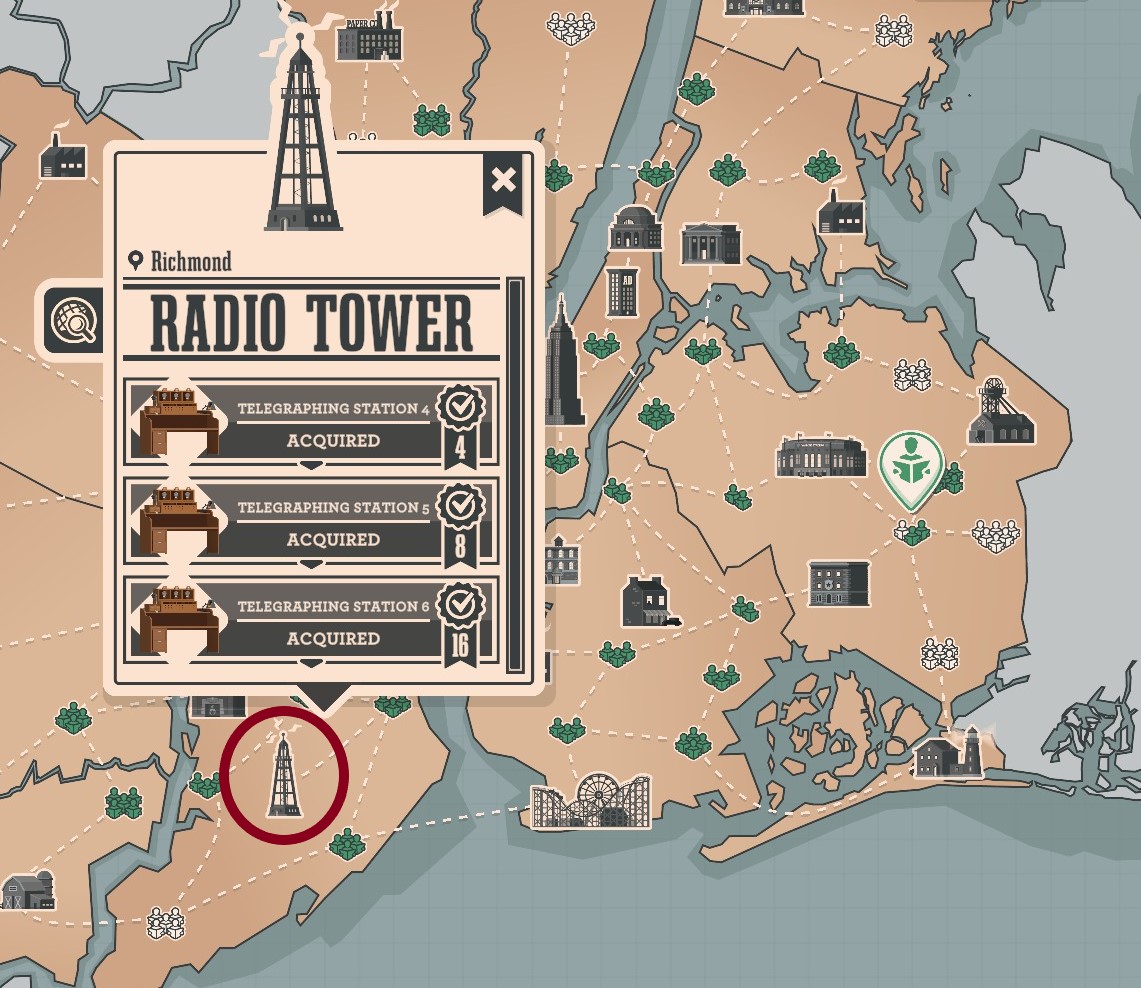
Haven't tried the cartography yet

Photographers are slower than the regular reporters, their tasks tend to take 2 days (before taking skill into account). It's unlikely you'll ever need more than one dark room except during exceptional situations. Two photographers may be useful for dealing with a rush, but they'll be idle a lot. Not sure about the repro camera or engraver, but I suspect one will be all you need for most of the game. I'll leave figuring optimum ratios and placement to someone else