ARMORED CORE™ VI FIRES OF RUBICON™

ARMORED CORE™ VI FIRES OF RUBICON™

194 ratings
A Compendium of weird and fun builds
By Malnux the Restless
NEW PARTS BAYBEE, Ever wanted to try speeding through Rubicon with a 408 speed mech? How about 4 smgs while firing out every bullet Walter can buy? Not enough for you? how about a mech only equipped with 6 shoulder mounted energy cannons? Now with 25 unique builds

12
4
4
2
3
   
Award
Favorite
Favorited
Unfavorite
Preface
After beating NG++ I have strived to defeat the greatest threats on Rubicon with some of the dumbest ideas I could think of, walking the tightrope line of inadvertently making a challenge build that I could still have fun with. In this guide I will show a number of builds I have made and the general thought process that went into them alongside some tactics if some of you crazy bastards want to try it yourself.

very important but these builds are designed around singleplayer, if you bring them to multiplayer I have no idea how well they will perform, but you will probably just die.

I should note, I heavily advise against reading this guide unless you have AT LEAST beat NG+. Additionally, some body parts can be up to user choice, such as the head piece, where I usually use Verril, since their impact can be relatively minor unless stated otherwise.

Now, I'll admit, I haven't beaten the campaign with each of these builds as there are far too many, however, my testing process goes as follows : Arena Raven fight, Balteus, Spider. After these 3 fights the build gets my seal of approval for being capable against an AC boss, a fast long range boss, and a tanky boss. Granted, the two non-AC bosses i mentioned were recently nerfed but I digress. Lastly, this is mainly to show off builds so a lot of these builds just have some color schemes I like as I didn't factor funny color schemes into making this guide.
#1 Mach 11
The thought process behind this first build was "what is the highest speed I can achieve while still having an AC capable of combat". Which lead to the 408 speed abomination you see before you, despite how horrible it looks, it actually functions decently well against common enemies and AC's primarily struggling against tankier bosses like the Spider but you have tons of speed so "just don't get hit smh".

Due to the limited weaponry the tactics are fairly simple, take advantage of your massive speed to dodge the opponents attack, stagger them with the burst gun and melee them when staggered, can kick an enemy if you need an extra bit of stagger.

I should note, if you really want to limit test, you can achieve a maximum of 422 speed as far as I can tell, but you would be left with only your fists, some of the worst parts in existence, and health in the 7000s. If you can call that usable, good on you, but I prefer my fist builds somewhat optimized.

AHAHAHA, THE GODS HAVE GIFTED THOSE WHO DESIRE SPEED. Due to new update with the extremely lightweight Lammergeier parts, we now can achieve an even faster max speed of 408. The difference is relatively small, but it is simultaneously ironic and pleasing that the first build I made to put here got indirectly buffed through the first wave of new parts (hopefully more to come).

NVDXUN7L9F0Z


#2 621 on Crack
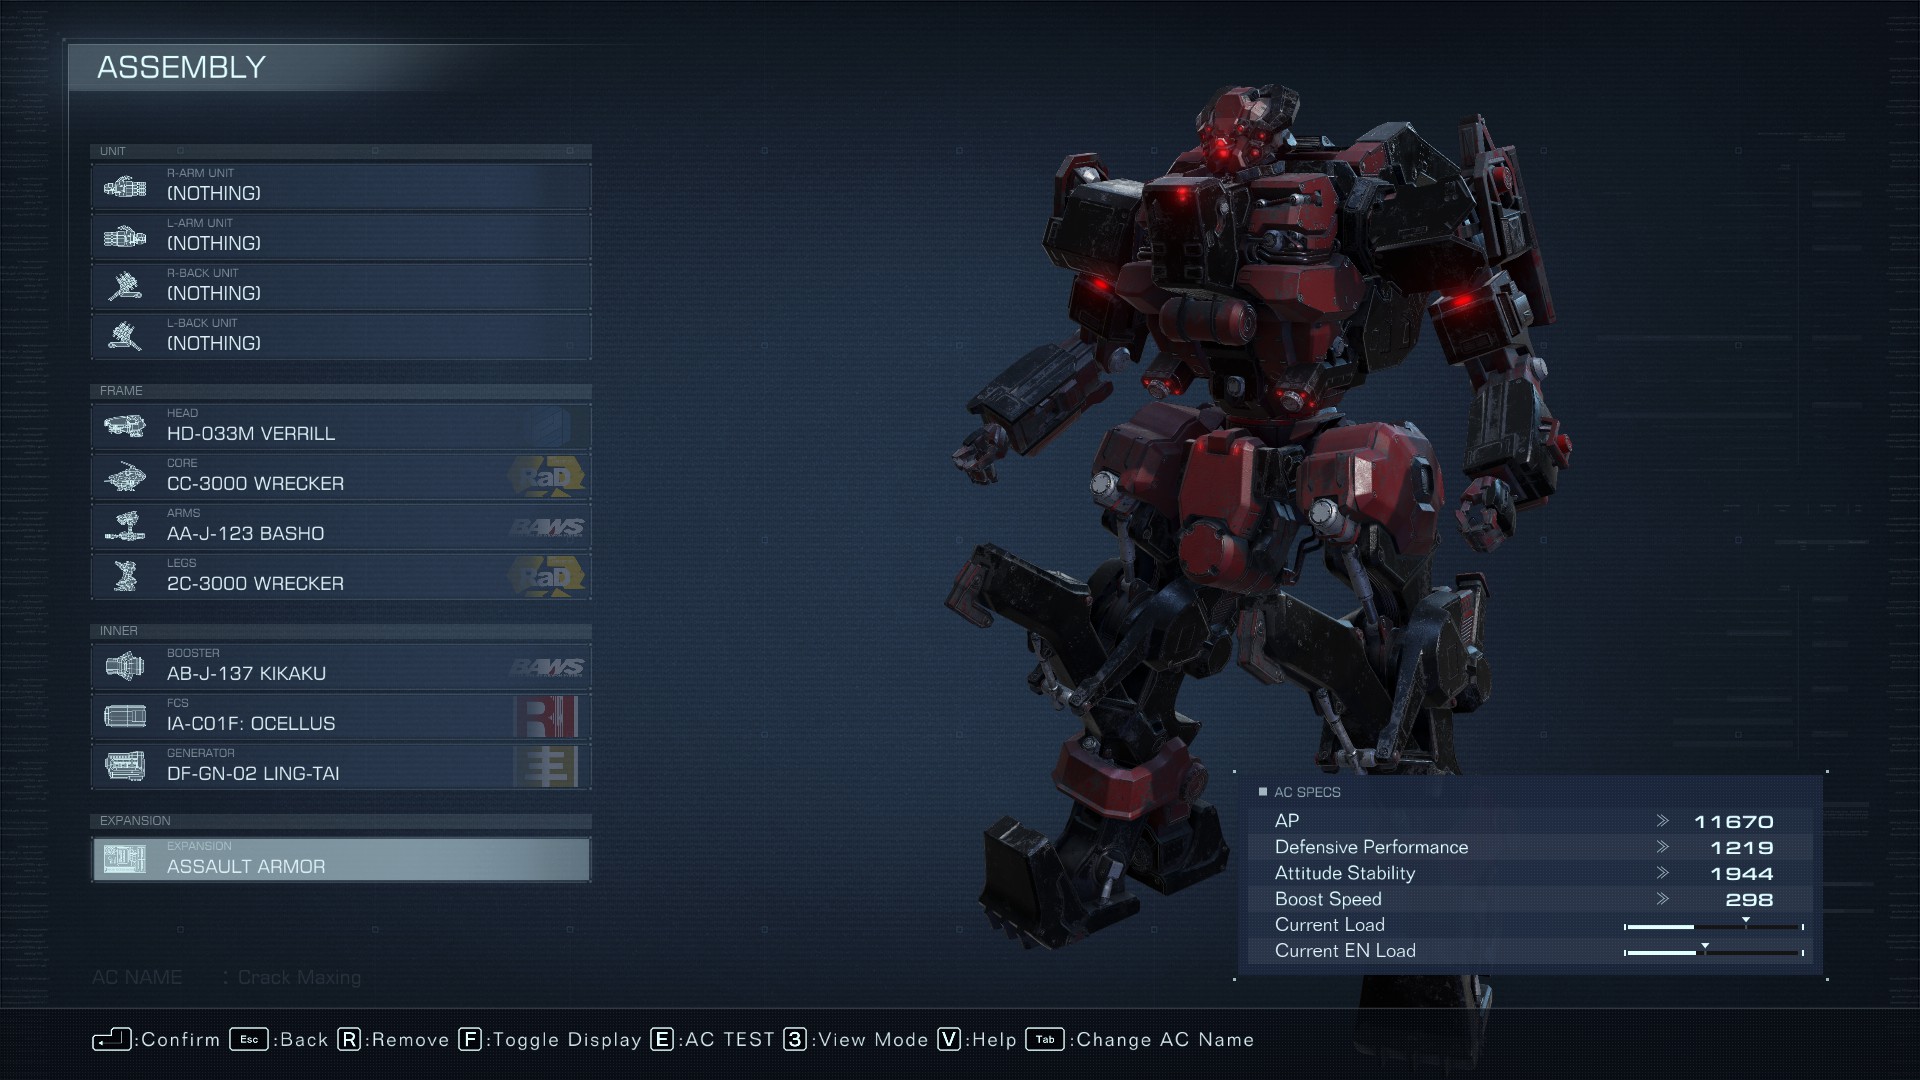
Talking about fist builds, this is one, now, a fist build might sound crazy, but contrary to public opinion it is actually easier than you would expect if you optimize its usage such as this one. How does one optimize a fist build? Well for starters arms have a melee stat so obviously we pick the one with the highest melee stat. Second boosters have a melee boost stat which dictates how far you lunge forward when you engage in melee so we pick the kikaku boosters since they particularly excel in this. The last step is simply to make sure we have enough stability to not get staggered when lunging towards an enemy.

For tactics the most important thing in my opinion is carefully placing your punches, sometimes it is better to just go crazy and slam the attack button constantly however there are two problems with that. The first is your fists can overheat, so without proper management you will leave yourself vulnerable and unable to attack the enemy. The second is that some enemies, bosses, and ACs have different dodge patterns, so sometimes it is best to wait 1-2 seconds in between their dodge. Additionally for the assault armor you can either use it to clear your stagger bar or a hail mary to stagger the enemy, this is kind of just a judgement call you have to learn how to best utilize.

Lastly, I won't do this for most of these builds, however, if you plan to complete the entire game with this build be warned the cleaner and a couple other bosses with extremely high resistance outside of their weakspot will be incredibly difficult and I would honestly recommend switching off the build just for them. Sucks to say something like that, but I am trying to prioritize a degree of fun and challenge and for those bosses the challenge far outweighs the fun.

71LSAC24CMA2

#3 Atom Bomber
Transitioning to something much heavier we have a whole lotta cannons. This build doesn't need to much explanation its for all you maniacs who get a wave of dopamine when you see thing go big boom. The heavier parts are primarily used in order to actually use these cannons due to the sheer weight.

However, as far as tactics are concerned, there is a fair amount for this one. The first and most important is flying upwards, as even if you miss these cannons have such massive aoe that hitting the ground next to an enemy can almost guarantee a hit, which is why we use the gridwalker boosters. Because of what was mentioned previously, you can handle almost any AC fight with extreme ease outside of being very unlucky. The main difficulty comes from fighting tankier bosses as the long reload time makes it hard to stagger these bosses and as such makes dealing meaningful damage difficult. The best way I can explain to handling this, is take these fights slowly and space out your shots so that the enemy doesn't lose too much of their stagger bar. Lastly, for those of you who use lighter builds and feel like giving this a try, make note that tanking an oncoming barrage in order to guarantee your own is a valid and recommended strategy.

V8CZTVFSJQ1N

#4 Two Energy Rifles One AC
Despite being better equipped than some other builds, this one will really test how well you can play the game due to how easily enemies tend to dodge laser projectiles and having no weapon options other than those laser projectiles. Before anything else, why the small energy rifle? well simply put it fits this build the best considering you can only bring two, as these two have a low enough charge time that when charging (which will be your main method of attacking) by the time you finish charging you can already fire the charged shot of the other rifle. Comparatively, the medium energy rifle is close to doing this, but the difference in stats is relatively minimal while making you wait an extra second or so in between firing your charged shots. As for the heavy energy rifle, it overheats after a single charged shot which massively lengthens the time in between shots, as once it finally cools down you then need to wait for the lengthy charge process.

As far as tactics go, I mentioned it previously but your main tactic for bosses should be charging your weapons firing one and then the other in tandem to overwhelm your opponent with firepower. Now if you don't already know, you can charge a weapon during the animation of another, so as soon as enter your firing animation you can charge your other rifle to be ready for firing by the time you finish the animation. Another aspect of importance is the reverse joint leg, since your generally going to spend a large amount of time standing still due to the animations, I recommend throwing in a dodge here and there utilizing the large boost distance of reverse joint to minimize the potential of being overwhelmed with damage. Lastly, the pulse dome is used due to your relatively long range, you usually want to be around 200 meters or more (up to 260) away from the enemy, which means the pulse dome can be used for heavier hitting bosses to tank a fairly large amount of damage.

6EDNT0L4CVXL

#5 God's Lightest Energy Build
Contrary to the title this is not the lightest energy build but rather the lightest energy projectile build + the laser dagger. Basically this is the middle ground between the Mach 11 build, and the previous energy rifle build, where the main detriment comes from using laser projectiles and building very light making the user susceptible to instant death. However, as one can see it is also not build as light as the Mach 11 build in terms of parts, which is mostly in order to sustain the build and not have it be terrible.

Generally the tactics of this build are fairly similar to the Mach 11 build but with a couple differences. For one the charged attack of the energy handgun does decent damage and stagger so it is a useful tool for staggering an opponent and opening up an opportunity for melee. The other thing to take note of is the laser drones can be returned early to avoid overheating, it is important to keep this in mind so that they don't overheat right as you are about to stagger a boss.

55K0GASCJH93

#6 Bulletstorm
One may think to achieve most dakka bullet, they need to use the miniguns BUT YOU WOULD BE WRONG. here we use 4 smg's which can perfectly alternate the minute you run out of ammo, allowing for spending 99% of fights shooting bullets, compared to the minigun which can overheat.

As per the recommendation of -, we equip the wrecker arms to properly control the recoil, originally I had believed the aim assist to win out in terms of usefulness but after through testing it proved otherwise.

The tactics for this build are by far the easiest you want to stay very close to the enemy (160 meters and less) and just hold down the trigger, the moment you run out of ammo switch to your next set of smg's. The only other advice I can think to offer is that in situations where you need to focus on dodging or just can't damage the enemy for some reason, just reload your weapons, after the recent buff these smg's actually have a considerable amount of ammo and i have yet to run out on any mission.

KP5KNAL1U5FM


#7 Saturation Bombardment
The little brother of the atom bomber, this build revolves using the explosive weapons with the lowest cooldowns (hence missiles are not used as they do not create a large explosion). Surprisingly, this is actually much better than the Atom bomber, and due to the weapons used it is also exceptionally strong at hitting and staggering ACs.

This build has enough relative strength that tactics does not need to be discussed, basically the "melee" weapon is a good opener due to the very low cooldown and the tiny bazooka is best used when the enemy is staggered due to being the weapon with the worst spread.

G7F0PAYMCZCR

#8 CBT
Personally, this build is the hardest and why it has been awarded the title of the CBT build, because thats what playing this build feels like. This build was created by me trying to discover what gimmick build i could make that poses the highest difficulty but could theoretically fun, so if you want my recommendation, don't use this build. Nonetheless, it is extremely effective at larger bosses, the problem starts and end with bosses that have the ability to dodge, as the needles are extremely easy to dodge. Thus when fighting fast bosses or ACs it honestly partially comes down to luck and hoping the enemy just decides not to dodge when you shoot them.

There are no tactics there is only CBT.

MPKQKAN0LM2D

#9 Broadsides and Fists
This is the raw unadulterated culmination of my madness into creating an extremely stupid build that actually works to a degree. At first originally this build just started as "is it possible to put 6 energy cannons on a bipedal mech?". However, after creating it, I decided to test it and the raw power of annihilating mechs with a broadside of 6 charged energy cannons had impressed me and decided to see how far I could take this. So since the cannons by themselves take up the majority of possible weight and EN load, the only real choice you have is focusing on a partial fist build hence the arms and booster.

Due the previously mentioned aspects the tactics for this build is centered around using the fist portion to stagger the enemy while keeping the broadside charge until they are staggered. Something I would caution is to watch the charge on the broadside since certain things such as being staggered yourself can cancel your charge for the broadside.

As recommended by - , the second image is utilizing the HAL parts for even wider shoulders for aesthetic purposes, but due to this forcing us to change legs and other parts I've kept the original alongside then new one.

4G9H1X7XMYCD (top one)


#10 Anime Protagonist
Make your dreams come true by using the coral rifle to unleash a DBZ level beam, or the Karasawa to unleash the mother of all energy attacks (although not as powerful as the 6 cannon broadside). These weapons can be extremely finicky and hard to use properly but it mostly comes down to timing your attacks and avoiding losing the charge.

Expanding upon what was mentioned previously, I recommend almost always charging the Karasawa to its 3rd stage but charging the coral rifle only to its 2nd stage. While you can charge the coral rifle to stage 3 I only would recommend doing so When there are very large opponents that can't avoid it.

QK1R3J76XZ3L

#11 Indirect Fire
Have you ever wanted to shoot at an enemy at any distance beyond point blank and miss a majority of your bullets/shells, look no further than here. To start we are doubling up on the sweet sixteen the worst i mean most inaccurate of all the shotguns. We combine this together with the spread bazooka make a build which can easily terrorize hoards of MT's and drones/helicopters but suffers greatly against any AC with a booster faster than walking speed.

As for tactics, it is pretty simple, you just have to be comfortable staying at point blank range with enemies, the problem arises from enemies using explosives which are hard to dodge since most of the time they will shoot the floor and the AOE will catch you even if you dodge perfectly. To this extent compared with the image below I recommend potentially equipping reverse joint legs for a big leap instead of a dodge, I used biped legs as they felt better in my testing. In terms of large bosses, they will become an absolute joke, since their large size will turn these indirect weapons into raw concentrated damage.

CJL6RWXG2QQ8

#12 Melee Annihilator
This is probably not the most original build, and kind of goes against what I usually put here since it is also highly effective, however, It is extremely fun and I love melee. You can exchange the lance for other melee weapons, however, the lance is the most effective melee weapon to be comboed with the Pilebunker. Something to note, is that weapons such as the lance and the pilebunker's explosive attack have a fixed lunge, so attaching melee oriented boosters do nothing.

Tactics differ depending on how easy/hard it is to stagger the enemy. For most enemy AC's you just hit them with a charged lance, swap to the pilebunker and get guaranteed massive damage. For enemies that are harder to stagger I recommend opening up with a kick before using the charged lance, and if need be throw in a punch to finish off that stagger bar before going into the pilebunker. Honestly the largest amount of trouble you will have is dealing with large numbers of regular enemies, to which I recommend killing with the lance or just a kick if they are required to kill, and due to this I would not recommend this build for S ranking.

909VJM6DABSL

#13 Walking Fortress
lets get the elephant out of this AC sized hangar, yes, those are hovering legs, look they are the biped legs that give the most HP and that was one of the goals of this build, call it the hovering fortress if you really want to. Besides HP my main goals with this build is having a a fortress type feeling with turrets, gunfire, and as much defensive capabilities as possible. To that extent I must sadly inform all of you that I tried my hardest to use the shoulder mounted shield launch, it is so garbage that on this list of garbage builds even I couldn't find a tactic to properly use it against most bosses, but trust me, i tred... I MEAN I REALLY TRIED. That aside, there is the turret dispenser for an ample amount of turret fire, the shield we use is the tower shield for obvious reasons, we are using the chainsaw because charging the chainsaw negates 40% of incoming damage, and the gatling gun to up our total gunfire. Lastly we use the speed booster because we don't want to be quickboosting (explained later).

So lets talk tactics, and start with a simple fact, playing this thing sucks, not because its weak or anything, no there are far weaker builds on this list, but if you want to play this YOU NEED a custom control scheme/keyboard layout. The reason why? well its simple you need to be holding down 3 of your weapon buttons at ALL times alongside consistently pressing the spawn turret button anytime it isn't reloading (and it reloads pretty quick). This issue makes this build a pain in the ass to deal with from a logistical standpoint, however, there is a silver lining, and that is that this build is optimized for holding down forward and ignoring all other options for 95% of bosses and scenarios. because you have the tower shield, you are negating a lot of damage, because you are charging your chainsaw you are negating even more damage, and because you have the highest HP a bipedal mech can have, you are tanking the rest of the damage with ease. Additionally, the chainsaw does damage while charging, so between your chainsaw when you get into point blank, the minigun for mid range, and the turrets to pepper in some damage here and there, its fairly easy to stagger most mechs/bosses, which allows you to throw in the finisher of the charged chainsaw attack. However, there is something you have to be aware of, the tower shield blocks damage well, but only after being deployed for a full 4 seconds, the shield undeploys anytime you quickboost or are staggered, so you need to ignore all your instincts of dodging and replace them for running through the attacks like a roided up gorilla (alongside popping pulse armor before you get staggered).

Sorry for the massive wall of text, this build is just mechanically complex, regardless of your thoughts I recommend at least trying this build, because when it works it is fun and evokes a massive sense of "I can't believe that worked"

ALRIGHT, SO THIS PARTICULAR BUILD GOT NERFED, which is very funny. Although i presume it was more of a pvp nerf since it seems to be that no shields can be used while charging any melee weapon. Press F for the tower shield and chainsaw combo, you will forever be missed. I am keeping the above section so that future generations will know what this build used to be like, however, going forward I decided the best thematic change is to add another turret dispenser (although I can see an argument for a cannon or large missile pod). Lastly, during testing I found the flamethrower to be much stronger than the minigun, but kept the minigun on the code/screenshot as I find it the more thematic option.

4DNNWLD2PJLS

#14 Dunce Boat
Have you ever wanted to use a missile boat, but as least effective while still having the possibility to win?... me neither, so anyways, this is the Dunce Boat. As far as I can tell the split handheld missile launchers have the worst tracking, but are still the best part of this build. The surfboard tank legs are used exclusively because I think it enforces the whole "boat" idea. The "delivery boy" missile launchers are used because the only worse option is the container missile launcher, which is hot garbage and completely unusable.

So for most missile boats it is usually a good idea to keep a fair distance away from the opponent, however, at times with this build I fully recommend and encourage getting into point blank range. The reason behind this is the delivery boy is usually complete trash due to the missiles taking way to long to land and too scattered to inflict much damage even if they do hit. Soooooo, if we are point blank the missiles from delivery boy hit almost instantly and are so heavily compacted they can chunk most AC's for half their hp. Because of this, the tactic I adapted was rushing in point blank firing the delivery boys than poking at the enemy at mid range with the handhelds.

J769D3F2JVPC

#15 Allmind's Best Boy
Is it just me or is there is something about Allmind that makes me want follow her orders and slaughter everyone around me... just me? ah alright. Nonetheless This build focuses on using the Weapons and parts given by Allmind, now originally I wanted to use the handheld rocket launcher with increased direct hit damage together with the Karasawa, however, the Allmind arms do not have enough load to be capable of that so I settled with the whip. Additionally While we do not have Allmind Internal parts, NG++ Spoilers most of the enemies associated with Allmind have blue thursters so the arquebus generator fits well.

As for tactics I recommend using the shoulder weapons and the whip for regular enemies due to the extremely limited ammo of the Karasawa. As for bosses themselves you can either stagger them with the Karasawa as one shot will stagger most AC's, or you can build up stagger with the rest of the weapons (2 hits of the whip is a stagger for most AC's) and finish up with the charged Karasawa for tons of damage. Otherwise this build is fairly generalist, it does not particularly excel at anything but it is fun for a themed run and using the Karasawa in a not so gimmicky build.

4RVMDG0CSHWR

#16 A Slow Death
A build centered around weapons designed to slowly burn/barrage your opponent, originally I thought of naming this Grim Later, but decided a slow death was more to the point, if you think Grim later is better comment and I may change my mind. Anyways, To get to the technical points of the theme, this isn't the slowest killing build, since that would just be an uber low damage build, but rather themed around DOT weapons or the closest thing to it (see : funnels). As such, I eventually landed on using the napalm launchers and the funnels, which is great because I was looking for a reason to slide the funnels into a build.

For tactics I should first note we go with a reverse joint as their is a decent amount of downtime after shooting so dodging a lot is generally a good idea. For tankier bosses I highly recommend charging the funnels and using the kick every now and then (especially since reverse joint have higher base damage kicks). Additionally, I recommend using the assault armor when an opportunity presents itself, because the napalm and funnels really mess up most bosses when they stand still and are staggered. Thats about it, relatively simple, flying enemies are pretty tough but just fire the napalms point blank.

HXR1AT4H41FY

#17 Hot Garbage
Imma be real with you, I added this solely because the name is a fantastic pun due to the food related names of all the parts. However, this is a fairly interesting build, the only bad parts about it are the lack of speed, lacking ammo for tanky bosses, and not being able to see anything when you shoot fire. On the upside, this surprisingly melts a lot of AC's and lighter bosses.

The only real tactic is shooting the napalms every now and then before going back to the flamethrowers, have fun being an intergalactic war criminal.

4WNHPE4V4UNS

#18 Bubble Blowing Baby
WE GOT A RULE AROUND HERE, ABOUT BLOWING BUBBLES.
*snap*
All Bubble Blowing Babies, will be beaten by every able bodied patron in the bar.

As for tactics prioritize not allowing the pulse weapons to overheat... oh and if they do overheat or if you find yourself wanting to be more careful use the power of the reverse joint to make tons of distance. This will absolutely demolish any boss that uses a shield such as balteus, snail, and ayre. Additionally, it will also make handling AC's who have pulse armor or terminal armor seem like a joke.

BZYVJFWQRPU3

#19 Giant Stingray
So... I am aware that double stun needle is very strong, HOWEVER, having ONLY the stun baton together with it downgrades the build by such a degree that I think its not the easiest build in the world to use. It kinda sucks that stun is just bleed, I really liked the idea of a stun build concentrated on making an opportunity to attack the enemy outside of stagger, but I digress. Lastly, due to the stun cannon called a needle stun cannon, i thought it would be pretty funny to name this the giant stingray.

Tactics are fairly simple, if your fighting something big, just fire both cannons immediately, if fighting an AC I recommend staggering the shots of your cannons in the case that you miss. Regardless, once you have fired both cannons you should try to go in with the stun baton before launching another barrage and repeat until thing is dead. If you need some extra damage you can throw in some kicks or even slide in Assault armor, personally I found myself taking tons of damage in short periods of time so I threw on pulse armor.

N8R45DT7145Y

#20 2 Dollah Mech
I present the poorest AC in Rubicon (mostly), also easily being the hardest challenge here. With the Jailbreak parts you barely attain 6.4k HP, this means that a large amount of giant lasers, cannons and otherwise, have the potential to one shot you or at least get very close. As for weapons we have the burst pistol (lightest weapon in the game) and the handgun (which has abysmal ammo), together with 2 of the starter missile pods. This culminates towards an honestly horrible build, if im being honest, your only playing this for one of two reasons, you want an insane degree of challenge, or you want to roleplay as the poorest mercenary alive. Lastly, some parts are not the poorest option such as the generator due to the build being nigh unplayable without the slight upgrade.

As for tactics, first things first, you are going to run out of ammo, its just part of the build where you WILL run out of ammo and be forced into melee for a large portion of bosses and missions. Luckily, a lot of poor options work fairly well for a punch build, such as the kikaku boosters and the jailbreak arms. Other than that pulse armor is highly recommend because of how little hp you have and how dangerous getting staggered is. The problem with having this low of hp, is using a repair kit is only worth it if you have 2000 or lower HP which is very dangerous number to wait for.

MVWSTRVJDH8D

#21 Cowboys & Cannons
In a way, you can consider this a weaker version of the zimmerman+songbirds combo as this combines a fairly decent kinetic option with a fairly decent explosive back option. By themselves each of these pair of weapons are kind of average to bad, running just dual handguns is easily equivalent to a fist only run, and probably worse if your not building with fist parts in mind since you will run out of ammo for most bosses. Whilst for cannons, as noted in the atom bomber build, it is fantastic vs AC's and clumps of enemies, but struggles immensely to larger bosses and large amounts of spread out enemies. Together, you have a good tool for staggering enemies/bosses, and weapons for capitalizing on that alongside handling spread out groups of enemies.

I classify this as a very fun build that is extremely simple to use, if you have already beaten NG+ you should have no problems using this effectively, only thing I would warn about is being careful about ammo during longer missions/bosses for your handguns.

W8ASDS43331F

#22 1/4th Meta Build
Zimmerman this, Zimmerman that, why don't you be a man and try beating the game with nothing but one. But yea, if you wanted to ever try using a zimmerman without making the game easier to beat than the tester ac fight, you only need to use no other weapons and not build your AC for punching... simple right?

Anyways as per some other builds that lack immense damage your going to need to mix in assault armor and kicks in order to stagger and then do direct hit damage. That said, this is still a zimmerman so against a good amount of AC fights you won't need to do all that unless they are exceptionally dodgy. Fairly straightforward, however, you will need to get fairly skilled at timing your attacks and finding good opportunities to kick, as you don't really have any other real options.

EDF0LRG1ER6G

#23 The Coral Duelist
So to those of you saying this build looks super easy because of coral shield, look, some of us never learned how to parry that well in dark souls, anyways. This build primarily revolves around your melee weapon and blocking with the coral shield hence the duelist theme. For those wondering about the javelin launcher, I added it simply because in testing I did not have enough damage to beat the bosses I test these builds on (raven/spider/balteus), even with the inclusion of the javelin it took me 4-5 attempts for each boss to make this work, which is a lot more than most of these builds which are usually 1-3. Also, using the coral generator massively increases the difficulty as well since using your melee weapon drains energy, which if you are already out of energy, makes the cooldown before regen take even longer. Nonetheless, if you want to make this build more of challenge, remove the javelin, if you want to make this easier, use a regular generator and maybe some different back slot stuff.

As for tactics the first thing I will mention is that due to using the coral generator you have to use your dodges extremely carefully, this is also why we use the gills booster as it has heavily reduced quickboost energy cost. As for the melee itself, generally I use the sweeping attack against AC's and the regular attack against tankier bosses as the sweep is not worth the massive animation time. As for the shield, if an enemy has hazard warning weapons (red box and beeping) just smack it as soon as you hear that, if not, again I suck at parrying so this is my method, just activate it the second it is off cooldown. Finally, due to the unique trait of the javelin launcher, you want to primarily save firing it until you stagger the opponent.

Lastly as an honorable mention, I made a far more usable non-coral version of this "duelist" theme. Borrowing parts from our buddy rusty, using the starter pulse blade as I thought it fit the "duelist" theme the best out of the rest of the melee weapons, but if anyone thinks this should use his darth maul melee weapon instead comment it and I might change it.

XSLTQ0XJK25V (coral duelist)

QMGYTUKV6ZWK (regular duelist)


#24 The Prism
The older brother of the indirect fire build, this is a version of that but energy focused, although that is not the only trait they hold. The thing I find interesting about the spread based laser weaponry is they can all be charged to be condensed into a singular powerful shot, akin to light under a prism, hence the name. For weaponry we use 1 diffuse laser cannon on the back alongside two of the shotgun spikes as I call them, we leave 1 slot empty mainly to conserve some EN load and weight.

The Tactics are relatively simple but interesting, basically the best way I have found to use them is to get to extreme close range and use the spread shots to build stagger and basic damage, as the enemy nears becoming staggered you begin charging your weapons. Personally at this point, I try to shoot out a couple charged shots until I get lucky, following up with a blast from the charged diffuse laser cannon and maybe 1 shotgun spike as well. Generally this rounds out the build to being highly aggressive, but as you already have a large amount of offensive capability I went with the pulse armor in particularly dangerous situations.

X7V2WRM7YERU

#25 Bad Investment
For a long time now I had stared at the coral missile launchers wondering how to fit them into a build. And now, I have finally established it, a build which can make some use of it with weapons of a similar style, namely the redshift nebulas. In simple terms, this build can be thought of a mix between #4 and #10 and in my opinion, ending up with a fairly better build with either of them. Although I would say this mainly comes down to the inherent strength of the Redshift nebula. Nonetheless, some of you may call builds like this somewhat repetitive, however, I am a sucker for coral based builds. While I would love to have slid in the coral generator, this build is so EN intensive that you have to use the vp20D in order to have a decent energy regen.

The tactics are fairly simple, use the redshift nebulas as your primary method of dealing damage and staggering the enemy, charge the coral missiles while doing so and launch them moments before you expect your enemy to be staggered as they can be very hard to actually land.

B4PTQMBE9DMU


#26 A10 Warthog on Legs
Due to the glorious advent of new parts, we can finally run four miniguns alongside a tanky frame for Maximum BRRR. The build itself is quite self explanatory, you use heavy parts so that you can use the required weapons, talbot for medium to close range, and the heavy VC generator for optimal thruster usage and recovery.

The playstyle is quite simple, you will have enough hp that rather than focusing on dodging your opponents your biggest concern should be managing the heat of the miniguns, I should note, the shoulder miniguns overheat much faster, but cooldown much faster as well. Regardless, when fighting a boss you should max sure all of your miniguns are as close to fully cooled before staggering the boss for maximum damage.

D0GYHRLY3ADF


Conclusion
Well, thats pretty much it, if you want you can say these builds are boring or too easy, I just posted them because I thought they were fun.

As of September 22nd unless there is an update making certain weapons better, a dlc/expansion, or a decently packed mod, I don't plan to add anymore builds as while I "can" make more, they either aren't unique enough or fun enough.

To date, there are only 3 weapons I think are too garbage to be usable in a build, the jamming grenade launcher, the container missile launcher, and the pulse shield launcher, if you figure out a way to make these useful for boss fights and the like comment it or a build using it and I'll check it out.

AS OF DECEMBER 19TH, WE HAVE NEW PARTS, TIME FOR SOME NEW BUILDS.

Otherwise, If anyone wants you can comment a build, I'll take a look at it and potentially add it here, crediting the commenter of course.
31 Comments
Hariman 24 Feb @ 8:06pm 
I'm not gonna lie... I want to try a few of these builds.
TravTrav 12 Jun, 2024 @ 7:36am 
I think it's hilarious we both individually, and most likely others too, came to the same Mach 11, CBT, and Dunce Boat conclusions.

I did my own Mach 11 because it's an alternate to a
[Haldeman/Ludlow/Sweet16 x2/TianQiang/40E/ToolArm/Firmeza] speed build that took me through the game.

I ended up making my own Dunce Boat as well with a Coral engine that basically bullied the Dam Complex NG+ Fight. Along with my speed build and a melee build, ended up being 1 of the 3 ACs I relied on to get shit over with. (Minus the Cel240 fight)

And I slapped all needles on an AC and just called it "da needle" because I already had a bee-keeper build, may just renamed it to "the wasp".
Malnux the Restless  [author] 17 Jan, 2024 @ 11:52am 
huh, just tested again, yea they must have changed something about how boost speed works, because right after the update it used to be possible... curious.
Skitter 16 Jan, 2024 @ 2:48pm 
Yep, running joso and the lightest FCS
Malnux the Restless  [author] 16 Jan, 2024 @ 8:36am 
joso generator, as generators can take up a bit of weight, don't remember if it matters but the FCS's also have slight weight differences.
Skitter 15 Jan, 2024 @ 3:29pm 
I did manage to get it up to 419 with lammergeier head and torso, jailbreak arms, and fortaleza legs, but I have no idea how you'd get it any higher.
Malnux the Restless  [author] 15 Jan, 2024 @ 6:13am 
it is mentioned in the #1 build, mach 11, but using no weapons and the worst auxiliary parts.
Skitter 14 Jan, 2024 @ 10:27pm 
What would the 422 speed build be? Highest I've gotten is 417.
Malnux the Restless  [author] 8 Jan, 2024 @ 9:19pm 
I usually use talbot for midrange since while it is slightly worse, its not a huge decrease, and is very EN conservative.
Obscillesk 8 Jan, 2024 @ 7:33pm 
Hmmm I'll look into that. Mostly I like it cause its the best thing for midrange targetting, which is where I tend to hang out