Griftlands

Griftlands

40 ratings
Full Card Guide for Sal - Prestige 7 Difficulty
By TrueMortal
Welcome to the first out of three card guides for characters in Griftlands, the rogue-like card game. I'm mostly running on the internet under the alias TrueMortal, and I have played ~500 hours in Griftlands. I play all characters exclusively on Prestige 7 Brawl, Campaign and Daily modes, which is the game's maximum difficulty (without modificators of course). I like the game a ton and it's one of my favourites to kill time!

In this guide I will describe and rate every single one of Sal's cards in terms of usefulness and usability, aka how good or bad one or the other card is. That includes every single battle and negotiation card that a player can obtain during the playthrough but only through drafts alone, excluding some cards that are commonly obtained through other cards e.g. "Slash" from Sal's "Fight Dirty" and such. Grafts, Items, Status and Campaign-specific cards are excluded from this guide.
  1. This guide is meant to provide players with insight on any of Sal's cards general usability, synergies, how the card is supposed to be used and to give you my perspective as an experienced player how good any card is in actual practice. You can use this guide as a reference to which cards to pick in your campaigns/brawls or, get a new perspective on cards you generally use in your games.

  2. This guide can help in any of your average Griftlands gameplay sessions, and since this guide covers the highest Prestige difficulty, it can also be used as reference to complete every single Prestige level below Seven, especially considering all those Prestige levels utilise Mettle, which is disabled on P7, making their completion even more trivial.

  3. And finally, of course this guide is somewhat subjective. With the hours I have in this game I pretty much ironed out my gameplay on all characters and have a good knowledge and understanding of whether any given card has a good use or is terrible. And while I do have quite an experience playing this game, I myself might be missing or lacking information related to niche synergies or synergies I haven't discovered. So if you like a certain card or believe (or know!) that it's better than it first appears, or I rate a card as bad/terrible but you know that it has other use I never mentioned in the first place, please point it out! I am open to critisism and different perspective and would unquestionably take into account your comment and try to re-evaluate cards if possible.

With that being said, let's get onto the guide!

[UPDATE 13/12/2023] After releasing the guide for Rook, I reevaluated some cards for Sal, as well as changed descriptions of some others to better reflect opinion on any given one, and fixed text typos throughout the whole guide. I will periodically update this guide as well in the same manner

The Rook guide can be found here: https://steamproxy.com/sharedfiles/filedetails/?id=2965000280
The Smith guide can be found here: https://steamproxy.com/sharedfiles/filedetails/?id=3138869225

   
Award
Favorite
Favorited
Unfavorite
Guide Introduction
Use CTRL + F to search for particular cards, and use Home/End & PageUp/PageDown keyboard buttons to scroll all the way up/down throughout the guide correspondingly.

If images don't load, press CTRL + SHIFT + R to reload CSS on the webpage

  • Every card has 2 criterias:

    • "Rating" - how good the card by itself in a vacuum with some regard to its usage
    • "Usage" - applicability of the card in question, e.g. "Generic" means the card can be used in any deck, because it's effect could be generally utilised in any deck (but that alone doesn't necessarily mean that the card is good, refer to "Rating" for it), "Niche" means for the card to work for its full potential it needs help of other cards and/or specific conditions which are tough to achieve

  • Recommended upgrades which I believe are the best for each individual card are mentioned in the card's Upgrade section

  • Every card is rated on a scale of 0 to 5

  • Each card has a description which provides commentary on the card

  • Seldom, if I have already described a card close to another card mentioned earlier, I won't describe it in detail and simply leave a few remarks or reference the respective card instead.

Main Remarks on Sal
With Sal being your first Griftlands character you get your hands on, she serves as an introductory character to this game

In general I would describe Sal as pretty balanced. She has overall great synergies with cards, has decent defensive capabilities and her offense won't leave you dissatisfied for sure. In negotiations she performs just as good, although I wouldn't call her negotiation cards anything special and she does not have any outstanding OP cards, simply a lot of good ones. Playing Sal has been a well-rounded and fun experience for me overall, and if you build her correctly she has little problems plowing through Prestige 7 difficulty on any mode.

With that being said, I will move on to describe which strategies Sal utilises in combat and negotiations.
Perks
Before getting into a Griftlands match, we need to cover the Perks that you should take with you on Prestige 7.

The following three in my opinion provide the best value out of all Perks in Griftlands, and are what I virtually use on the regular, permanently, 99.999% of the time, for the following reasons:


  • Basic Training - Sal's basic cards are weak. You want to upgrade them ASAP and preferably destroy/expend them, but default experience is too long for the highest Prestige difficulty. Heck, even with this you won't be able to upgrade all of your cards until the very first boss which may already give you a lot of trouble. As such, this Perk is an invaluable asset: lowers both Combat/Negotiation cards' EXP, allows you to upgrade them way, way faster than you'd normally would and personally, in my opinion, this is how Prestige 7 Griftlands should always be played.

  • Fast Learner - for same reasons as Basic Training, this Perk helps out upgrading your non-basic cards so you can start getting your deck to late-game ASAP. It covers every single card in the game, and has huge value for a single Perk.

  • Ancient Warrior - this Perk helps you get through the early game by upgrading non-basic cards instantly once you draft them, so overall you get 4 upgraded cards, two for Combat and Negotiation. The value of this Perk is that you can start using upgraded versions of cards immediately without the need to upgrade them in combat or negotiation first, which becomes invaluable early. Some cards desperately need upgrading ASAP, others not so much, but still could utilise this Perk nonetheless. Some early-drafted cards you don't even want to start using immediately in negotiation/combat because your main early game priority is upgrading and getting rid of basic cards. Moreover, you can skip first few drafts to potentially get better cards and immediately upgrade them with this. It facilitates early game by a large margin, as the cards you upgrade instantly can serve as a hefty support for you to focus on upgrading other cards and getting through that first day boss. Truly, a Perk you cannot miss taking.
Combat

There are two main strategies for combat Sal that are self-evident when you see her initial deck and what it upgrades to, and they both utilise the "Sal's Daggers" upgrade. You do not want to remove this card period, unless you're directly using another strategy, since this card's upgrades are way better in comparison to the rest of Sal's basic cards.

One thing to mention is that each of Sal's archetypes has a what I like to call a 99-defense card which is a card that could potentially net you the maximum amount of defense in the game, which is 99, but usually gives you a solid amount of defense nonetheless.

Depending on what you choose, you are hereby presented with two strategies:
  • BLEED SAL
  • COMBO SAL
In Sal's non - basic card pool, there are also cards that feature the Improvisation mechanic, and that benefit from being Improvised. I do not consider them as a separate cumulative archetype. These cards are highly reliant on each other's presense in a deck while being semi-weak individually, and what's more Sal only has "Fight Dirty" as a card that provides Improvisation effect but it only selects those from the card's individual pool of options, as such she doesn't have any means to be able to Improvise cards from her deck by default. Cards featuring Improvisation mechanic should be viewed as mainly individual support cards that round out your deck or help out with some other strategy instead.
That being said, a deck entirely dedicated to and centered around Improvisation mechanic works incredibly well (read: it's overpowered) when put together. A great example of one can be seen at the end of the "Example Runs" section.


BLEED SAL
It's solid. Cards that mention the Bleed mechanic not only are obtainable and presented quite often, but also are quite good and provide solid combat effects. The archetype also provides reliable utility against many threats and decent damage. Even on the highest Prestige difficulty, Bleed Sal is my go-to deck and something I can generally rely upon up until the very final boss.

There is a small but tangible downside to running this archetype, because some enemies feature the "Metallic" keyword. Bleed Sal relies on Bleed debuff to deal damage and through applying one of the best debuffs in the game - Wound, which amplifies the damage of her low attack Bleed cards, the two debuffs Metallic enemies are completely unaffected by. As such, from time to time you may run into a situation where you cannot deal any damage to an enemy and will be forced to chip them down bit by bit with the low default damage Bleed-focused cards can provide. Moreover, several Bleed cards that apply said debuff don't feature attack numbers at all and apply Bleed only in flat amounts, as such not benefiting from enemies having many Wound points on them.


COMBO SAL

Combo Sal has the potential of dealing absolutely massive amounts of damage, thanks to this bad boy card that enables everything in this archetype: "Gut Shot". Unlike options of "Sal's Bloody Daggers", "Gut Shot" does not expend itself upon being cast and is permanently added to your deck for the duration of the combat you are in if you choose it through "Sal's Combo Daggers", which means you can have several copies of free damage in your deck during the same combat. When you get a grip on Combo Sal, you begin to understand how good are "Attack twice" cards in this game and how strong attacking several times in one turn can be, especially alongside some supporting card draw which would let you attack with "Gut Shot" over and over again.

This archetype by its nature makes great use of the Power buff. I initially wanted to make a Power Sal archetype as a distinct one from the initial two, but because that one also uses "Sal's Combo Daggers", I decided to consider it a special case of Combo Sal.

The Combo archetype is a little risky. Because your combo is halved every time you take damage, your synergy with cards utilising combo points, such as passive abilities, might fall off if you lose too many combo points. Moreover, because most of the time you want to be spending those points on cards' effects, those aforementioned passive cards that give you bonuses depending on how much combo you have accumulated might be lacking in use. Also unlike Bleed Sal, Combo doesn't feature much defensive capabilities in the form of consistent defense or Impair source, leaving you vulnerable as such: there is only one card that uses combo points in that archetype for applying defense and at the same time it is the best defense card for Combo archetype.

Despite this, the damage "Gut Shot" can potentially give you alongside some Power buff and Wound debuff significantly outmatches Bleed Sal's damage, so much so that it doesn't come even close in comparison. If you can get your hands on the aforementioned 99-defense card of this archetype early on in your run, it would be a great indicator to go for Combo. Moreover, it's simply a lot of fun!
Negotiation
Just like for combat, there are two main strategies you can use for Sal in negotiations, and they both revolve around your choice on "Sal's Instincts". Again, do not remove this card, as it provides great utility and value.

Depending on what you choose, you are hereby presented with two main Negotiation strategies:
  1. DIPLOMACY
  2. HOSTILITY

DIPLOMACY

Diplomacy Sal is solid. The damage numbers are okay, and she can perfom great up until the very end depending on cards you pick. General strategy revolves around picking a couple "Good Impression" cards with the 0-cost upgrade and thinning your deck as much as possible while having a card that draws you them on your first turns to end negotiations quickly. Another strategy is to stack Influence and cast "Rapid Fire" for a one-shot win.

This is the archetype you should expect to build around if you wish for reliable defense and damage. However, it can potentially fall off in the late game, and you will lose negotiations you would otherwise win because your damage wasn't enough by the end of it. Also if you don't happen to get specific cards for the synergy you build to combo down on your opponents, Diplomacy has little options to win swiftly, and you will need to chip down arguments bit by bit with the only cards you have. Basically Diplomacy Sal is decent early game, but sometimes falls off later in the game.

Another thing to say about diplomacy cards is that one specific card, "Keep Cool", provides best defense for both Diplomacy and Hostility Sal no matter what you choose.

HOSTILITY
A complete opposite of Diplomacy, this archetype is meant for experienced players with emphasis on raw damage and strong offense, and is my go-to whenever I play Sal. Main strategy revolves around stacking Dominance and overwhelming your opponent by utilising the damage potential your cards can have. "Hostile Instincts" is the primary card for this, as one of its options allows you to generate two Dominance stacks, which you should be spamming in negotiations.

The main thing to mention for this style of negotiation that you should know about is that it hits hard but also starts off super-weak. Sometimes you can never get the cards you need and as such will lose negotiations because your deck lacks critical cards or doesn't have enough damage.

Another important thing you have to know about this archetype is that the game has a sly way of punishing you for using it which you don't feel at all when running Diplomacy. It comes in a form of a very specific argument which the Spree faction members have, and if you don't deal with it promtly, you are guaranteed to lose that negotiation. I'm talking of course about ESCALATION

It's a nasty, deadly argument that is meant to cut your aggressive tempo if you don't deal with it immediately. It's the second main inhibitor to running Hostile decks, because if you don't burst it down as soon as it appears, you will lose. Thankfully, Hostility Sal has a couple of cards meant to deal with this monster, specifically "Bluster" and "Heavy Handed". Beware of negotiating with Spree faction members late-game if you don't have means of dealing with Escalation... or things will get ugly quickly.

Despite all this, late game Hostility has no alternatives in regards to what it can do. You can win negotiations on the spot in a few turns without any regard to who you're talking. Provoking someone yields a card that enhances your Hostility deck's damage unlike Diplomacy which doesn't benefit from it at all. Intimidating someone gives essentially free "dominance" making negotiations trivial. Few bad cards, unlike Diplomacy, which has many weak ones. Strong straightforward effects. Unmatched damage. Very fun!
Basic Guidelines for Sal
Here is a description of what you generally should do with Sal's basic cards you get at the start of every game as well as general deck-building tips:

NEGOTIATION
  • Once you're set on an archetype, remove all cards of the opposite one. Destroy up to two offensive cards depending on your initial draft and/or what upgrades you got for them, but keep at least one until you get better non-basic cards.
  • I would advise against destroying Composure cards, unless you drafted a good composure card. At worst expend.
  • Remove "Quick Thinking" at your leisure, although I personally don't do it period. Any upgrade is good, Improvise+ for more overall utility, upgraded cards for stronger effects. Try Improvise+ for starters

COMBAT
  • Destroy, if possible, all basic attack cards. Expend is the second best option, though eventually try to remove them. If neither is possible, "Draw a card" is the third best one since it at least could exchange itself for something better, or "Discard a card" for small utility/synergy later. Anything else is pretty much meh and should be removed ASAP.
  • I would advise against destroying Defense cards, unless you drafted a good defense card. Destroy at best one and keep the rest with at worst expend. Be on the lookout for and prioritise picking the "Feint of Hesh" upgrade: removing debuffs in this game in general is rare and as such is highly, highly valuable, and Sal has it in her basekit, while other Grifters do not have access to such luxury.
  • Remove "Fight Dirty" at your leisure, although I personally don't do it period. Any upgrade is good, Improvise+ gives more overall utility, but I prefer stronger effects. Try Improvise+ for starters

TIPS
  • It's usually a good idea to remove most (ideally all) of your basic attack cards because they provide little damage/utility. Most of your offensive in a deck should come from non-basic cards.

  • Thinning your deck is your top-priority. This will allow you to draw good cards more often. Bad cards clutter your deck and are a waste of a draw. You only have so many actions per turn, and must utilise them as much as you can. "Thinning a deck" comes from destroying cards as well as having some of them expend upon use (and getting item cards with the Replenish keyword). So assuming your deck has 14 cards, if half of them have the "Expend" keyword, that means that this deck essentially has 7 cards in it for permanent use during encounters, which will allow you to draw these 7 good cards over and over again.

  • Since you (most of the time) have 3 actions at your disposal, you must value each action point. That means you have to be ruthless when it comes to choosing which cards to pick. A lot of the time it's better to skip the cards you are given in a draft. Remember, the less bad cards clutter your deck, the better.

  • For the same reason as above, you should strive for making your deck cheap and low-cost while prioritising cards which provide best efficiency for your actions. This will ensure you get as much output from each of your turns as possible, rather than just being able to cast two-three cards and ending your turn

  • Choosing an archetype for either combat and negotiation you want to go with should come from first 1-3 card drafts the game gives you. If you get a good card early on, it should be an indicator of which archetype you should be building and steering towards on that session.
------ NEGOTIATION CARDS ------
--- MANIPULATE CARDS ---
Brainstorm
Rating: 3/5
Usage: Generic

Commentary: This card is usually used in Hostility decks because they lack draw options, and it fits quite well there. Diplomacy cards have those, and frankly speaking a direct upgrade to this (namely "Magnetic Charm") so this card isn't so useful for that archetype, but could serve as an alternative. One copy is good, two copies are more than enough.

Upgrades: Two additional composure is negligible. I'd rather draw an additional card
Doubt

Rating: 1+/5
Usage: Ultra-Niche

Commentary: Some might argue that Doubt Sal is also an archetype but whenever I tried this on high Prestige it proved to be very, very slow. The gist of "Doubt" is that it deals damage at the end of opponent's turn, but you have to stack it to high numbers for it to deal decent damage in the first place. And as you know, Impatience is a thing. By the time you stack doubt to relevant damage numbers, the negotiation could be over had you been using an actual archetype. Moreover, the doubt inception targets randomly, which means you won't be able to assign where it should aim. It's generally just too slow for high Prestige.

Upgrades: No preference

Update: I changed my mind a little on "Doubt", so I'd like to elaborate on the statements above.

It's benefit, apart from consistently dealing damage every turn, is that you can quickly stack it in high amounts and early game it can serve as a great damage substitute for whatever archetype you're running. But the other downsides, apart from one mentioned in the previous description above, and which in my opinion constitute this card as slow and detrimential to run, are as follows:
  1. Because of the way doubt works, you will not be able to destroy detrimential enemy arguments at a whim. This is horrible, as there are many arguments that you must destroy before they are able to do any impact on you, meaning if you let them persist you have to somehow survive through them and whatever effect they provide, be it damage or adding a negative status card to your deck, which you'd rather always avoid by attacking them with your cards directly and immediately rather than waiting until doubt decides to target them at the end of turn
  2. To stack Doubt faster and somewhat alleviate the detrimential situations desribed above, you must have drafted "Exploit Weakness" and upgrade it to "Enduring" as soon as possible to spam whatever Doubt stacks you have to speed up the course of negotiation, otherwise you will likely unnecessarily lose a lot of resolve or the whole negotiation entirely, and on Prestige 7 you cannot slack around and wait for doubt to do your job for you. In Brawl where the stakes are somewhat lenient, this can work, and in fact, here's a screenshot of a Brawl run using "Doubt" as main damage source (cards cropped below are "Pale Lie", "Boosted Know It All", "Pale Reconsider"), but if you try to pull the same strategy in Sal's P7 Campaign, it will make your life incredibly miserable

Back Pedal

Rating: 2-/5
Usage: Generic

Commentary: You could potentially use this to thin your deck on-the-fly if you couldn't remove bad cards prior, but the effect it provides is comparable to an upgraded basic Composure card, so I don't pick it usually. Has synergy with "Recall" though. Also can expend bad cards that opponents give you like "Baffled" or "Bad Deal", so can serve as a safety precaution for those.

Upgrades: A bit more composure is good, you don't want to expend too many of your cards unless your deck is full of bad cards that you couldn't remove. Then again, it's way easier to thin your deck outside of negotiation rather than on-the-fly
Drain Resolve

Rating: 0/5
Usage: Ultra-Niche

Commentary: It would be somewhat good if the resolve it took was permanently added to Sal's maximum resolve outside of negotiation, but unfortunately this card only heals your resolve within the negotiation you're in. So it's virtually a bad damage card.

Upgrades: They're both bad so doesn't matter.
Entrapment

Rating: 3/5
Usage: Generic

Commentary: This card's primary function is to shield your other arguments. It achieves this by making every opponent's intent/argument target the Bait this card creates, so you can virtually spam all your composure cards on it and chill out. It also stacks with itself so you can add more through "Quick Thinking". Works great against opponents which give you detrimental arguments

Upgrades: I'd rather have it cheap, one additional stack doesn't change much.
Ergo...

Rating: 1/5
Usage: Generic

Commentary: Unless you have a whole lot of cards in your deck to dump into discard pile I can't think of a reason to pick this card. And you don't want to have a lot of cards in your deck

Upgrades: Whatever.
Exploit Weakness

Rating: 2/5
Usage: Niche

Commentary: This card's primary use is in copying your Doubt stacks or other nasty inceptions. There is also a quite niche application of this card in copying a lot of Auction bets in Sal's campaign and then using "Clean Slate" to get many copies of the Lot you wanted, which is quite funny.

Upgrades: No preference
Just the Facts

Rating: 1-/5
Usage: Generic

Commentary: See "Back Pedal", but this gives Smarts instead. Smarts by itself is a good argument, but it could be obtained via way easier means unlike this.

Upgrades: No preference. Drawing is probably better though.
Know it All

Rating: 3/5
Usage: Generic

Commentary: Speaking of means of getting Smarts easier, this is the primary card for it, and it's a great one too! Generally having +1 damage to yourself isn't that bad of a downside, especially if you got your hands on Keep Cool prior, but having an additional action for several turns is valuable as heck. Although, be wary that timing when to cast this card is important too, as if you do not replenish your Smarts before the argument expires you'll have to lose an action next turn casting it again

Upgrades: No preference. No vulnerability allows you to spam it constantly without any tradeoff at all, but it is negligible anyway so I pick the more Smarts one, just so it could last a bit longer.
Non Sequitur

Rating: 1+/5
Usage: Generic

Commentary: In my opinion it's meant to cheapen a card that costs 2 or more so it costs 0 instead. Thing is, there are few cards like that and they're better off just being cast straightforwardly. Moreover, grafts can cheapen them too, so this card just falls flat.

Upgrades: Whatever
Pure Style

Rating: 1/5
Usage: Ultra-Niche

Commentary: Terrible card. For this to work, you need to actually draw cards that need upgrading in the first place, but in the end you want to upgrade your cards during negotiation ASAP so that you aren't stuck with non-upgraded cards for the rest of the game. So in the end this card's main effect just becomes useless, hinders your ability to actually upgrade cards and it clutters your deck. The only saving grace is that it at least draws cards. And even then, why wouldn't I just use "Brainstorm" instead?

Upgrades: Whatever
Reconsider

Rating: 2/5
Usage: Generic

Commentary: The primary target for this card is usually the Vulnerablity inception or small bombs that Admiratly enemies incept onto you. It's alright but an unnecessary card to have, since having +1 damage to yourself isn't that significant and detrimential arguments which enemies target can be defended by other better cards that also help you more overall anyway, like "Keep Cool"

Upgrades: Both upgrades expend anyway, I prefer the zero cost one to not waste an action
Second Wind

Rating: 2-/5
Usage: Generic

Commentary: If you remember, the main priority for you is to thin your decks as much as possible. This card only works if you have a lot of cards in your discard pile, but you shouldn't have a lot of cards in your deck in the first place for there to be many cards in that pile. Also you should have them there when you draw "Second Wind", otherwise this card will clutter your hand. Unless it's upgraded, you need to have at least 6 cards in discard pile to even justify using it. Although, seldom this card definitely can yield you 3-4 actions for one use, so it's not that bad

Upgrades: I'd rather have it cheap
Segue

Rating: 1+/5
Usage: Generic

Commentary: Could be utilised as an end-turn cast to postpone a card which you'd want to use on the next turn. Thing is, getting value out of putting cards back to draw pile is hard because a lot of the time you have means to draw them inadvertently on the same turn

Upgrades: No preference.
Tactical Mind

Rating: 4/5
Usage: Generic

Commentary: Pretty good! More cards per turn is always great, and in the end this card gives you good value, provided you can defend the argument it gives.

Upgrades: Both are fine choices, personally I use the two cards per turn one, since it's a stronger effect overall for me
White Lie

Rating: 1+/5
Usage: Ultra-Niche

Commentary: See "Doubt"

Upgrades: Whatever
Clean Slate

Rating: 3+/5
Usage: Generic

Commentary: Very strong effect. Two actions for this is more than justified. In brawl specifically, you need to deal with many bad arguments your opponent has such as Heckler for instance, and this card is your saving grace. One copy in your deck is more than enough. You should know that Remove =/= Destroy, which plays around some nasty effects upon destroying an argument, if that argument mentions "When destroyed...".

You should ideally use it prior to using your own argument cards so you don't remove them as well, which is usually on your first three turns. Sometimes though you just don't draw "Clean Slate" when you need it, so it seldom clutters your hand a little, as such the card is somewhat held back by RNG factor.

Upgrades: Cheap is always good, but getting rid of intents? That's AMAZING. I pick that one 99% of the time.
Deceive

Rating: 1+/5
Usage: ???

Commentary: This is a for-fun card. In campaign/brawl you want your deck to have consistent costs. There's a Chem Broker that basically uses an argument which has the same effect where it assigns all your cards a cost from 0 to 2, and it's nasty to play against. Why would you want to inflict this willingly on yourself is beyond me.

Upgrades: You want more chaos? Go ahead and make your entire deck random cost. 0 to 1 upgrade may be good though, since you usually play cards in those cost ranges.
Duplicity

Rating: 3+/5
Usage: Generic

Commentary: Very interesting card. If you cast this alongside a strong argument card, you get two strong arguments, and I find that to be this card's primary use. The synergy you could potentially get with this is incredible.

Upgrades: No preference. If you have a strong "Gain argument" card, have this be cheap.
Planning

Rating: 2-/5
Usage: Generic

Commentary: See "Segue". Can help you exchange a card you don't want to use on the current turn for something else, but it's inconsistent and RNG-reliant until upgraded. Although, it costs nothing and it's upgrade is a bit better, so it's alright.

Upgrades: Depends how thin your deck is. Honestly Improvise is better in my opinion every time.
Recall

Rating: 5/5
Usage: Generic

Commentary: One of the best arguments for Sal. You expend cards quite often, especially cards that you get through "Quick Thinking", and exchanging those for a card in your deck is really good. Moreover, enemy cards that also expend themselves count towards this argument. Fun note about this card: because it expends as well upon being cast, you get to draw a card with its own effect.

Upgrades: No preference, each one is good. Cheap lets you immediately and quickly start getting use out of it at no cost during the first couple of turns, but the stronger effect provides more value and rapidly becomes better with each passing turn
--- DIPLOMACY CARDS ---
Build Rapport

Rating: 3/5
Usage: Generic

Commentary: Main Influence accumulation card alongside "Sal's Diplomatic Instincts". Post-upgrade provides most Influence instantly at 1 action out of all Diplomacy cards.

Upgrades: Take the +1 Influence one. It doesn't matter whether you get it immediately or a bit later, when you play Diplomacy you aim to stack Influence eventually, not immediately.
Good Impression

Rating: 4/5
Usage: Diplomacy Win Condition

Commentary: The first card you want to build your strategy around. One of the main offensive Diplomacy cards that you want around 2-3 copies of in your deck if you plan on this being your win condition, which means winning negotiations within a few turns. You need to upgrade this ASAP so it can cost 0, and then use "draw" cards to deal big damage during early turns before this card's damage falls off.

Upgrades: Always 0 cost one.
Intrigue

Rating: 0/5
Usage: Diplomacy Generic

Commentary: This is basically a slightly more damaging "Fast Talk", so not worth taking period, there are better cards.

Upgrades: Whatever.
Keep Cool

Rating: 5/5
Usage: Generic

Commentary: Amazing, the BEST Composure card in the game for Sal period, NOTHING comes close to this card's usefulness. It's so good that I want this card even in Hostility decks. This gives huge Composure numbers after you use one-two Composure Manipulate cards, and if you get it early on you're virtually invincible up until later stages of the game. It tanks hard hits and helps out your other arguments if they have Composure as well. Great card, always get one.

Upgrades: I don't know why you would want the Sticky upgrade. The +3 Composure upgrade applies first and only THEN the card doubles the Composure on all arguments. It's too good to pass up.
Plead

Rating: 3+/5
Usage: Diplomacy Generic


Commentary: "Good Impression"s little brother. You can use this instead if you aren't getting the mentioned card or alongside it in the same deck, but you need to upgrade "Plead" quickly for it to be more useful. Unlike "Good Impression", this card does not lose on damage throughout the negotiation which is quite nice.

Upgrades: I pick the higher damage one. Although, even considering that getting influence with the right cards is easy, if you plan on spamming this card, especially several, you will lose that influence quickly and might find that your damage numbers fell off due to this card's wide damage range. Prioritise getting something else to support Plead.
Setup

Rating: 2/5
Usage: Generic

Commentary: Changed my mind on this card a bit. This is an alternative to "Build Rapport". Best usage of this card is for "Tyrannize" exchange for Dominance stacks, since unless you have "Reconsider" you cannot un-gain the lose-Influence argument, or once you have drafted enough 0-cost Diplomacy cards that benefit from Influence. You can, provided enough card draw, generate lots of free Influence stacks with this, but with low amount of draw sources this card will do nothing. Despite the mentioned synergies, I still recommend going for "Build Rapport" instead, as it's simply better and more consistent.

Upgrades: No preference
Solid Point

Rating: 3/5
Usage: Generic

Commentary: "Solid Point" is, truly, actually solid. Fits into any Diplomacy archetype you're going for, and the effect aligns with what you usually want out of any Diplomacy deck. It also fits in Hostility decks, because "Tyrannize" can get Dominance off of the Influence this card generates.

Upgrades: If you stack influence, go for Visionary, if you play "Good Impression" or something along the likes you will be fine with having just a single point of Influence, so go for a little more damage one.
Subtlety

Rating: 1+/5
Usage: Diplomacy Generic

Commentary: This is a bit better than "Intrigue" since it draws you cards. You can use this in Diplomacy decks as a substitute for card draw if you desperately need one (works alright alongside Subte Setup early)

Upgrades: No preference
Aplomb

Rating: 1/5
Usage: Diplomacy Generic

Commentary: If it weren't for the 2 Influence initial requirement it would be a solid early pick. You don't really need this card in any deck, but if you plan on getting this you need to upgrade it ASAP to justify its usage. Also "Keep Cool" is still better than this, without the Influence requirement.

Upgrades: Usually 8 Composure is more than enough.
Beguile

Rating: 2/5
Usage: Diplomacy Generic

Commentary: This is a card you want to have in your deck, but not to build your deck around. It only gains damage when you draw it, but Sal doesn't really have means of discarding her cards to draw them immediately several times. So in practise, it takes a few turns before it ramps up in damage, but you should already win the Negotiation by then. This card will eventually get enough damage to finish off your opponent, or you can use this to one-shot small resolve arguments.

Upgrades: Boosted one.
Buying time

Rating: 2+/5
Usage: Generic

Commentary: As a one-of it can help you deal more damage in "Good Impression" decks in one turn, or simply be a useful utility card in any Diplomacy deck you chose to run

Upgrades: Boosted one. Gaining Influence is easy.
Calm

Rating: 2+/5
Usage: Generic

Commentary: By itself, this card is weak. Composure numbers it provides matter only during the first couple of days, and what's more most of the time you want to apply Composure to specific arguments, not to everything. Yes, it synergises with "Keep Cool" but again, you don't need to defend all arguments in one turn, most of the time only specific ones. Despite this, I recommend to consider taking this card regardless of mentioned points, since "Calm" gets better after the upgrade and fits in Hostility decks alongside "Keep Cool" as well

Upgrades: The zero-cost upgrade can net you a lot of Composure numbers provided you have enough card draw to cast "Calm" repeatedly, and the value of it increases greatly as you obtain more draw sources
Elucidate

Rating: 4/5
Usage: Generic

Commentary: By itself the card does nothing, but with how often Sal is able to draft cards which provide arguments this card is fantastic in the ovewhelming majority of the time. As you can probably guess, the card's primary usage is to duplicate Dominance or Influence stacks. Can also duplicate strong abilities such as "Bulldoze". Problem is it only does so once per negotiation before the upgrade, and it duplicates a randomly chosen argument, but the latter could be easily worked around if you only have a single argument in play before casting "Elucidate"

Upgrades: I usually go for Enduring. If you use it several times, you can basically get a crap ton of Influence/Dominance stacks as well as other useful arguments, despite the random factor. But the other upgrade is also fine and allows for running several copies of "Elucidate" at once: for example, you can stack some Dominance during early turns and specifically duplicate those stacks with this card, acquiring massive amounts of damage boost
Hard Facts

Rating: 1+/5
Usage: Generic

Commentary: Not worth taking due to low Composure accumulation per card played. It's only good in "Good Impression" decks where you cast a lot of 0-cost cards, but generally by itself this card is mega-weak. Also it targets a random argument too, so you may not even get Composure where you really need it.

Upgrades: Whatever. Get a better Composure card
Ipso Facto

Rating: 0/5
Usage: Generic

Commentary: Weak card. You don't destroy arguments every turn, and even if you do the effect this card gives isn't enough to justify having it in your deck. As such it simply clutters your card pool, even with the Evoke keyword. It's even worse if you draw it, since you've virtually wasted a good card draw and got this.

Upgrades: +1 Influence, if you even consider taking this.
Level Playing Field

Rating: 3/5
Usage: Generic

Commentary: No matter which Diplomacy strategy you use, this card is good in any. "Good Impression" / "Plead" wrecks with this and "Rapid Fire"s damage looks like it sniffed drugs and became ultra-cracked. Works with Hostility cards too, although not quite needed for those since Dominance covers those decks' damage needs. Having +1 damage to yourself is essentially non-important, especially with several 0-cost Diplomacy cards which when compiled together let you one-shot your opponent on the same turn when this card is cast. And even if you don't, the damage you can achieve with this in a single turn is nothing to scoff at

Upgrades: Boosted one.
Magnetic Charm

Rating: 3+/5
Usage: Diplomacy Generic

Commentary: Great card draw and Influence stacking for any Diplomacy deck. Always get one if presented.

Upgrades: "Good Impression" strategy - Enhanced, "Rapid Fire" - Boosted.

Rapid Fire

Rating: 3/5
Usage: Diplomacy Win Condition

Commentary: The second card you might want to build your deck around when playing Diplomacy. This card by itself is weak, but give it enough Influence stacks and this pretty much one-shots everything, especially if you activate "Level Playing Field" / "Evil Eye" on the same turn. Make sure to defend those Influence stacks and you can essentially win any Negotiation.

Unfortunately, held back by the fact that to make "Rapid Fire" work you need to have already drafted supporting cards for it, which are many, since to deal significant damage with it you require a lot of Influence stacks (ideally 10+), and deciding to cast it by itself or at early stack amounts won't yield much benefit to you.

Upgrades: Boosted Fire is better, because more damage per "Rapid Fire" instance.
Swift Rebuttal

Rating: 3+/5
Usage: Diplomacy Niche

Commentary: Primary usage of this card is in "Good Impression" decks to get them back from discard pile immediately and get some more value out of them before the damage on that card falls off. You want this upgraded ASAP.

Upgrades: Visionary one, because you're relying on several "Good Impression" / "Plead" cards for damage
Airtight

Rating: 3+/5
Usage: Diplomacy Generic

Commentary: Essentially you gain 2 defense for every card you play with this in Diplomacy decks, and it's quite common for this card to provide solid defense numbers. However, it targets random arguments, and you can really only get good use from it decks which utilise cheap / 0-cost Diplomacy cards or while having many actions available. It's not that of a required card to have in your deck either since other defense cards can usually provide all the Composure you need. Still, certainly not bad to have, and has great synergy with "Keep Cool"

Upgrades: Pale one. You don't need this on your first turn.
Appeal to Reason

Rating: 5/5
Usage: Diplomacy Generic

Commentary: Almost always will cost 0 in Diplomacy decks. Strong attack card and in thin decks it's not uncommon to draw this several times which gives this card even more value. Always a good pick if you generate Influence ASAP and have means to redraw your deck.

Upgrades: For the reasons above, Boosted Appeal is better
Calling in All Favours

Rating: 1+/5
Usage: Diplomacy Niche

Commentary: You guessed it, "Rapid Fire" loves this card. Of course, by itself this does nothing. Works best when you have around 10 or close to 10 Influence stacks. Use this on the same turn or the turn before you're about to cast "Rapid Fire". Other than that, the card finds virtually no use.

Upgrades: Tall Favours. One more damage to yourself doesn't matter if you're about to win the negotiation.
Collected

Rating: 0/5
Usage: Generic

Commentary: You're always going to get this effect if you play Diplomacy. But you don't need it because it's weak. Especially if you have many Influence stacks on your side, which means this card will target a random one. It will only work once per turn and that's it.

Upgrades: I guess being able to cast it for 0 is better than it just lying around and cluttering your deck after being evoked once.
Empathy

Rating: 1/5
Usage: Ultra-Niche

Commentary: This is only good for "healing" yourself mid-negotiation so you don't have to drink at the bar. Restoring resolve to your opponent is a negligible setback, and you can always use it on your first turn too so it can have basically no downside. Thing is, you don't necessarily need this at all if your deck is already good, since the resolve you'll be losing won't even come close to the amount this card restores. And even if you do lose a bit, there's the "Clemency" Flourish.

Upgrades: More restored resolve is better
--- HOSTILITY CARDS ---
Abrupt Remark

Rating: 3/5
Usage: Generic

Commentary: An alright card draw. Can also be used in Diplomacy decks too.

Upgrades: Visionary is great. You don't want "Wide Remark" really, however I must say that sometimes there are no opponent arguments to destroy. But that only happens consistently if you drag the negotiation for too long, in which case your deck isn't that good in the first place.

Erupt

Rating: 2+/5
Usage: Hostility Generic

Commentary: This might be not obvious at first, but Dominance increases this card's damage number, which makes it a solid follow-up to your initial set of offensive attacks when you have stacked some Dominance and this comes up immediately after.

Upgrades: One more damage won't make a difference, but one less card to enable the Evoke keyword for this card absolutely DOES make a huge difference, especially early on.
Oppress

Rating: 3-/5
Usage: Hostility Generic

Commentary: This card potentially can be better than your default basic "Threaten", but only when upgraded. Until then, it's a little weak, and what's more, if there are no arguments in play to destroy, this card provides no value at all.

Upgrades: Depends on how much Dominance you can get. I usually run Tall Oppress, but if you are able to stack Dominance via other means to offset the lower damage of the other upgrade, it can net you more Dominance during the early turns when opponents put out their arguments
Bellow

Rating: 2+/5
Usage: Hostility Generic

Commentary: Weak base damage before it's upgraded. However, depending on your draws, this card can potentially be on the level of "Bluster" in terms of damage numbers at the cost of a single action and as such act as a direct substitute, but it somewhat depends on draw RNG

Upgrades: No preference. While I pick the Tall upgrade most of the time for a chance to get more damage, the Rooted one makes "Bellow" more consistent in providing comparable damage to "Bluster"
Bluster

Rating: 5/5
Usage: Hostility Generic

Commentary: Strong card and a great one at that. This is your main heavy damage Hostility card. Two actions for the damage and the effect it provides are totally justified. But the main reason you want this card in particular: it has enough base damage on its own to help you destroy the most oppressive argument you can face on the same turn it was placed while playing Hostility decks: Escalation.

Upgrades: I prefer to keep my opponent weaker for longer. Having +1 damage on all cards is usually negligible and can be achieved with Dominance, however flustering an opponent usually only comes via "Quick Thinking" Manipulate card which is unreliable.
Browbeat

Rating: 0/5
Usage: Hostility Ultra-Niche

Commentary: No, just no. This essentially ends your turn and trust me when I tell you that you're better off doing something else with all your actions rather than wasting them all on this card's attack.

Upgrades: Whatever. Don't use this card.
Evil Eye

Rating: 1/5
Usage: Overbear / Rapid Fire

Commentary: There are two primary uses for this card: "Overbear" and "Rapid Fire" (which becomes ABSOLUTELY CRACKED with this and "Level Playing Field"), that's it. Other cards won't give you same damage, unless you stack big Dominance numbers, but then you won't need this because you've already won.

Upgrades: Pale one.
Heavy Handed

Rating: 3+/5
Usage: Generic

Commentary: This is the second high value card, apart from Bluster, that you want in your Hostility deck. Main reason: immediately removes Escalation, for 1 Dominance only, no matter how big it gets. Other reasons: removes anything annoying you don't want to spend your attack cards on and you can even put this into a Diplomacy deck because "Diplomacy Instincts" upgrade still can give you a single point of Dominance.

Upgrades: Pale. You want to remove specific arguments with this, and the remaining ones can be dealt with by regular matters.
Invective

Rating: 2/5
Usage: Hostility Generic

Commentary: "Agitation"s little brother. It's alright and can be easily Evoked in Hostility decks, but a single Heated is weak, it becomes better the more of those you have at the same time.

Upgrades: Any upgrade is fine, but I pick Boosted. Unfortunately none of the upgrades will give you more copies of Heated argument, and then again, you don't necessarily need this card and you need to protect it too until it reaches decent damage numbers.
Low Blow

Rating: 2/5
Usage: Hostility Generic

Commentary: On average, the effect is unimportant. Most enemies' Composure numbers are weak enough for you to penetrate anyway, can be applied to irrelevant arguments that you may not wish to target immediately, and what's more the Composure only lasts for their one turn which could be simply waited out. The best use of this card is against Bartenders which stack defense as you play Manipulate cards, and Barons which place an argument (which can be destroyed relatively quickly anyway) to defend themselves for each Hostility card you draw.

Upgrades: Stealing composure is something I wouldn't pass for more damage.
Menacing Air

Rating: 2+/5
Usage: Hostility Generic

Commentary: This basically says "You don't lose Dominance at the start of your turn". If you can somehow duplicate this, it generates Dominance instead. Even though the effect this card provides is great, helps maintain hard-earned Dominance and allows to quickly jump back should your Dominance get destroyed for any reason, this card isn't that necessary to have in Hostility decks, since Dominance could be obtained through other means anyway, and moreover it is quite costly, making you either skip a whole turn to cast it, or skip casting this card several times until later, which clutters your hand. Still, nice to have.

Upgrades: Pale one anyday.
Overbear

Rating: 3/5
Usage: Hostility Generic

Commentary: This is good with some Dominance stacks. Opponents are going to have several arguments for the first few turns almost always, and this card serves as a semi-AoE damage card.

Upgrades: Drawing a card for each argument is really good, especially considering Hostility doesn't have much card draw by itself
Tyrannize

Rating: 3+/5
Usage: Hostility Dominance Source

Commentary: Since there are a few non-basic cards providing Influence, and simply because basic "Hostile Instincts" can give you two Influence stacks already, this card can serve as your secondary Dominance source.

Upgrades: Both are good
Veiled Anger

Rating: 4/5
Usage: Hostility Generic

Commentary: Nice free damage that can be cycled several times in a turn alongside some card draw and save a bunch of actions. I always get one or two if I can.

Upgrades: I prefer the Tall one, but attacking twice can also be good. However, you spend Dominance doing this, which lowers your other cards' damage, and keeping high Dominance is already tough as is.
Agitation

Rating: 4/5
Usage: Generic

Commentary: You want to use this card as soon as possible so it begins to ramp up immediately on your first turn. It's a great damage addition that can win you negotiations on its own no matter the deck, however costly and fragile as you have to defend the three arguments it creates. The longer you wait to use it the less useful it becomes.

Upgrades: No preference, but I usually take the cheaper version.
Bulldoze

Rating: 4/5
Usage: Generic

Commentary: Awesome stuff. Fits in any deck and allows you to keep your heat going during early turns where opponents spam their arguments. It also packs a bunch having 8 resolve by itself, so it's not that easy to destroy. If you're running "Elucidate" alongside this and copy it even just once, you can get so many actions with "Bulldoze" it's unreal, especially in Brawl mode against many arguments such as Heckler or Intel. The argument itself is just invaluable when you play against Barons who spam arguments every turn.

Upgrades: Dominant one in Hostility, but Resolve one in Diplomacy decks.
Caprice

Rating: 3+/5
Usage: Hostility Generic

Commentary: Since the majority of Hostile cards are decent, this acts as a pseudo-substitute for card draw. However, the cards you improvise are random and aren't upgraded, which could be fixed by getting a specific upgrade of this card, but at the same time doesn't matter much due to how good Hostility cards are by themselves anyway. Funny note about this card, it can net you another copy of Sal's "Hostile Instincts", which accelerates your Dominance-stacking capabilities quite much.

Upgrades: I usually need only one card with this so I pick the Boosted upgrade.
Domineer
Rating: 1/5
Usage: Hostility Niche

Commentary: It might seem good at first until you remember that Dominance is your main source of damage, not the cards themselves. Getting Dominance and keeping it high isn't necessarily easy, and getting the spent Dominance back isn't really worth the effect this card provides. You want to stack as much Dominance to keep the damage high, not stay on the same level of damage by spending all of your Dominance. Use at your own discretion. I'm pretty sure you can go infinite with this + "Enhanced Tyrannize" + some card draw.

Upgrades: No preference.
Scorched Earth

Rating: 0/5
Usage: Hostility Ultra-Niche

Commentary: Your deck should be thin and you don't really want non-hostility cards removed from it so this card is tough to make good use of. Especially since once you do, it becomes useless so it's either all-in or you are left without most of your deck's utility. Moreover, to even use it effectively you first need to have all or the majority of your non-hostility cards in the discrad pile and only then draw this card, which is a complete RNG and it's going to clutter your hand most of the time. Also it costs 2 for some reason.

Upgrades: Whatever. Hard to use, you're better off with something else.
This Ends Now

Rating: 2-/5
Usage: Hostility Niche

Commentary: Honestly, great effect. This essentially can reset your turn and draw half your deck, depending on the amount of Dominance you have, but you need at least more than two Dominance stacks to justify using this card, and in reality you need more than five. Thing is if you have a lot of Dominance already you can end the negotiation on the next or same turn anyway, so this card's usage becomes a bit questionable

Upgrades: I don't know why you'd want the Enduring upgrade. This card can be used effectively only once. Maybe you could go infinite with this depending on how much Dominance you can get with all your actions.
------ COMBAT CARDS ------
--- MANEUVER CARDS ---
Chamber

Rating: 1+/5
Usage: Combo Generic

Commentary: This is a slightly better "Feint". I do not take it normally unless I lack better defense options while running Combo decks

Upgrades: More defense is always preferable.
Improve Accuracy

Rating: 0/5
Usage: Ultra-Niche

Commentary: Useless card. You don't really care about dealing max damage on your attacks ever. The only card I can think of that may use this well is "Tall Wild Lunge" but otherwise it's atrocious

Upgrades: Whatever. Don't play this
Deception

Rating: 2/5
Usage: Niche

Commentary: While there are attack cards that benefit from being Improvised, they're usually bad. Best case scenario for this is "Blademouth Beating", but it only keeps the buff it gets from being Improvised for one turn. This card's primary and frankly better use is in a thin combo deck. You use this to repeatedly buff one of your "Gut Shot" cards for crazy damage, or "Discharge" until it one-shots your opponent. Doesn't see much use in other cases, and is strongly unreliable since the cards you want to improvise should be in your draw pile at the time of casting this, which doesn't always happen.

Upgrades: Tall one. You need only two attack cards that you wish to buff several times in your deck for this to shine
Jarackle Free-Fighting

Rating: 3/5
Usage: Combo Generic

Commentary: It's nice to have for more overall damage. Take at your own leisure. Having 2 of these at the same time can be really decent, provided you can keep the Combo counter high enough

Upgrades: Both are fine. Having extra Power in general is always nice. Evasion is more preferrable for defensive purposes, since if you cast this on the turn you're being attacked, this helps avoid unnecesary damage due to spending 2 actions for this card, which you may have needed for defense cards instead. Moreover, having several copies of this card in your deck upgraded for Evasion helps you strategically avoid heavy damage should you decide to skip casting this card on any given turn.
Prediction

Rating: 1/5
Usage: Niche

Commentary: To get value out of this, it needs to be improvised repeatedly, and then it can potentially become your best defense card. What if you don't improvise this? Then it's a worse "Feint". However, with how you usually need defense here and now in combat, this card takes a good while to get good use out of, which on P7 unfortunately is a large detriment. And of course, by itself it's terrible, needs other cards to work.

Upgrades: Patient for faster defense gain
Readiness

Rating: 3+/5
Usage: Generic

Commentary: This is great for replenishing your hand, but the secondary effect is pretty negligible.

Upgrades: Boosted >> 2 more defense
Rebound

Rating: 0/5
Usage: Niche

Commentary: Counter in this game is bad. Your average opponent attacks once, maybe twice, per turn, so even in high numbers, Counter only works once and then you have to stack it again. This also requires you to play more cards beforehand but costs 1 action by itself, so with 3 actions at best you get 4 counter...

Upgrades: Spined for better effect, but again, bad card.
Scatter

Rating: 2-/5
Usage: Niche

Commentary: Use this in conjunction with Feint that removes your debuffs and it becomes a solid Power source, although with how often enemies apply other debuffs this strategy is somewhat lackluster. Other than that it's pretty meh, and what's annoying about running this card too is that you more often than not need the cards which "Scatter" requires you to get rid of in exchange for temporary power.

Upgrades: Boosted for better effect.
Slippery

Rating: 2+/5
Usage: Generic

Commentary: Another "Feint" that has a different effect. Best use of this in my opinion comes from improvsing "The Slip" from discard pile to give it more consistency in providing Evasion, so you don't have to rely on it to be in draw pile only.

Upgrades: Having more defense is more preferable
Spare Blades

Rating: 1/5
Usage: Niche

Commentary: This is a card you get when you have other cards that discard for you, to justify their presense somewhat. The Blades clutter your deck since they do not Replenish, even though they Pierce, which is nice to have, but not required to get through combat.

Upgrades: No preference, but the Stone upgrade doesn't clutter your deck with blades as much. Generally this card isn't worth it to use anyway
Specialty

Rating: 2+/5
Usage: Combo Niche

Commentary: This makes Combo decks a bit more consistent. Doesn't matter where your Finisher is, it Improvises through your entire deck which is flexible. In my opinion this card's best usage is a tutor card for "Shoulder Roll", albeit at one more cost. But in a thin deck, this is unnecessary.

Upgrades: Rival's. More combo is good
Survival Reflexes

Rating: 3/5
Usage: Generic

Commentary: Good utility card in any deck, but more so after the upgrade

Upgrades: Cheap is best
Active defense

Rating: 1+/5
Usage: Niche

Commentary: You won't discard enough cards per turn to justify using this card period. Average discard numbers vary 1-3 per turn, and there are better defense cards than this.

Upgrades: Enhanced upgrade could potentially make it alright.
Adapt

Rating: 3/5
Usage: Generic

Commentary: Primary usage of this card is in resetting your poorly drawn hand. In thin decks this is mostly unnecessary, because you're already using your best cards every turn. Despite this, "Adapt" does not clutter your deck and can definitely help out to avoid potential poor draws as a safety precaution, or work wonders against certain enemies which forcefully insert status cards into your deck. With cards that benefit from discard effects "Adapt" could give good synergy, although the inconsistency of that is off the charts.

Upgrades: No preference
Barbed Defense

Rating: 0/5
Usage: Ultra-Niche

Commentary: Average opponent attacks you once-twice per turn, this card is bad.

Upgrades: Whatever, bad card
Battle Scars

Rating: 0/5
Usage: Ultra-Niche

Commentary: Useless in thin decks. Primary use of this is in Dailies at the end of your turn when you have lots of cards in hand and that's it

Upgrades: Whatever
Bloodbath

Rating: 2/5
Usage: Bleed Generic

Commentary: Alright in Bleed decks except for late game, since you'll be fighting a single boss. Don't expect this card to stack much Bleed however, it's here to spread out the Bleed debuff so that your other cards requiring Bleed could benefit from it on multiple enemies at once without your need to apply Bleed on everyone manually. Synergises well with "Hemophage".

Upgrades: I like Pale better
Breather

Rating: 2-/5
Usage: Combo Ultra-Niche

Commentary: I do believe you can infinite with this with the right combination of cards, in general this card is meh, it's ok if you can draw things to make use of additional actions, although it requires you to keep gaining Combo somehow if you plan on casting this repeatedly

Upgrades: Pale is better
Concentrate

Rating: 1+/5
Usage: Niche

Commentary: Highly RNG dependant. If you draw a card with this that costed 1, you've done virtually nothing. If you happen to draw an ability card, you saved at worst 1 action. Meh card.

Upgrades: No preference
Dagger Storm

Rating: 0/5
Usage: Don't play this card

Commentary: First of all, blades by themselves do nothing and clutter your deck. Second of all, the card costs 2 actions for making two of those unnecessary cards. Third of all, it puts them into your draw pile instead of immediately into your hand. So you've effectively wasted two actions for nothing. Just terrible.

Upgrades: Whatever. Bad card.
Defensive Surge

Rating: 4+/5
Usage: Niche

Commentary: Great defense card but specifically in decks with enough draw and cheap / 0-cost cards, as outside of those you may find this card's defense numbers lacking. Post-upgrade ramps up in defense quickly, and potentially can become your 99-defense card. It's common for this singlehandedly to provide around 15-25 defense given the right cards.

Upgrades: I prefer Stone Surge for more defense per card.
Exertion

Rating: 2+/5
Usage: Generic

Commentary: I'm not sure if there exists a one-turn oneshot deck for Sal, but if it does this is the card that would be used there for certain. In general circumstances, it's alright but unnecessary

Upgrades: Visionary, just to draw something else instead of this to justify the actions it gives
Footwork

Rating: 1/5
Usage: ???

Commentary: Generally meh. You don't want to have a lot high cost cards in your deck for this card specifically. Its upgraded version is useful in dailies where I have no idea what I'm going to get

Upgrades: No preference
Into the Night

Rating: 1/5
Usage: Niche

Commentary: Poor effect. Average discard numbers are in 1-3 per turn, so in the end this effect is lackluster at best

Upgrades: Stone
Murder Bay Boxing

Rating: 3/5
Usage: Combo Generic

Commentary: The effect is easily maintainable so this ability is nice to have in combo decks. But if your deck is already thin this is unnecessary

Upgrades: Maybe Initial? To get the effect going ASAP.


Muscle Memory

Rating: 1-/5
Usage: Generic

Commentary: I cannot really think of a card you'd want to duplicate. Maybe an ability one like "Boulder Stance", but then again, this card improvises only from draw pile at random, costs 2 actions and slows you down.

Upgrades: Pale
Projector

Rating: 2-/5
Usage: Niche

Commentary: Potentially can provide great damage in conjunction with "Deception" + "Blademouth Beating". However, you need to get those cards in the first place. It's better utilised with "Deception" + "Gut Shot" / "Discharge", which speeds up the process of ramping up the damage of those cards faster to tremendous amounts.

Upgrades: You don't need this immediately, so Pale
Rummage

Rating: 3+/5
Usage: Generic

Commentary: Good free generic card for skimming through your deck. The discard utility is nice. This card also allows to do some very stupid things in thin decks e.g. with Lumin Bio-Accelerator (see the attached screenshot)

Upgrades: 99.9% of the time I take the Boosted one. The other upgrade is only utilised in very niche circumstances, and besides it makes it difficult to cast "Rummage" repeatedly, as eventually you'll be forced to expend your actual good cards

Defense is overrated anyway:


Sharpen

Rating: 0/5
Usage: Bleed Ultra-Niche

Commentary: Bad, you don't need this period. This can yield in general around 3-5 Bleed which could be done through other better means and at the same cost

Upgrades: Whatever
Shoulder Roll

Rating: 5/5
Usage: Combo Generic

Commentary: This is THE 99-defense card. Best defense card for Combo decks, protects your combo points, gives insane defense numbers at one cost. Becomes even better after the upgrade, always pick one if you go for Combo. You can legit have this as your only defense option and you don't need anything else.

Upgrades: "Boosted Roll" is preferrable most of the time, but if you feel like you have too much defense with this + other cards, go for Rival's
Size Up

Rating: 3/5
Usage: Combo Generic

Commentary: Alright card draw for Combo decks to provide some deck consistency. Combo you gain with this card is a little irrelevant though.

Upgrades: I'd rather have an additional card
Spines

Rating: 1/5
Usage: Niche

Commentary: Counter isn't good in this game. However, this card and other two do synergise together pretty well, specifically this + "Boulder Stance" + "Deepstance".

Upgrades: Pale
Stringer

Rating: 1-/5
Usage: Niche

Commentary: Weak card, weak effect. It's just worse than a basic "Feint"

Upgrades: Boosted upgrade is the only thing that can justify using this at all. And even then the card's still weak
The Slip

Rating: 3+/5
Usage: Generic

Commentary: In terms of defense, this is another "Feint", however what differs this card from the rest "Feint"-alikes is the Evasion part. Evasion is really good, especially since one of this card's upgrades gives you two immediately. Evasion can help you avoid damage that you otherwise wouldn't be able to block, or dodge piercing attacks or attacks that even when blocked give you nasty debuffs/cards. One thing to note, even if you Improvse this card while it's not even in your deck, it will still give you Evasion when you cast it, which makes it a great card in Sal's card pool overall. Although, it should be mentioned that to utilise this card's secondary effect to its fullest you must have several cards that Improvise from your deck, preferrably "Zig Zag"

Upgrades: Both upgrades of this card are good, but I prefer more immedate defense for the times when this card is in hand and not in your deck to be improvised. Upgrading defense is more consistent and reliable, however if you have ways to improvise this card repeatedly, you can potentially never require any defense but Evasion.
Thieves' Instinct

Rating: 2+/5
Usage: Generic

Commentary: For-fun card. Can either net you worthless trash for 0 or a great card for 0 depending on RNG, as such is unreliable.

Upgrades: Boosted is a little better in my opinion
Zig Zag

Rating: 3+/5
Usage: Generic

Commentary: This is your primary improvisation source card, as it enables those cards that benefit from being Improvised. You could (and to be fair should) put several of these in your deck once you upgrade them to cost 0 and some card draw or Improvisation from discard pile to get "Zig Zag" again for cumulative effects.

This card makes a really simple Infinite deck when you have two 0-cost "Zig Zag" cards in your very thin deck and the "Resonance" ability. The way Improvisation works once you have your draw pile exhausted, is when you Improvise with one "Zig Zag" (or any card for that matter but nonetheless) when the other is in your discards, it shuffles into your draw pile and automatically gets drawn. Which means with two of 0-cost "Zig Zag" cards you get infinite damage with "Resonance". You'd be surprised how easy it is to build this deck in brawls, although it does require you to have "Resonance", which doesn't come by often in drafts.

Upgrades: 0-cost one if you're going for the Infinite, otherwise no preference. But to be fair, I'd rather always upgrade it to cost 0 even outside of infinite combo, because the effect isn't really worth one action, even an upgraded one.
Absolute Domination

Rating: 3-/5
Usage: Combo Generic

Commentary: Strong effect, albeit highly offset by the card's cost and its requirement. Without doing anything fancy, you can get 8 Combo at around turn 2-3 or so, and you need to keep yourself from being damaged to not lose it, otherwise this card has no effect. But if you can, this increases your damage output significantly and at the same time it tremendously improves the rest of the attack cards you use by that much once you start going with this after a couple of turns. Moreover, the effect helps to maintain itself if the first attack card you use provides Combo-generating effect

Upgrades: Pale
Blood Guard

Rating: 1+/5
Usage: Bleed Niche

Commentary: The effect is only strong if you can deal a lot of damage with "Burst" through having enough Wound / Power, or chain a lot of bleed applying cards together, like discarding "Kra'deshi Barbstorm" several times. Most of the time, this card will give less than average amount of defense and as such just clutters your hand and deck. You can get defense via easier means.

Upgrades: No preference
Boulder Stance

Rating: 4/5
Usage: Niche

Commentary: Great card in decks featuring cheap or 0-cost cards, especially once upgraded. The more 0-cost cards you use per turn the better this is and you can get around 5-10 free defense with this easily. Not a bad idea to get 2 copies of this in your deck even

Upgrades: Pale
Churn

Rating: 0/5
Usage: Don't

Commentary: If you find a good use for this card please tell me because as it stands, this is wortheless. There's not a single Maneuver card or strategy that revolves around making your entire deck consist of two Maneuver cards (this included) that win you the game on the spot by healing you a lot and/or discounting said drawn Maneuver card.

Upgrades: No idea. Terrible card.
Cynotrainer

Rating: 1+/5
Usage: Niche

Commentary: The effect would be great if it weren't until the end of turn. Quite situational and in general circumstances not worth running, however I found a pretty niche use of this card to be either as a faster "Discharge" buffer alongside "Deception", or in a deck that features "Final Assault" (see the picture below). The combination of those could potentially one-shot Kashio from full health. The result was what I expected, but it's too much work for what can be achieved with other cards

Upgrades: No preference


Deepstance

Rating: 1+/5
Usage: Niche

Commentary: It's only good if your enemies attack you a lot, which is virtually only against Flefkis. And even then, there are way better options to apply MORE wound than this.

Upgrades: No preference, bad card
Doom

Rating: 2+/5
Usage: Niche Win Condition

Commentary: This card is funny. In theory you can win using only this card, however it needs to be mentioned that all units in combat receive panic, which may make your allies panic earlier than opponents. Besides, Metallic enemies never panic, which makes this card useless against them. However, in general, provided you never damage your opponents, it can win you combat after 4-5 turns of repeatedly casting this, raising their panic to full health. This is a card you want to build your deck around usually, however as a secondary support card this could work, although it would be slower unlike if you were building around it.

Upgrades: I value cheap more, since you don't want to waste your entire turn (3 actions) casting this alone, which means you aren't doing anything else for the follow-up. If you already have ways to give yourself more actions or cheapen this card, make enemies panic only.
Efficient Disposal

Rating: 0/5
Usage: Niche

Commentary: Weak card, doesn't do enough damage ever to justify using it period

Upgrades: No preference
Follow Through

Rating: 0/5
Usage: Combo Niche

Commentary: Just use "Shoulder Roll"

Upgrades: Whatever
Hemophage

Rating: 4+/5
Usage: Bleed Generic

Commentary: This is actually really nice. You apply bleed often, and after the upgrade (but even before), "Hemophage" can keep you healthy for whole combat, especially if you aren't targeted first. If you happened to have two upgraded versions of these in your deck you can literally just live off of the healing in combat. Serves as a pseudo-defense.

Upgrades: Boosted
Inside Fighting

Rating: 5/5
Usage: Combo Generic

Commentary: Really good effect for Combo decks, at no condition. Way easier to stack Combo with this card than simply using Gut Shot. If you have multiple cheap attack cards, you generate Combo easily with this, which in turn also makes it easier to keep up with the conditions of other Combo Ability cards.

Upgrades: One of the few cards I prefer to pick Ambush on, to start getting value out of this immediately.
Ravenous

Rating: 0/5
Usage: Ultra-Niche

Commentary: Unnecessary and outright terrible ability for Campaign and Brawl that clutters your deck and card pool. Only ever useful in dailies.

Upgrades: Whatever.
Resonance

Rating: 2/5
Usage: Niche

Commentary: This is either less than average or the best card in Sal's deck. In a vacuum, this can help you do some okay damage, since Resonance debuff cannot be lost, but nothing extraordinary. However, the REAL strength of this card unveils itself in conjunction with two 0-cost "Zig Zag"s and a very thin deck (so thin you should draw all your cards and have nothing in discard/draw piles). See "Zig Zag" for more info on the infinite damage this card deals.

Upgrades: AoE is hard to come by in this game. Wide "Resonance" is times better than Boosted, and simply mandatory if you're going for the infinite.
Seeker

Rating: 3/5
Usage: Generic

Commentary: Solid defense card, and the discard utility is quite nice to have. Works well with "Survival Instincts"

Upgrades: No preference

Shadow Mastery

Rating: 1+/5
Usage: Ultra-Niche

Commentary: All I'm going to say is that there are no cards in Sal's card pool that feature Adrenaline apart from this one. In a vaccuum, you're getting at best 3 points of a worse-than-temporary-power buff

Upgrades: Whatever
Viciousness

Rating: 1/5
Usage: Niche

Commentary: Probably the card with which you can gain the most amount of Counter possible. Then again, in most scenarious, counter is terrible.

Upgrades: No preference
Waylay

Rating: 4-/5
Usage: Generic

Commentary: Defense this card provides is awesome. However, it has a downside of filling your deck with piercing blades, which means you won't draw good cards. Generally however, the card is good, but try not spamming it or half of your draws will consist of wortheless blades.

Upgrades: Don't clutter your deck with even more blades, especially since getting 12 defense off of one action is more than anyone could wish for.
--- ATTACK CARDS ---
Backstab

Rating: 1+/5
Usage: Niche

Commentary: Generally this is weak, since to improvise this for the majority of the time you need it to be in your draw pile and draw a card that improvises first, so you're counting on draw RNG that's highly unreliable. Using it with "Deception" is the only good option due to the damage but at the same time not worth considering the previous point, since you could have done way more damage already with other attack cards instead rather than waiting for this card's damage to ramp up. Six to ten damage by default improvisation methods is alike "Wild Lunge" which can deal comparable damage with a better effect without needing to get Improvised

Upgrades: If anything, dealing heavy damage and expending this card afterwards is the best option.
Bedlam

Rating: 1+/5
Usage: Generic

Commentary: Less than average value attack card. Attacking at random can also be detrimental against some opponents, not to mention annoying.

Upgrades: No preference
Brazen Attack

Rating: 2-/5
Usage: Generic

Commentary: Piercing and Impair fully justify the cost this card has, although I don't pick it often due to Piercing keyword being unnecessary to get through combat at all and considering Impair could be applied through cheaper means

Upgrades: Boosted, just because of the unchanging cost
Burst

Rating: 3/5
Usage: Bleed Generic

Commentary: Simply a heavy damage card for bleed decks, alright as a one-of. You won't find better source of big bleed numbers anywhere else from a single card, especially with enough Wound / Power

Upgrades: Tall
Combination

Rating: 3+/5
Usage: Combo Generic

Commentary: Decent card for what it does at one cost. A priority pick for Combo decks.

Upgrades: Boosted, one more combo doesn't make a difference
Cross

Rating: 2/5
Usage: Combo Generic

Commentary: An alternative to "Burst", but for Combo decks instead. In my opinion it's slightly worse, because it can deal the same damage as "Combination", while providing you with a bit more Combo, which doesn't make a difference. So I wouldn't recommend this usually. However, immediately getting high Combo numbers can be beneficial at times.

Upgrades: No preference. Rooted is more consistent though.
Duster

Rating: 2+/5
Usage: Generic

Commentary: This card's primary function is discard utility. Held back only by its weak damage numbers, but attack damage on this card is supplementary anyway

Upgrades: It depends. If you have several cards that benefit from discarding, and/or you see that you will have to fight nasty enemies that give you bad status cards, consider taking Enhanced duster. Otherwise, take boosted
Freighter

Rating: 1+/5
Usage: Niche

Commentary: On Prestige 7, cluttering your hand with high-cost cards is horrible, and the bonus damage this card will give is absolutely not worth that downside. This card finds better use in dailies rather than campaign/brawl.

Upgrades: Replenish
Gash

Rating: 5/5
Usage: Bleed Must-Have

Commentary: This is the best card for bleed decks, for many reasons. It's of common rarity, so appears often, costs one action but provides both Impair and Wound, which are the best debuffs in the game. Moreover, this card buffs its damage ITSELF constantly because of the Wound it applies, and it's condition for doing so is very, very easy to meet. You want to upgrade "Gash" fast, literally ASAP. This card is so good you want two of these in your bleed deck, and you want to SPAM them in combat.

Upgrades: Always take "Enhanced Gash". The more Wound your enemies have the better, it enhances the damage of other attack cards in your deck. Having two of these in your deck escalates your damage dramatically.
Ghost Strike

Rating: 2+/5
Usage: Generic

Commentary: You don't pick this card for the damage, but rather its utility. Alright fit in most decks to help out with card draw, and sometimes to be used as a discard target

Upgrades: No preference. If you can replenish your hand easily and have cheap damage cards, take Boosted, otherwise Visionary.
Lacerate

Rating: 3+/5
Usage: Bleed Generic

Commentary: Great Bleed card. Even though, "Gouge" does the same with one point of bleed difference, post-upgrade options are good enough to consider taking this card as a one-of.

Upgrades: It is preferrable to take Savage since Bleed is easily applied
Leech

Rating: 1+/5
Usage: Bleed Generic

Commentary: In theory you can heal up to full with this, but realistically - only around 5-10 health, and only once, since this card always expends even post upgrade. "Hemophage" is frankly speaking more persistent and better for healing yourself in Bleed decks.

Upgrades: Boosted for more healing
Reckless Swing

Rating: 2+/5
Usage: Generic

Commentary: This is a weaker "Bedlam" version, albeit without the random component, which makes it somewhat of a better option

Upgrades: Focused.
Reversal

Rating: 1-/5
Usage: Combo Generic

Commentary: Your entire hard-earned Combo points can be spent on better means than this, as Counter itself is a poor effect

Upgrades: No preference.
Sneak Attack

Rating: 2/5
Usage: Combo Generic

Commentary: It's a meh finisher in my opinion. You can deal the same amount of damage at one cost with other cards without losing Combo points, e.g. "Reckless Swing". If you don't have Combo points to spend, this card simply clutters your hand because damage it gives for 2 actions isn't worth it. "Wild Lunge" also has better effect.

Upgrades: No preference
Stomp

Rating: 2-/5
Usage: Combo Generic

Commentary: This is a slightly weaker version of "Sneak Attack".

Upgrades: No preference
Tackle

Rating: 3/5
Usage: Generic

Commentary: Best defense is offense as they say am I right? Well, unfortunately that's not the deal with this card right here. Being "Brazen Attack"s little brother, albeit a non-piercing and slightly less damaging one at one cost, the defense numbers this card gets you are low, and it is primarily taken for the Impair part.

However, I have to say that overall this card is quite efficient for what it does at one action, which constitutes this as a solid early pick for defensive purposes. And frankly speaking this card is cute for that. Primarily, Combo decks can utilise this card, as they lack early defense options. Feel free to take one and at most it is viable running two of these for nice cumulative defense numbers after the upgrade

Upgrades: Boosted. The damage increase isn't that important or significant, and could be achieved with Power instead. Moreover, having two copies of this card in your deck upgraded for Boosted variant can substitute lack of defensive measures early on
Wild Lunge

Rating: 3-/5
Usage: Generic

Commentary: Good early pick. Wound is the best debuff in the game, and you can use this card in conjunction with other Wound-applying cards to keep up the damage going. Unfortunately targets at random, which can be detrimential against some enemies. Still, solid damage and good for stacking Would alongside other cards, but by itself does little.

Upgrades: I usually go for Tall. One thing to note about attacking twice with this, is that you only apply Wound once if you attack the same enemy.
Barnacle

Rating: 4/5
Usage: Bleed Generic

Commentary: This is the 99-defense card for Bleed decks. Can serve as your only defense card while being an attack card itself, and also doesn't trigger counter of opponents, since has no damage numbers. Cast it at the end of your turn once you've applied all the Bleed you could. Unfortunately this card is held back by its initial cost and the fact that by itself it doesn't achieve anything, it needs support of other Bleed-applying cards such as "Lacerate" or "Burst" for instance, so you want this upgraded ASAP. Great idea to have two of these in your deck.

Upgrades: Always Pale.
Blade Fury

Rating: 4+/5
Usage: Combo Generic

Commentary: Great finisher. Attacking several times is a powerful effect. Synergises with Wound/Power insanely well, pretty worth a card slot in your deck as your main heavy damage Finisher card.

Upgrades: I prefer Boosted almost always.
Blademouth Beating

Rating: 1/5
Usage: Bleed Niche

Commentary: Meh card. Requires you to be running Improvisation cards in a Bleed-focused deck, but the effect this gives isn't worth the effort. You can get same or higher Bleed numbers with other things. If you simply draw this, it's the worst-case scenario, as its basically a weaker basic "Elbow Strike" by itself.

Upgrades: No preference.
Carve

Rating: 5/5
Usage: Combo Must-Have

Commentary: The BEST Combo Finisher in the entire Sal's card pool. It's "Gash" card's alternative for Combo decks, without the Impair component. This card amplifies itself and other cards' damage in your deck for just one cost. Insanely good Finisher for Combo, consider having two of these in your deck even. Upgrade ASAP. The one thing that holds this card back is it's greediness for Combo points, which makes it tough to keep Combo high.

Upgrades: Both upgrades are fine. "Tall Carve" if you can easily acquire large amount of Combo points and need to dump them into something consistently. Combo decks love when you stack Wound / Power. Otherwise, two Wound points are still really good, so Boosted is your go-to.
Crusher

Rating: 1+/5
Usage: Niche

Commentary: It's very easy to make this cost 0 in decks featuring several improvisation effects, but unfortunately it's just a high-damage card and nothing else.

Upgrades: Rooted, because easy to make it cost-free
Crushing Blow

Rating: 1+/5
Usage: Generic

Commentary: The effect is fantastic but there's a card that provides the same effect at just 1-cost. You don't want to pick this for the damage in the first place.

Upgrades: Boosted
Dagger Throw

Rating: 0/5
Usage: Generic

Commentary: Meh card. Only might be worth it to deal with Fleads and/or if you stack Wound. But you don't need Piercing damage to deal with weaker enemies because in a good deck Sal plows through opponent's defenses.

Upgrades: No preference
Drunken Master

Rating: 0/5
Usage: Don't

Commentary: Not worth it at all. Clutters your deck with useless cards and the damage it gives can be achieved through way easier means.

Upgrades: Don't play this card.
Echo Strike

Rating: 1+/5
Usage: Combo Generic

Commentary: There are better cards to get combo with. This card's damage numbers are weak, but you shouldn't be taking it for the damage in the first place.

Upgrades: Rival's
Focused Assault

Rating: 0/5
Usage: Ultra-Niche

Commentary: See "Cynotrainer"

Upgrades: Whatever.
Haymaker

Rating: 2/5
Usage: Combo Generic

Commentary: I used to think this card was good, but on Prestige 7 it's way too slow. It's tough to keep high Combo numbers, and in a regular session, it simply takes too long for this to ramp up in damage significantly. Moreover, you want to cast it once-twice per fight since you need to preserve Combo points for this until it actually ramps up, which get halved as soon as you take even 1 point of damage, and thus the card clutters your hand most of the time.

Despite all of the above, provided you stack enough Combo this card can absolutely oneshot even the toughest of opponents in the game from full health (see screenshot below). In the end however, not worth picking this most of the time unfortunately

Upgrades: Always Boosted, so it can ramp up way quicker

Hemorrhage

Rating: 2/5
Usage: Bleed Generic

Commentary: This is only decent alongside big bleed numbers. This card doesn't deal damage by itself, so avoids various counters

Upgrades: Savage
Kra'deshi Barbstorm

Rating: 3/5
Usage: Bleed Niche

Commentary: One of the cards you generally want to have in your Bleed decks, however it only truly shines with other cards providing discard effects. But if you do have several means of discard in your deck this card is absolutely worth taking. You can even try building around it, to get a lot of AoE value.

Upgrades: Boosted. You get way more value off of discarding this as much as you can.
Over Extension

Rating: 0/5
Usage: Don't

Commentary: See "Drunken Master". Except this is even worse because you won't be able even to play it upon drawing one of those useless cards this creates.

Upgrades: Don't play this card.
Psionic Feedback

Rating: 0/5
Usage: Niche

Commentary: If you have any means of discard, this is very easy to make cost 0. If you don't, it's a terrible cost-to-damage ratio, and the damage this gives is weak.

Upgrades: Whoever thought to make an already easy to make cost-0 card have a PALE upgrade has a good sense of humor
Target Practise
Rating: 0/5
Usage: Generic

Commentary: This is a basic "Stab" with a worse "Attack twice" effect

Upgrades: Whatever, it is still not much better than a "Stab" in either case. Even attacking three times with this is not worth it, not to mention at random.
Silent Steel

Rating: 3-/5
Usage: Generic

Commentary: Essentially, taking this card costs you nothing, and you can have several of these in your deck at once. It does not clutter your deck, since you draw this alongside your initial hand immediately and it expends upon being cast. But it also has a free cost, so you want (and should) cast it on your first turn. I would take this card if i have the opportunity every time (although only up to 3-5 cards, if I do not have anything else that draws me cards on my first turn), but it does not take priority over greater options naturally.

Upgrades: Having Impair at 0 cost on your first turn, especially several, is really good and is the main reason you want this card - to lower the initial enemies' burst for a few turns. Especially since this card does not Pierce, its damage is relatively weak anyway, and you need to get rid of it on your first turn.
Slaughter
Rating: 2+/5
Usage: Generic

Commentary: This card even at its worst gives great value, but first it is costly and second it is very easy to overdraw with it. You don't necessarily want this card in a thin deck. Despite this by itself it has great value in being your primary draw source, but needs upgrading to make it cheaper.

This card has a niche function as a primary Power source, as it has an insane synergy with "Feint" that removes debuffs an item card called Robodex. I do believe even cards that you overdraw and immediately discard count towards it. So while having Robodex in hand, you use this card to draw as much as you can, remove the temporary power debuff and boom, you now have permanent power.

Upgrades: Pale always. Your hand size is limited, and this card can easily overdraw your hand even if buffed by just 1 point of damage.

Slice

Rating: 2-/5
Usage: Bleed Generic

Commentary: This card won't give you much Bleed on average sadly. And its damage numbers are weak too. It is way easier to get a lot of bleed points going with "Burst" or "Hemorrhage" instead

Upgrades: No preference
Switch Blade

Rating: 2+/5
Usage: Combo Niche Win Condition

Commentary: This card can have an infinite damage combo with two copies of "Inside Fighting". Outside of that, it needs solid support of Combo generating cards. Trying to play it by itself without any of those means it will clutter your deck the majority of the time, not to mention it is incredibly greedy for Combo points, which are tough to keep high in numbers.

Upgrades: Barbed. Wound buffs this card's damage as well as others, and generally more useful to have rather than 2 more damage points on this card.
Trained Strike

Rating: 1/5
Usage: Niche

Commentary: Takes too long to ramp the damage up, even post-upgrade. By itself obviously does nothing.

Upgrades: Boosted to ramp this up a little bit faster.
Uppercut

Rating: 4+/5
Usage: Generic

Commentary: Powerhouse card. Great in any deck but primarily in a Combo-focused one, and you want this upgraded ASAP, since one power for two actions is a bit weak (you can get one power through upgraded "Fight Dirty" for example). Ramps itself up, improves other attack cards, fits everywhere.

Upgrades: While cheap version of this is fine by itself, I prefer the Boosted upgrade, because then it justifies costing 2 actions. Moreover, if this card gets discounted while giving you two power, it becomes invaluable.
Wind up

Rating: 2-/5
Usage: Niche

Commentary: A slightly better version of "Trained Strike". This card gets more damage per trigger instance and it's easier to obtain discard for it too. You can discard this repeatedly on the same turn and it only gets better. Problem: in the best possible case scenario, you're still very slowly ramping up the damage that could be achieved with other cards instead and faster, and since you want to wait to cast this card, it just clutters your hand most of the time or at the very best you can get around 10-20 damage on it before finally using it. There is a possible infinite combo with this card and several "Rummage" cards in a thin deck.

Upgrades: No preference really. If you have a lot of discard and can target this card repeatedly, take Twisted, otherwise Boosted is fine.
Discharge

Rating: 2+/5
Usage: Niche

Commentary: Same as with "Wind Up", by itself this card is weak. However, combine it with "Deception", and this pretty much one-shots everything after a couple of turns and can serve as your deck's main win condition. The maximum amount of damage instances you can get with this is limited by the number of maximum cards in your hand (which is 10, including this card too) but even at default 5 cards, as long as this card's damage is amplified, it has incredible damage potential, especially when used against a single enemy.

Upgrades: Mirrored for one more damage instance.
Hilt Bash

Rating: 3/5
Usage: Combo Generic

Commentary: Awesome and simple Combo accumulation card that you want to cast at the start of your turn or upon drawing a good amount of cards. Competes easily with "Cross" card's effect, especially considering this costs one action. Unfortunately lacks in damage, but makes up for it by providing a solid Combo gaining effect

Upgrades: You don't take this card for the damage, so Rival's
Kidney Shot

Rating: 5/5
Usage: Generic

Commentary: "Crushing Blow"s little brother, and frankly speaking a better one. This is a card you want at least as a one-of in your deck, just because of the effect alone. And it's a worth having one at that: works everytime, helps out in a lot of circumstances, e.g. you're about to receive a lot of damage or your opponent is casting something instead of attacking, which you can easily interrupt with this, and it even helps you out setting up if you want to spend your initial turns casting Ability cards and wish to avoid taking heavy damage early. You can use several of these in your deck for certain.

Upgrades: You don't take this card for the damage, make it cost 0.
Wretched Strike

Rating: 2/5
Usage: Niche

Commentary: On an average session this card can get some hefty damage but that's about it, nothing special, you won't get much out of it. By itself it is weak, needs support from other cards/grafts, specifically "Slaughter", which synergises with this. There is a niche application of this card in that it creates an infinte combo with a couple of "Rummage" cards in a very thin deck, so thin that those should draw each other and discard irrelevant cards, making "Wretched Strike" gain infinite damage

Upgrades: Whatever
----- FLOURISH CARDS -----
--- COMBAT ---
This is the default Flourish for Sal. It doesn't accomplish much, but better than nothing at the start
This is better than "Hail of Blades", primarily because the Yotes not only deal AoE damage, but also apply a few Wound points to your enemies.
Primary usage of this comes from running a Bleed deck with cards that benefit from high Bleed numbers. If your opponent is alone, all 20 Bleed points will be applied to them.
Primary usage of this comes from running a Combo deck with cards that benefit from high Combo amounts. "Shoulder Roll", a primary defensive Combo card, is also considered a Finisher, so this Flourish can be viewed as an urgent defense card, at times when you desperately need defense. Alternatively, can give you lots of damage with "Haymaker" immediately
In my opinion, the best and most universal of Sal's Combat Flourishes, the one that you should be using most of the time on Prestige 7 difficulty. It has a strong effect and great damage, and you want to use it to buy yourself one more turn or to interrupt an important enemy cast / attack that you would like to avoid, while additionally Impairing them on top of that. An invaluable instant disruptive effect that helps out tremendously in times of need.
--- NEGOTIATION ---
Weakest Floursih in Sal's arsenal, Influence can be gained faster and easier with common cards, really not worth using this at all
Mainly used to replenish your hand at times when you still have actions available, or if you drew badly. Primarily this often happens in "Good Impression" decks and using this Flourish for that strategy is justified to help dish out more damage or to finish off your opponent in one turn. Once you start rolling with your cheap Diplomacy deck, this Flourish becomes your primary one that you'll use. Outside of that, seldom used, but is still a very useful and efficient niche nonetheless
This is a good Flourish if you need to deal heavy damage. You want to cast this at the start of your turn for maximum effect, so requires a bit of planning. Moreover, you need to be careful with this, since despite being a Floursih, it counts as a Hostility card, so Escalation will trigger off of it.
The second best Negotiation Flourish for Sal, it helps out during times when you cannot afford taking damage to your main argument and desperately need to get defense / resolve back, especially if you're being targeted by arguments rather than intents. You can also use this Flourish as means of simply regaining resolve instead of healing at the bar, if you find yourself not using any others for a good while
This is the best and most commonly used Negotiation Flourish for Sal on Prestige 7, which is ironic because it's also the default Flourish. Despite this, the effect "Trounce" provides is instant and insanely good: as you get more experienced with what arguments your enemies place at which turns, you can strategically use this Flourish to get rid of them preemptively and permanently meaning you won't even have to deal with them in the first place, making some enemies a total joke. This can also buy you a turn if you do not want or cannot afford taking damage from intents but are convinced that you will win on the next one. Absolutely the greatest and the most universal Flourish of all Negotiation ones for Sal.
Example runs
Naturally, this guide wouldn't be a guide if I didn't present proof that with the right card picks, skills and grafts, your deck will actually work and lead you to victory on the highest Prestige difficulty in Griftlands. I mainly play Brawls, which feature more diverse enemies, but same strategies absolutely can be utilised in Campaign mode as well

Run one - Combo and Hostility
-
-
-
-
-

Run two - Bleed and Diplomacy
-
-
-
-
-

Run three - No attack cards (!) and Diplomacy
-
-
-
-
-

Run four - Bleed and Hostility
-
-
-
-
-

Run five - Combo / Power and Hostility
-
-
-
-


Improvisation-focused Combat deck
-

Closing Words
Thank you for reading this guide! It's been a great pleasure writing it and hopefully you've found it quite detailed and useful to apply for your own gameplay sessions. If you liked the guide and/or found it helpful, feel free and take a short time to leave a rating and/or a comment if you'd like. And remember, most important of all, have fun with the game!

[Update] Hey, did you know I have guides for the other two Grifters as well? Check them out here:
https://steamproxy.com/sharedfiles/filedetails/?id=2965000280
https://steamproxy.com/sharedfiles/filedetails/?id=3138869225
6 Comments
Devosh 16 Jun @ 3:40pm 
I don't see anything on the Negotiation - Manipulate card: Deflection (Apply 3 Composure). The upgrade is either Boosted Deflection (Apply 4 Composure) or Deflection of Clarity (Restore 5 resolve and apply 5 Composure. Destroy).
survive but not unaltered 2 Jan @ 8:06am 
Just The Facts works in Doubt decks to flush excess copies of White Lie in your hand before reloading it with draw cards.

Scorched Earth can have a similar effect, eating copies of White Lie in discard to close matches out in the same manner as Rapid Fire.

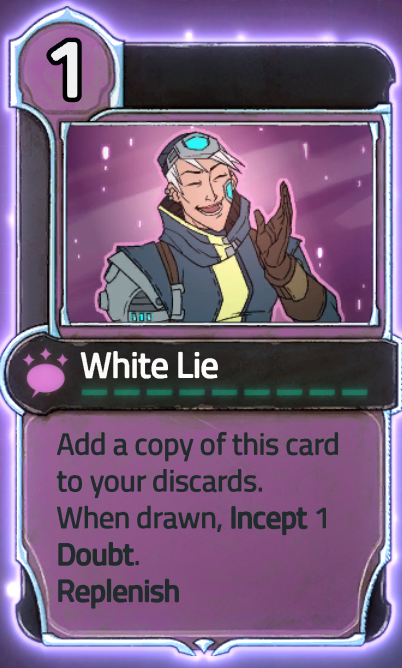
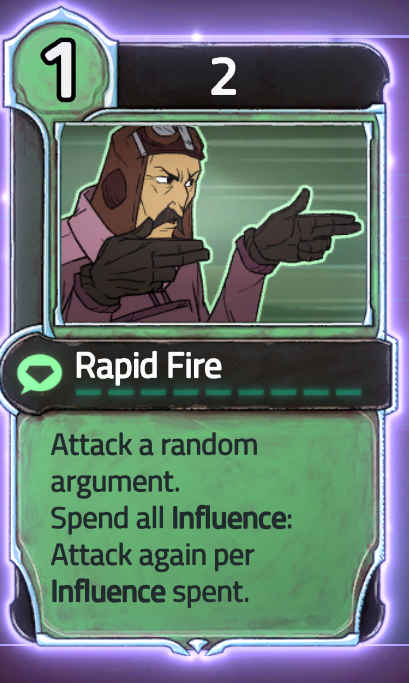
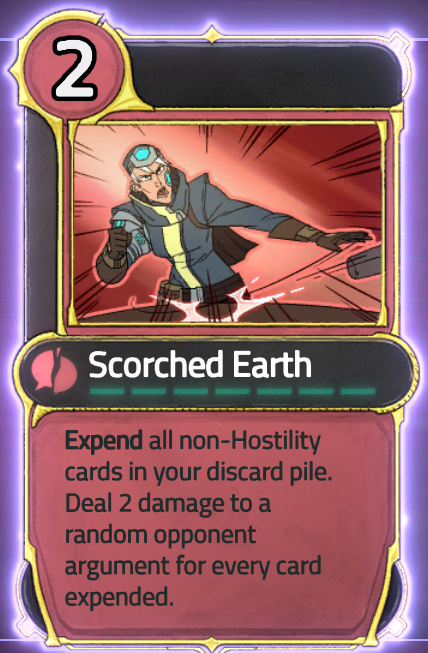
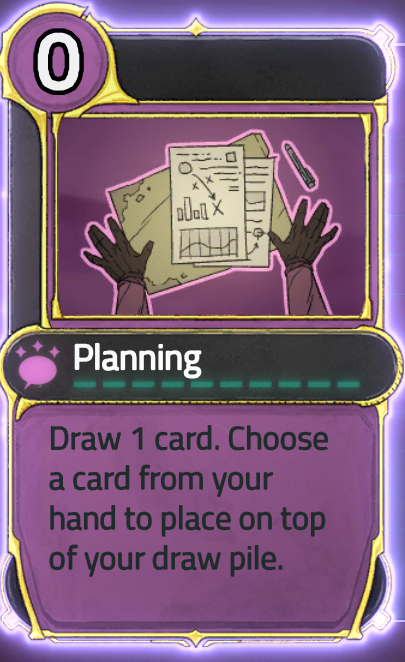
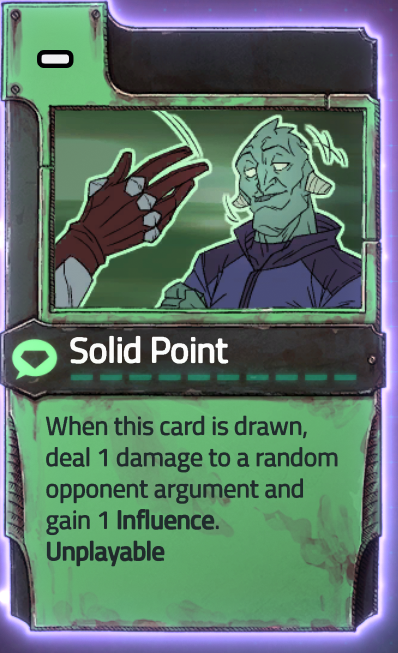
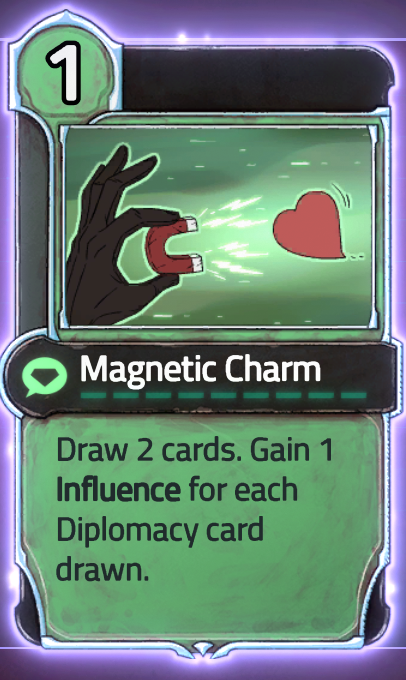
Planning works in Diplomacy decks to double-dip Solid Point. It also helps get value from Magnetic Charm.

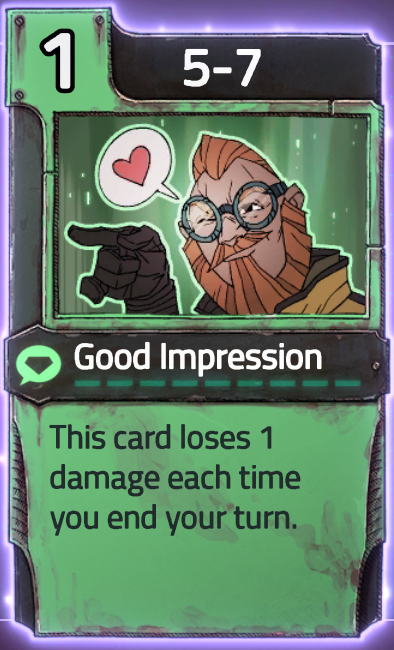
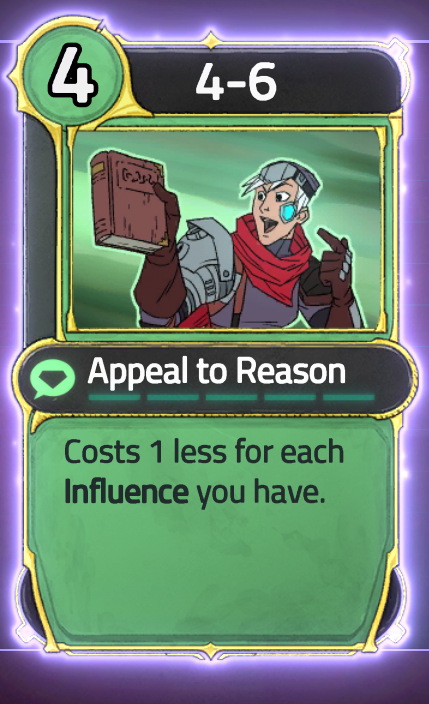
Appeal to Reason works well with Good Impression decks.

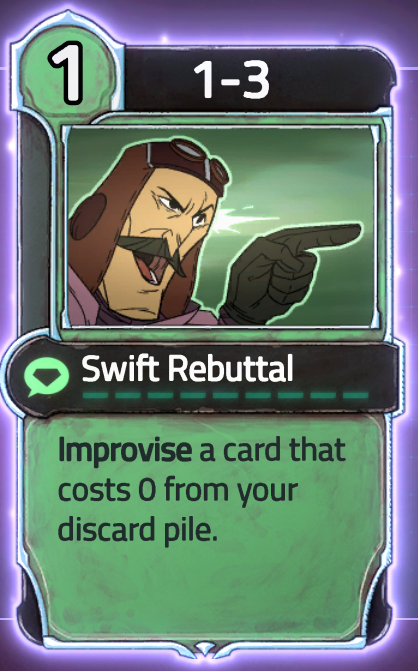
Likewise, Swift Rebuttal can also recycle Appeal to Reason once you get the latter's cost to zero.

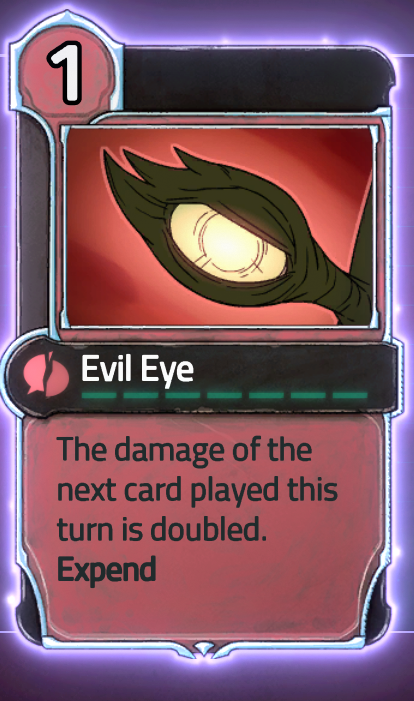
Evil Eye is another soft Escalation counter.
good fighter 7 Jun, 2024 @ 9:45am 
Nice guide thank you.
SandroDark 17 Dec, 2023 @ 3:35am 
Looking at ratings, and thinking about devs make too much trash cards, and not scaling enough for play... And Sal in my opinion is the hardest to play, which makes new players a hard time... And Smith is the easiest, ironically.
Gallowsborn 17 Apr, 2023 @ 9:59pm 
This is so awesome! Are you planning on doing the other two?
Hyuyuyuyu 15 Apr, 2023 @ 3:47am 
Doubt + duplicity into exploit weakness = 6 doubt turn one which is usually what you'd get on a basic hostility/influence deck first turn.

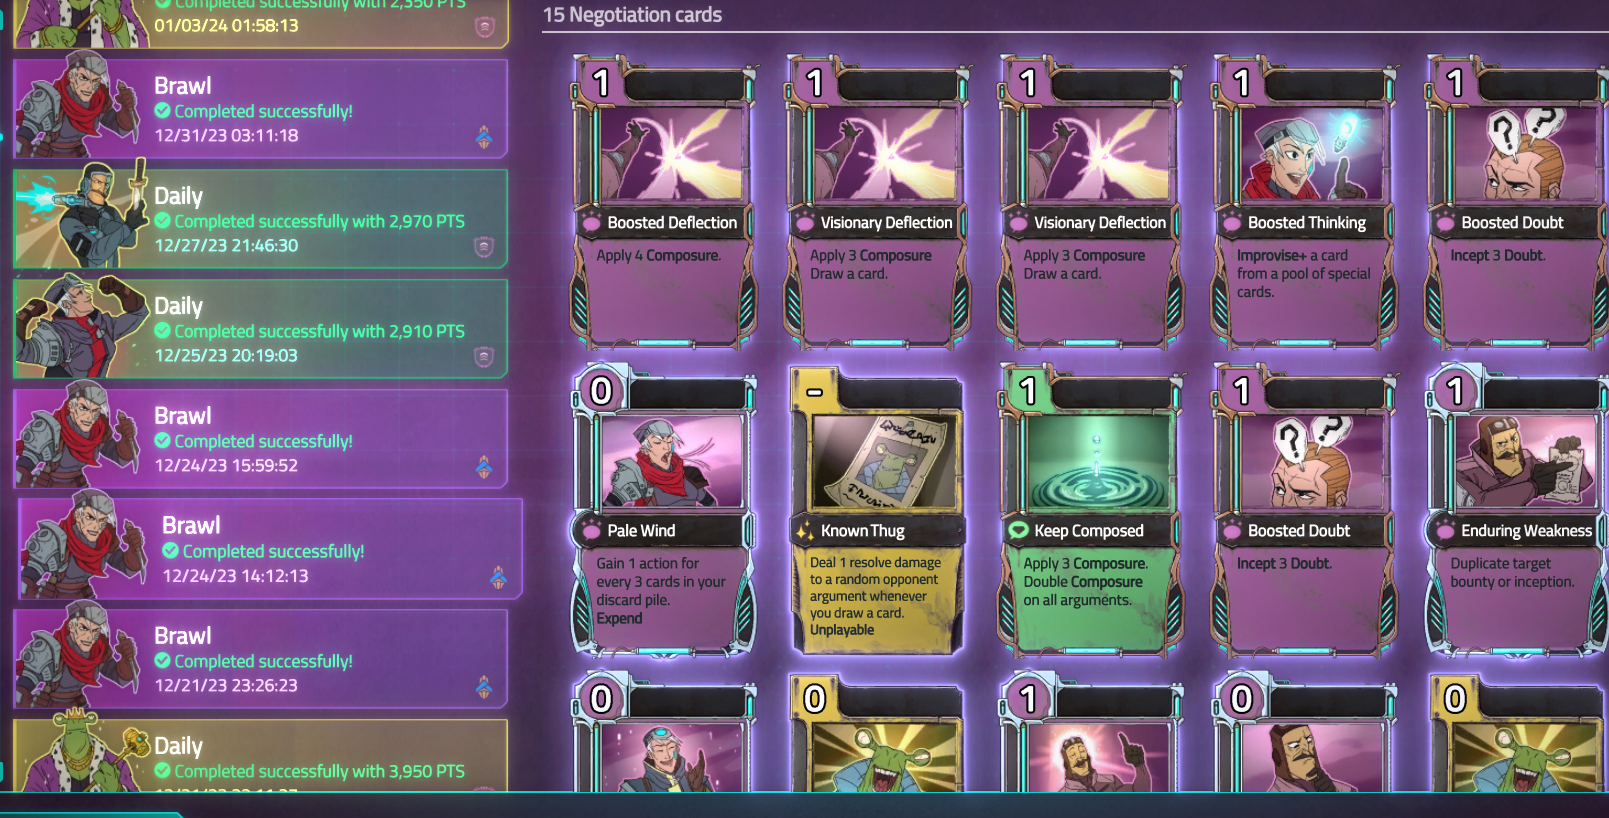
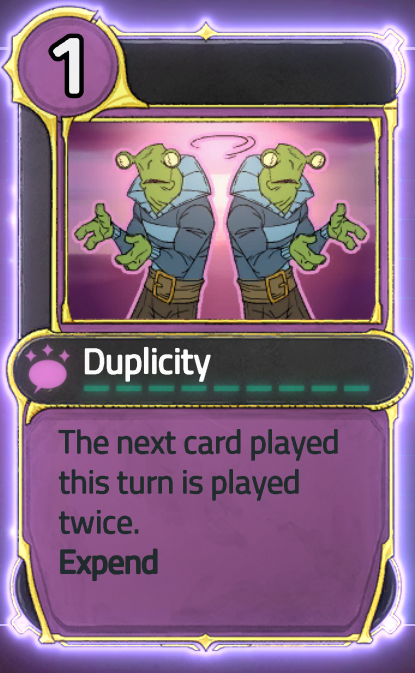
After that do duplicity with the doubt card then double it with weakness, a doubt card stacks onto one of the doubt argument so your damage is exponential. I ran a 5 cards deck and could apply 16 doubts in 2 turns which was basically when I won the negotiation.