Crowns and Pawns: Kingdom of Deceit

Crowns and Pawns: Kingdom of Deceit

35 ratings
Section-by-Section Video+Written Walkthrough for Crowns and Pawns
By Arion
Just so you don't need to through a 4-hour-long video to find the part you're stuck at. If you just want hints, not the solutions/answers: https://steamproxy.com/sharedfiles/filedetails/?id=2807362023

Doing a written walkthrough+achievements as well but that'll take a bit more time to compile so please bear with me!

3
   
Award
Favorite
Favorited
Unfavorite
Part 1 - The Art Exhibition
The video mainly answers these questions:
How to get the painting to stay in its easel?
How can you get the musician (sorry man!) to stop playing?
How can you get the money you need to buy lemonade? No, you don't steal it from the trumpet case.


  1. Use the computer to print out the PINK flier. Grab the flier from the printer.
  2. Dress-up, grab your phone + whatever item your chosen profession gives you, and leave the house to meet Dana.
  3. At the square, talk to Dana. She will tell you that everything needs to be perfect. At that moment, one of the paintings will fall. Putting it back won't work since the wind will keep blowing it off the easel.
  4. Talk to Dana again and she'll mention something about a chewing gum. Ask for the gum.
  5. Right click on the gum to chew one. Note that Milda mentioned that she couldn't feel her tongue - you can use this info later. Use the chewed up gum to stick the painting to the easel.
  6. At this time, Alfred will arrive. He will ask you - Blondie - to 1. Get something refreshing for him to drink, and 2. Stop that "racket" (the music) in the background.
    If you want to get the Meanie achievement, you'll want choose the dialogue option "My name is Milda and I'm not your servant".
  7. To get the drink, you'll want to go to the lemonade stand. Talk to the girl scout and she will tell you that a glass of lemonade costs a dollar.
  8. Since you're dirt poor and you can't just steal money from the musician's trumpet case, go back to Dana to ask for some coins. Use those coins to buy a glass of lemonade.
  9. Give that glass of lemonade to Alfred.
  10. Now, the music. You'll want to talk to the girl scout again. This time ask about the lemons (about how sour they are) and at one point (About those lemons...), ask to get pure lemon juice. She ask why and you just need to say that you like the sour taste very much. She will then challenge you to drink a glass of the super sour lemon juice without making a face.
  11. Before drinking it, chew that gum again. Before the effects of the gum wears off, drink the glass of pure lemon juice. The girl scout will then agree to sell you pure lemon juice but it'll cost the same as a glass of lemonade.
  12. Go back to Dana to ask for more coins. Use the coins to buy a glass of pure lemon juice.
  13. Go to the musician and Inspect his trumpet case. You'll notice the lack of coins.
  14. Talk to the musician, ask him to stop playing for just 20 minutes, which he'll refuse to do, and subsequently ask about the lack of coins. You'll know that he will immediately collect any coins if any are thrown into his case.
  15. Try giving the musician the glass of pure lemon juice (you'll lie that it's lemonade). He'll tell you that lemons and trumpet playing don't mix.
  16. With all that info at hand, go back to Dana and ask for more coins before going back to the musician.
  17. You'll need to be quick with this one - throw the coins into the case, wait for the animation where the musician will grab the coins from his case and inspect them with glee. Quickly use the lemon juice in your inventory on the trumpet he left on the bench. If you can't do it, feel free to repeat steps 16 and try again.
  18. Once done, go back to Alfred and he'll ask for a flier. Give him the pink flier (because he's apparently a fan of the colour pink).
  19. He will then ask you to become the mascot of the art exhibition and you'll need to dress the part. Go back home and wear the exact same outfit as the person in the flier is wearing. If you forgot, you can always print out another flier to check.
  20. Go back to Alfred and you're done!
    If you want the achievement "Say Sorry", make sure to go back to the musician and apologize to him.
  21. Back at your place, follow the instructions given to prepare for your trip. 1. Talk to your mum; 2. Text Joris and lastly, make a list of stuff to bring. Make sure to include all essential items (the travel document and toiletries), plus one of each (sandal/boots/sneakers, jeans/shorts, and headphones/earphones)
Part 2 - Grandpa's House + Joris' Place
The video mainly answers these questions:
How to find the bolt at grandpa's house?
How to fill in blanks in the translated Polish note?


  1. Pick up the Keys, the Library Card, and the Blank Paper from the mailbox.
  2. Enter the house and try flipping the switch. Milda will mention something about having no electricity.
  3. Exit the house and try opening the Fuse Box. It's locked. Use the Keys in your inventory to open it.
  4. To solve the puzzle, simply follow the instructions. I started with a Negative, then a Positive, a Neutral, another Negative, Neutral, and lastly, a Positive.
  5. Go into the house again. An intruder in the other room will break the window in his haste to escape.
  6. Before you go out to investigate, go to the Cabinet to grab the Kerosene and the Batteries.
    Everything you need to grab.
  7. Check the Oven to get a Lighter and grab the Shovel propped against the wall.
  8. Grab the two Magnet stuck to the metal Sink.
  9. Grab the Blank Pages on the table and on top of the shelf.
  10. You can Inspect the Crack on the floor as well, but you don't have the items to do anything yet. You can also try the door or grab the paper stuck underneath it, but Milda will say that it's blocked.
  11. Go outside and enter the house again through the window.
  12. Pick up the Walkie Talkie and talk with the person... or not.
    To get the Not Talking to Strangers achievement, you'll want to NOT pick up the walkie talkie until you leave the place. Note that the guy will still call you on your phone and that's alright, you'll still get your achievement.
  13. Once done, go to the Toolbox and grab everything in it - two parts of a pair of Shears. Check the Drawers of the Wardrobe as well to get a piece of String and an Invisible Ink. Inspect the Invisible Ink to find out how it works.
  14. Grab the Metal Detector on the floor as well. Inspect it and you'll find out that it's "Not Working". Put those Batteries in and it should work now.
  15. Move the chair to grab the Blank Paper stuck underneath the door. Check the Torn Mattress to find another Blank Paper. You should have 5 Blank Papers by now.
  16. To see the hidden message on the papers, you'll need a light source and that Lighter just won't do. Pour some Kerosene into the nailed Oil Lamp and light it using the Lighter. Put the Blank Papers on top of it.
  17. Drag and drop the pieces of paper one by one onto the flames. Remove the papers that don't reveal anything and you should get the secret letter that Grandpa Kovas left you. He mentions something about the "hollow of the apple tree".
  18. For future "puzzle", you might also want to Inspect the old Sweatshirt.
  19. Head back into the Kitchen. Connect the String with the Magnet (the one with the handle) so make a makeshift "fishing rod". Use this Magnet on a String on the Crack to get another Nut.
  20. Go to the Garden and use the Metal Detector on it. Milda should mark the spot where it beeped. Use the Shovel on the Marked Spot to get a Bolt.
  21. Fit the Bolt with the correct Nut and then use the Nut-Bolt combo on the Broken Shears. You'll get a functional Shears. Use it on the Sosnowsky's Hogweed to access the tree hollow. Grab the Apple as well while you're at it.
  22. You should get a Wooden Puzzle and an Old Letter. Inspect the Old Letter and then the Wooden Puzzle.
  23. Head back to the Oil Lamp and check your grandpa's letter again. Take note of the highlighted (extra bold) words and its order as you read it while ignoring any repeats. This will reveal that the solution to the puzzle is Horsemen > Crown > Tombstone > Violin > King
  24. Collect and then Inspect the Old Note. Talk to the mysterious guy on the walkie talkie but this time on the phone, and head over to Joris' place.
  25. When it comes to the wine, pick any choice. It doesn't matter. You'll still end up with a bottle of red wine on the table.
  26. Show Joris the Note in Polish. You'll then be asked to fill in the blanks as follows: keys > crown > hidden > fire > gods > manuscript
  27. Show him everything of import the letter left by your grandpa and he'll say there's an easier way to view it if you can make it see-through. Go to the cabinet and grab the Bottle of Olive Oil. Use it on the letter and then show Joris the letter again. Showing Joris The Old Letter, on the other hand, will have you call your mum.
  28. Ask Joris to find a history buff to help give context to the translated Polish text.
  29. End the day texting with Dana.
Part 3 - The Vilnius Library
This video mainly answers these questions:
How to outwit the librarian and get her password and ID?
How to log into Grandpa Kovas' library account?
Which 3 churches you need to add to the list on your phone?

Photographer playthrough

Programmer playthrough - note that it's not a full playthrough, just the parts that are different from my first playthrough.

Psychologist's Assistant playthrough - note that it's not a full playthrough, just the parts that are different from my first playthrough.

  1. When Joris asks if you want a bagel, you can pick any of the choices. Grab the red wine off the table. Then, dress up and go outside.
    If you want the Morning Snack achievement, you'll want to ask for a bagel.
  2. Pick up the Promotional Flier on the table and Inspect it. You’ll know that it’s a flier for a lecture about Jewish heritage in Lithuania and that you should talk to the Bagel Shop Lady to find out more. You don’t yet need to do this so you can skip talking to the lady.
  3. Talk to Joris instead and grab that bagel (if you asked for one). Head over to the library with Joris.
  4. Go straight into the Library and pick up the Historical Flag on the table.
  5. Talk to the professor and show him the translated Polish Note. Click on all the Important Info parts.
  6. Now, for some data gathering, talk to the Librarian and ask for all the books in the dialogue list, except for the Necronomicon. Click on all the Important Info parts to add new Notes to your phone.
  7. Next, you’ll want to figure out what book/s grandpa Kovas has borrowed from the library. This next part is trickier since the solution varies depending on your profession.
  8. Show Grandpa Kovas' library card to the librarian and ask if she could check what books he might have borrowed. She will refuse to do so since you are not the owner of the library card and direct you to the laptop on the table.
  9. Next, you’ll want to Inspect Grandpa Kovas’ library card in your inventory. Make sure to click on the Library ID part to get a new Note added to your phone.
  10. Then, Inspect the Librarian’s Staff ID that the cat is holding on to. You will now know the librarian’s name.
  11. In the Notes section on your phone, link both pieces of info together and you will now have the librarian’s ID.
  12. Now, for the password. Ask the librarian to get that Necronomicon book for you. FYI, you might want to click on the book... for fun :)


    Photographer
  13. While she’s away, and you’ll need to be fast for this one, click on the mirror on the table to rotate it. You’ll want to rotate it until you can see the computer screen. Inspect the mirror everytime you make a turn to check and see if you are at the right spot.
  14. If you can’t get it right before the librarian comes back, quick-exit the library by double clicking on the exit, and double click again to quickly re-enter the library. Repeat the steps until you get it right. This can save you some time.
  15. You’ll also want to be fast for this part. The mirror isn’t enough for you to see the password since it’s too small. So what you need to do is to use that camera of yours on the mirror. Make sure to do it right after the librarian returns with the book and before she logs into her account on the PC.
  16. For this one, if you missed the moment, ask the librarian to grab you another book - any book this time - and wait for her to return. Repeat the above steps to get the password.
  17. Make sure to combine the Notes!


    Programmer
  18. While she's away, use your USB stick on her computer to infect her PC with the key logger.
  19. Wait for it...
  20. Voila! Password obtained.


    Psychologist's Assistant
  21. Talk to the librarian and ask how she's doing. Then, use the psychology book on her.
  22. Talk to her again. This time, talk about Cramps.
  23. Empathize with her by mentioning you get bad cramps too, but mention that there are worse things. When she asks, "Like what?", answer "Menses and migraine combo". Then, let her know that you deal with yours with Hardcore Painkillers. Let her know you've got some potent ones and are willing to share. Once the dialogue ended, go to your Inventory and give her the Pills.
  24. The librarian will be so grateful to you that she left you a hint as to how to "guess" your grandpa's password (favourite pet's name and add "123" to the end), but in reality she's actually revealing how she, herself, constructed her password.
  25. You just need to know what her pet cat is called. Click on the cat to attempt to pet her. The cat will hiss at you and will allow you to choose to ask that very question. You'll find out that her cat is called "Fortuna". So, voila! Her password is Fortuna123.


  26. Head over to the laptop and log in the librarian’s account using the username and password you got. You’ll find out that Grandpa Kovas borrowed the book, Don Quixote. Milda may mention that she kinda saw the book back in grandpa’s place. Head over there now.
  27. Once you are in the Kitchen, check the bookshelf. You should click on it until Don Quixote is mentioned. After finding the book, you should get a bunch of hints. Make sure to click on everything that's on the book. They are all, mostly, important information, especially the "Menorah", which Milda helpfully pointed out that it's Jewish. The only Jewish church in the list (in the Notes section) you have is the Great Synagogue of Vilnius. This is your first house of worship.
  28. Now, if you think the bishops in the book look familiar, you aren't wrong. You'll want to go to your inventory and Inspect the other stringless magnet you have. You'll notice that the bishop on the magnet is similar to the one in the book. Read the text on the magnet, and use the magnet on the bishop in the book, and you'll get your second house of worship - Church of St. Catherine.
  29. The third is a bit tricky but there's a hint for you in the form of the Translation of the Old Polish Text. Take note that the Fire of Vilnius occurred in 1949, so you'll want to be looking for a church that's (re-)built on that year but is of a different religion - "three different gods" as per the note. That leaves you with Church of the Holy Spirit.
  30. Talk to Joris about your latest discovery and you should unlock the options to travel to Church of St. Catherine and Church of the Holy Spirit. Unfortunately, the Great Synagogue of Vilnius was destroyed so there's no point travelling there (more on this later).
Part 4 - The Churches + The Library Archive
This video mainly answers these questions:
How to get the wine needed for the Divine Liturgy?
How to get into the Church of St. Catherine? You don't, not yet anyway ;)
How many metal cubes to add to 3D print the seal?
How to get onto that hockey fan club bus to go to Minsk? Or specifically, how to dress up and pretend to be a hockey fan?


  1. You can head to either churches first, but personally, I'd recommend going to Church of St. Catherine first just so you can meet the simply delightful lady, the Broom Guard :)

  2. At Church of St. Catherine, you'll want to talk to the everyone and realise that you can't go into the church. However, this isn't a dead end. Make sure to Inspect the bottle of wine the Homeless Guy has tied to his bag.
  3. Head over to the Church of the Holy Spirit. Inspect everything, especially the part where the "key" was supposed to be hidden in and the place with the Holy Water. Talk to the priest and he'll tell you that he can't help you until you help him recover the stolen sacramental wine... wait a minute, didn't you just Inspected some wine back then?
  4. At this point, you'll also receive a mysterious text asking you to meet him at Church of St. Catherine. Since you're going there anyway, you might as well.
  5. Head back to the Church of St. Catherine and talk to the homeless guy again. Ask him whether he was the one who sent you the mysterious text. A voice from the statue will then call you over and give you a number to call. Calling that number will point you to your next stop - Minsk.
  6. Talk to the homeless guy again and ask about the wine. He will admit that he stole the wine based on flawed logic and won't trade it for anything else other than with a bottle of Strong Holy Wine made of red wine and holy water.
  7. Thankfully, you grabbed the red wine off the table back in Joris' place, so you just need to go back to the Church of the Holy Spirit to fill it up with holy water.
  8. But doesn't that make the wine diluted? If you attempt to give the homeless guy this wine, he will point this out as well and refused to do the trade. You need to "strengthen" the wine somehow.
  9. In case you need a refresher, make sure to Inspect the bottle of Invisible Ink in your inventory again. Right, it contains strong alcohol and lemon... the perfect thing you need.
  10. Add the Invisible Ink to your diluted Holy Wine, and give the homeless guy your concoction. You'll be able to grab the sacramental wine from him. Return the wine to the priest at the Church of the Holy Spirit.
  11. The priest will then reveal that the "key" you're looking for is actually a seal that has a W on it and that it's currently stored in the Vilnius University library archive. Check the List of Chancellors to figure out the only person with a W emblem is Albertas Gostautas. Note the year of his reign.
  12. Head over to the Vilnius library and talk to the librarian. Point out that the cat is missing, at which point she will say that Fortuna is likely out looking for tuna.
  13. Go back to Joris' place and talk to the Old Bagel Lady. Ask what kind of bagels she has and you'll notice that there's a tuna option. Ask for that.
  14. In your inventory, tie the Tuna Bagel up with the Magnet on a String. You can also talk to the bagel lady about the Promotional Flier at this point, but to keep the flow and to avoid an extra backtracking step, I skipped it for now.
  15. Return to the library but instead of entering it, you stay outside. You'll notice that Fortuna is right next to a pot of flowers. Don't approach her yet. Use the magnet-string-tuna bagel combo on the metal pipe outside the library. Then, chase after the cat. Eventually, she will be attracted to the tuna bagel, allowing you to grab the Librarian's Staff ID.
  16. Use the Librarian's Staff ID on the card scanner and enter the archive.
  17. Read the open book on the table before picking up the glue and the metal cubes. Approach the console.
  18. Since Albertas is a Grand Chancellor (a politician) who held his post in the 16th century (1522-1539; in roman numerals) and that the seal is made of metal, you should be able to find the seal pretty easily.
  19. Grab the seal from the metal box and put it into the Object Scanner part of the 3D printer. Now, you need to put in the correct number of cubes to print out a replica. There's a bit of trial and error here since there isn't a hint, but to cut to the chase here, you'll want to put in 1 Big Metal Cube + 1 (medium) Metal Cube + 2 Small Metal Cubes and that 1 remaining nut you found in grandpa's house.
  20. Put the replica into the box and keep the original. Make sure to return the item using the console or the gate won't open as per the instructions in the open book on the table.
  21. Since you have 1 seal now, you can try to get the other. Go back to Joris' place and show the Promotional Flier to the Old Bagel Lady. Ask what the lecture is about and who the organizer is. At one point, Milda will ask if she could just ask Tamara some quick questions and the lady will tell you that Tamara is actually coming over to the shop soonish. After the conversation is done, Tamara should appear sitting at the table outside. Go talk to her.
  22. Ask her about the artifacts she found from the synagogue and she'll show you a photo. There's a candlestick in it that looks suspiciously similar to the seal you already have. Use the seal of Albertas on the "candlestick" in the photo and you'll unlock a new line of dialogue whereby Tamara will provide you with a number to the candlestick buyer. The buyer will hang up though so this is a dead end.
  23. No matter, you still have to go to Minsk. Conveniently, there's a Travel Agency right next to the Church of the Holy Spirit. Go there now.
  24. Talk to the Travel Agent and ask for a trip to Minsk. She will have you fill out a form for a visa. You can fill whatever you like in those forms, but right at the end, you'll see a flier for a hockey match. Inspect it and you'll find out that the ticket to this hockey match between Lithuania and Belarus can serve as a visa.
  25. Show the Travel Agent this flier and she will sell you a ticket. Once you exit the agency, you'll see the bus right outside. Talk to the bus driver and he'll tell you that you don't look like a hockey fan. Take note of the shirt the driver is wearing.
  26. If you're unfamiliar with hockey in general, a quick Google search will show you, generally, what a hockey fan looks like and a light bulb might just go off in your head - there's a sweatshirt in your grandpa's house that might just be the thing!
  27. You can go back to the driver and ask him if the sweatshirt work and he'll (vaguely) tell you what you need to do to fix it, but to go straight to the answers: you'll want to use the shears to cut off the sleeves of the shirt and the crest from the Historical Flag. Use the Glue on the Crest and then on the shirt to combine them both together. Once done, Milda will automatically put on the shirt.
  28. Go back to the driver and ask him how do you look. He will eventually let you on the bus.
Part 5 - The Hockey Game
This video mainly answers these questions:
How to get that painting without paying money?
How to help Belarus win the hockey game so you can win the bet?
What are the honk patterns for defending?


  1. Before reaching the hockey game, you'll need to take a few things on the bus - the Lithuanian Flag and the Honk Horn. Use the Honk Horn on the sleeping Hockey Fan. He will then teach you how to use the Horn. It's best to remember the honk pattern (Upper, Middle, Middle, Upper, Upper - for getting goals), but if you can't, you can still try doing it by ear later on.
  2. At the Hockey Game, head straight to the VIP lounge to meet your contact. There, you'll realised that you need money to buy a painting your dad was after from Vlad the Belarusian oligarch.
  3. Once he's on a call, unveil the painting, grab the Belarusian Flag, and then talk to Vlad again. Ask about the call and ask if he's a betting man. You'll then make a bet with him to get both the painting and your dad's phone number. If you lose, you'll lose your grandpa's house... an unfair deal but that's the only deal you can make.
  4. Go back to the fan area and talk to the Hockey Fan (you might need to do it twice). He'll tell you that at this point in the match, the fan area is best seen by the Belarusian team. You'll need to give them a morale boost somehow.
  5. There are 2 ways you can do so: 1. Make sure they see their flag. 2. Make sure they hear the fans cheering for them to score a goal.
  6. For the first, you'll want to be sneaky since you don't fancy getting whooped by the Lithuanian fans for betraying their national team. What you need to do is to add glue to one of the flags, and combine it with the other flag to get a Two-Sided Flag. Put it up on the Protective Glass.
  7. For the second, you'll want to honk the Horn in the same pattern as the Hockey Fan taught you on the bus. This will help the Belarusian team score a goal, putting them at a tie.
  8. Ask the Hockey Fan again about the situation, and you'll find out that the LT team is on the offensive now. So, you'll want to honk the horn in a way that will make the fan cheer for the defense instead. This is a bit trickier since you'll have to listen to the honk patterns of the opposing team - or if you had the honk patterns memorised from the first hockey round - and repeat it on your horn. The honk pattern should be: Lower, Lower, Upper, Upper, Lower, Lower, Middle, Upper.
  9. Now, to get the winning goal. Ask the Hockey Fan again about the situation. Take note of the lines and pairs he mentioned.
  10. Go to the VIP lounge and note the pair the LT team is using. Identify the line needed to counter the pair - which in this case is Line 3 - and ask Vlad to make a change in the roster.
  11. Return to the fan area and use the same honk pattern for making a goal. This will help the Belarusian win the game.
  12. Go back to Vlad to collect your prize. Call the number given, and you'll be asked to go to Italy. Don't forget to grab the painting!
  13. On the fan bus, check your phone for a text from Dana.
  14. Once you're back to Joris' place, Joris will get you a ticket to Italy, but before you leave, you need to do some "preparations". This simply means that you have to Inspect the painting to get the story going. You just need to follow the flow (video call Dana) to go into the next section of the game.
Part 6 - Italy
This video mainly answers these questions:
How to shoo the goat from the staircase and get to the balcony?
How to distract the ex-KGB agent?
How to get the seal from Grandpa Kovas?


  1. Go to the Piazza de Campo. There should be a fairly stubborn goat in between you and the staircase leading to the balcony where your "dad" said he will be. Use the apple in your inventory on the goat to get it to move. At this point, the balloon seller will talk to you. You can find out more about the event and the reason why he has two tanks of gas (hydrogen of all gases though!).
  2. Go to the balcony and get surprised - it's your grandpa! However, eventually your reunion will be interrupted by an ex-KGB agent, who threatened to kill you just to make Grandpa Kovas give up his seal. While they are bickering, you'll need to orchestrate a distraction.
  3. First, grab an apple off the bowl on the table. Click on the option "Ground Level" to look down. You'll see the goat and the two tanks of gases.
  4. Throw the first apple onto the Helium tank (the one with the green tube/ labelled as He). The goat will saunter over and chew on the apple while chewing through the tube as well.
  5. Now, you'll want to grab another apple and throw it on the balloon itself. The goat will eat the apple and also the thread that holds the balloon. At this point, the balloon seller will turn around, noticed the missing balloon and tries to pump another. However, since the tube to the Helium tank is broken, he then connects the balloon pumping machine to the Hydrogen tank instead.
  6. Grab the last apple you'll (likely) need off the table and throw it on the balloon again. However, this time - this is a Quick-Time Event so you'll need to be fast - once the balloon flies off into the air, quickly switch the view back to the balcony, go into your inventory and grab your Lighter, and Use the Lighter on the runaway balloon. If you failed, you can try again with another apple.
  7. The distraction worked and you managed to escape, with your grandpa, back to the first place you started when you arrived in Italy. Hijack a scooter as instructed by Grandpa.
  8. This is mostly trial and error but if you get one of the Pins in the right position, the lights around the ignition switch will light up. Get all 3 lights lighted and you'll start the engine. Answer for this one is shown in the picture below.
  9. Racing through the streets in Italy on your scooter, your grandpa wants to pass you the seal that he has obtained from the Synagogue for safe-keeping but a goon interrupted his attempt by damaging your scooter.
  10. Now, to get the seal from your grandpa, you'll want to first startle the goon enough so you can overtake him on your damaged scooter. Move your Scooter Left (I'd recommend holding the Spacebar for this entire part of the game so it's easier to spot the interactive points). Make sure the goon is close enough to your scooter before using the Honk Horn (right click).
  11. You'll get to overtake him this way. Move Left, but watch out! He's going to ram you. Quickly, use the Accelerator on your scooter to get a burst of power. Grandpa Kovas will ram the goon's scooter, letting you escape with the seal.
  12. Back in Joris' home, call Dana and she'll tell you that the painting of Vytautas is partially painted over. So, now, you'll need to reveal the actual painting. To do so, you'll need something acidic, strong alcohol, and a clean cloth. You already have everything you need in your inventory - the sleeves from the sweatshirt and the invisible ink. Mix the two and use it on the painting (anywhere will do for now).
  13. Now, you'll want to take note of what both Joris and Dana has to say regarding which part of the painting that might be fake. You can trial and error here to Dana's horror at all the art destruction, but the answer is Seal > Face (Use the List of Chancellors on the painting for this part) > Text at the bottom.


Part 7 - Church of St. Catherine (Finding the last seal)
This video mainly answers these questions:
How to solve the bishop statue puzzle?
How to solve the monks with the light (the one in the hidden passage) puzzle?
How to escape from the hidden passage?


  1. Refer to the fake Don Quixote book with all the clues, specifically the page with the bishops.
  2. Take note of which statue that is "leading the way" by pointing on the ground. Every other statue should be "looking" at this "lead statue". Press the nameplate of each statue, sometimes you'll need to do it a few times, to turn their heads.


  3. Refer again to the fake Don Quixote book. Go to the page with the monks and the drawing of a cross.
Part 8 - The Grand Finale
This video mainly answers these questions:
How to get into Sapiega Palace? You don't
How to find the correct passages to get to the room with the crown?
What's the ending that you get?

A note about the achievements - for achievement hunters.
I only included the ones that you might miss during your run. I'll skip the ones that you'll automatically get by simply going through with the story.

Note that since you get an achievement for playing as a Photographer, a Programmer, and a Psychologist's assistant each, you'll need to play the game through three times to get all the achievements.
6 Comments
Lavender919 20 Jan, 2024 @ 7:35pm 
Thank you for your wonderful walkthrough video and many details.
It helped me a lot and enjoyed playing the game.
duschkoenigin 11 Mar, 2023 @ 12:02pm 
Thanks!
Ductator 6 Jan, 2023 @ 11:18am 
Something to add:

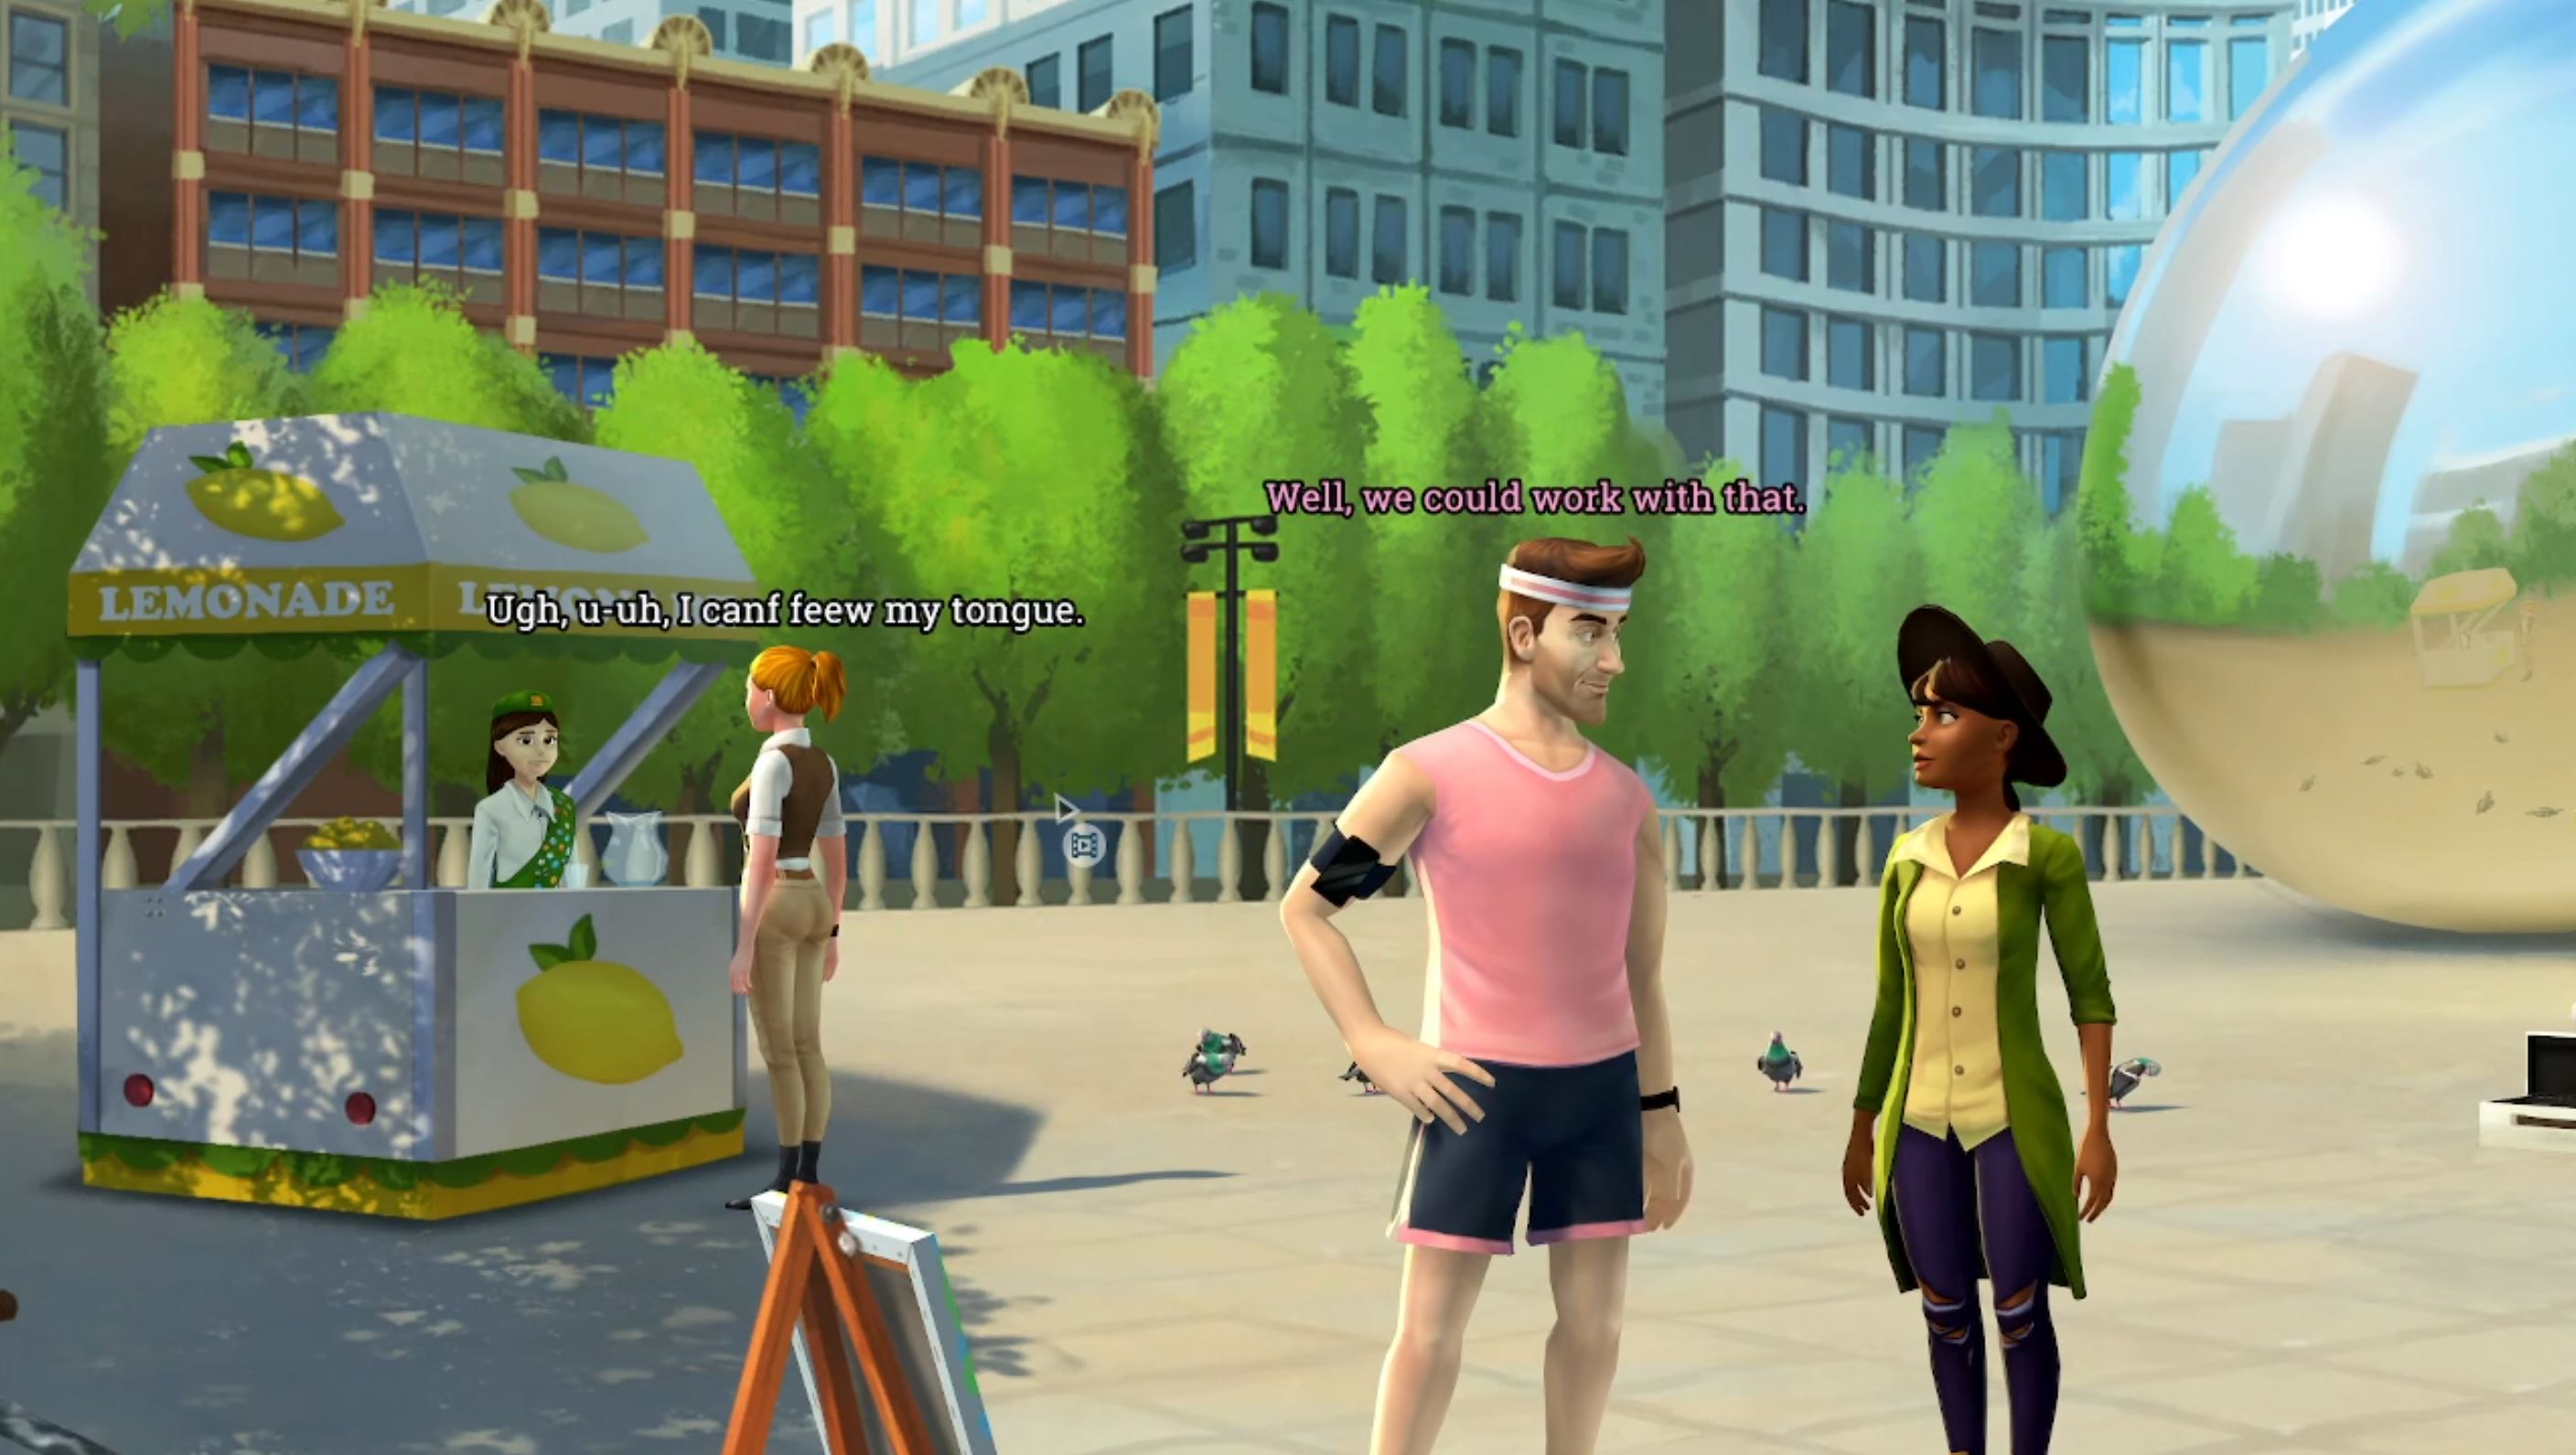
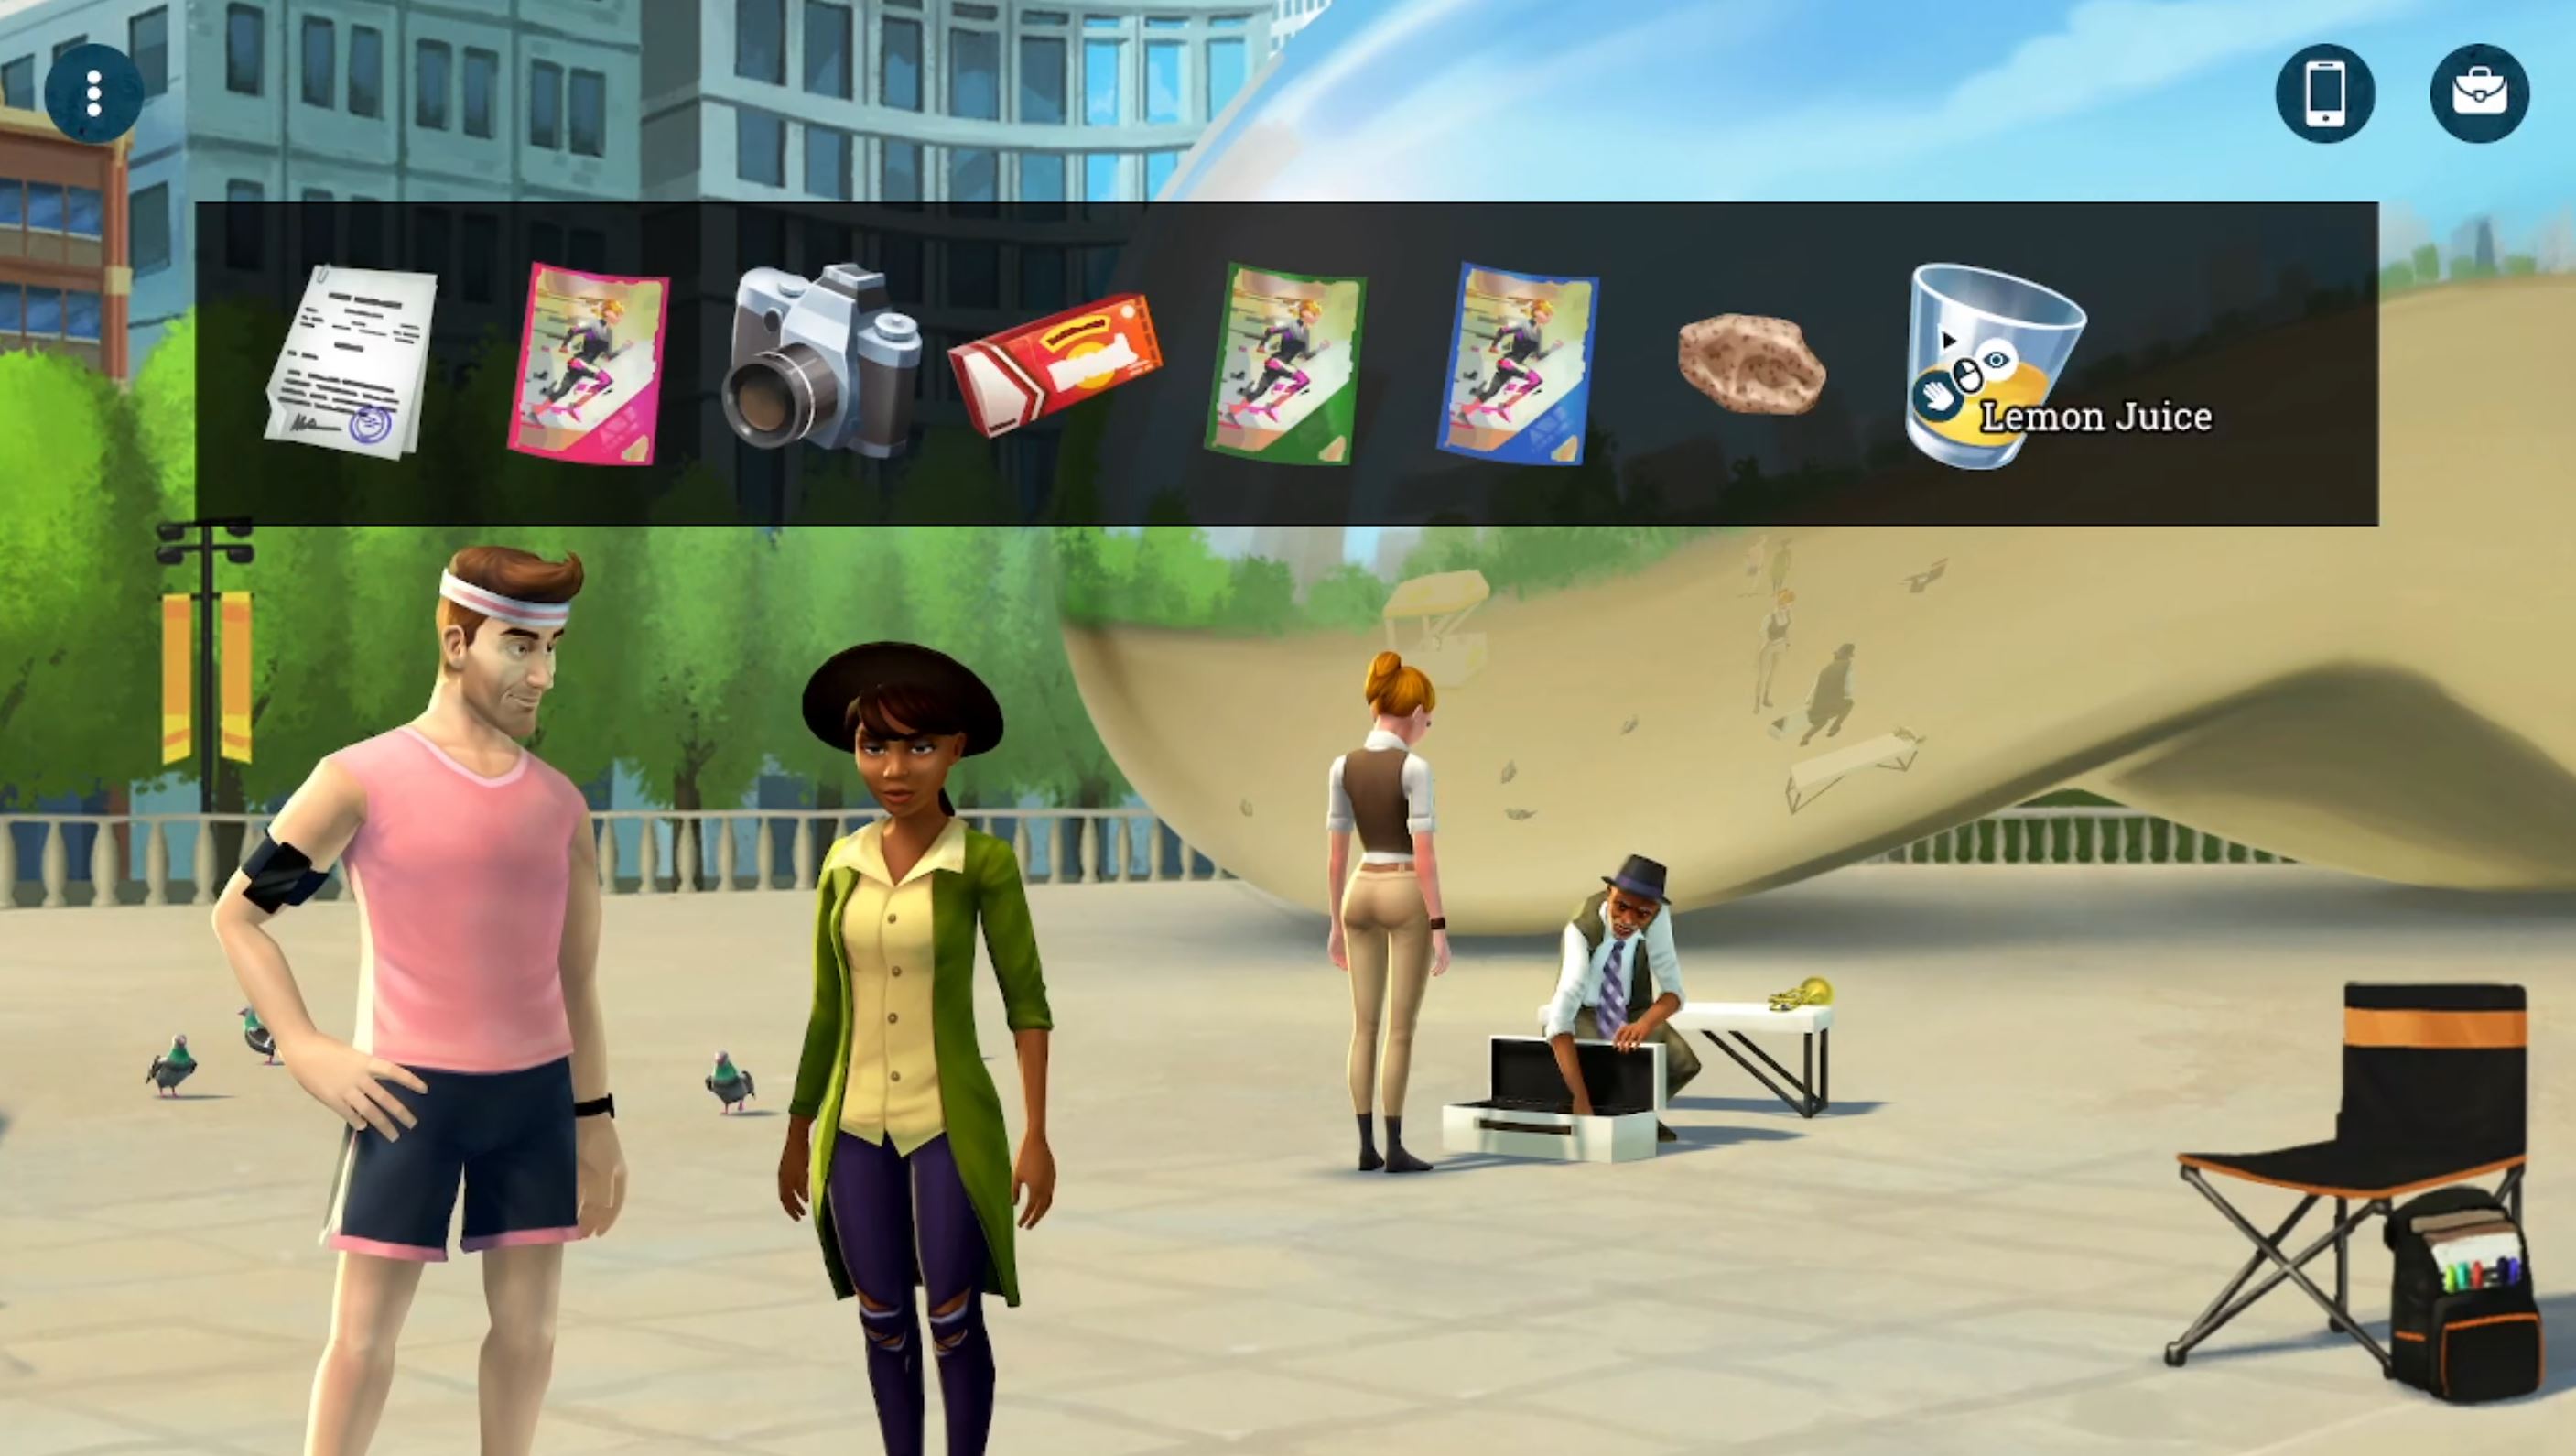
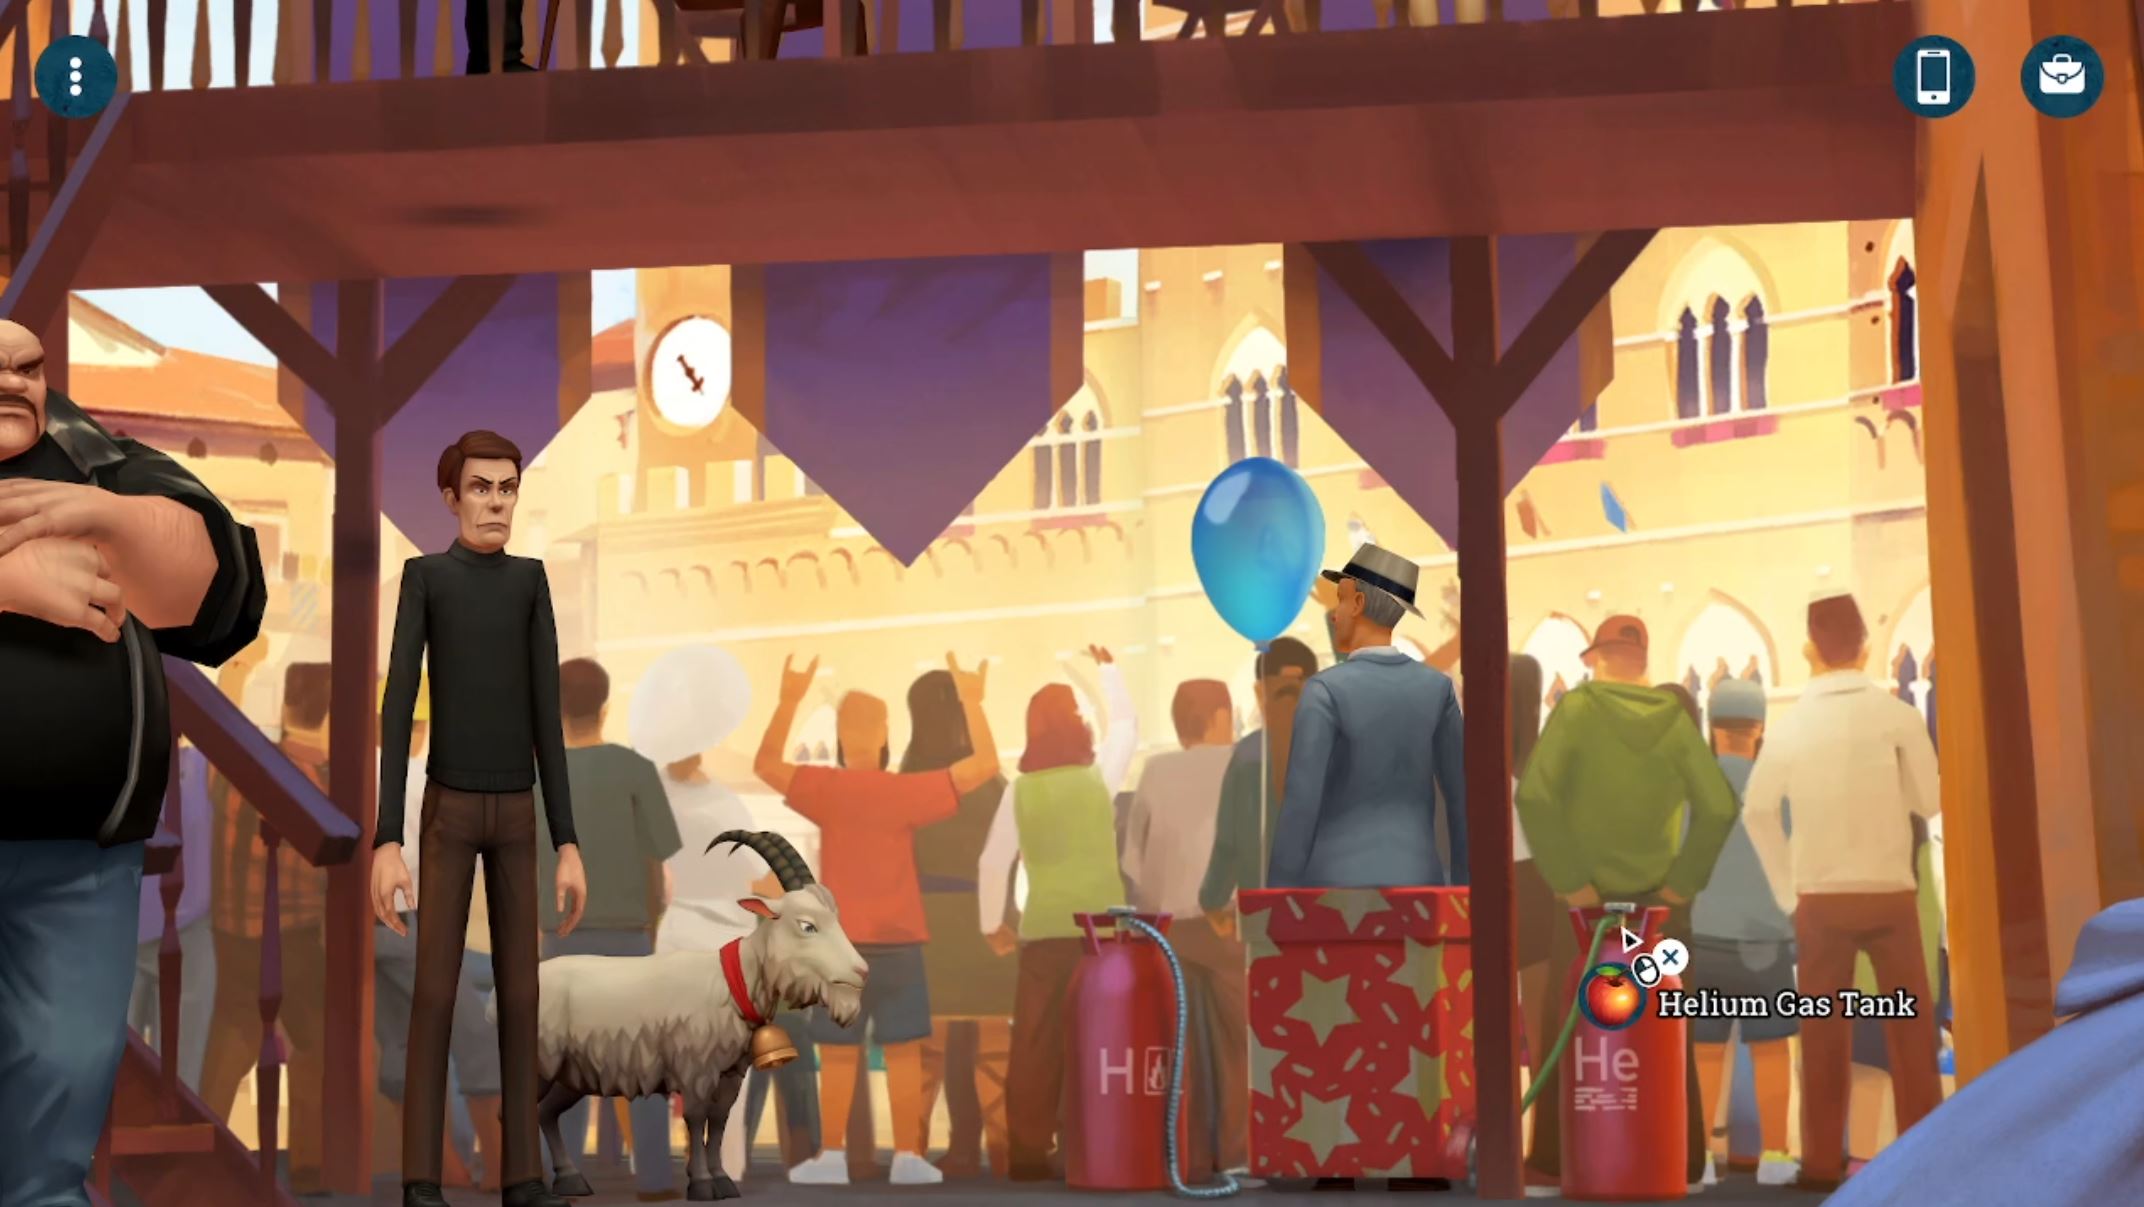
In the Art Show portion, it's possible to use chewing gum instead of pure lemon juice on the performer's trumpet. This means the "Say Sorry" achievement won't be possible to get. Additionally, since it's possible to use chewing gum instead of pure lemon juice, the "Sweet or Sour" achievement is possible to be missed if you don't go through that interaction.
Arion  [author] 17 May, 2022 @ 11:07pm 
Ah yes, maybe I should have worded that better - "until the end of the *section*" or maybe "until you leave the place".

And yes, that's supposed to be added to Part 8 - The Grand Finale, but I haven't gotten around to writing that yet. Sorry for that!

But since you still need to replay the game to get the achievements for all the roles, you can easily get this achievement in your subsequent playthroughs. There's no need to do a save before entering the chamber in the final part of the game.
joridiculous 17 May, 2022 @ 11:33am 
Not sure if they have added achievement after you wrote this, but there is one hidden you "missed" (In this written guide)
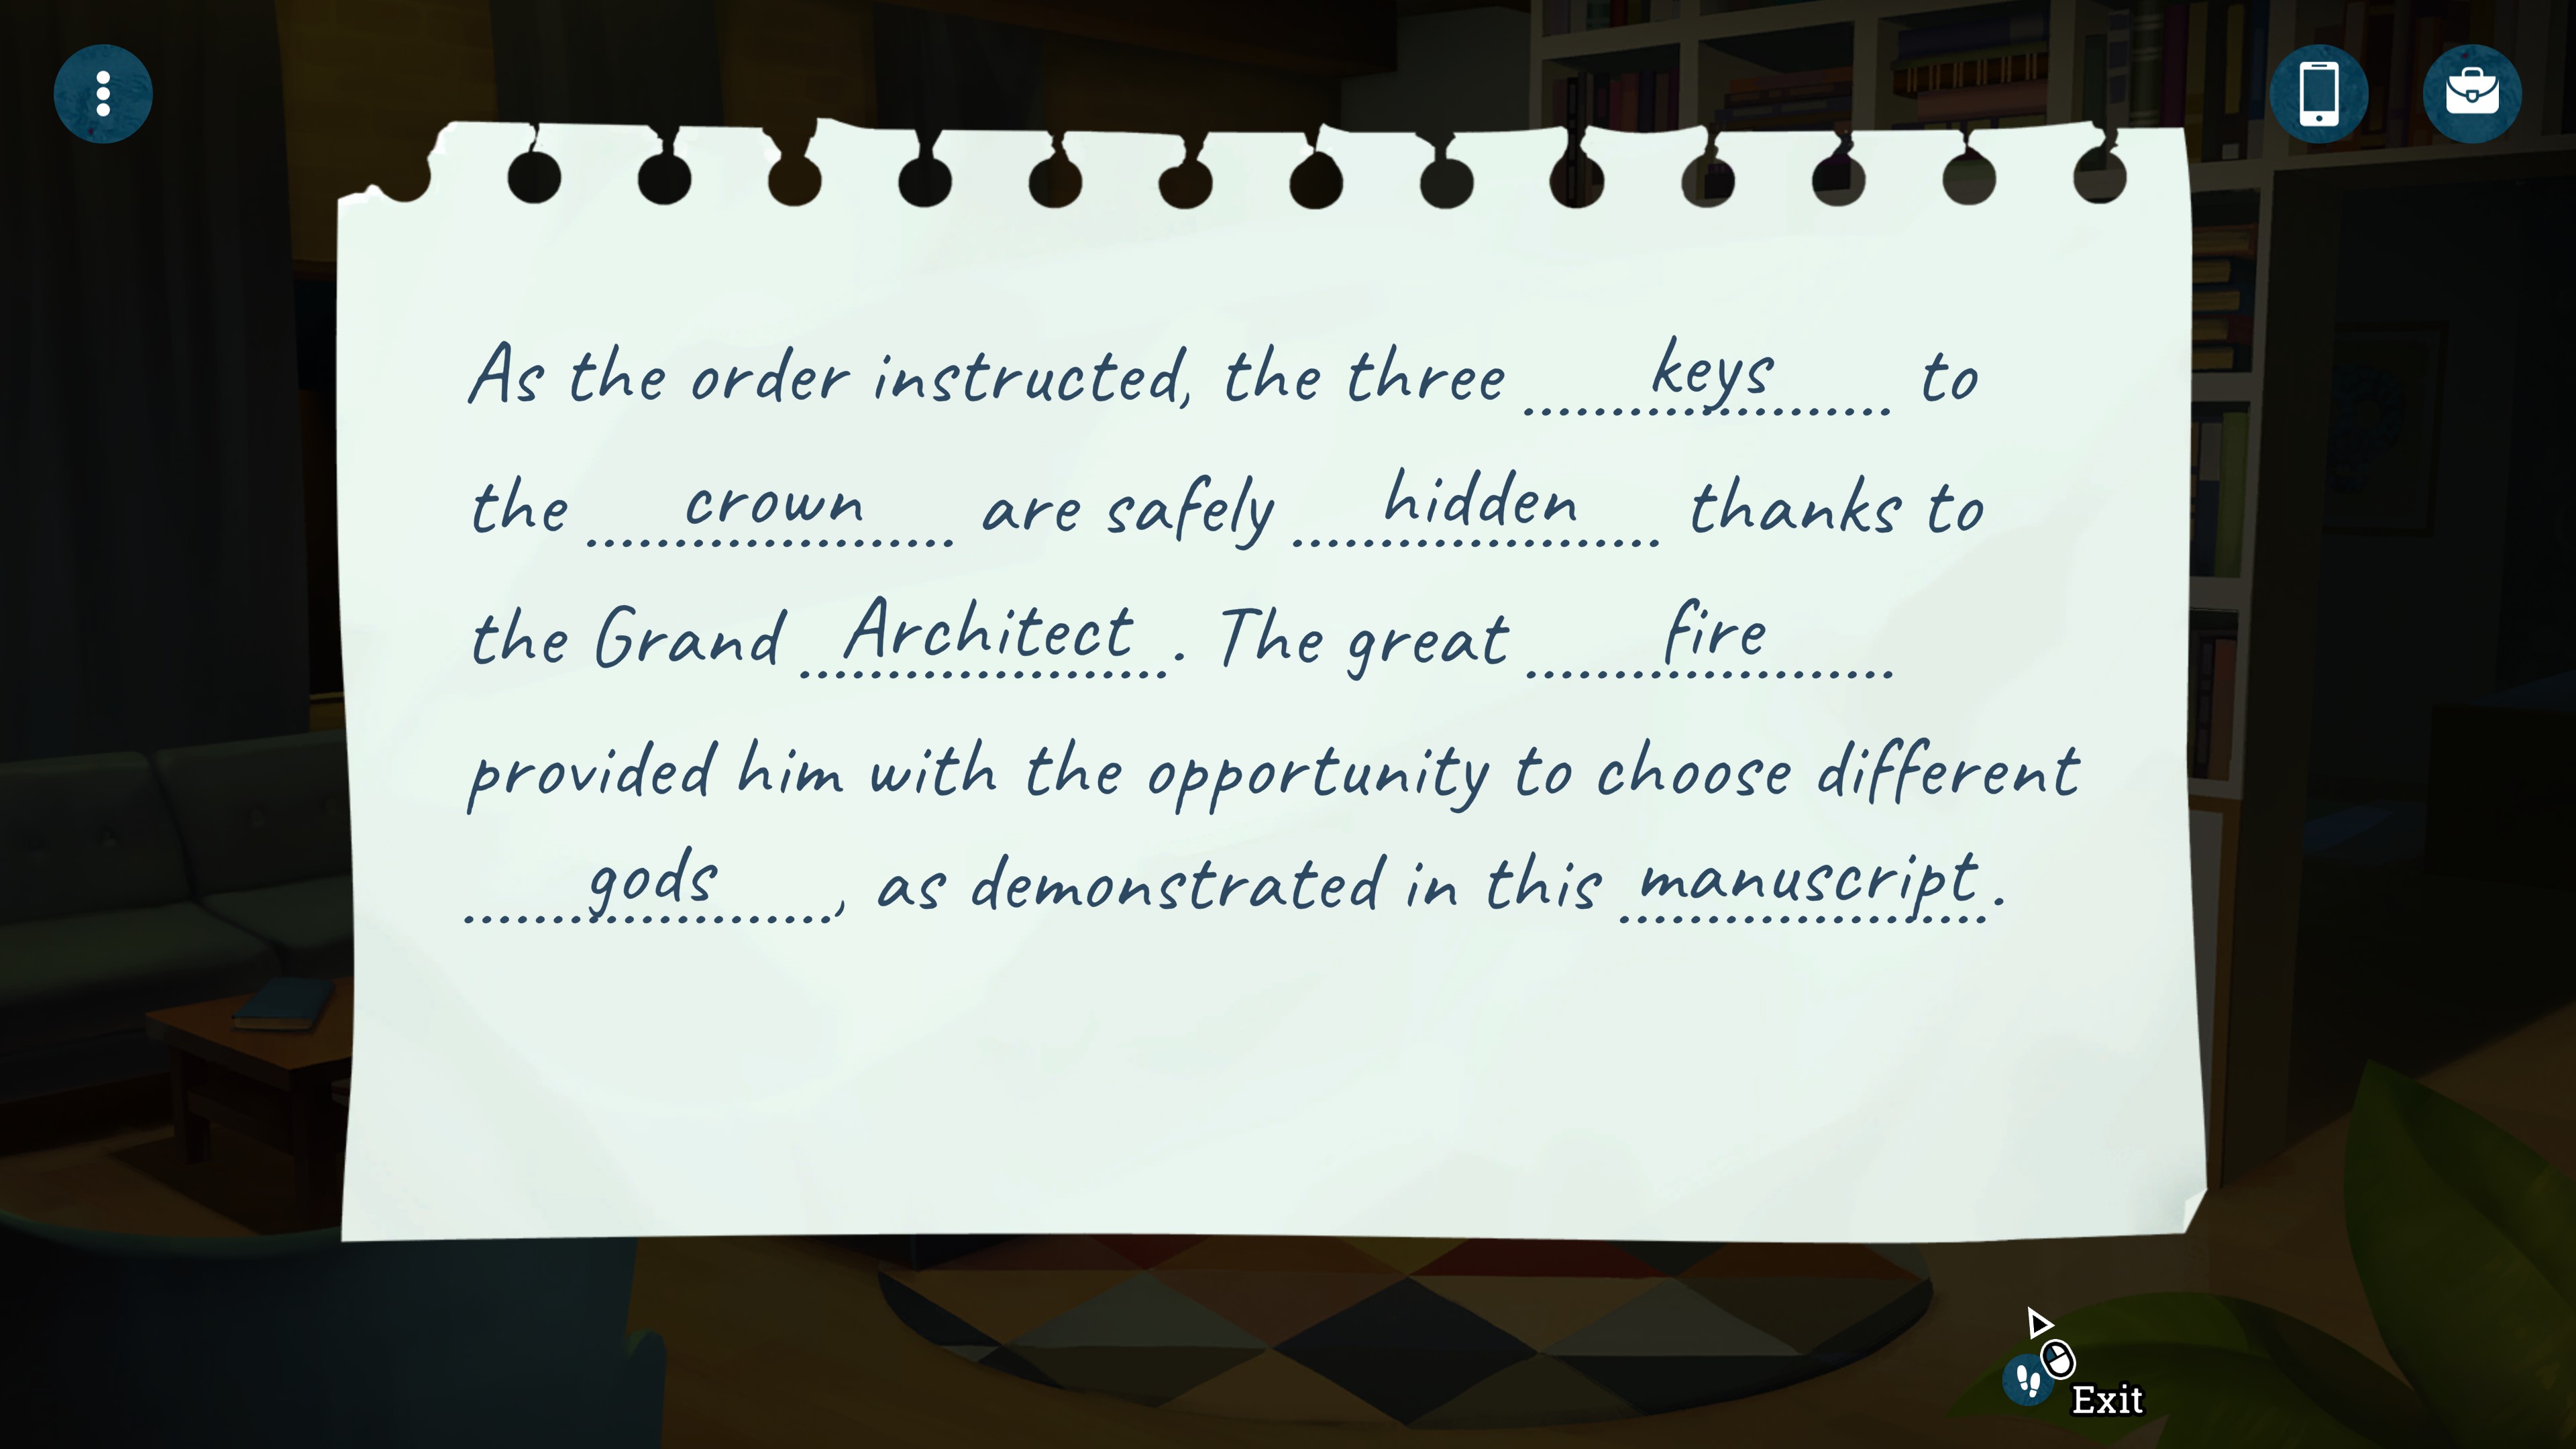
"Not supposed to be taken" <- Left the crown
joridiculous 17 May, 2022 @ 11:30am 
for: "To get the Not Talking to Strangers achievement, you'll just want to NOT pick up the walkie talkie until the end of the scene. Note that the guy will still call you on your phone and that's alright, you'll still get your achievement."
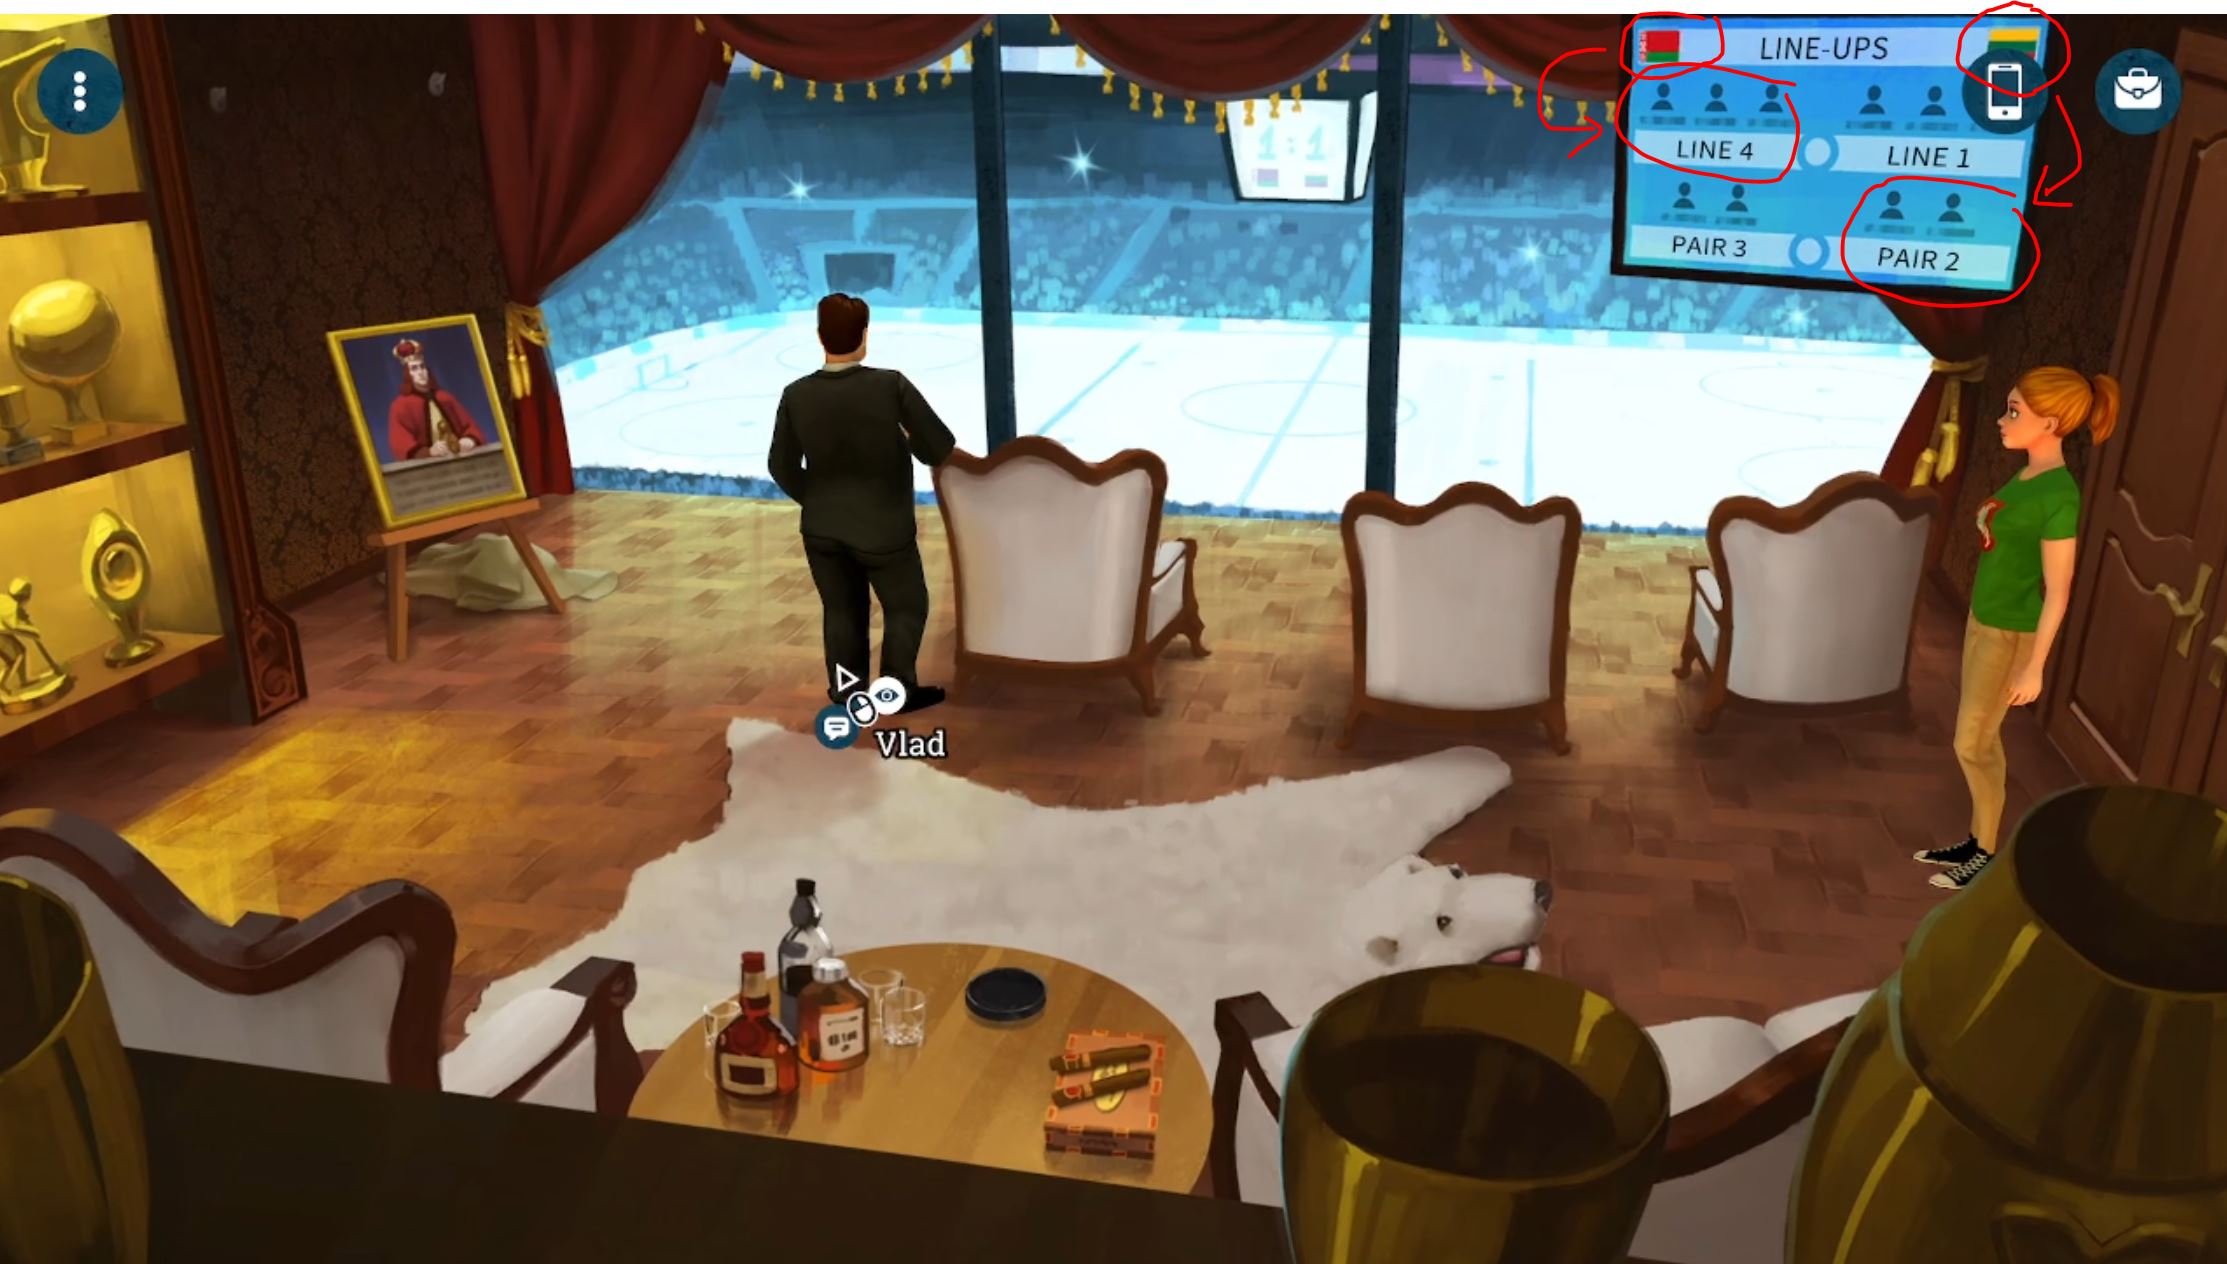
You cant pick up the walkietalkie at all! I picked it up just before leaving the scene and achievement newer popped.