Team Fortress 2

Team Fortress 2

527 ratings
MVM: Two Cities Guide - By Veterans
By -=|Markus|=- and 3 collaborators
Here is the recipe how to win easily the Two Cities maps in Mann Vs Machine.
   
Award
Favorite
Favorited
Unfavorite
Basics
The team:

For Mannhattan:
After a lot of tours.. we ended up that with the set up below, a map shouldn't take more than max 40 minutes.
The key is: having a scout, soldier, heavy, demo, medic, and an engineer - when you start.
( Later - when you can refund - the scout can change to spy - as he is extremely useful against the giant hunstmans, and the soldier bosses - see below ).

For Rottenburg:
You should always have a:
  • Money collector (Scout, Spy)
  • Medic picker (Demoman, Sniper, Spy)
  • Crowd controller (Soldier, Pyro, Demoman, Heavy)
  • Tank Buster (Soldier, Pyro, Grenadeknight)
  • And an engineer

The 6th person can go medic or 2nd Soldier/Demoman/Heavy/Sniper as long as he is good enough and that he knows what he is doing.
Classes one by one:
Scout:
Weapons:
  • Primary: Soda Popper: for its ability to jump up to five times in mid-air, so your jump height upgrade can wait (this is pretty useful especially on Mannhattan, since you have to collect money from the stairs). Baby Face Blaster can be also useful, or you can choose Force-A-Nature to help push back sometimes, but you are not likely to use your primary weapons anyway.

    (NombreGenerico89's thoughs: while Soda Popper may help to grab money for high heights, double jump with max jump heigh is equally as useful, and to the FaN to work %100, you need to aproach them closer to you, and drawing your attention away from collecting and milking. I recommend using stock Scattergun. No upsides, but no downsides either.)

  • Secondary: Mad Milk - nothing else.

  • Melee: Fan O'War or the Sandman - to mark giants to death.
The scout's main task is to collect money. It is important to get all the credit, because it makes the gameplay much easier obviously. To achieve an A+, you should start your upgrades with movement speed, and crit resistances. Then upgrade the milk's slow ability, to help your team. Save it in the early waves to milk the Giant Scouts! other Giants, and sentry busters for your medic. ( The medic will taunt or melee the sentry buster 4 times with his Ubersaw to get 100% uber rate ). After you have these you can go for Blast and Bullet resistance. After you have maxed the run speed and crit resistances, max out the Blast and Bullet resistance, then go for mad milk recharge rate, jumps, and after this you will have some more money to spend - max out the Fan O'War's speed or depends on you to what you want to spend it, you can also buy ubers to be a block unit for giants.

(NombreGenerico89's thoughs: Rationalize your resistances according to the wave. If there's a lot of soldiers, is wise to invest mainly on Blast Resistance. In a wave of heavies, scouts and engineers, invest on Bullet Resistance. If a wave contains crit pyros, put some credits on Fire Resistances -1 or 2 slots should be enough- That way you can balance you money on useful upgrades. Oh, and Slow Down on Milk is A MUST on wave 1).

The gameplay: should be look like this: wait for the first stack of robots to be killed by your team, jump in for the money, and then keep FANing the robots, run around collecting the money and milking the giants.

(NombreGenerico89's thoughs: Make sure that you get buffed by your medic before jumping into a pool of robots).
Soldier:
Weapons:
  • Primary: I prefer the Beggars Bazooka. It is incredibly useful against robots when compared to the other primary weapons. However, with this one, you will constantly run out of ammo, but still the best choice overall. Although the stock RL is a good option too. The black box is also a good alterative, as you gain +15 hp per hit. If you do decide to use this weapon remmeber to get 1 point into clips size, and then work your way up.

  • Secondary: Buff Banner - nothing else.

  • Melee: Disciplinary Action, Escape plan or equalizer- I used it a lot of times to save the money from run speed, it is useful to boost your and your teammates run speed when you are nearly out of ammo - since with Beggars you get ammo only from the ammo carts. The escape plan can help you get out of sticky situations quicker and the equalizer can save you on a rare occasion. Just remember when a medic is trying to heal you that you needs to switch to another weapon.

Upgrades:
If playing bazooka:

Start with 3x Reload Speed, 1x Rocket Specialist, 1x Health on Kill, 1x ammo capacity. Always look at your ammo, and know the locations of ammo carts. For crit resistances instead 2x. Now, if you are the one who does the most killing blowsm, you can go for the +25% damage. If you are not as good, go for 1x blast and 1x bullet resistance first. Spend your money on the damage 4x400 credit. Expensive but it is worth it. Do not upgrade the Buff Banner duration, it is just a waste of money. I get the buff meter up after 4-5 shots when the damage is fully upgraded. When the final waves come, spend your remaining money to 1x Ammo loaded or what is it [ I will edit this after I check ingame ], rocket specialist, ammo capacity, more resistance if needed - Especially on Empire Escalation and Bavarian maps. If your team was A+ all the time, you will have some extra to spend to buy crits to your canteen.
Engineer:
Weapons:
  • Primary: There are several options: Rescue Ranger, if you play with Wrangler it can be very useful, since you can be next to your dispenser and your sentry somewhere else.
    If you like camping behind your sentry, you can use Widowmaker. However, you will probably not use this one. If you have the Wranger in the secondary slot, you will use that one to boost your damage, and will be then jagging your sentry anyway. You will have no time to shoot with with this.If you use short circuit, then it's again not as efficient as your secondary, so you will not using this one. Frontier Justice is the option instead.

    (NombreGenerico89's thoughs: on Bavarian Botbash, the Pomson is a good weapon of choice. It will help draining ubers from the giant medics, that way they can't uber instantly, grating your team more time to deal with).

  • Secondary: As I mentioned before the Wrangler is great. Now, I tell you why. It not only adds a shield to your sentry, but also makes your sentry shoot 2x faster AND at any range (your target just has to be in direct line line - no obstacles between) AND it also has minor auto AIM! On the other hand, if you like play combat engie, and nobody is checking the damned spyes, short circuit is a great option too.

  • Melee: JAG! And if you dont have building upgrade in your canteen keep jaging even when its still building. "The Jag's 30% increase in construction rate adds onto the 90% increase in construction rate that is applied when hitting a building with the stock Wrench, so hitting a building with the Jag increases the building's construction rate by 120%. As a result, the construction rate of any building being hit by the Jag is only increased by 15.79%, not 30%."

Upgrades:
I usually start with the Jags melee speed 2x, 1x metal capacity, 1-2x dispenser range - this is important for your team, especially heavy and medic. Medic can overheal everybody, but he is vulnerable at the first few waves. And heavy functions like a power sentry so he usually stays close to your dispenser to have unlimited ammo. After maxed the dispenser range, the melee speed, upgrade fire speed for sentry, and health. Then buy upgrade buildings and use it in sticky situations, use it only when it is necessary (eg. dispenser down). For the final waves, you can finally buy the mini sentry, upgrade some resists, or upgrade short circuit. 2 way tele is not really useful.

Below few screens to show you where to put your buldings.

Mannhattan:


Rottenburg:


A lot of people put their dispenser next to the left rock, however it will be hardly defendable, even with 3x melee speed when some soldiers aren't killed in time in the early waves. However, if your team kills the spawning robots almost instantly as they land (good soldier and demo). Feel free to put it next to the rock, but make sure that you can repair it when needed or the heavy and medic duo while camping next to it. Also, DONT FORGET ABOUT THE SENTRY BUSTER - it will always run to your sentry, but if your dispenser is in the way, it will be destroyed, and also - DONT BLOW UP YOUR TEAM. You can loose your good spot and it will be hard to fight the front back to where you were. If already lost it by a stupid move - (running towards the sentry buster with your sentry where your team is and killing almost your entire team)

3rd Tick Sentry Firing Speed glitch has been reported by Hacked Exhale and proven in Botspan's video. You can save your money by not getting Firing Speed upgrades early on. (added by Draekon)
Original source - Hacked Exhale's Damage Spreadsheet[docs.google.com]

Botspan's Video demonstration for glitched sentry firing speed upgrades:
http://steamproxy.com/sharedfiles/filedetails/?id=268033317
Medic:
Weapons:
  • Primary: Syringe Gun, overdose or the crossbow - the mad milk upgrade IS useful. The overdose's speed can help in some instances and the crossbow can help with killing sniper bots.

  • Secondary: Kritzkrieg

  • Melee: Ubersaw

Upgrades: 2x Shield, 4x Heal Mastery, 2x Crit, 1x Blast & 1x Bullet Resistance, 1x Syringe milk, 4x overheal, 3x canteen specialist, More resistances + crit canteens.

Gameplay Especially in Metro Malice, it is essential to use your shield properly. When the Black Box Giant Soldiers come, I have seen some very bad fights where they were killing the soldiers for more than 5 minutes, because the pyro, or scout, or whoever got shot by them all the time. It is not about the doing damage to them, because with bad team you can be killing them even for hours even when the medic is critboosting the heavy all the time.

Medic is really OP with his shield, and do not only use it only for defense, BUT also use it to offense - it does damage. Use it to kill spies, to protect the sentry, and to damage robots tanks, everything. As I mentioned under the scouts section, using your ubersaw you can be on 100% in less then 6 seconds. You dont even have to upgrade movement speed, or jump height when the your Scout milked or Sniper slows the Sentry Buster. However at final waves, if you have + money to spend, you can buy movement and jumps which can be good in Mannhattan, but with good team its not necesary. You can also save the money with this trick, because then you don't have to spend it on uber rate. You can choose uber duration instead. Keep everybody overhealed, and heal the heavy when giants come to build your shield up, and ask your teammates not to buy back if not needed. When Bosses come, the two Giant soldiers at wave 4 and 5 or The Giant Heavy. Stay back a bit, milk him, switch immediately to your kritz, activate shield. Do not let die anybody during the boss fight, becuase it will heal up the boss. Uber the Heavy usually - sometimes its better to uber demo when giants medics are coming - to prepare critty sticky trap, or uber the soldier. You will see, it depends on the situation, but do not switch targets. The worst thing you can do. Crit a heavy for a sec, then crit somebody else. Your target should always be made aware before you crit him. Always crit demoman before the waves start. For tank fights if there is no demo crit the heavy - heavy does ususally the best damage, but tanks have a resistance, so demo and soldier can make better DPS (damage / second ). A soldier with buff banner is making about 240 damage with each shot, while with crit boost he does 540. A heavy when activated the rage - shoots 10x37 shots per second.
[Edit: I will give a scrap to anyone who provides proof]
Also: Buy back if needed. But not always.

(NombreGenerico89's thoughs: Since the Shield button is +attack3, and most people use a traditional mouse, sometimes clicking the mouse wheel accidentally change your weapons, wasting your shield. If you have auto-reaload enabled, try binding the shield into another button, like R.

Open your console -usually when is enabled is the button next to 1- and type "bind r +attack3" without the ". R is the button to bind in this example. So everytime you want to use the shield, press R instead of the wheel mouse).
Heavy
Weapons:
  • Primary: Brass Beast for +20% damage or Minigun. With the stock Minigun, it is easier to
    dodge the few rockets that are not destroyed. (BB for Mannhattan, Stock for
    Rottenberg is my preference)
  • Secondary: Sandwich - to save your medic.
  • Melee: Gloves of Running Urgently - to move 30% faster

Upgrades
The upgrade path should be modified according to your preference and also according to the performance and setup of your team. There are two major upgrade paths: offensive (aka firepower) & defensive (aka tank). I prefer the offensive upgrade path but newer players should start defensively. I prefer not to use crit canteens until the last wave or buy in early when I have a good team. With the defensive upgrade path, upgrade your resistances early starting with crits, get health on kill, uber canteens and then upgrade the minigun at a lower priority. The minigun has to be upgraded fully by the last wave with at least full firing speed or you will not do enough damage to help your team with the giant bot hoard. With this upgrade path, you really need to know how to be a good heavy and especially knowing how to get close enough to do the most damage without dying. With the medic's cooperation with sticking close to you up on the front lines and up next to giant bots, but learn to do well without a medic as a crutch as Radioactive Panda suggests. There are situations where uber canteens are called for like the Giant Health on Kill boss on EE while the medic shield is recharging especially with no Rage upgrades. Crits nullifies the minigun's damage falloff with distance. Using crit canteens early will hurt your performance in the future with the slow upgrades so find the right balance for the team. With a good medic, I do not need to buy resistances or health on kill early and it means you need to know when to take cover from bullets, grenades and rockets such as a wave of crit heavies. Never go solo so stick with the team and stick with the medic protecting him also from pyros and spies.

Defensive Upgrades (Stay alive but sacrifices DPS output)
1&2 Blast, 1,2 Crit (Choose Bullet or Blast depending on wave)
1 Bullet, 3 Crit, 1 Firing
1 Ammo, 3 Blast, 2 Bullet, 2 Firing
3 Firing, 3 Bullet, 2 Ammo
1 Projectiles, 4 Firing, 3 Ammo, 1 Health on Kill
2 Projectiles, 1-2 Penetration, Health on Kill
Uber Canteens for last wave. You can switch Penetration with Rage.

Offensive Upgrade (Penetration or Rage depends on personal preference)
1&2 Firing, 1 Ammo
3 Firing, 1&2 Crit
4 Firing, 2 Ammo, 1 Blast, 1 Bullet, 3 Crit
3 Ammo, 1 Projectiles, 1 Penetration, 1 Health on Kill
2&3 Blast, 2&3 Bullet, 2 Projectiles or Penetration, Crit Canteens

Balanced Upgrade 50:50 Off & Def
1 Projectiles, 1 Blast, 1 Firing, 1 Crit
2 Blast, 2 Crit, 2 Firing, 1 Bullet, 1 Ammo
3 Firing, 3 Blast, 3 Crit, 2 Bullet
4 Firing, 2 Projectiles, 3 Bullet, 2 Ammo
1-2 Health on Kill, 3 Ammo
1 Penetration, 1 Rage, 3-4 Health on Kill
1 Movement Spd, 1 Health Regen, Canteens

Actual upgrade path examples with scoreboard screenshots in next section.


Gameplay
The most important thing to remember is the Heavy's damage output decreases the further away you are from the target as the minigun is like a rapid fire shotgun. This means get up close and shoot point blank at giant medics or tanks. If the giant is focused on another teammate or is reloading, you can stay out of the giants line of sight and shoot from behind or the side carefully. If you have an engie, ask the engie to have a dispenser near you at major defends points & enjoy your ammo. Know your limits of how much damage the heavy can take out in front, so the heavy should move around or just be the team meatshield in body blocking depending on the situation so think instead of mindlessly camping in one spot. Learn to how to body block super scouts (examples later) & use corners effectively. At corners, you can kill a lot of bots before they can react and shoot you. With Projectile Penetration, the heavy must stand on the same level as a crowd of bots not shoot downward from an upper level. (See the diagrams in the referenced guides.)

New players do not realize how useful Destroy Projectiles and sometimes Knockback Rage are. Destroy Projectiles is not as good as the medic shield but still great at protecting you. With Destroy Projectiles, aim low or crouch for rockets and aim high to destroy grenades. With rockets, I find it easier to look for the ring of flames as the rocket goes towards you than the rocket itself and for the giant soldiers aim at their waist or legs depending on the distance from you. For demos aim at their heads or just above depending on the distance.

Rage allows you to push even giant bots which will give you and your team more time before a giant breaks your defenses. Rage allows you to control the situation pushing the giant boss away from you giving your more time like for medic shield to recharge and it allows you to stay by the dispenser longer. It is common sense not to use Rage to move the giant bots away from your demoman's crit stickybombs. Rage is perfect with Sir Nukesalot to make him fly into the air to take fall damage while standing under the cliff. Use Rage for the giant pyros on EE and on any giant bomb carrier who is about to cap. You can also take advantage of the pit in Rottenberg or the grinder pit in Manhattan with Rage. I use Rage for the giant deflector heavy on EE to give the team more time while the rest of the team kills the super scouts upstairs. Remember, Rage decreases damage output by 50% so choose when you use Rage sparingly. If your team is great at doing damage, then I probably would not upgrade Rage at all. Otherwise, 1-2 Rage points by the last wave is good enough. To activate Rage, use the "special attack" which may be the middle mouse wheel button. You may also use taunt to activate Rage. I would not recommend this, as you may accidentally taunt instead of Rage. I switched the taunt and special attack keys in my setup. Learn to use Rage effectively & learn to succeed without it also as Rage is just a tool to decide if your preference is Rage or Projectile Penetration.

The medic bots are always the priority for the team. It is important to wait for the demoman on your team to kill the uber medics or you will trigger uber which makes the medics and the giant invulnerable for a few seconds. If the demoman is dead or someone already triggered the uber medics, wait until the blue uber sheen to disappear & immediately try to kill the medics. When there are 2 giant medics like on Bavarian, you can separate one of the medics with Rage, never both, or they may end up healing each other making them harder to kill. Separating the giant medic from the patient is usually not necessary though. On the Rottenberg maps, I like to attack the giant medics from behind and it is best to do so when the giant heavy cannot see you like around a boulder or the small stone wall to the right of the tunnel. If you use penetration upgrades, do not hit the giant quickfix medic's patient to set off the medic's uber to instantly refill their health.

For tanks, there should be at least two damage team members working on the tank. The Phlog pyro, demoman and soldier do more damage than the heavy in that order because of the tank's 75% minigun resistance. If the heavy is on the tank, however, stay really close to the tank as in touching it, you may use crits and Rage is useless with tanks. Turn on "Display Damage As Text Over Your Target" in advanced options to make sure you are doing maximum damage. Check my profile for guides with a few more examples.

Contributed by Draekon Updated 7/27/14
Heavy: Screenshots
Body Blocking:
Empire Escalation

1st Defend Point
Stand beside the crate to body block. I duck behind crate with a crit bot rush when the medic shield is recharging and wait for the bots to start to reload before attacking them.


1st Defend Point
Example of body blocking a giant scout. I stand about half a body length away also which reduces the chance that a scout will run round my left.


1st Defend Point
Another example of body blocking a giant scout closer to the ramp. This is more aggressive which means you need to put out more damage or you will die. This means you will likely be further away from your team's sentry also. Remember, when you die, your team's defenses may fail.


2nd Defend Point
Stand by the wall shown here to body block giant scouts. You should use the right wall as cover by moving right when the medic shield is not deployed to reduce exposure to rockets, grenades and bullets. Start to move left as you kill more bots keeping yourself exposed to only a few bots at a time. With all the bots spawning in one area, your whole team needs to do the most damage or the defense point will fail. The medic shield does not protect against fire. You must kill the pyros before they get too close so you may have to chose to let the soldier or sentry get the few scouts that pass by. You can back up a little to give yourself more space with the giant pryos and use rage for giant pyros when you have to. The team needs the utmost maximum damage from the heavy, demo and soldier will clear the room as fast as possible so proper upgrade path for everyone is important. A giant might push the team back to the dirt mound but a good team will be finished with the giant to return to the line of defense before the next wave. If the line falls, treat this area like a corner to shoot bots from the side or behind. Don't forget to rage giant bots into the grinder when you can.


2nd Defend Point
An example of body blocking giant bonk scouts with the help of a sentry body blocking immediately to the left. The medic shield can damage and also block giant scouts to some extent so any class including a sentry and medic shield can block giants. Passed the giant bonk scout rush with absolutely no problem.


2 Giant Medics:
Bavarian Botbash


2 giant medics just dropped. The team is getting ready to attack them from behind using the boulder as a shield from the giant heavy. You can also use the stone wall to keep the giant from seeing you. Get close to the giant medics & you can even use their bodies as a shield from the heavy's fire. "Giant medics pop if their health drop under 54 or if the patient goes under 50% of its health." I recommend studying Hacked Exhale's video linked below.


Just killed both giant medics. Focus on one giant medic bot at a time paying attention to which one has the least health and marked for death. You need at least 2 damage classes on one medic at a time. With a combination of the scout's fan, soldier's buff and/or the kritzkrieg, the giant medics die easily.


The giant heavy bot dies a few seconds later.


Here is another example where the heavy gets up close from behind the 2 giant medics with the help of the team medic. I recommend getting this close to the giant medics and you can hide behind a medic away from the giant heavy's view. You need to hit the giant medic bots hard and fast before they uber to regain all their health again. Don't use Rage on the giant medics.


Empire Escalation Upgrade Example (Balanced 50:50 Offensive & Def)
Wave 1: 1 Destroy Projectiles, 1 Firing Speed, 1 Crit
Wave 2: 1 Penetration, 2 Firing, 1 Bullet, 2 Crit
Wave 3: 3 Firing, 1 Ammo, 1 Health on Kill, 1 Blast,
Wave 4: 2 Projectiles, 4 Firing, 1 Knockback, 3 Crit
Wave 5: 2 Penetration, 2 Ammo, 2 Health on Kill, 2 Bullet
Wave 6: 3 Penetration, 2 Knockback, 3 Ammo, 3 Health on Kill, 2&3 Blast, 3 Bullet

End Results (1 Death!!! Sacrificed maybe 50-100k damage)

Empire Escalation Upgrade Example (More Offensive)
Wave 1: 1 Projectiles, 1 Firing
Wave 2: 1 Rage, 2 Projectiles, 2 Firing, 1 Ammo
Wave 3: 3 Firing, 1 Penetration, 2 Rage
Wave 4: 1 & 2 Crit Resist, 3 Firing, 2 Ammo
Wave 5: 4 Firing, 3 Rage, 3 Ammo, 3 Crit Resist, 1 Blast Resist, 1 Bullet Resist
Wave 6: 2 Penetration, 1 Health on Kill, 2&3 Blast Resist, 2&3 Bullet Resist, 3+ Crit Canteens

Partial Final Scoreboard (240k damage)

Bavarian Botbash Upgrade Example (Balanced 50:50 Offensive & Def)
Wave 1: 1 Firing, 1 Knockback, 1 Health on Kill, 1 Bullet
Wave 2: 1 Projectiles, 2-3 Firing, 1 Ammo
Wave 3: 1 Penetrating, 1 Blast, 1 Crit
Wave 4: 4 Firing, 2-3 Health on Kill, 2-3 Crit
Wave 5: 2 Ammo, 2 Blast, 2 Bullet
Wave 6: 2 Projectiles, 3 Ammo, 3 Blast, 3 Bullet
Wave 7: 2 Penetrating, 2 Rage, 4 Health on Kill, Rest on Crit Canteens

End Results

Bavarian Botbash Upgrade Example (More Defensive)
Wave 1: 1 Firing, 1 Ammo, 1 Bullet, 1-2 Crit
Wave 2: 1 Penetrating, 1 Projectiles, 2 Firing
Wave 3: 2 Projectiles, 3 Firing, 1 Blast, 3 Crit
Wave 4: 1 Rage, 1 Health on Kill, 2 Blast, 2 Bullet
Wave 5: 4 Firing, 2 Ammo, 2 Health on Kill, 3 Bullet
Wave 6: 3 Ammo, 3-4 Health on Kill, 3 Blast
Wave 7: 2-3 Penetrating, Crit Canteens

End Results (3 Deaths, Sacrificed Damage)

References for Expert MvM:
MvM Heavy: The Bot Bully
Expert's Basics for MvM
Demoman
Weapons:
  • Primary: Stock, Lock n Load, Loose Cannon (experts) or Bootlegger/Wee Booties (+25 hp)
  • Secondary: Stock or the Scottish Resistance for extra crit stickybombs
  • Melee: Anything. (Except pain train, half-zatoichi or anything that changes speed or damage)

Upgrades
There is not enough money to upgrade two weapons without sacrificing damage, performance or resistances. I recommend using the sticky launcher for beginners, but I have seen good grenade demos out damage a good heavy on Rottenberg maps. Learn to use the stickybomb launcher well so that you do not need to use a grenade launcher. It will make you a better MVM player and a more useful team member. Reload and firing speed are cheaper ways of dealing more damage since more grenades is better than a few grenades even with some boosted damage. With uber medics, you want at least 2 damage points to kill them reliably without setting off their ubers. You want to be able to deal the most damage from your sticky launcher so you can instantly kill a crowd of bots or a regular giant with crits. You and your team must be able to kill most of the bots before the medic shield expires. Upgrade paths are dependant on your style of play, your team and just personal preference also. I always upgrade damage as fast as possible but experiment with the other upgrades for your style of play.


Upgrade secondary weapon:
Offensive Upgrades
1&2 Reload
1-2 Firing, 3 Reload
1 Damage, 3 Firing
2 Damage, 1-2 Crit, 1 Ammo
3-4 Damage, 4 Firing, 1 Bullet
2-3 Ammo, 3 Crit, Blast, 1 Clip, 1 Health on Kill
With extra money, 2 Clip, Health On Kill and/or Crit or Uber Canteens

Defensive Upgrades (Still aggressive so modify as needed)
1&2 Reload, 1-2 Firing
3 Reload, 3 Firing, 1 Damage, 1 Ammo
2 Damage, 4 Firing, 1-2 Crit
3 Damage, 1 Health on Kill, 3 Crit
1 Health on Kill, 1-2 Blast, 1-2 Bullet
4 Damage, 1 Clip, 2-3 Ammo, 3 Blast, 3 Bullet


Empire Escalation Upgrade Example
Wave 1: 1-2 Firing, 1-2 Reload
Wave 2: 3 Reload, 3 Firing, 1 Damage
Wave 3: 2 Damage, 1-2 Crit, 1 Ammo
Wave 4: 3-4 Damage, 4 Firing
Wave 5: 2-3 Ammo, 1 Blast, 1 Bullet, 1 Clip
Wave 6: 2 Clip Size, 1-2 Health on Kill, 2-3 Blast, 2-3 Bullet, 3 Crit

2 Deaths! Damage the priority

Empire Escalation Upgrade Example
Wave 1: 1-2 Firing, 1-2 Reload
Wave 2: 3 Reload, 3 Firing, 1 Damage, 1 Ammo
Wave 3: 2 Damage, 4 Firing, 2 Ammo, 1-2 Crit
Wave 4: 3-4 Damage, 1 Health on Kill, 3 Crit
Wave 5: 1 Clip, 2 Health on Kill, 1 Blast, 1 Bullet
Wave 6: 2 Clip, 3 Ammo, 2 Blast, 2-3 Bullet

Slightly more defensive but still get damage upgraded sooner. Less damage score

Hamlet Upgrade Example
Wave 1: 1 Firing, 2 Reload
Wave 2: 2 Firing, 3 Reload, 1 Clip
Wave 3: 1-2 Damage
Wave 4: 3 Damage, 3 Firing, 1-2 Crit
Wave 5: 4 Damage, 1 Ammo, 3 Crit
Wave 6: 2 Ammo, 4 Firing, 1 Bullet
Wave 7: Phlog Pyro


Gameplay
As a demoman, you should memorize the path of the bots so you know where to put the sticky traps. Demos are not the team meat shield like a heavy so use cover like standing behind the heavy and shoot over the cover. It is also the heavy's job to do the giant medic bot killing but there should be also another 2 damage classes helping the heavy and support like fan o'war, buff banner and krtizkrieg. You should also jump out from a cover like a crate or corner and run back while detonating. To throw stickybombs further, I jump as I shoot at the peak of the jump height. Try to setup your sticky traps further up closer to the spawn points so you team does not have to wait too long for you to kill uber medics. On the Rottenberg maps, decide who goes after the tank ahead of time and it is usually the soldier, pyro or demo. On wave 5/7 of Hamlet, there is a tank and wave after wave of giants and uber medics so the team is forced to split up. With a common 6 class setup, you have 2 options, have demo & soldier stay on the tank to put out the most damage to kill the tank the fastest. With this combo, the engineer may lose the line even with heavy and medic support with the uber medics. After this, just regroup and help kill the tank with a sentry. The other option is a heavy & soldier combo on the tank with the engineer, medic, scout and demo staying behind. Having the demo stay behind has the advantage that the demo can kill the uber medics immediately. With tanks and with giants that break the defenses, learn to get in a rhythm with shooting stickies and detonating while reloading about 3-4 stickies (depending on clip size) while on the run. I put out a tight group of about 4 stickies while reloading another 4 while running away getting a "rhythm" with shooting & reloading. With the standard clip size when around 3-4 are loaded, I immediately shoot 4 stickies for a stickybomb trap & run while reloading and detonating the stickies. This gives me the best rhythm between shooting and reloading to almost constantly shoot & detonate with the smallest delay between detonations. I also use this "rhythm" method with the beginning of Rottenberg waves and the subwaves of early weaker bots. Of course, you wait longer with reloading when you want more stickies for the bigger bots. One final tip is to turn on "Display Damage As Text Over Your Target" in advanced options to make sure you are doing maximum damage finding a balance between the width of the sticky trap spread and getting the most damage with giants. Check my profile for guides with a few more examples.

Mannhattan - Empire Escalation
Mannhattan - Metro Malice
Rottenberg - Hamlet Hostility
Rottenberg - Bavarian Botbash
Study the wave information for stickybomb placement strategies.

Contributed by Draekon
Updated 7/27/14
Demoman: Screenshots
Empire Escalation

Wave 2: Setup on top level for giant huntsman & uber medic. With crits, both will die instantly. Focus on the huntsman when you detonate. The medic or soldier can also help the out. Otherwise, learn to avoid the huntsman's line of sight and use corners as cover. If you have a spy on your team, let him get the huntsmen.

Giant heavy with uber medics: Setup a medium wide group of stickies 2-3x the width of the giant heavy. As the group hits the ground, notice how spread out the bots are. Wait a few seconds for the medics to get closer to the heavy before detonating. Learn to use a tighter group of sticky bombs for more damage to the giant, about 1.5 width, while still killing the medics. As a demoman, maximum damage is the key or the giant will push your team back and you will not have time to setup for the next group of uber medics.

Instantly killed all 12 uber medics with a giant soldier. With this screenshot, memorize where the giant is for sticky placement. Try 2x giant width sticky spread for more damage but you need more spread w/12 medics.

Giant soldier & giant medic bot: It is safer to ignore the pyro or few scouts letting the rest of the team handle them to save your sticky trap for the giant. Use a tighter grouping of stickies, 1.5 width, for maximum damage & focus on the giant medic. The giant bots tend to drop slighlty left of the warning light but setup on or right of the warning light for giants with small uber medics. I also recommend setting the sticky traps where the bots drop. When you do this, you will get a second chance to do more damage with another sticky trap on the ramp.

The giant medic bot does not die right away so stay close to the ramp with the heavy so you can both put down the medic bot first. A scout or soldier can distract the giant soldier bot to give you more time to kill the medic bot. Always be ready just in case the heavy activates Knockback Rage away from your stickies which is another reason for sticky placement where the giants drop. Here, both a medic shield is deployed and a short circuit firing at the same time. It is better to alternate with the short circuit while the shield is recharging. With giant black box soldiers, the medic shield and short circuit are essential for not falling back since the giant black box soldier heals about 1/4 of its health with every hit. Make sure the scout, heavy, etc. do not get themselves hit regularly. It is also best to use an engineer building like a sentry to body block.

Giant scouts: They tend to drop further away from the wall. You can also leave a trap on or before the ramp. I do hide by the barrel to keep from being bonked & jump for a good view. This is when a good scout with mad milk, soldier with rocket specialist are needed. Body blocking is also essential for the heavy and eng. With the bonk super scout horde, setup sticky traps in front of the body blocking heavy or sentry and kill them before your teammate dies. Form a wall at the 2nd defend pt.

Getting ready for the uber heavies. I made a line of stickies but you can just make a wide spread out group of stickies as shown on the right. When there is wave after wave immediately following each other, you will need to constantly put out stickies so find a balance between shooting and reloading/detonating. When the action gets heavy in this area, put stickies on down the ramp and a group in the bottom of the ramp while hiding behind the crate.

Whether if there are uber heavies, burst fire demos or with wave 4 of Metro Malice with both super scouts & heavy bots, you need to learn to take cover either by the crate and rust colored cylinder or to the left by the stairs on the upper level as shown here. There will be a wave when the medic shield is not ready so staying alive is the key. You must find the right angle to shoot stickies without the bots seeing you which will be closer to the front wall and more to the left away from the edge. There you aim for the ramp area or just before the ramp. If you are behind the crate, you can either shoot to the left of the crate and slowly move left as the bots die or aim above the crate letting the stickies fall before detonating them. The whole team must do tons of damage to pass these waves.

Use the steel beam as cover by keeping the heavy's eyes and gun blocked while shooting around the beam. Be ready to jump down the ramp also. This can be tricky but it can work.

This is the final wave with a giant heavy with health on kill. I use crit canteens here to kill the giant before the next wave shows up. I may also stay behind the heavy or the crate for some cover.
+ tricks&tips
In Mannhattan, when the Soldier Boss is coming, it is very useful if scout or demo switches to spy, and jumps on his head, and keeps sapping him. The boss will try to kill the spy out of his head, but he can't shoot him. Although, the medic should be carfeful when meleeing the boss for uber, not to push the spy accidentally down - as the boss is constantly moving. Spy is also good for when on Mannhattan the Giant Huntsmans are coming with uber medics. Playing a spy is only worth it after the 3-4th wave, so if you wish, he can refund. Don't start a lobby with a spy, he is weak compared to the other classes at the start.
[DOESNT WORK SINCE THE PATCH]
Fixed an exploit where players could stand on a robot's head to block their movement for an easy kill

Sniper is also great. You can pick sniper instead demo, but only if you are good with headhunting. Demo is easier, and has more health, but if you choose sniper anyway:
Weapons Hitmans Heatmaker or the Bazaar Bargain. The one that you are the best with, since you already chosen sniper.
Upgrades Explosive Headshot, reload speed, scoping... depending on the weapon.

Pyro! For Hamlet Hostility when the 3 tanks are coming at the last wave if you all refund and go with Phlogistinator pyro, you can win it within 1 minute. Upgrade max damage - do not upgrade afterburn, only damage to max, ammo to max, health on kill to max, resistances (3x fire - 3x blast) Bullet resistance is not needed with only pyros, demos, and spies spawning. Upgrade movement speed, and buy 3 crit canteens. Before the first tank comes, kill the few demos and pyros. When the tank enters, activate uber and as soon as it fades press G to taunt and activate Mmmph. You will get health and crit boost. Do it 2x times, and enjoy the way of insanity.
[Update]: Best for the last wave is 1 pyro and 5 demo with upgraded grenade launcher + critz. (and not the loch):
7IdE: On loch-load you have: +20% dmg and -50% clip size.
7IdE: Under using crits canteen you can make 12 shots.
7IdE: So, maximum dmg of stock is: 600*12.
7IdE: On lock: 600*(12/2)*1.2
7IdE: That wouldn't be more.
7IdE: 7200 > 4320.


The drop chance of an australium seems to be 1:25 -> 0.04 for a tour so 4 in 100 tours. (4%)
The drop chance of a gold pan seems to be somewhere between 0.01 and 0.001~> 0.1%

Info about the waves:
http://wiki.teamfortress.com/wiki/Empire_Escalation_(mission)
http://wiki.teamfortress.com/wiki/Metro_Malice_(mission)

http://www.youtube.com/watch?v=F9I6YT7kcyYBy Hacked Exhale
Screens:


7IdE's contribution:
Pre-wave Setups for Scottish Resistance
Special thanks to 7IdE (370k damage record as SR demo/pyro-last wave) & FL@)I(OK!

[/tr]
Wave 1
[/tr]
[/tr]
Wave 2: Giant Huntsman with uber medic
[/tr]

[/tr]
Wave 3
[/tr]

[/tr]
Wave 4
[/tr]
[/screenshot]
[/tr]
Wave 5
[/tr]
Wave 6: No screenshot provided as the Scottish Resistance demo changes class. There is a giant health on kill heavy spawning at the bottom and later super scouts spawn on the upper level.
[/tr]
[/table]
NombreGenerico89's Tips Corner:
This section currently will talk about Scout and Engineer tips, since those are the classes that I play the most on Two Cities.

Once I get enough experience with other classes I'll adress them here.

Scout tips


- Always check around the corners and little ledges on the maps. Sometimes, money gets stuck in there even if you draw them close to you.
- If your Medic is experienced, whenever you had full recharge on Mad Milk, try milking the Sentry Buster. This will help the Medic saw the Buster until full charge.
- Always look where is the Sentry of your team. Sometimes a support robot pass by and may leave some money near it. This should be the Engineer responsability to pick up sentry money, but if he's busy reapiring or building, doesnt hurt checking once in a while.
- Attract the robots attention. When a horde of robots is shooting at your defense line (i.e. a group of heavies), sneak behind them and shoot them at their back. Naturally the robots will turn to shoot you and your scattergun may not be enough, but you draw some fire away from your teammates, finish them down.
- In a missile barriage, keep jumping. This come in handy specially when the jump upgrade is maxed. Also try not to be predictable in your movements.
- If a pile of money is at front and there's a wall of robots in front of them, don't walk in their fire sight. Use alternate routes and avoid firing your gun if you don't want to be mauled before grabbing the money.
-If your Mad Milk isn't maxed yet, use it wisely. In a wave when there's Super Scouts, save your milk for when they arrive or when your defense line is getting weaker.

Engineer tips


-Rationalize your canteen usage. If there's no theat on sight and your dispenser is safe, build your sentry as fast as you can. You want to save money for better upgrades.
-Building health is more important than Firing Speed for your sentry. Why? Well, Firing Speed makes your sentry run out of ammo faster, and when you have to repair your sentry under fire, the wrench favors ammo before health, so you'll hit your sentry in vain.
-If there's a Tank and your whole team is shooting at it, it's a good idea to bring your dispenser to your teammates and follow them around with it. You'll teammates will constantly fire away and they don't have to roam around for ammo.
-When your sentry is firing at the Tank, you can add more damage by wacking the Tank with your wrench while your sentry is shooting. That's like 2 people firing in one!
-If the bomb is very close to the hatch and your team is away from it, is a very good idea to keep the sentry watching the bomb while you take care of the dispenser and help with the fire at the front. A stray scout may end the wave sooner than you expect.
-The Wrangler is very useful when you need to avoid shooting a Giant while still has some medics, but it also helps to kill far away snipers.
-In a wave with spies, sometimes you will be alone against them. One way to take care of them is by making the spies decloack in front of your sentry. It may be risky to approach them, but a good Medic is always ready to revive you. Another thing to do is when you have spies and Sentry Busters at the same time. Grab your sentry and lure the spies to a safe corner, wait for the Buster to come at you and when it's abut to explode, lure them into the blast radius. Again it's very tricky, but with practice it can be done easily :)
Answers
(in case an answer would be too long for a comment)

@Teh Mudkip: Usually when somebody choose pyro in our team its instead the heavy, but pyro does almost the same damage, isn't so easy to heal, and due to that can't body block. However to Bavarian Basin pyro is very useful, especially with the back burner, if you can dodge and hide properly. The last 40 tours we played bav, with 3 soldiers ( each equipping different buff) a scout, an engie and a pyro.. to other maps: for Metro you dont have enough credit to buy enough resistances, so if you still wanna go pyro for any reason I'd suggest you the plog, since it heals you up, and provides 75% dmg reduction when taunting, and also you dont have to attack from behind to crit, however you will also doing less damage. Atough, since you'll be probalby dying less, you do more dmg overall. For Empire you will have the money, but if you don't have a great demo with the Scottish Resistance, and a medic who knows when to put down the 14 critty stickes for giants.. with heavy it will be easier. Hamlet: With sniper in the team/good demo/soldier/medic bburner might be viable, otherwise phlog, however only in case if you play with an experienced engie, who knows the exact spot to place his sentry when the giant scouts come, because scouts are faster then you as a pyro, and you will not be able to body block. A good soldier can stun/ demo can sticky trap.. but it requires some skills and experience. Pyro may be good paired with spy, since he can also slow, and prevent the small robots from shooting.. and if you read the whole guide you already know that we usually play the hamlets last wawe as 5 phlog pyros and an engie. ( sometimes bison soldiers / grenade demos / or anything for fun..).
Conclusion: Pyro isnt bad, does about as much damage as a heavy, but he requires close range and has les hp, and cant body block. So there are more cons than pros, but it doesn't mean that you are forbidden or anything.. to play pyro. We also play pyros sometimes, but in most cases it is switching from scout, at the last wave. Also we played demoknights at the last wave.. so if your team is great, or if you play with friends, and have at least A rating, do as you wish its up to you. Have fun!

@Garret Longstocks

Gate A lost: Build the dispenser on the wall near the gate, near the corner if you have max range, so that way the heavy can bodyblock giants without worrying to get ammo.

The sentry can be placed on top of the containers, at the edge near the gate, so the sentry busters can be detonated safetily (you may need the rescue ranger to repair your dispenser from that height). Another option is on top of the pile of dirt between gate A and B.

Gate B lost: Build the dispenser either on the corner below the big ammo pack (the platform that has the ramp to climb up), on top of it if the dispenser has max range or behind the wall near the bridge of the center.

The Sentry can be placed either is the samll platform with the med size ammo pack and small health pack (if you have the rescue ranger), around the corner of the right path that leads to the center bridge or in the middle of the bridge covering the three paths, though this last one isn't recommendable.

If the three bombs are near the hatch, build both sentry and dispenser on the corners behind the walls of the middle path (bridge).

Might post some screenshots if anyone doesnt beat me to it :P

-NG89
103 Comments
maksx2010 31 Jan @ 1:42pm 
novere is said that i cant use gas passer:steamhappy:
-=|Markus|=-  [author] 22 Aug, 2024 @ 2:05am 
Spy is not bad, but harder to play with randoms and it alters the meta.
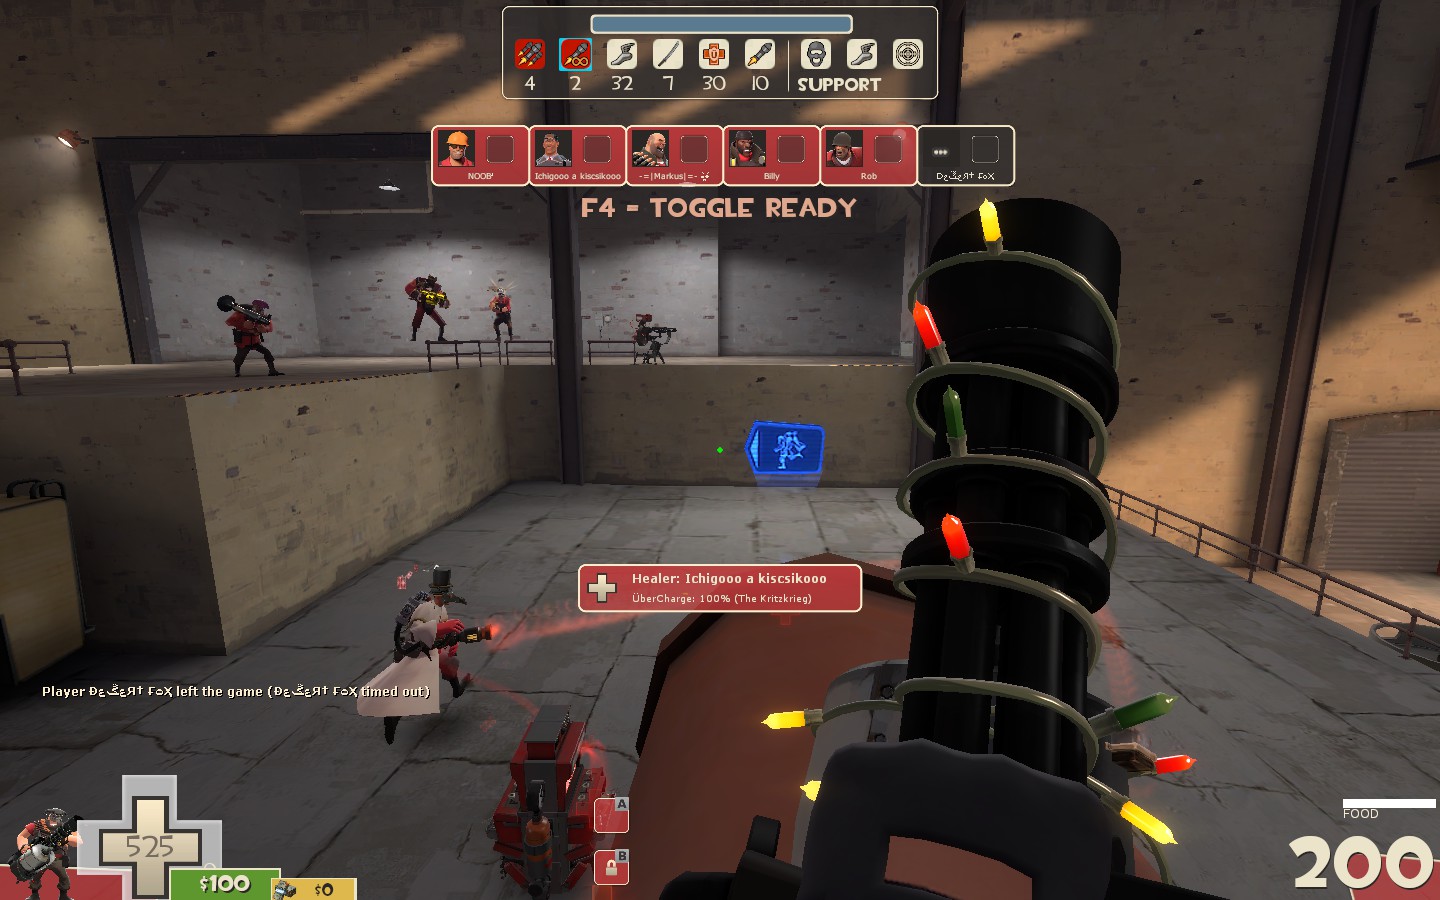
With spy you don't need scout, but scout is good to Milk (heal on damage) enemies.

Spy can sap enemies and is good in killing off medics fast; however its niche because with good team you don't really need a spy, and with bad team while spy can be useful it is incredibly hard to carry as a spy.
Diarrhea Man 21 Aug, 2024 @ 10:52am 
what about spy
Filip 17 Jan, 2022 @ 6:51am 
I got 200000 damage with heavy on two cities with brass beast and offensive upgrades really good
Crazylom 14 Apr, 2019 @ 5:24am 
What abount very fast revive technic for medic ?
It was written by delfy in some...very...old write.
Shortly , you just need to CLICK on revive thing so it does faster

The best of it you may get by this command:

bind %YOURBUTTON% '+attack ; wait 2 ; -attack ; wait 2 ; +attack ; wait 2 ; -attack ; wait 2 ; +attack ; wait 2 ; -attack ; wait 2 ; +attack ; wait 2 ; -attack ; wait 2 ;'


instant revive , what would be better :D
Ala 25 Feb, 2018 @ 2:59pm 
do i do all the cities????????????????????????????
Nate 12 Nov, 2017 @ 1:00am 
How do you trap sentry busters
Krysta Kream 24 Oct, 2017 @ 8:14am 
dragon's fury is actually really good against bots (ik this post is old but u could try it and update it)
-=|Markus|=-  [author] 11 Oct, 2017 @ 12:53am 
we wrote a guide to make your life easier. Sniper and pyro is advanced strategy. With pyro you'd be constantly refunding and switching between phlog and bburner, you also need your team to not be retarded and be turning the mobs around; also can be done without scout, and pyro gets the money instead; but then you have to make sure that the medic doesnt use crossbot but the other primary to milk the giants up so the pyro doesnt die.

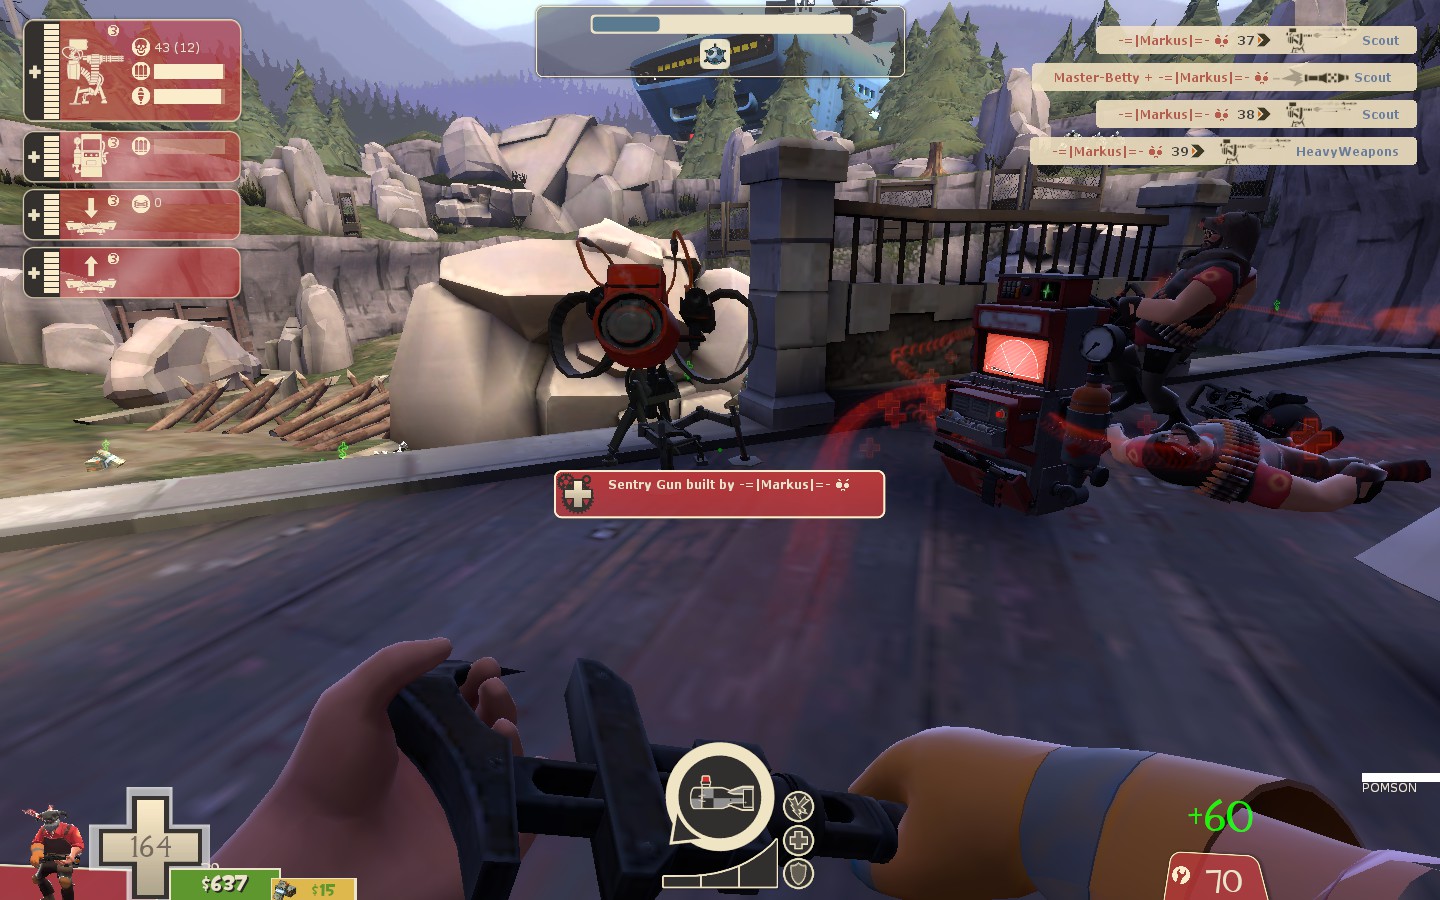
regarding sniper: we used demo with scottish on EE first wave with no upgrade and then switched to sniper. but sniper requires skill to perform well, whereas even a not so good demo does much better job. That is why we didn't cover these I guess.
forensics analyst 10 Oct, 2017 @ 8:29pm 
w h a t a b o u t p y r o