War of the Roses

War of the Roses

63 ratings
Armoury of the Roses: An Equipment Guide
By Nosnazeb
A guide to the weapons, armour, and other equipment found in War of the Roses.
   
Award
Favorite
Favorited
Unfavorite
Introduction
War of the Roses features a wide and sometimes confusing selection of weapons and armour that can be a bit daunting to those new to the game. Many things are pretty straight forward but there are some things that may not be immediately evident to a new player. This guide sets out to explain different types of weapons and armour, how they can be customised and how they should be used.
A Note on Free to Play and Class Customisation
War of the Roses is a game that can be played for free, but your options with a free account are limited. If you are playing for free, some of the information in this guide may still be useful for you, but it is important for you to know that you cannot create custom classes with a free to play version of the game. You can only play the four prebuilt classes (footman, guardsman, longbowman and footknight). If you want the ability to make your own classes and choose your own weapons, armour, and perks, you have to buy the game.
Armour Overview
War of the Roses lets you take to the battlefield in anything from filthy peasant rags to full body heavy steel plate. There is no best armour set in the game, it is up to you to find the best armour for your play style. First thing's first though, War of the Roses is not Skyrim. While that sounds obvious (the names aren't even close), RPG players are used to putting on armour and getting a flat "armour rating", where wearing a helmet somehow helps protect your entire body.

What you see here is the guardsman base class, wearing munition plate armour and a bascinet. He wears a breastplate with tassets (the plates over his thighs) over a byrnie (short sleeved chainmail shirt), The rest of his body is covered only in cloth and leather. While most games would just add damage resistance due to the armour, War of the Roses is a bit more involved. Basically, what you see is what you get. Damage to his chest will be affected by his breastplate, while a blow to his back or shoulders will have to pierce his chain mail. However, his cloth sleeves and leather boots offer almost no protection to parts they cover. Fighting someone in this armour you might be discouraged to see some of your attacks deflect off of his helm and breastplate, but you can still deal heavy damage to his arms, legs and especially his neck.

The obvious solution to having such weak points is to cover yourself from head to toe in steel plates. While this may sound like a good idea, generally the better protection your armour provides, the more it will slow you down. While all gear has encumbrance, heavy plate armour will slow your movement speed and attacks far more than the munition plate pictured will. The importance is to find armour that suits the role you're playing. Those who charge into battle swinging a claymore may find heavy armour more suitable than those who kill at range with a longbow.
Armour Categories
Armour in War of the Roses is divided into three categories: light, medium, and heavy.

Light


Light armour is composed mostly of cloth and leather. The lightest variety is the peasant rags; only available to those who've reached game's maximum rank, 60. The heaviest variety of light armour is the mail gambeson (seen here on the longbowman base class), which hides a mail byrnie under a padded cloth gambeson. Light armour's low encumbrance makes it ideal for archers and others who don't mind sacrificing protection to stay quick on their feet, or swing their weapon faster. An opponent in light armour should not be dismissed as an easy kill; while those in light armour take more damage than others, their low encumbrance can make them difficult to hit, and their quick attacks can be difficult to block and parry. It is for these reasons most advanced players prefer light armour to heavier varieties.

Medium


As the name implies, medium armour is between its light and heavy counterparts in terms of protection and encumbrance. Most medium armour consists of mail, with added plate to cover the most important body parts. The lightest medium armour is the galloglass mail, which is a simple mail shirt over a padded aketon. The heaviest is brigandine, which protects the torso with small interlocking metal plates that are hidden under leather and covers the arms in plate. Medium armour is the most varied of the three categories, not only in terms of weight and protection but in coverage as well. The aforementioned brigandine has fairly heavy armour on the torso and arms, but leaves the legs entirely unarmoured. The Almain munitions harness, on the other hand, protects the torso and arms with chainmail and a breastplate, and protects the thighs and knees with plate cuisses. Since medium armour protects more than light armour without being as restrictive to movement and attack speed as heavy armour, it is a common sight on the battlefield - worn by new players and veterans alike. The munitions plate is worn by the footman and guardsman (pictured here) base classes, and is also standard (free) equipment to those starting a custom class.

Heavy


No game of medieval warfare is complete without knights in heavy plate armour. There are currently only 2 varieties of it, the harness of plate (pictured here on the footknight base class) and the Knights Hospitaller plate. Both suits of armour protect the whole body in plate armour, with weaknesses only in some of the joints. The differences between them are largely cosmetic, though the Knights Hospitaller plate costs far more. Heavy armour offers the absolute best in protection, and many weaker attacks will simply bounce off of it doing no damage at all. This top notch protection comes at the price of slowing you down more than any other armour, your attack speed and acceleration on foot will suffer. Heavy armour is common on the battlefield among infantry, and is especially favoured by cavalry, though generally only the most inexperienced of archers use it. Many of the most advanced players avoid it due to the high encumbrance.
Armour Customisation
Most armour in the game already has your coat of arms emblazoned across the chest, but it can be visually customised even further. Steel can be polished to a shine, or sometimes it can be made to look rusted and neglected. It can even be painted anything from a humble brown colour to the vibrant courageous orange. DLC packs can let you paint your armour in Yorkist or Lancastrian colours. Here are a few examples of different paint jobs on Knights Hospitaller plate:


Standard Steel


Polished Steel


Knight of Green & Black


Royal Knight of Lancaster


Royal Knight of York
Helmets
Helmets, like armour, come in light, medium, and heavy varieties. Light helmets feature various forms of cloth and leather hats and caps. These may be light, and some look fashionable but they do little to stop an opponents blade. Medium helmets are steel, but don't offer full protection to the entire head, though some can be fitted with visors. Heavy helmets are all made from steel plate and offer the best coverage and protection for your head. All heavy helmets either cover the face, or can have a visor attached to protect the face. Since hits to the head take the most damage, even those who wear the lightest of armour often choose a medium or even a heavy helmet.

Visors
Some helmets have visors - metal shields attached to the helmet that can be lowered to protect the face by pressing v. The sallet (pictured above) is the only medium helmet that can be fitted with a visor, though the bascinet heavy helmet can be fitted with a variety of visors. The armet is the only helmet that always has a visor. The purpose of the visor is to protect the face from any incoming shot or blow. This is critical since the face would otherwise take exceptionally high damage. The downside to a visor is that it restricts your vision. Some visors restrict vision differently than others, but the result of lowering your visor is an immediate narrowing of your field of view. The following pictures show a crossbowman's vision with the visor of his sallet raised and lowered.

Visor Raised

Visor Lowered

Aside from visors, some helmets always protect the face. The kettle sallet, barbute, Venetian barbute (pictured below) and Frogmouth helmet all cover the face to a lesser or greater degree, These helmets are unpopular though, as they still obscure vision the same way a visor does, only they can't be raised. While wearing one of these helmets your face is always protected, but you never have a full field of view. Many prefer visors for the option to raise a visor for better visibility when out of combat. All of these helmets, except for the kettle sallet, are classed as heavy.

There are a few weak points in helmets which are difficult to hit. Attacks to enemies with open visors are brutally effective, but even a closed visor doesn't offer total protection. Strikes can occasionally enter through the eyeslits of a helmet or visor, dealing damage against bare flesh. This is quite uncommon, though it can happen. These gaps are larger (and easier to hit) in the barbute style helmets than in similar visored helmets. Most helmets, even heavy ones, don't completely protect the neck, leaving a small but vulnerable gap between the bottom of the helmet and the armour of the chest. Strong attacks to the neck from axes, greatswords and pollaxes can cause a decapitation. The only helmet to offer total neck protection is the frogmouth helmet, and it's small eyeslit is not so vulnerable a target as the opening in a barbute.

Customisation

While it has already been covered that some helmets may have a visor attached, all helmets can be customised to different colours in a fashion similar to armour. Helmets can be customised in two further ways: plumes and coifs. Any helmet can be given a feathered plume, although the armet and frogmouth helmets can have a crest attached. The crest is set in the coat of arms creation menu, and can be anything from feathered plumes, to a giant eagle, antlers, or even a sculpture of an axe wielding badger. Striking the crest does not damage the head.

The last customisation option for helmets is the coif. Most helmets can be fitted with a mail coif underneath it, a padded arming cap, or even a plate bevor. It is important to know that all of these coif modifications are purely cosmetic. You do not get added protection to your head or neck because of the coif under your helmet.
Shields
There are three types of shields currently in War of the Roses. The domed steel shield (pictured, on the base footman class) is a heavy shield, while the Welsh buckler is quite small and light. The other variety is the hand pavise, a rectangular shield that can be customised to be a fairly light shield or to be heavy and resilient. The pavise and domed shields will bear your coat of arms and will be worn on the back when not in use, while the buckler is worn on the hip.

Normally, to block an attack a person must block in the direction of the attack. With a shield, you simply need to press the block button. This streamlines blocking, allowing you to focus on the attack instead of carefully coordinating your blocks, or to easily block attacks from multiple combatants. Shields are also great for dealing with enemy archers - even when not blocking, any arrow that hits the shield will be deflected. This will happen even if the shield is worn on the back or hung on the hip. A shield perk can also be taken to allow a shield bash, a skill without a cool-down that can stun enemy infantry or dismount cavalry when timed correctly.

For all of these benifits, shields do have some drawbacks. Shields can be slower to raise for a block then weapons are, and every time the shield blocks a weapon it takes damage, eventually breaking. A broken shield can be replaced by bandaging yourself, and can be reequipped by pressing 4. Bandaging does not repair damaged shields or weapons, it only replaces broken ones. Shield bashes, while useful if used sparingly, are often overused by novice players, so most players know to anticipate them when fighting shielded foes. Like a tackle, a shield bash can be blocked with another shield or a low block from a weapon, stunning the shield basher instead of the intended target. Shields, especially those modified for great durability, can have a high encumbrance. This may not greatly affect those in light armour, but it makes them unwieldy in the hands of someone who is heavily armoured. Even worse, the shield bearer perk to allow the use of shields can not be taken with armour training. Without the armour training perk to reduce armour encumbrance and with the additional weight of the shield, shields often become more of a burden than a boon to those in heavy armour.
Ranged Weapons
While some prefer to sieze victory at sword point, others prefer shooting them long before their sword can reach. There are three classes of ranged weapon in the game: bows, crossbows and guns, or handgonnes as the game refers to them. While they are all used differently, the base idea is still the same: kill them before they can reach you.

As in any other game that involves shooting anything, regardless of whether it's a longbow, shotgun or laser pistol, headshots are difficult to achieve and well rewarded when you do. Not only do you get a large damage bonus, headshots give extra gold and xp well beyond the standard reward for dealing damage or scoring a kill. You also recieve a "long shot" bonus when you kill an enemy far away.

Bows


Unlike the other options for ranged weapons, bows need to be drawn directly before firing, instead of being ♥♥♥♥♥♥ and ready. To fire a bow, hold the right mouse button. The game will switch to first person view while you are drawing your bow and aiming. You will see two lines appear on an arch, moving towards the centre. This is the indicator for the bow's draw, with the bow fully drawn when the lines meet in the middle. The bow in the picture below is almost fully drawn. A bow can be fired while only partially drawn, with the arrows dealing less damage and dropping much faster than normal, but allowing a greater rate of fire. Partially drawn arrows are less likely to pierce armour though, so against opponents in heavy armour be patient and draw it to full strength. While pulling a bow to full strength gives a better shot, you can't keep a bow fully drawn for very long, or the shot gets wildly innacurate and is eventually abandoned all together. There are archery sub-perks that allow you to draw the bow faster, or hold it fully drawn longer. After firing the game returns to third person view and the archer nocks another arrow automatically.

Bows have relatively low damage but a fast reload time when compared to crossbows and guns. There are many bows available, from slow, high damage bows to rapid firing bows that do less damage per hit. A bow also requires the archer perk to equip, leaving you with some melee penalties compared to those who choose man-at-arms.


Crossbows


Where bows are fast and deal light damage, crossbows are slow to reload but pack a fair bit more punch. Where crossbows are always fully ♥♥♥♥♥♥ before firing, they are more consistant for aiming than regular bows are. You spawn in a game with your crossbow unloaded, and need to hold your right mouse button to load it. A ring will appear, with a notched strip moving slowly clockwise, and a mutch faster hook moving clockwise inside of it. The crossbow is done reloading when the notched strip reaches the top of the circle. You can wait for it to do that on it's own, called a passive reload. The other option is the active reload, where you click the left mouse button when the hook is over the notched strip, advancing the strip much faster for a moment. This can be tricky with some reload mechanisms though, and there is a noticable penalty to reload time if you miss.


After the crossbow is loaded, holding the right mouse button moves the game to a first person perspective to aim. You can hold shift to hold your breath and steady the shot, and although you can't hold your breath forever, it gives you a much longer window to precisely fire a shot. The archery sub-perk Eagle Eye will allow you 2 levels of zoom while aiming, accessable by hitting the Ctrl key.

While crossbows usually do more damage in a single hit than bows do, there are some drawbacks. While reloading, a hit will interrupt it and you'll have to start all over again. You are also completely stationary while reloading, making you an easy target for enemy marksmen. When you're shooting, it's best to have a place to take cover while reloading and bandaging. The slow reload time can also mean that often an enemy who survives the first hit can bandage and return to full health before you can finish reloading and take another shot. Also, if you switch from a loaded crossbow to a sidearm, the crossbow will not be loaded any more when you switch back, forcing you to reload again before firing. Lastly, the crossbow requires the archer perk to equip, leaving some melee penalties compared to those who've chosen man-at-arms instead.

There are three different crossbows in the game now: the horn spanned crossbow, the steel spanned crossbow (pictured), and the Italian arbalest. The horn spanned crossbow is certainly the fastest crossbow, but it deals less damage than the other two. Steel spanned crossbows and the arbalest both do much higher damage, though with a longer reload time.

Handgonnes


The guns in War of the Roses are nowhere near the precisely engineered weapons of war that they are today. These 15th century firearms are slow, innacurate at range and do substantially less damage at range. Compared to the games bows and crossbows, guns are a terrible ranged weapon, but fortunately that's not how they're used.

Guns in War of the Roses are meant not for marksmanship but to supplement infantry. Guns are the only ranged weapons not to require the archer perk, leaving a gunner free to take man-at-arms instead for the melee bonuses and the ability to tackle. This leaves a gunner very effective with his sidearm.

Guns are automatically loaded when you spawn. The right mouse button is used to aim, zooming you in a bit but not entering first person mode. The left mouse button must be held to fire. There is a delay between hitting the left mouse button and the gun actually firing. After firing the player automatically switches to their secondary weapon. The gun reloads on it's own, and this is indicated by an icon at the top of the screen. Once the gun is reloaded you can reequip it, aim, and fire again. This system is meant to fire at the beginning of a fight to wound the target or damage their shield, or at the end of combat to finish off a fleeing opponent. The Man-at-Arms sub-perk Highwayman is useful for guns, since it speeds up the regular weapon switching.

An opponent hit by a gun is stunned for a moment, and shots that hit shields deal extremely high damage, often destroying shields in a single shot. Still, guns are slow to fire, even if they allow you total freedom to fight or run during the reload. They are also very innacurate at range and do less damage at longer ranges. The fastest gonne is the serpentine arquebus (pictured), but it also does the least damage. It takes about as long to load as a crossbow with a windlass.
Ranged Weapon Customisation
Like armour, shields and melee weapons, ranged weapons are customisable as well. A crossbow can have a custom reload mechanism, and both bows and crossbows have different ammo types and attachments available. Handgonnes, on the other hand, can not be modified.

Reload Mechanism (Crossbow)

Crossbows have four options for reload mechanisms: hand drawn, push lever, pull lever, and windlass. Hand drawn is the standard, and offers no penalties or bonuses. A push lever mechanism has a slightly slower passive reload speed than normal, and a substantially smaller notched strip, but offers a good bonus on a succesful active reload. Similarly, the pull lever mechanism is slightly slower yet at passive reloading, with an even smaller notched strip, but will reload almost fully after a single successful active reload. With these two mechanisms, the Nimble Minded archer sub-perk is useful for increasing the size of the notched strip. The last reload mechanism is by far the slowest. The windlass has the slowest passive and active reload speeds. It makes up for this by still having a sizable notched strip and giving a substantial damage boost to the crossbow. The windlass is best used with the archer sub-perk Sleight of Hand, rather than nimble minded, and is best with the high powered steel spanned crossbow or Italian arbalest, and using standard or swallowtail bolts.

Ammo type

Both bows and crossbows can use different types of arrowhead, with different effects on projectile count, projectile drop, damage and other special effects. Standard arrowheads have no special effects, and the standard quiver size is 12 projectiles. Hammer head bolts are unique to crossbows. They do blunt damage instead of piercing, and stun the target, but they do less damage, drop much faster and come in half sized quivers of 6. Crescent moon headed arrows do high damage, but cannot pierce plate at all. Swallow Tail arrowheads cause bleeding damage over time (seperate from the bleeding out message when health is low). Their drawbacks are that they come in quivers of 9 and suffer a bit more projectile drop than normal. Barbed arrows are like a lighter version, causing bleeding but without the projectile drop penalty, and come in larger quivers (16), but suffer from lower damage shots. Armour piercing arrows are less likely to deflect from armour, ignore part of armour's damage resistance, and do more damage to shields, but do slightly less damage. Flaming arrows do less damage yet, and drop quickly, but light enemies on fire. Another issue is that the glowing of the fire or the streaks of fired arrows may give away the archer's position.They are best not used for long range sniping. Flaming arrows are also prohibitively expensive, costing 25,000 gold, as opposed to the standard 4,000 for most weapon modifications. The last ammo type is exclusive to bows; bodkin arrows fly just a bit further than normal but come in slightly smaller quivers. As with any modification, unlocking a special arrowhead for one bow does not unlock the same arrowhead on any other bow.

Attachments

Both crossbows and bows can use a double quiver, doubling the available ammunition, but increasing encumbrance and halving the ammunition regeneration. This is not useful for slow firing crossbows, as a steel spanned crossbow with a windlass will take nearly as long to reload as it does to regenerate more quarrels, making it nearly impossible to run out of ammunition. Bows can also use footed shafts to lower projectile drop, but recieving the same penalty to arrow regen. Crossbows can get a safety, allowing the crossbow to be stored and reequipped loaded, but slowing reload speed and applying the same ammo regen penalty. A bow or crossbow can apply both attachments available to it.
Horses & Cavalry
One of the most common questions asked by new players is "How do I get a horse?", and a few skilled cavalrymen can make or break a victory. Horses can be taken in the game if there is one without a rider, though horses are rarely left unattended. To spawn with a horse, you must have the cavalry movement perk, similarly to how Archer must be selected before buying a bow or crossbow. Afterwards a horse, like any other equipment, has to be bought. There are two categories of horses: non-barded and barded. Barded horses are slower and less manouverable, and require the Heavy Cavalry cavalry sub-perk, but their armour makes them far more hardy on the battlefield.

Move a horse by hitting w. This kicks it into the first speed, it can be sped up more by hitting w again, to a maximum of 3 speeds, or slowed by hitting s. While riding, hold shift to gallop, and space to bring the horse to a stop.

Fighting on horseback is not the same as fighting on foot. For a start, ranged weapons cannot be used on horseback. Lances are the weapons of choice for most cavalrymen, though eventually those break, leaving you to use a sidearm. Weapons are still wielded the same on horseback, although the emphasis is on attacking and hit and run tactics against enemy infantry, rather than blocking.

Eventually, most cavalrymen will find themselves dismounted. They can be unhorsed by some lance strikes and successful shield bashes, but it is far more common for the horse to be killed, sending the rider tumbling to the ground. Since this usually happens while surrounded by enemy infantry, prepare to be lynched. Taking the cavalry perk precludes use of the infantry perk, raising your encumbrance on foot and making many cavalrymen easy prey to the angry mob.

A cavalryman without his horse

If you manage to survive your lynching, you can remount your horse if it's still alive, steal someone else's, or you can call a new horse by holding C, and you will whistle for a new mount, which will eventually appear. You automatically mount the new horse. You can not move while calling a horse.

Running your horse into those who are on foot knocks them over, whether they're on your team or the enemy team. This can be extremely disruptive, and if you are skilled you can run down enemy infantry, allowing the infantry on your own team to hit them while they regain their feet. Used clumsily, you'll knock your own team mates over as ofen as you knock enemy soldiers down, at best annoying your team mates and at worst getting them killed. While any cavalry is bound to crash into their comrades from time to time, constantly running them over is the hallmark of an inexperienced or careless cavalryman.

Lancing


Lances are long spear like main weapons that can only be used from horseback. You can select a lance without selecting the cavalry perk or buying a horse, but you can not use it unless mounted (with the exception of a rare glitch). Lances can't be used to block, but can not be blocked themselves. While riding, holding the attack button (left mouse is default) causes you to switch to first person and lower the lance. The lance is then aimed by moving the mouse around, and attacks are made by aiming the lance at an enemy and riding into them, the damage depending on speed.

Lances are unique in that they are damaged not by blocking with them, but by striking with them. Lances are also damaged if they strike the environment, sometimes shattering off of trees. Lances cannot be replaced by dismounting and bandaging, like other broken equipment can be. If dismounting while a lance is equipped, it will break. Broken lances slowly regenerate on their own over time, their progress tracked by an icon (pictured) at the top of the screen, similar to the reload on guns. The lancer is free to ride and use his sidearm while the lance regenerates.

Despite these odd constraints, lances are the standard weapons used by most cavalry players. Lances can deal extremely high damage and often achieve instakills, while being mounted leaves the rider free to use hit and run tactics. There are two varieties of lance, the tourney lance and the war lance. War lances are a bit shorter and slower to use, but they do more damage and break less easily than the colourful tourney lance.
Melee Weapons Overview
While bows and crossbows are a staple of combat, it is with melee wapons that most kills are made, and even archers have to defend themselves once in a while. In War of the Roses you can take a main weapon, a sidearm, and a dagger. Main weapons are those that require both hands to handle, from crossbows to claymores. Sidearms are all one handed melee weapons. Daggers are usually used for little more than executions, but they have their uses and are quite deadly in the hands of anyone skilled, desperate, or crazy enough to use them.

Aside from the special bleeding and fire damages caused by specialised arrows, there are three types of damage you can do: blunt, piercing, and slashing. Most weapons let you do 2 or even all three types of damage depending on how you use them. The pollaxe (pictured, wielded by the footknight base class) can do all three types of damage. A low attack causes many weapons, such as swords and pollaxes, to stab. Hammers, pole-arms and most axes can also switch grip to do damage with the reverse side of the weapon, usually a backspike. Hit q to change grip.
  • Slashing damage is possibly the most common: it tends to do more damage then piercing or blunt attacks, but is the least effective against armour. Striking with a sword or axe, or swinging a pole arm or spear all do slashing damage. A strong enough slashing attack to the neck will cause a decapitation, granting extra points for an instant kill, but not allowing an execution or revive after.
  • Piercing damage usually does a bit less damage, but is a bit better at getting through armour. Arrows, sword stabs, daggers, spear and polearm thrusts and strikes with the backspike present on many axes, pollaxes and hammers all do piercing damage.
  • Blunt damage is a bit uncommon, since it tends to do less damage than slashing or piercing. Where blunt damage excells is in fighting armoured opponents: blunt damage ignores much of armour's protective ability, making it the most devestating choice for fighting enemies in plate armour. Hammers, maces, hammer head crossbow bolts, quarterstaves, the hammer on the reverse of the pollaxe and blunted lances all do blunt damage.

As important as the type of damage you're doing, the reach of a weapon can be the difference between glorious victory and being viciously executed.

Getting impaled sucks

While it is obvious that yes, you can stab people from farther away with a spear than you can with a dagger, there's more to it than that. Sometimes you can be too close to an enemy to hit them. Swords are the simplest weapons for this, able to strike with any part of the blade, whether extremely close or just barely within the blade's reach. Headed weapons, like hammers, maces, axes, spears and pole arms though have a minimum reach. If you are too close to the enemy, you will hit with the shaft of the weapon instead of the head, dealing no damage. With these weapons it is important to hit with the head.

While a long weapon can be used to hit an enemy before you are within their reach, they can run into some extra problems. Long weapons can be terribly unwieldy in tight quarters, with attacks getting cought on walls or deflecting off of trees and fences rather than striking the enemy. It is in these conditions that short weapons excel.
Main Weapon Categories
Your main weapon is your two handed weapon, whether it's a crossbow or a claymore. Ranged weapons are covered earlier in the guide, so this section will focus on the melee variants.The categories for primary weapons are:
  • Bows
  • Crossbows
  • Handgonnes
  • Lances
  • Pole-arms
  • Two Handed Axes & Clubs
  • Two Handed Swords
  • Spears
  • Select Nothing

Bows, Crossbows & Handgonnes


This guide already goes into detail on these weapons in the ranged weapons section.

Lances


Lances are already discussed in the Horses & Cavalry section.

Pole-arms

Pole-arms are long hafted weapons with a steel head that usually has an axe blade and a few spikes on it, though there are some exceptions. Pole-arms, including the pollaxe (pictured) are very popular weapons for a variety of reasons. One reason is that they are very adaptable, with most able to do piercing, slashing, and sometimes also bashing attacks. Pole arms are also very high damage weapons, and are the weapon of choice for those looking to instakill or decapitate their foes. Lastly pole arms have a long range, able to attack enemies without getting close enough to be harmed by many shorter weapons. The longest of the pole-arms is the Knights Hospitaller halberd. This long range also makes pole-arms, especially the halberd, very effective weapons for taking down enemy cavalry. The cost of this long range is that sometimes it is difficult to hit enemies at closer ranges, especially with the longest pole-arms. Pole-arms also take very wide swings. This and the range issue can make them difficult to learn for beginners, though they are some of the most effective weapons in the game. Pole-arms, especially the pollaxe, are favoured by many of the games most experienced players.

Most pole-arms have an axe blade on the front, a spike at the tip, and a fluke or backspike on the reverse for doing piercing damage. The pollaxe has a hammer head in place of a backspike, and the lucerne hammer has a hammer head in place of the axe blade. Hit q to use the pollaxe's hammer or the backspike on other pole-arms.

This is the peasant pole-arm. Don't laugh, you'll die. This clearly improvised weapon is available only to those who've reached rank 60. That means the person wielding it is extremely experienced and will most likely kill you. This is not a shoddy farm implement. It is the Mighty Death Rake.

Two Handed Axes & Clubs

Many of the weapons in this category are wielded identically to pole-arms. These are the spiked, pronged and simple bills. The galloglass axe and long axe are likewise wielded similarly to pole-arms, though the galloglass axe is far shorter, and they both lack the end and back spikes. The langer morgenstern is also handled the same way, thought it has a top spike. The quarterstaff distances itself from the others in a few key aspects. First, it has no steel head. This means that the entire haft is the striking surface, ignoring minimum range issues faced by other pole-arms, but dealing blunt damage. The quarterstaff does low damage per hit, but strikes quickly.

This leaves the executioner's and headmsan's axes, and the warhammer (pictured). These weapons are wielded differently, with swings moving in a much shorter arc then pole-arms. Also they can not stab, low attacks are an upward swing. The shorter hafts of these weapons mean that while they don't have the range of pole-arms, they are often faster, and have much less difficulty with minimum range. The axes lack backspikes, and only do slashing damage, though axes do greater damage to armour and shields than swords. The warhammer does blunt damage, making it extremely effective against heavily armoured opponents, and it's backspike allows it to do more damage against those in lighter armour without switching weapons.

Two Handed Swords


Two handed swords are the simplest weapons in the game to use, this ease of use and availability with even a base class (Guardsman, pictured) mean that they are extremely popular with new and inexperienced players. This should not, however, be taken to mean that all players with two handed swords are noobs. These swords are moderately effective against armour, and a well placed hit can cause a decapitation. Swords are generally well balanced but as a category they are highly variable, some are extremely quick, dealing light damage, while others are slow, heavy weapons. Swords do not have issues with minimum range the way pole-arms, hammers and axes do.

Spears

Spears are unique in that they are the only main weapons that can also be used with a shield. When used without a shield, a spear is like a pole-arm, able to slice with the blade, though it gets its best damage from stabs. With a shield, a spear can only be used to stab. Most spears are very long, able to hit enemies at great range. Whether used two handed or with a shield, spears suffer from minimum range issues, unable to attack close enemies. Using a spear with a shield lowers its maximum range, but also lowers it's minimum. The shortest spear, the chiavarina, has little to no issues with minimum range when used with a shield. Spears are rarely seen used by infantry, especially with the shield. Usually, only inexperienced players attempt to play with spear and shield on foot.

Spear and shield users are very easy to fight against one on one. A low block will deflect any attack they can make, whether it's a stab, tackle, or shield bash. This makes spear and shield a poor choice in many situations, though in groups it can be good for stabbing enemies that are occupied fighting someone else, while being able to block your own attackers easily.

After some recent changes to gameplay, particularly in the way lances work, spears have seen an increase in popularity among cavalry, both with and without shield, doing very high damage at high speeds, without becoming damaged after stabbing an enemy, and is faster to use than the lance.

Select Nothing


With all of the options available, why would you pick nothing? While uncommon, some players prefer using sidearms, often with a shield, and find they can better specialise in this without the added encumbrance of a main weapon they don't use. The footman base class (pictured) does not have a main weapon.
Sidearm Categories
Though the section on main weapons was rather lengthy, this one will be far more brief. Sidearms are all melee weapons, and are the main defence in close quarters for archers. Some players prefer having a balanced sidearm that can deal with any situation, while others customise theirs for specific uses. For example, a person wielding a warhammer may select a sidearm that is exceptionally effective against lightly armoured opponents, switching weapons depending on who they're fighting. Sidearms are similar to their larger two handed counterparts, though they tend to be weaker, shorter, and faster. All sidearms are held in one hand and may be wielded with a shield. There are only three categories of sidearm: swords, one handed axes, and one handed clubs.
  • Swords are the lightest sidearms; they are quick, with no minimum range, but generally deal less damage then the axes and clubs do. Swords used to only be effective against plate armour while stabbing, but relatively recent changes mean that swords with a hollow grind can pierce armour on a slash, though they deal low damage.
  • One Handed Axes, like their two handed counterparts, are extra effective against armour and shields, while the suffer from minimum range issues. Axes tend to be a bit slower than swords as well, but most have a fluke or back spike that can be used by pressing q.
  • One Handed Clubs are, contrary to the name, not just a bunch of simple wooden sticks used to hit the enemy, though the shillelagh is. Maces and warhammers function similarly, dealing blunt damage, though the warhammers have usable backspikes. These are often the slowest sidearms, with the exception of the shillelagh which is fast and does comparitively low damage. One handed clubs are the most effective sidearms for fighting enemies in heavy armour.
Daggers
After all of the axes, pollaxes, battleaxes and super duper axes, why would you want a dagger? Well, the game forces you to take one, but will you ever use it? Yes. Daggers are tiny weapons with very little reach, and they are unable to block, but are still good for a few things. Since blocking with weapons damages them, they often break. Once your main weapon is broken, you are automatically switched to your sidearm. If the battle rages on and the sidearm breaks, you are left with your dagger. Thus, daggers are often a weapon of desperation.

Some people, though, sheath their larger weeapons from time to time to use their dagger. They do this for a multitude of reasons. Some are just crazy. Others use the dagger's great speed to strike enemies too quickly for them to block. Others find themselves in a tightly confined space, the small size of the dagger allowing it to be used far more effectively than larger weapons.

Another use of a dagger is for executions. Many weapons don't have their own animation for executions. Swords, two handed axes, and shields have their own execution animations, but for other weapons the execution is done with the dagger.

Though there are many styles of dagger in War of the Roses, the differences between them are mostly cosmetic, the stats on the daggers themselves are very similar, regardless of what the stats shown say. Some claim the quillon dagger and pointed stick are the best, but it really comes down to personal taste. Dagger options range from the pointed stick to daggers with elaborately carved ivory hilts, with golden inlays of latin scripture.

It says "Love thy neighbour"
Weapon Customisation
Weapons in War of the Roses can be heavily modified to affect everything from their damage and armour penetration to their speed and durability. The defaults for these weapons are always free, but modifications tend to run a flat rate of 4,000 gold. Also buying a modification for one weapon doesn't give you that modification for others; buying a blade with a hollow grind for your Almain falchion won't unlock hollow grind for your longsword. Most primary and secondary weapons can have 4 options for modification. None of these modifications affect the look of the weapon. It should also be noted that just because a weapon can be modified, doesn't mean the modifications are better for you.

School of Fighting

School of fighting is probably the most important customisation you can make on your weapon, and is available for all melee weapons (except lances). This is the only modification available for daggers. Keep in mind that this only affects the weapon you apply it to; your main weapon, sidearm, and dagger could all have different fighting styles applied. There are three options available:

  • Common Fighting Style is the default, and gives no bonuses or penalties.
  • Imperial Fighting Style is the strongest fighting style, hitting hardest. It is also the slowest, making you a little slower to swing your weapon.
  • Milanese Fighting Style is slightly quicker than the common fighting style, but does less damage. This makes this a good fighting style for getting hits, but you'll need to stab your enemy a few more times than normal.

Blade Material

Blade material, called tip material for some weapons such as halberds, is the second customisation available. Most melee weapons can have this material modified, although daggers, lances, and non-metal weapons such as quarterstaves can not.


  • Standard Steel is the default option, offering no bonuses or penalties.
  • Passau Steel is an upgrade that makes your metal harder: more resistant to damage, but with less weapon health.
  • Toledo Steel is only available for swords, not for maces, spears, axes or hammers. It slightly reduces damage absorbtion, making the blade take more damage when blocking, but it also allows the blade to slice through multiple targets with reduced penalties. Be careful though, on a crowded battlefield this can mean damaging friend and foe alike.

Edge Grind

Edge grind affects the blade profile. It is available on all bladed melee weapons, except daggers and lances. Edge grind can affect the damage, durability, speed and armour piercing ability of a weapon.


  • Flat is the standard option, offering no penalties or boons.
  • Double Beveled blades are far more durable than any other blades, but are slower to swing.
  • Convex blades deal extra damage, but are extra fragile. This makes them useful for cleaving through lightly armoured targets.
  • Hollow Grind affects a blade's health, though less severely than the convex blade grind. Hollow ground blades do not do extra damage, but they do have a bonus on armour piercing, reducing deflections and increasing damage against armour.

Shaft Material

Weapons with wooden shafts, including lances, can alter the material their shaft is made of. Swords and daggers, lacking shafts, can't make this alteration. Even weapons which appear in game to have steel hafts, such as the Knights Hospitaller gothic mace or the battleaxe, can still use this. Shaft modification mostly affects wapon durability.


  • Standard shafts are the default, offering no bonuses or penalties.
  • Hardwood shafts are stronger, giving the weapon more health, but they increase encumbrance a bit more and make the weapon slower to wield. Hardwood shafts are often used by people who find weapon durability paramount, such as those who do not have a shield or another melee weapon to block with. Weapons used with a shield rarely have this modification.

Pommel

Pommels are the weights on the end of a sword hilt, made to balance the blade. As such this is a sword exclusive modification, and is probably the most minor modification.


  • Standard pommels are the default, offering no bonuses or penalties.
  • Balanced pommels allow slightly quicker attacks, but increase encumbrance slightly.

Lance Tip

Lances have only two modifications, the shaft material and the lance tip. The tip is used to modify the type of damage dealt by the lance.


  • Sharp Tip is the default, and is used to deal piercing damage.
  • Blunt Coronel Tip is used to deal blunt damage.
13 Comments
Sir Diealot 21 Aug, 2023 @ 10:42am 
does anybody still play?
Uncle Dog 8 Jun, 2022 @ 9:10pm 
kek
Rock 9 Sep, 2014 @ 8:57pm 
An excellent guide.

The only thing I'd argue with is your description of spear and shield on foot. It's a horrible setup for dueling or otherwise fighting other infantry straight on, but it's a very good combination for dealing with cavalry and fighting opportunistically, taking advantage of the reach, speed, and strong piercing damage to exploit openings.
duronk 17 Mar, 2014 @ 1:34pm 
heavy armor+headsman+master clicker
Var 12 Mar, 2014 @ 7:53am 
Rating: 10/10
Like: Yes
Found useful: Yes
Wildbold 12 Dec, 2013 @ 3:42pm 
Very good guide, thanks! I love reading lengthy ones! :)
KhorneHub 26 Oct, 2013 @ 6:45pm 
thanks Nosnazeb, just started playing the game, your giude might help. At least I know the wepons and what they do, THANK GOD FOR YOU!!!
DisposableGoon 28 Sep, 2013 @ 7:44pm 
Already use the bascinet. Alot.
Yeah I think what happened was I purchased the DLC, but the DLC wasl imited time only.
Nosnazeb  [author] 28 Sep, 2013 @ 7:25pm 
Good to know my guide is appreciated!

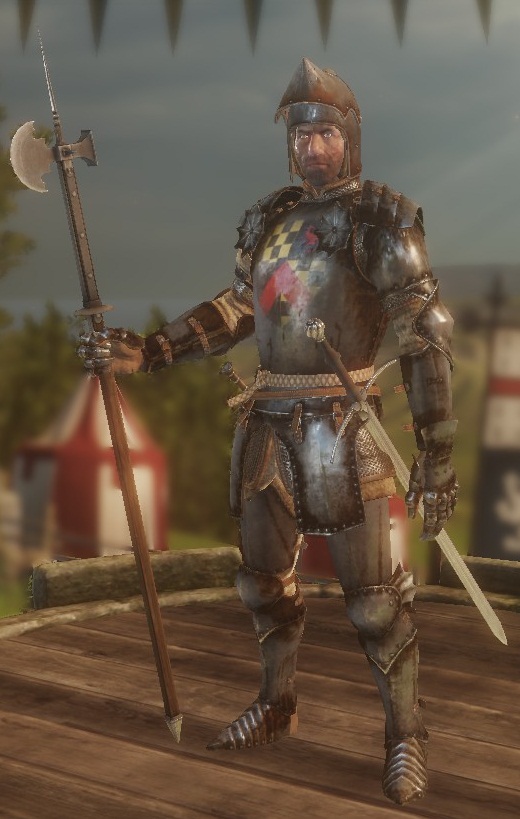
The jupon is popular, at 50,000 gold it's one of the more affordable sets of armour, and it looks more dignified than the peasant rags.

I didn't see the Lancaster and York DLC's when I just checked, but I know I bought them a few months ago. Do you have to purchase Yorkist or Lancastrian colours on new armour, or is it always unlocked for you already? Whenever I check new armour it already lets me paint as Lancaster or York.

Also, I have yet to add it to the guide, but the kettle sallet offers partial protection to the face, like a regular sallet except you can't lift the visor. It's a medium helmet. If you're looking for something cheap and visored (to save money for your jupon), sallet or bascinet. As I recall, they are the lightest visored helmets and offer good protection.
DisposableGoon 27 Sep, 2013 @ 11:31am 
Damn dude, this guide is really good!
Sadly though, I learned all this before I read it, but there was a tip or two that helped me.
I just need 50,000 coins for a Jupon XD

Anyway, It is perfectly written and gives many good tips. I also have to ask, the York and Lancaster armor paints are DLC only? Because I have them 24/7, and I bought War of the Roses before "Kingmaker" and I can't remember if I bought the DLC or not.

Oh, also I'm referring to this when I need helmet info. I couldn't find out which helmets had permanent visors, and which ones had raisable ones.