Team Fortress 2

Team Fortress 2

36 ratings
BlacKy's sniper guide - Expert MvM
By BlacKy #SlavaIsraelini
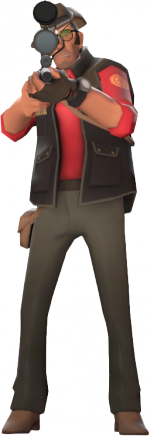
This guide will tell you everything you need to know about sniping in Operation Gear Grinder, from basic skills to advanced tactics.
   
Award
Favorite
Favorited
Unfavorite
Intro
Before I start, I just want to note that I have a complete all-around guide for expert MvM, so if you wish to know more about how to play on expert, you should read it.
http://steamproxy.com/sharedfiles/filedetails/?id=139924058

Sniping in MvM is often considered as a bad move, mostly because it takes some skills to actually do a decent amount of damage, and take down key targets like medics, swarm of robots, and more.

All the info you're about to read now is mostly based on my experience alone, this guide isnt a bible and should be considered as an advisor only. Feel free to try out other strategies and loadouts that meet your comfort. Remember that MvM is a team effort, dont try to be on your own without thinking about the group. Help them help you.

This guide will help you gain the confidence you need in sniping robots on expert MvM, showing your teammates that you are as helpful as the heaviest of the heavies, the smartest of the engineers, the fastest of scouts, and as croud controller as the demoman.
Sniper's role
Did I just mention crowd control? I believe I did.
The sniper has the highest efficiency on crowd control more than any other class. This includes the demoman and the heavy aswell. You can eliminate over 10 robots with just one shot, making you be more effective than a demoman, mostly because you can kill safely form a distance with no issues, while not having to get close to the danger zone like the rest of the classes.

The Sniper's main job is to eliminate key targets such as medics, giants and hordes of small robots coming along the path. He also makes the scout's job much easier, as for every headshot he does, the money is being tagged as 'red', red money will be auto picked up upon disappearing (when its burning out), which means Its just there for healing purposes.

Last but not least, the sniper can easily take out other enemy snipers, since they most often shoot from the distance, it will be much easier for him to pin-point their exact location and pick them off one-by-one, and sometimes even four-by-one.
The weapon arsenal
As you may guess, each weapon has its own advantages and disadvantages compared to the stock weapon, but some are much better than others, so lets review them:

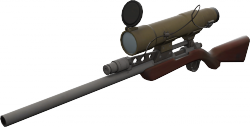
* Sniper rifle (stock) - Hit. Headshot. Damage. Simple. No big drawbacks about this weapon, although it wont suggest much comparing to the others. Not a recommended weapon to use.


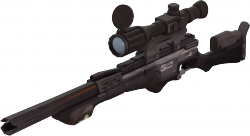
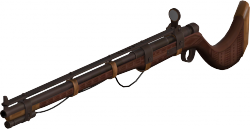
* Machina - The straight upgrade from the stock sniper rifle. On full charge it will add 15% to your damage (on a fully upgraded machina, this means 1035 damage per headshot (!), instead of 900 damage for the other rifles). It will also give you a free penetration with fully charge shots, making you not being dependant on the 400$ penetration upgrade.
Its drawbacks are barely visible on MvM. Its tracer bullet is irrelevant since you're fighting with robots, they will pretty much know where you are no matter how invisible your rounds are. The more visible drawback tho, is the 'no no-scoping' drawback which comes with the Machina, but you will find it so rare to want to noscope a robot (mostly happens with tanks) making it also an irrelevant drawback.

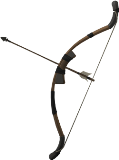
* Huntsman - The sniper's Huntsman is a very bad option to take, since the damage it does is significantly smaller, plus the fact that you cant scope, plus, you must release the arrow after 5 seconds or it will be fired blindlessly. This weapon has no upsides comparing to any other sniper rifle, and for that its considered the worst of choices.


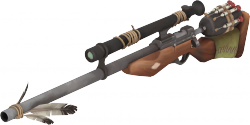
* Sydney Sleeper - The support sniper. The purpose of this rifle isnt to make as much damage as possible, but to make the team's damage as high as possible. Meaning that you will make your team get mini-crits on the robots instead of normal damage, at the penalty of no headshots.
Overall this weapon is very situational and also dependant on the sniper's ability to headshot. If you're not delivering too many headshots and your team suffers for it, you should switch to the sleeper as you wont have to aim for the head. Overall i wont suggest this weapon to everyone, just those who suffers the lack of basic-medium skill of sniping.

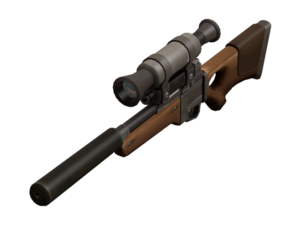
* Hitman's Heatmaker - The weapon for the professional headshotter. This silenced rifle delivers 20% less damage on bodyshots, which is bad for scenarios such as tanks, or when you're missing a lot of heads. But when you start headshotting in packs, this baby packs the most devastating punch than any other sniper rifle out there, making it the obvious choice to pick for the medium-professional skilled MvM sniper. Its focus ability combined with fast reload speed giving you the ability to eliminate every single robot out there, with one of the highest DPS (damage per second) sniper rifle, you can deal an insane amount of damage, constantly, to a group of robots, pack of giants, or a single robot sorrounded by robo-medics.

* Bazaar Bargain - Was once the perfect sniper rifle to headshot with, as it had an insane bonus for every headshot. For each headshot you deal, your next charge gets quicker and quicker, up to 7 headshots (heads) stored. Its base charge rate is very slow comparing to any of the other rifles, plus for every shot you miss (or bodyshot) you will be reduced 1 head from you meter, making your recharge a bit slower. This weapon has been nerfed badly, and now the maximum charge rate it can get is only twice as fast than the base charge rate (not including upgrades you add from credits). Unadvised after the nerf.


Verdict:


I will sum up the top three sniper rifles, without any order (thats up to you of course), plus my recommended upgrades to buy for each:

* Hitman's Heatmaker - For those who like to take fast punches on masses of robots, making them more vulnerable after each additional shot. Very good against hordes of robots.

Upgrades: 1 Explosive HS > 2 Reload speed > Some damage and more explosive HS > 1 Ammo + 1 Health on kill > Penetration > Maxing out reload speed > Maxing out damage and explosive HS > resistances / health regen at your will.

* Machina - For those who likes to actually wait for their charge meter to go full on every shot, then take a hefty amount of damage on each relatively slow shots. Very good against giants.

Upgrades: 1 Explosive HS > 2 Charge rate > 2 reload speed > Some damage and more explosive HS > Maxing out charge rate > 1 Ammo + 1 health on kill > Maxing out reload speed, damage, and explosive HS > Resistances / health regen at your will.

* Sydney Sleeper - For those who lacks the ability to headshot frequently enough, or just when having a bad team to deal with (E.G - Helping heavies with minicrits).

Upgrades: 2 Charge rate > Max out reload speed and charge rate > 1 Ammo + 1 health on kill > Penetration > Maxing out explosive HS + damage > resistances / health regen at your will.

- Note on secondaries and melee -

The common secondary weapon is obviously Jarate, helping the scout slowing down fast robots plus dealing minicrits on them. Another option is the Darwin Danger Shield, after its stats got enhanced a bit, it does not only gives +25 more health, but now it also gives a natural, stackable +15% bullet resistance, which is very good when you have an annoying wave with robot snipers as support, or a giant heavy/deflector.
Razorback is a very bad choice since while it blocks a backstab from a spy, it only does so once, and in MvM there is never a situation which you'll meet only 1 spy. It is much better to Jarate them and then use the Bushwacka to 1 hit them, which leads us to the melee weapon: Bushwacka. Always use it, since you're almost always using the jarate anyway, Plus, at later waves, if having a Buff Banner soldier on your team, a fully speed-upgraded Bushwacka will deal an insane amount of damage on tanks, since all minicrits turns to crits (this situation rarely happens, but when it does, you should use it).
Sniping positions - Coal Town
Coal town is the most straight forward of understanding sniper positions. You will be offered a few places with a great distance to shoot down robots from, but you should always stick to this one location: The top of the main building's banner.


The view from here covers the entire front's 'hallway', giving you the optimal location to snipe from. Spies wont get to you if you stay put, since you will be standing on a higher ground, however, there will be some frequent trips to the ammo/health kits behind you, so make sure the area is clear behind you before falling back.

In case of falling back, you will gain 2 additional spots to snipe from, one per each path. Note that they arent as spy-protective as the 1st spot, but they will do the trick view-wise:

Sniping positions - Decoy
Decoy is a bit more complexed map for snipers, the downside with Decoy is that its just too small, so as much as you can see everyone, everyone can see you.

I'm mostly talking about robot-snipers, when they arrive, they will always spot you on the main building, which is your primary location. As for where to stand? Anywhere on top of the building will give you a clear view of the front hallway, when spies come however, you should stick to the back edge of that building, to avoid of being backstabbed (the upper left screenie is aiming at the exact location).
When there are (absolutely) no spies on the wave, but quite a few snipers, it is advised to take cover inside the building. Snipers and other robots will very rarely spot you there, giving you the optimal hiding position from them, however, you will gain a bad view comparing to the upstairs location. If playing expert, it is suggested to go down there for the last 2 waves, since there are no spies at all, but too many snipers.
Sniping positions - Mannworks
Its been said that this map is the hardest of the 3 maps to snipe at, but i find it quite easy, in fact, for me its the easiest map to snipe among them.
If the robots are going on the left path, there are three popular sniping spots which i'd like to mention:

1) There is a hidden spot which you cannot take damage from (the back however, is entirely exposed to damage). You need to stand on the tires and aim in that crack between the wooden building and the metal plate/fence. The view from there is simply awesome, you could see the entire front from there, potentially eliminating any target without the need to dodge enemy fire, thats because nobody can hit you from there (they will if they aim at you, but they just dont). Another great feature of this position is the anti spy mechanism, standing too high will prevent yourself from being backstabbed, as they cannot reach you with their knives, altho, there was 1 time which they have backstabbed me when i was standing too far back on that tire, but that almost never happens. The last great advantage is the constant dispenser healing/ammo regeneration, while its on max range, it will reach you even if its behind that wall (behind your back, near the heavies).

2) Another spot on that path is at the back, on top of the main building at the front. From here you will get a full view of that path, with almost not damage taken at all, but with the cost of spies breathing around your neck, you should be really careful if you wish to snipe from here, and always pay attention to the announcer when she's alerting for spies.


3) This spot is also a good area, just up on the higher crate for dealing with small robots which can be killed in 1 shot, or just melee robots which wont attack you. You will also get full immunity from spies, plus constant ammo and health refill from a nearby dispenser, altho if you happen to fall from the crate, you will have to go back up from the stairs and jump from there. Be aware tho, as long range robots will pick you off very easily, choose wisely when to stand there.


If the robots are taking the right path, things will get even easier for you and your team. On this area, you will gain much wider view for sniping robots, but at the risk of taking damage from them. There are 2 popular positions for the right side:

1) Right on the crate near the barrels, behind the set of wooden planks (which usually serves as a cover for the heavies. Just like the 1st suggested position on the left side, a fully upgraded dispenser range could reach you for ammo and health, while also being immuned from spy attacks.


2) The other location is the area being pointed at in the picture, just on top of that crate, near the tree stump. You will be immuned not just from spies, but also from any frontal robot damage, since you will be standing very far comparing to the 1st location, they will never reach you without taking down the entire team first. Bad news is that you wont have a dispenser to constantly serve you, altho you have a medium ammo pack + full health kit on the back. This place is advised if dealing with super scouts or giant soldiers.
10 Helpful tips
While gaining experience from MvM sniping, you also gain knowledge on the robots, the maps, and your overall sorroundings, so i've gathered these few extra tips to show you how to increase your damage output and survival potential as much as you can.

  • Ask the engineer to get the dispenser close to you too, so it will heal you, assuming you're sniping close to the nest.

  • Sync your thrown Jarate with the Scout's Mad Milk. If your goal is to slow down fast robots, dont throw it at the same robot he threw his milk at, if your goal is to mark robots for mini-crits, pay attention to which target the scout is marking, again, to avoid marking the same robot, and vice versa.

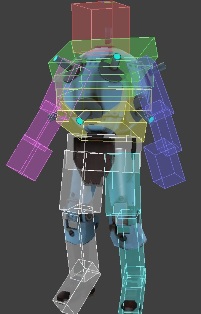
  • Sentry busters are never a threat to you, but it doesnt mean you can fully ignore them. Since you almost always starting with explosive bullets, its good to give your engineer some help with headshotting them to slow them down. However, they are a bit harder to headshot than any other robot, not just because they always move fast, but also because their head is invisible (their head hitbox is on the top of the top spike, as you can see in the attached pic as the red cube).

  • Try different set to weapons of your disposal. You can try the 'Machina method', which is to invest credits on faster charging rate, instead of bullet penetration, or with the Hitman's Heatmaker, investing credits on faster reload speed rather than charge rate.

  • If your only threat is a tank, bodyshot it without scoping at all, it does the same damage as with quick scoping, but at a bit faster speed.

  • Assist your team with killing spies. If you use the jarate-bushwacka combo and see a spy or two, dont be afraid, as with that combo you will 1 hit them anyway.

  • If there are no super scouts intimidating your team, and you have too many snipers/heavies attacking you, wear the Darwin Danger Shield. Dont forget it has another feature now: +15% bullet resistance.

  • On Decoy, you can tell the engineer to set up the teleport exit at the end of the ramp so it could block spies. Note that this wont always block them, and eventually they could knife it down and get to you, but it will give you a few extra seconds to be alerted by them (click on the top of the pic to enlarge).

  • When being picked off by a group of snipers, dont try shooting them while they are dodging bullets, always give them the time to scope on you, and only then quick scope a headshot on them. Try to zig-zag roughly and then scope on them for a fine-tuned aim before releasing a bullet. If there are too many snipers and you feel they are going to kill you, run away and get some health, as its better to pospone your assistance by a few seconds than dying.

  • It is advised to switch to heavy on wave 2 of Mannworks and Decoy, as you will meet too many scouts to deal effectively with as a sniper. You wont be needing to buy anything as a 1-wave heavy (unless you want to use a canteen, which is fine).
Videos
On this section I will show you how its being done in action. On expert MvM we have 3 missions, 1 per each map, and since I've recommended 3 sniper rifles to use, I will just use them 1 for each map.

Note: It may seem that I have a bad aim in these vids, but I'm not, its just that its hard for my PC to run smoothly while Fraps is recording it at 1080p, so everytime I record stuff, I get massive PC lag.


Mannworks - Sydney Sleeper


Decoy - Hitman's Heatmaker


Coaltown - Machina

Outro
I would like to thank my parents who were been there for me through my hard times...

*cough*cough*cough*

Sniping is fun, especially in MvM. Always remember to practice some more, as you'll learn the benefits of sniping vs. other classes.
I hope I helped people gain confidence of sniping on MvM. Always remember that even if you dont do good enough, its always important to keep practicing.


26 Comments
Mom 6 Feb, 2015 @ 10:16am 
Also I could be wrong, I feel delay every time I use the thing and other people tell me that's true so I have a few google searches to make
Mom 6 Feb, 2015 @ 10:15am 
And rage means anger, but video game communities use real words for stupid shit
((The reference being rage mechanic has little to do with anyone getting actually angry, it has to do with how much damage one has accumulated))
Mom 6 Feb, 2015 @ 10:13am 
And rage is anger, but video game communities use real words for stupid shit
BlacKy #SlavaIsraelini  [author] 6 Feb, 2015 @ 10:02am 
Thanks.
I have never felt any time delay with machina.
Also, drag is the force pulling u backwards while u move forward. What u mentioned has nothing to do with the irl physical phenomenon called drag.
Mom 6 Feb, 2015 @ 9:07am 
noticable* not noicable wow
Mom 6 Feb, 2015 @ 9:07am 
+BlacKy
There is a slight delay when firing the rifle, drag is one of the names put on the phenomenon for the delay that is pretty noicable when firing while aiming from left to right (especially when flicking the mouse)
Also, great expert guides by the way. Got me out of advanced mode and into expert.
BlacKy #SlavaIsraelini  [author] 5 Feb, 2015 @ 11:52pm 
Drag?
Mom 5 Feb, 2015 @ 6:10pm 
The machina is not an upgrade to the stock because of drag, not just because it can only shoot while scoped in.
Dollynho your little friend 4 Oct, 2013 @ 7:34pm 
Hey (OffTopic) sometimes i get killed by the Sentrybuster without it exploding, it appears the icon of an Ullapol Caber!
Dollynho your little friend 4 Oct, 2013 @ 7:30pm 
Hey BlacKy MK i know dat i only use on the 3 and 4 waves, i always buy ammo upgrades so i can hunt alone for more time while not supporting the team with my sleeper. The spot also works as an decoy against demoman hordes cuz they will stop at the start and will not stop firing at you with no sucess, so the team can destroy then!, also all soldiers will target you at first(useful making an decoy for giants) you just have to sit there like an duck in the stair out of the AOE dmg and let the team kill then!