Supreme Commander 2

Supreme Commander 2

432 ratings
Supreme Commander 2: Everything you need to know.
By 为让我心醉的你 and 1 collaborators
Basic information on how to stay alive and a variety of information on every unit in the game.
5
2
10
4
2
   
Award
Favorite
Favorited
Unfavorite
Introduction
This guide is a conglomeration of information and advice on various aspects of Supreme Commander 2. Inside, you'll find basic strategies to employ in multiplayer, mechanics of various types of unique units in the game, general advice on the usage of specific units and tactics, as well as a complete list of all mobile and 'unique' combat units in the game, with tips and (sometimes) tricks to go with every individual unit.

If you have any information you believe is worth adding, or if you spot any errors in grammar or factual information in this guide, drop your thoughts in the comments. If you have any other comments (or issues) with the guide, feel free to give us your thoughts. We don't bite.

Written and maintained by Badstormer.

Enjoy your stay.
Differences between DLC and non-DLC matches
Note that this section does not apply to tutorial or campaign missions.

The first thing to know about this game is that there is a distinct difference in the game's economy in a game that is DLC-enabled vs. one that runs without DLC. The relevant DLC can be found here and is, in this author's modest opinion, completely worth the money.

The difference is simple: with the Infinite War Battle Pack 1 DLC enabled, mass extractors run at 50% efficiency after being built and scale up to 200% efficiency over time (roughly 20 minutes after being built). What this means is: With the DLC enabled, holding mass extractors for long periods of time becomes enormously more important. This breaks the longstanding tradition of the Supreme Commander series that mass should be taken and held for any period of time possible (as they tended to pay for themselves rather quickly and never became more efficient), and more of a long-term investment that should be prioritized more heavily for destruction and more heavily for protection.

Put simply, with the DLC enabled, mass extractors are much more valuable, especially ones that have survived for long periods of time. Mass extractors also take a longer initial period of time to return on their investment to build, further increasing the importance of defending them. The actual build cost of the mass extractor remains the same.

As for other differences...
  • The infamous Monkeylord, the single most powerful experimental in the game by a wide margin, cannot be built without the DLC;
  • Several experimentals from all factions with unique, and often niche traits, are unavailable without the DLC, reducing tactical options in a match;
  • Several non-experimental units with unique, strategic use cases are unavailable without the DLC;
  • Several upgrades to units are either reordered or removed entirely from the tree without the DLC;
  • Build orders differ significantly with the DLC due to major early-game mass income differences;
  • Players without the DLC cannot participate in a DLC-enabled lobby.

Frankly, the game plays much differently with the DLC than without it. You'll feel it within minutes of starting a match. For the full experience, I strongly recommend investing in the Battle Pack. At a whopping $1.24 before taxes on the frequent 75% sale, it's a bargain bin of content.
Common Wisdom
As with most RTS games, there is no singular strategy that beats all. By design, any strategy tends to have a weakness, whether it's you or your opponent utilizing it. Adaptation is the key to success. That said, there is some wisdom to be imparted about basic concepts that tend to be learned the hard way:
  • Build a factory first. Not unlike the former entry in the series, you cannot go wrong by building at least one factory directly at the start of any match. Building a factory immediately permits you to assemble a task force, send out scouts to assess your opponent's strategy, and construct more engineers to expand more quickly.

  • Mass wins games. While it is true that the overwhelming majority of strategies can be countered, there is one particularly difficult strategy to counter in virtually any context: having overwhelming numbers compared to your opponent, and this particular strategy can be accomplished in only one way: having more mass than your enemy. More mass is more units, more research, more options, and more firepower. You can never have too much, and the more you have, the easier it is to take more.

  • Scouting saves lives. While any strategy can be countered, it is much easier to counter them if you can see them coming. Throwing a disposable fighter over an enemy base every few minutes will permit you to assess everything they're doing in exchange for a modicum of mass, and prepare accordingly for whatever they're getting ready to throw at you, be it artillery, experimental units, nuclear missiles, or a naval armada. One of the most common ways games are lost is not seeing a threat to your strategy before it's deployed against you.

  • Mobility beats firepower. While the occasional turret can dissuade your enemy from encroaching on a specific spot briefly, over-reliance on turrets can quickly turn a match out of your favor, for one simple reason: the turret can't move. If a unit is attacking the turret out of its firing range, such as a mobile missile launcher, the turret cannot be ordered to move into firing range, nor can it be ordered to retreat somewhere safer. While stationary defenses can be helpful in keeping units a certain distance away from an area, you can expect your opponent to deploy something sooner or later to demolish any weaponized structures you build.

Put simply, by focusing on constructing mobile units more than stationary units, expanding to mass deposits wherever possible, scouting regularly, and adopting a mindset of rapid adaptation, you'll have already overcome the most common mistakes made not only in Supreme Commander, but virtually any RTS.
Standard Build Order
This is a basic and flexible build order that can be easily modified to suit one's personal preferences. This generalized build order is suitable for any map that does not have a strong naval emphasis.

ACU - Land Factory (direct-fire units)
Engineer 1 - Land Factory (3-to-1 direct + indirect-fire mixture)
Engineer 2 - 2 Mass Extractors
ACU - 2 Mass Extractors
Engineer 1 - 3 Power Generators
ACU - Radar
Engineer 1 - Mass extractors near spawn
Engineer 2 - Mass extractors near spawn

Build more power generators as needed after completing this build order, and adapt unit production based on what enemy units you encounter. Additional factories can be constructed as soon as mass income permits it. Mobile anti-air should be added to the mixture if air units are encountered early.

This basic build order assumes you will not build more engineers early, and also assumes you will mass-produce assault bots/tanks/artillery directly after the factories finish construction. The intent of this unit pattern is to harass enemy expansion efforts early with small groups of units, prioritizing mass extractors and any poorly defended expansion points. This also supplies the commander with a suitable army early to react to enemy encroachment.
The United Earth Federation

The United Earth Federation's doctrine revolves around simple units, thick armor, heavy shields and long-range weaponry to push forward through enemy positions and hold them with confidence. While easy to understand and very forgiving, this doctrine comes at the expense of slower movement speed than usual and less precise weapon systems than other factions. UEF units - especially heavier ones - pack a punch, are hard to break, and tend to outrange their Illuminate/Cybran equivalents, but are more easily outrun and tend to fire less accurately than their counterparts. Functionally a 'jack of all trades' faction, there is no situation the UEF cannot effectively contribute to, be it on land, sea or the air.

In essence, The UEF is a simple faction that has a healthy balance between offensive and defensive capabilities.
The Aeon Illuminate
The Aeon Illuminate

The Illuminate are a faction that heavily favors employing unconventional and specialized tactics to outsmart their enemies, with a heavy emphasis on using special abilities or unit functions, such as teleportation, area-of-effect buffs, reflective shields and hovering abilities to take enemies by surprise and outsmart them with unconventional tactics. This comes at the expense of completely lacking a navy (with a limited variety of their units naturally hovering over water to compensate) and having a less straightforward approach to combat than either of the other factions. With less defensive options than the other factions and less per-unit firepower, the Illuminate doctrine revolves around the strategic usage of unit abilities to gain the upper hand in any engagement.

In essence, the Illuminate strongly emphasize the strategic usage of unique structures and unit abilities to work around problems in unconventional manners, with less direct firepower in conventional engagements.
The Cybran Nation
The Cybran Nation

The Cybran doctrine revolves around an aggressive approach to any match, largely forgoing defensive abilities in favor of superior unit mobility and firepower. Cybran units are commonly short-ranged, quick, and dish out disproportionately more damage than their Illuminate or UEF counterparts, but are significantly less durable and often lacking in weapon range. Cybrans have a competent arsenal in the land and air and a reasonable naval force, but require more micromanagement, planning and intelligent maneuvering than either other faction to be effective. They also sport some of the strongest experimental units that mass can buy, if you can afford the cost.

In essence, the Cybran nation is an aggressive faction with poor defensive ability and a heavy emphasis on mobility and firepower at the expense of durability and weapon range.
The Armored Command Unit
The Armored Command Unit (ACU) is the most important unit in the game. In most situations (if you are not ACU-rushing), you cannot win with your ACU alone, though it can help in most land combat/building situations more than any other unit. Your ACU should always be defended or evacuable. Many people lose their ACU from letting it wander off on its own or placing it up on forward bases. In Supremacy, this is sometimes viable - but often pointless. Your ACU should be supporting your units pushing forward in the early game to either kill mass extractors or structures, and is generally supported by about 5-10 tanks/assault bots (though more is better). Your enemy/enemies will need to spend more resources rebuilding their structures and units as you destroy their early structures, giving you a considerable advantage mid-game, alongside a slight research boost.

The ACU early-game can take quite a lot of damage from tanks/assault bots, allowing it to distract enemy units, or just act as a tank while it destroys structures, to give you early ground or just irritate your enemy - though 10+ tanks/assault bots can usually destroy it early-game. Remember to upgrade it or support it with your own units. Later in the game, your ACU should stay further inside your base, protected from any enemy assault. However, it builds 50% faster than engineers and can boost factory production speed by 150%. It can also be used late-game, if kept alive, that is, to assist with forward outpost attacks, or just building point defense very quickly where it is needed. In Supremacy, you can use the ACU to simply walk into an enemy base, attack their ACU, blow up, destroy the entire base, you still have engineers - other base is gone. Alongside that, if you have any large buildings waiting to be built, such as artillery, experimental factories, nuclear launch/defense silos, etc, use your ACU when possible. It builds twice as fast as an engineer - even faster if upgraded - and can potentially mean the difference between victory and defeat from its building speed alone (meaning do not blow it up in Supremacy just because it is a free mini-nuke - it does LESS damage than regular nukes).
Armored Command Units
The ACU plays an important role during the entire match. It builds structures quickly and, when fully upgraded, can be a formidable weapon if used correctly.

ACUs are also very important to protect. Losing one's ACU during an Assassination match triggers an immediate loss, as well as a nuclear explosion that damages friendly and hostile units alike. So, despite its resilence, the commander should always make sure the ACU is well protected. However, if core dump is researched, the threat of a nuclear detonation is averted and the ACU falls over harmlessly onto the ground, ready to be reclaimed.

The United Earth Federation Armored Command Unit


The UEF ACU possesses the most individual weapon systems out of the three factions and is designed to be a defensive powerhouse. It is the only ACU to feature an underwater torpedo upgrade.

Regeneration: Increased health regeneration.
Anti-Air: Adds an Anti-Air Weapon onto a shoulder of the ACU.
Energy Income: Increases Energy Income.
Radar Cloak: Hides the ACU from Radar.
Tactical Missile Launcher: Adds a medium range Tactical Missile Launcher to the ACU.
Range: Increases the Range of the ACU's weaponry.
Torpedo: Adds a Torpedo Tube for naval defense underwater.
Vision: Increases the ACU's sight range.
Hunker: Allows the ACU to crouch down and emit a shield above itself, making its weapons unusable, but decreasing damage taken by 50%.
Hunker Effectiveness: Increases Hunker Effectiveness by 15%.
Jump Jets: Adds Jump Jets to the ACU.
Shoulder Mounted Artillery - Adds a short-range (but powerful) artillery cannon to the ACU.
Core Dump Technology - Prevents a nuclear detonation upon ACU destruction.
Escape Pods - Ejects the command center of the ACU which can fly to safety and reconstruct the rest of the chassis.
Overcharge - When activated, increases main cannon damage to 150%. Doubles firing rate. Adds substantial area of effect damage.

Tips
The UEF ACU has the most weapon upgrades of the three factions, this allows for survival and function in various combat scenarios and environments.
When fully upgraded, this ACU can survive four simultaneous nuclear hits and can leave with enough health to return to fighting.
This ACU can be effectively used as an offensive unit - if escorted with fair amounts anti-air, it is equivalent to a small army.
The radar jammer and jump jets can be fully utilized by guerilla tactics: the radar jammer masks the ACU's presence on apporach and jump jets allow for an escape.
On several maps, there are small islands that are just slightly within ACU jump jet range. One especially effective guerilla tactic is to jump your ACU to the island, build a Noah unit cannon and some basic defense, then jump back to base. On at least 3 maps, a unit cannon placed on these small islands is able to reach locations on the map that would otherwise be out of range, and can allow you to attack the rear flank of the players that aren't directly on the front lines, and thus will often have scarce few defenses to stop you. Note that if this isn't possible, you can always daisy chain the unit cannons, using a Noah in your own base to launch engineers to the islands, but your ACU has jamming, and will probably be more effective.

The Aeon Illuminate Armored Command Unit


The Illuminate ACU has various unique features including teleportation, a reflective shield and a deployable nanite swarm.

The Illuminate ACU upgrades consist of the following:

Movement Speed: 25% increased walking speed.
Teleport: Allows the ACU to instantly move to a specified point. Can be further upgraded to double the possible teleport distance.
Anti-Matter Chrome Shield: Adds a personal shield, equivalent to 75% of the base health.
Rogue Nanites: Allows the commander to spawn Rogue Nanites. These cost 750 energy and sacrifice themselves to either do 5000 damage on one target, or heal 5000hp on one friendly unit.
Escape Pod: Allows the commander to eject the head of the ACU which can fly back to their base and allow the player to survive the ACU's destruction. The body can be rebuilt by the Escape Pod. The escape pod cannot be moved while rebuilding the ACU.
Core Dump: A special emergency mechanism that turns the ACU from a 'walking nuclear bomb' into a falling ACU. This ensures base safety.
Hunker: Reduces incoming damage by 50%. Immobilizes movement and all weapon systems.
Overcharge: When activated, increases main weapon damage to 150%. Doubles firing rate. Adds substantial area of effect damage.

Tips

The Illuminate ACU is designed similarly to standard Illuminate units: it is a powerful hit-and-run unit that, unlike other ACUs, can teleport long distances in a short time.
The Illuminate ACU is a weak full-frontal offensive unit compared to other ACUs, with fewer unique weapon systems, no tactical missile launcher and shorter attack range.
The Antimatter Chrome Shield upgrade gives the ACU a very beefy additional layer of defense that makes hit-and-run tactics utilizing teleportation substantially more viable.

The Cybran Armored Command Unit


The Cybran ACU is the strongest ACU in the game, and is extremely difficult to destroy, even with air. Cybran commanders with anti-air can fend off upwards of 50 bombers/10-15 gunships, and the ACU is capable of taking on a Universal Colussus with no assistance. The only experimentals it cannot destroy alone are from its own faction.

The ACU upgrades consist of the following:

Speed Increase: Increases walking speed by 50%.
RoF Increase: Increases main cannon rate of fire by 30% (stacks with Nanite weapon)
Jump Jets: Adds Jump Jets to the ACU, allowing it to fly around temporarily. (These can be upgraded to increase travel distance by 100%).
Nanite weapon: Causes the Cybran ACU's main weapon to do area of effect damage over time. Increases main gun range by 60%. Increases damage radius. Doubles firing rate.
Knockback: Active subsystem that consumes 250 energy which allows the Cybran ACU to knock back units with its normal attack for a limited time.
Hunker: Reduces damage taken by 50%. Immobilizes all movement and weapon systems.
Anti-air: Adds an anti-air turret to the ACU.
Tactical missiles: Adds a medium range tactical missile launcher to the ACU.
Core dump: Averts a nuclear detonation upon ACU destruction. ACU chassis can be reclaimed after destruction.
Overcharge: Increases main cannon damage by 150%. Doubles (unupgraded) firing rate. Adds substantial AoE if not already present. Halves main cannon range.

Tips

The Cybran ACU can take on any experimental land unit 1v1, except for the sanity-defying Cybran Monkeylord, and live.
The upgraded Cybran ACU moves substantially faster than the other two ACUs, although this can, at times, bug out and return the ACU to its default movement speed. Using jump jets seems to fix this issue.
The nanite upgrade to the main cannon reduces the immediate damage the cannon deals, but rapidly stacks its area of effect damage over a few seconds, offering several times more DPS than the standard cannon.
The knockback upgrade to the main cannon can greatly assist when retreating from land units.
This ACU's offensive capabilities are comparable to a large army or several high end experimental units.
Its main weakness is its inability to destroy high-health units (notably Universal Collossi and King Kriptors) quickly enough to mitigate the damage they deal to the ACU. Stacking several of these units can bring down the Cybran ACU, although air units - especially experimental gunships or upgraded standard units - can do the same job for less mass.
Shields and You
Shields are a utility that puts a layer of raw energy between you and your enemy, selectively blocking their bullets, while allowing yours to pass through. Despite SC2's health regeneration feature, even a single stationary shield generator can massively improve the survivability of a defensive fortification. Shields come in a few forms - stationary, mobile and personal. Each faction's shields also have differences in their protective functionality.


Stationary shields are the strongest, and most commonly deployed, type of shield. They don't move, they have a decent range, and block a large amount of fire before dropping. Factory shields, standalone shield generators and the 'Aegis' fall under this category.

Stationary shield generators are usually used to protect structures from either artillery (very temporarily) or direct fire, be them defense lines or general base buildings. While they can stop the vast majority of projectiles from slamming into whatever they're protecting, nuclear and EMP missiles will pass straight through them. They will also fall, and sooner than later, to a sustained assault.


Personal shields are the weakest shields available, but are available to most non-experimental units, excluding naval units. These shields are essentially another layer of armor for the unit - one that dissipates rather quickly and regenerates reasonably quickly. These shields cost nothing but research points to permanently obtain.

Unique to the Illuminate ACU is their own personal shield, pictured above, which is slightly stronger than the beefiest sub-experimental shield generator in the game.


Mobile shields are vastly weaker than standard shield generators, but generally stronger than personal shields. They also have a much shorter range than stationary shield generators. Mobile shields are not horribly common in real matches, for several reasons:

  • They're much slower than tanks and assault bots;
  • They aren't very durable;
  • They usually don't have any weaponry;
  • They tend to form up in the back of a squad of units.

The only exception to this is the Cybran 'Adaptor' (pictured above), which is a mobile shield, anti-air and anti-missile unit. This unit is generally used as mobile anti-air, with its extremely low-durability shield being more of a convenient single-bullet dissipator than a real benefit.

Shield statistics

Below is a table detailing the basic statistics of each type of standardized shield generator for each faction.

Stationary shields
UEF
Illuminate
Cybran
Durability
10,000
10,000
8,000
Regeneration
100HP/s
100HP/s
80HP/s
Recharge delay (seconds)
40
40
40
Radius
42
46
42
Projectile deflection
0%
50%
0%
Projectiles penetrate
No
Yes (50%)
Yes (100%)
Damage reduction
100%
85%
85%


Mobile shields
UEF
Cybran
Durability (shields)
600
140
Durability (health)
560
700
Regeneration
1HP/s
1HP/s
Recharge delay (seconds)
10
10
Radius
26
26
Projectile deflection
0%
0%
Projectiles penetrate
No
Yes (100%)
Damage reduction
100%
85%

Experimental shields
UEF
Durability
50,000
Recharge rate
0/s
Recharge delay (seconds)
Projectiles penetrate
No
Projectile deflection
0%


Notes
  • All unique faction shield mechanics carry over to personal shields and mobile shield bubbles.

  • Area of effect projectiles, such as artillery, will detonate upon contact with UEF shields.

  • Shields that permit penetration will always reduce projectile damage by 85% post-penetration. This effect stacks with each shield the projectile passes through. For example, if a projectile passes through two Cybran or Aeon shields, its damage will be reduced by 85% by the first shield, then by another 85% by the second shield, reducing it to a total of 2.25% of its original damage.

  • Projectiles that explode on contact with a UEF shield will still damage units outside of the shield.

  • Projectiles that drop the shield (i.e. reduce the shield health to 0) will still have their damage reduced as much as a projectile that pierced the shield without dropping it.

  • Projectile damage reduction does not apply to strategic weaponry; nuclear missiles bypass all forms of shields.

  • Shields will recharge much more quickly if they are completely dissipated by enemy fire. Otherwise, despite being active, they will regenerate health at least twice as slowly, if not more.

  • There is no way to force a sub-experimental shield to drop or recharge itself other than depleting its health.

  • Shields do not consume energy while they're active; instead, the energy costs for their initial construction are inflated.
Nukes and You
Nuclear missiles - also known as strategic missiles - are one two things to you at any given time: a minor annoyance, or a complete game-ender, and seldom anything in between.

Nuclear missiles are expensive, slow, can't change course after launch, can be destroyed by something almost half the cost and take four full minutes to build, none of this counting the actual silo itself. In return, you're given an explosion that will destroy anything not thoroughly reinforced in a roughly four-hundred meter radius around the site of detonation (about half the size of one of the eight larger outer platforms on Tourney Dome), with a maximum yield of about 15,000 damage within the inner half of this radius. Nuclear missiles penetrate all forms of shielding and can only be intercepted with a physical object or an anti-nuclear missile.

Nuclear missiles are intended to do three things:

  • Destroy forward bases that would yield more mass destroyed than the missile itself costed;

  • Set the enemy back enough to warrant a net loss in terms of mass expended;

  • To destroy heavier bases that commanders have neglected to construct strategic missile defenses within.

While other uses for missiles exist (such as intercepting an incoming army), the inability to steer the missile after launch coupled with the enormous cost of a single missile makes this less appealing to anyone that doesn't have more mass than they know what to do with, or finds themselves in an otherwise (or already) hopeless predicament.

The only consistent way to defend oneself against strategic missiles is to invest in a nuclear missile defense silo, available to every faction through research, and stock it with at least one anti-nuclear missile. The silo's range is just barely smaller than the upper detonation radius of a nuclear warhead, but will not fire at any nuclear missiles that do not fly directly above its defense radius. Enabling unit range visibility within the game's settings is crucial for ensuring your strategic missile defenses reach as far as you need them to.

UEF and Cybran nuclear launch silos also come with an automated tactical missile launcher that fires unguided, but unusually powerful, salvos of tactical missiles at nearby targets at no cost. Furthermore, all nuclear missile silos do heavy damage to nearby units - friendly or not - upon destruction, with a maximum of 10,000 damage to anything sitting directly next to the silo.

Cybrans, in particular, have a specific unit to severely punish players who neglect to conduct proper reconnaissance: the Boomerang Nuke Redirector. This unit, when loaded with at least one redirection charge, will redirect any incoming nuclear missiles back to the silo that launched them, while ensuring that this redirected missile cannot be intercepted by strategic missile defenses. The downside is it usually can't redirect numerous missiles at once which can lead to it being overwhelmed during a salvo of two or more missiles.

Your best defense against anything nuclear - whether it be verifying targets or checking for threats - is regularly tossing a few cheap fighters anywhere your enemies could be building silos of any sort. The golden rule of Supreme Commander (scout early, scout often) applies exceptionally well to nukes.

Notes
  • Nuclear explosions do not discriminate between friendly or hostile units, and will damage anything in the explosion radius.

  • A single nuclear warhead is more expensive than most minor experimental units.

  • Nuclear missiles are ideal for destroying enemy fortifications outside of their main base, where it is unlikely to encounter anti-nuclear missile silos.

  • While it is possible to simply spam nukes to end a game, it's often more viable to develop units one can actually control.

  • Both nuclear missile silos and anti-nuclear missile silos will never show any indication as to whether they are actually loaded with anything before firing.

  • Nuclear missiles will not collide with any form of shielding, but shields can marginally reduce the damage a nuclear explosion does, as long as there is at least one layer of shield between the inner radius of the explosion and the shield projector. Bubble shields won't do much either way, but personal shields can offer some degree of protection.

  • On larger maps - especially 4v4 maps - launch sites can be hidden practically anywhere, which makes scouting everywhere even more important.

  • A single nuclear missile launch site can force the enemy to invest in multiple missile defense silos to protect their assets, leading to them expending more mass than you to protect themselves. Their failing to do so also opens up a direct method for destroying anything they neglect to protect.

  • Anti-nuclear missile silos can hold twice as many missiles as a nuclear missile silo.

  • Anti-nuclear missile silos can fire several times faster than any nuclear missile silo, and can consistently fend off five or more incoming missiles, provided the silo is loaded with sufficient missiles.

  • Anti-nukes need to physically collide with a nuclear warhead to neutralize them. In most cases, this doesn't change anything, but in edge cases - like anti-nuke construction finishing a quarter second before the nuke itself impacts - can lead to both the nuclear missile detonating and the anti-nuclear missile being launched.

  • Nuclear missiles redirected by the Cybran boomerang cannot be intercepted by anti-nuclear missiles.

  • Nuclear missiles have global range.
Veterancy
"Veterancy" is a mechanic that allows units that participate in active combat to become more effective over time. This system allocates veterancy 'points' to units, or groups of units (if several contribute to the same kill), based on the threat the destroyed unit posed, as well as how much damage the contributing units dealt. The veterancy system positively reinforces the survival of allied units - especially experimental ones - by boosting their durability and damage output the longer they survive in combat. Veterancy also applies to factories. Veterancy also applies to Mass Extractors, increasing their health and mass output over time.

The veterancy system makes it even more rewarding to ensure the survival of experimental units while still engaging them in frequent combat. Over time, veterancy can increase health and damage up to 50% above standard, and health regeneration by up to 125%. Veterancy boosts health, damage and regeneration in 10%/10%/25% increments, respectively, per level. This can massively increase the effectiveness of experimental units - especially the Monkeylord, Universal Collosus, or Soul Ripper II, which have the firepower, durability, and, of course, price, to motivate keeping them intact.

Most factories do not gain veterancy even if they manage to secure a kill - instead, they procure it through the production of units and addons, with one point of veterancy being provided per construction project completed. Veterancy levels reduce both the build time and cost for addons and units by 10% per level, up to a maximum of 50%.

Notes
  • Veterancy point requirements for individual units increases by the same amount for every level gained. For example, an ACU requires 5000, 10,000, 15,000, 20,000 and 25,000 veterancy points for each level of veterancy, i.e. 5,000 veterancy points for each new level.

  • Factory veterancy requirements do increase with each veterancy level, but this is offset considerably by the increased unit production speed.

  • Mass Extractor veterancy levels are gained after 1, 3, 7, 15 and 31 minutes of operation, increasing mass output increasingly with every level, eventually quintupling it from 0.6/second to 2.4/second. Mass Extractors cannot gain veterancy through unit destruction, even if they are equipped with defensive turret addons.

  • Naval factories have half of the veterancy requirements as land/air factories, due to the increased resource and time cost of naval units.

  • Any unit constructed by any factory will increase its veterancy by exactly one point, irrespective of the unit's actual construction costs.

  • Experimental gantries have the lowest veterancy level requirements of any unit in the game, requiring a mere two veterancy points to gain their first level.

  • Engineers and ACUs can gain an (admittedly very small) amount of veterancy points by constructing buildings. Clocking in at a whopping one point per building completed, an engineer would require 250 successful construction projects to gain one veterancy level - half of the standard unit capacity for a skirmish match.

  • The Proto-Brain Complex's 'Brain', when deployed, triples the veterancy point gains of all units in its boosting range. Mobile air, land and sea units are affected.

  • Cybran naval factories can gain veterancy points by destroying hostile naval units with their Proton Cannons, obtained through the "Sea Operations" upgrade. This usually increases the factory to its maximum level immediately.

  • Veterancy points cannot be deducted, or transferred, from a unit by any legitimate means. Veterancy losses from unit destruction are irrecoverable.

  • Veterancy points do not accumulate beyond level five for any unit.
United Earth Federation Units

The Rockhead Tank

The Rockhead is the UEF's starter tank. A jack-of-all-trades land unit, it is more than capable of facing most enemy land units one-on-one and can be upgraded for protection from virtually any air or land threat. While specialized units may be more effective at specific roles, the Rockhead can be thrown at virtually anything on the ground with a reasonable degree of success.

Tips
  • Rockheads lack the speed and damage of assault bots, but in return have a significantly higher health pool.

  • Rockheads can be upgraded with four separate distinct upgrades - a third barrel for the main cannon, personal anti-air defenses, afterburners, and a personal shield.

  • At maximum training, research, and veterancy, the Rockhead has a whopping 3,525 effective hit points, putting its durability well above any other non-experimental land unit when fully developed.

  • Rockheads are best used to pad out an army and soak up damage, with groups of Titan assault bots being more suited for dedicated raiding roles due to their superior speed and firepower.

  • Rockheads can be grouped with less durable units such as anti-air, artillery, or shield bubbles, as tanks tend to group up in front of slower units when given a move order in a group.


The Titan Assault Bot

The Titan Assault Bot is the UEF's take on assault bots. Roughly equal to the other factions' variants, the Titan is effective at raiding enemy bases with more speed and firepower than a conventional tank, at the expense of being significantly more fragile.

Tips
  • Assault bots are a more specialized combat role than a tank, being more suitable for rapid attacks on smaller bases, utilizing their speed and firepower to get in quickly and shred structures more efficiently than a tank can.

  • Mass extractors more distant from the enemy's base are a prime target for assault bots due to their ability to quickly deploy to the extractor, destroy it and anything around it, and escape before the enemy can deploy a reaction force.

  • Assault bots themselves are a good reaction force as they can deploy to combat zones more quickly than tanks or other, slower alternatives.

  • Like the Rockhead, the Titan can be upgraded with a diverse array of upgrades to deter most forms of air and land units, though it does not benefit from a third barrel as the Rockhead does.


The Demolisher Mobile Artillery

The Demolisher Mobile Artillery is an indirect-fire unit that sacrifices both durability and movement/projectile speed for a much higher damage output to anything its artillery shells collide with.

Tips
  • The Demolisher is more effective against structures than mobile units due to the slow speed of the shells it fires - especially tightly packed groups of smaller structures that allow the full AoE effect of the shells to affect several structures at once.

  • While the Demolisher has a hard time hitting mobile targets, it does have a degree of movement prediction when aiming its shells at mobile units and will do much more damage per-shot than a tank or assault bot if any shot manages to land.

  • Slower units, such as experimentals, will have a much harder time dodging mobile artillery shells than smaller, more agile units.

  • As with other UEF land units, the Demolisher has a range of upgrades that apply to it, both increasing its DPS and adding minor deterrents from air and land attacks.
United Earth Federation Units (Part Two)

The Meteor Mobile Missile Launcher
The Meteor Mobile Missile Launcher is a UEF indirect-fire tactical missile launcher. It specializes in outranging point defense turrets with its superior range and overcoming tactical missile defenses with its large salvo size. Its durability and speed are both lacking, requiring protection from other units in the event of attacks, and, as with all tactical missiles, its projectiles do not track targets after being launched.

Tips
  • Meteors are especially effective at destroying defensive fortifications and are specifically designed to counter point defense turrets, though they are effective against virtually any structure they can get in range of, as well as any particularly slow land units, such as a deployed Jackhammer.

  • Meteors, like Demolishers and other indirect-fire units in general are not durable and are better used as dedicated artillery units than direct-assault units. At the very least, a wall of tanks between them and the enemy will dramatically improve their odds of survival in any engagement with mobile units.

  • Tactical missile launchers are very effective at depleting bubble shield generators if long-range artillery or heavier units are not an option.


The Archanist Mobile Anti-Air Gun

The Archanist Mobile Anti-Air Gun is a dedicated mobile anti-air unit designed to protect itself and any units around it from air threats. While completely incapable of engaging land units, it is very effective at dispatching air threats.

Tips
  • The Archanist trades land-based turrets for surface-to-air turrets, rendering it incapable of destroying any form of land unit.

  • In the early game, mobile anti-air is the only alternative for air defense if constructing fighters is not an option. Verifying whether your opponent is using air units early will let you gauge whether you require mobile anti-air or not.

  • Dedicated anti-air turrets have a dramatically longer range and more damage output than mobile anti-air of any form, but are more easily targeted in dedicated attacks and cost much more per-unit to construct.

  • The anti-air upgrade that applies almost universally to UEF land units renders the Archanist largely obsolete once obtained, as it does only slightly less damage per-unit for no extra cost after being researched.


The P-Shield Mobile Shield Generator

The P-Shield Mobile Shield Generator is a mobile bubble shield generator. As a fully defensive unit, it lacks any defensive armament of its own, instead being designed to shield groups of units or structures around it from damage.

Tips
  • Compared to other factions' mobile shield generators, the P-Shield has the most shield health but lacks the multipurpose functionality of the Cybran Adaptor, while the Illuminate opt for a defensive alternative that buffs the armor of nearby units instead of generating a shield.

  • Surprisingly, the P-Shield has the speed of an assault bot despite being a defensive unit, letting it keep up with other land units easily.

  • Mobile shields tend to group up at the rear of land unit formations, which significantly reduces their effectiveness if your intent is to shield the units toward the front. Micromanagement can mitigate this to a degree.

  • Mobile shield generators have a fraction of the health of a dedicated, immobile shield generator, but also regenerate the shield much more quickly once it is broken.


The Sharp Shooter Mobile Missile Defense

The Sharp Shooter Mobile Missile Defense is a mobile anti-missile unit designed to intercept tactical missiles targeting units near it. It cannot fire at any form of land or air unit and instead offers a direct counter to long-range tactical missile launchers.

It should be noted that the Sharp Shooter is useful as an escort unit for slow units with siege capabilities, such as the Fatboy or Jackhammer.

Tips
  • The Sharp Shooter is best used in groups. Single mobile missile defense units are usually incapable of taking out any given salvo of missiles.

  • Unlike previous Supreme Commander entries, mobile tactical missile defense units are typically the only option for tactical missile defenses, with only anti-nuclear missile silos offering any similar functionality.

  • The Sharpshooter is best used to defend structures from tactical missiles and doesn't serve much purpose in the field, as even slower land units can either dodge tactical missiles effortlessly or simply absorb their damage if the unit is colossal enough that it cannot move out of the way. That said, particularly slow units, such as the King Kriptor, may benefit from tactical missile defenses if the enemy is using an unusually large quantity of tactical missile launchers.

  • Tactical missile defenses can, and often will, 'miss' their targeted missile depending on the angle between them and the missile. The most effective method to manage this is to simply add more tactical missile defense units, as targeting cannot be manually corrected.
United Earth Federation Units (Part Three)
UEF Air


The Wasp

The Wasp is an air-to-air engagement unit that sacrifices durability and air-to-ground weaponry for cheapness and high effectiveness in air engagements. Unlike other factions' fighters, the Wasp cannot engage land units, instead being a dedicated air superiority fighter.

Tips
  • The Wasp is the only fighter in the game that is unable to attack land units.

  • The Wasp is substantially cheaper than Fighter/Bomber units but deals less damage. It is still a better choice than producing Fighter/Bombers, provided the only intended use is air-to-air combat.

  • The Wasp, being a cheap, early-game air unit, is very useful as a scout.

  • Like other fighters, the Wasp tends to match the speed of what it is targeting, allowing it to remain behind the target and continue firing even if it is significantly slower than the fighter.

  • When being pursued by hostile fighters, one can hit S to stop their fighters dead in their tracks, often resulting in the hostile fighters moving ahead of one's own. This allows one to fire on otherwise difficult-to-track targets.


The "Eagle Eye" Bomber

The Eagle Eye Bomber has a fairly high speed, but is lightly armored and has no anti-air weaponry, meaning it must be escorted with Wasps for maximum effectiveness. Notable upgrades include the Shell Cam, which provides an extended view of the target being bombed, and torpedoes, which allow it to serve in an anti-naval capacity. While its bombs track their target, the explosions do damage over time and thus are less effective against agile units.

Tips
  • The Eagle Eye is the only dedicated bomber in the game.

  • Bombers are cheaper to build than gunships.

  • Automatically comes with a damage over time bomb. Cluster Bomb increases the damage over time and the size of the bomb.

  • Unlike gunships, bombers keep moving throughout their bombing runs, whereas gunships hover in place. This is both a blessing and a curse, as it leaves the Eagle Eye less vulnerable during the initial strike, but an easy target when it slows to turn back for another hit. A good counter to this is to include enough bombers in a strike to kill the target on its first pass and allow the bombers to continue flying straight out of the danger zone before turning around.

  • Unlike the other two factions, the Eagle Eye has a torpedo bay on board when upgraded, allowing it to drop a pair of torpedos, making them valuable versus navies and invaluable should the enemy have a Kraken or an Atlantis on hand.

  • The damage-over-time bombs used by the Eagle Eye are area-based. Fast units, such as assault bots, can escape the damage radius before it applies all of its damage.


The Broadsword Gunship

The Broadsword Gunship is an anti-ground unit. It can also engage other gunships in a pinch. It is more expensive than the Eagle Eye, and it has a weaker weapon but more armor and does not use bombing runs, instead it hovers above its target while firing on it. Like most air units that attack ground units, the Broadsword is more vulnerable to air units so it is best used alongside Wasps for anti-air.

Tips

  • Gunships are a highly effective combatant against enemy ground units early on. Late-game almost any ground attack will include anti-air (Rock Head Tanks gain anti-air upgrades, Cybran players will bring Adaptors, and Illuminate groups include Urchinows or even Airnomos), but early on few players will dedicate resources to traditionally weak mobile anti-air units. Keeping this in mind means that even a few gunships can easily and effectively level almost any early ground force with their high damage output.

  • Gunships fly low enough to attack from inside enemy shields. Use their high attack power directly on the shield generators to quickly shut down enemy defenses.

  • Air-to-air units such as the Wasp will readily destroy Gunships, even in large numbers.

  • Gunships need not make sweeping passes to attack, making them great for attacking key parts of a base or platoon.
United Earth Federation Units (Part Four)

The C18 Star Lifter Air Transport

The C18 Star Lifter is primarily a transport, capable of holding up to 15 units or 30 with research, it is not capable of carrying Experimentals. It has two AA Linked Railguns: one in the frontof the ship and one in the back. It can also gain shields through research. While it can be easily shot down by 5-6 AA turrets, the C-18 can hold its own against a couple of fighters. While it can carry ACUs, this is extremely risky because if the relatively weak transport is destroyed, so is the ACU.

Strategy
When a transport is destroyed, all units it was carrying are also destroyed. This is a much greater loss of resources than just the transport's construction cost. It may not be possible to protect all the transports as they deliver units to a contested zone, so filling all transports with units guarantees the maximum loss of resources. Instead, mix some empty transports into your transport group. Your opponent cannot tell which transports are loaded, so at least part of the anti-air defenses will only destroy the relatively cheap transports.

As they are relatively fast they are good to transport your units close to the enemy base. But unlike the C-230 Star King Extreme Experimental Air Transport, it can be shot down very very easy especialy if the enemy researched the Linked Railgun Anti-Air (available for Mass extractors and Research stations) - So it is a good idea to unload the units near the enemy base away from the range of the AA guns in the enemy base or you may not see any transports survive.

Tips

- The C18 Star Lifter can generally survive anti-air long enough for short trips into the enemy base to unload units. Their return, however, is not guaranteed.

- It is a good idea to support transports with fighters and/or gunships, unless you are sure the enemy will not have any way to avoid the transports altogether.

- C18 Star Lifters can be produced in a Mega Fortress, but they may not dock inside of one. This makes them useful for quickly unloading to an enemy base in a swarm to retreat or drop off units.

- Units controlled by another player cannot be loaded into someone else's transports.

The UEF Navy


The Mastadon Cruiser

The Mastadon Cruiser is designed as a naval support unit, equipped with long-range tactical missiles, extensive radar and sonar, powerful anti-air weapons, tactical missile defense (when researched) and short-range cannons for use in naval battles. However, the cruiser is only a naval support unit, so sending a fleet of cruisers unprotected leaves them vulnerable to other naval vessels, especially submarines. Its tactical missile launchers have a tendency to miss when shelling patrolling naval units. The Mastadon, especially when compared to the Poseidon, has very good anti-air, so they are good for providing anti-air support for your fleet. They can also easily eliminate buildings from an enemy base from a very long distance with their long-range tactical missiles.

Tips

- Use large numbers of these to hide behind the thick armor of battleships and rain missiles on bases.

- With their long-range tactical missiles, Mastadon Cruisers have a range equal to Poseidon Battleships. They excel at early game harassment, especially if the opponent has not built a sufficient amount of anti-missile defenses.

- Mastadons do not have torpedo tubes.

- While their bombardment capabilities are great with its tactical missiles, its ship to ship capabilities are terrible. Three bombarding Mastadons, lacking upgrades, can quickly be taken out by a single moving Salem Class Destroyer. When upgraded with Stacked Gauss Cannons, this becomes less problematic.

- Mastadons are at their best when they are paired with Poseidons, as the Poseidons take out ships, while the Mastadons take out air.


The Tigershark Submarine

The Tigershark is equipped with 3 torpedo tubes, as well as a cannon for use when surfaced. It can surface/unsurface at will, and is capable of short-range bombardment of enemy bases, however, it's cannon is very weak and can be easily destroyed by point defense. They are best used as anti-frigate/naval support, to allow your Poseidons and Mastadons to level the hostile base in peace.

Tips

- The Tigershark is one of only a few submersible units. Being submerged makes the unit invisible to radar and vision (unless revealed by sonar), as well as immune to most weapons. Only ships armed with torpedoes (the Destroyer, the Tigershark itself, and the experimental Wilfindja Sea Hunter) or other anti-sub weapons can engage a submerged unit.

- The Tigershark is fairly weak in direct combat. Engaging any ship that can fire back one-on-one will probably result in a loss. Instead, use your submarines' low cost and mobility to bring several subs to bear on each enemy group, destroying one enemy ship at a time.

- Surfacing your submarines will allow you to bring an additional weapon to bear. Surfacing makes the Tigershark vulnerable to surface weaponry, which cannot hit it while submerged. As such, use the cannon when engaging targets that cannot effectively shoot back, such as unupgraded naval yards.

- In groups, Tigersharks can be very powerful sea-going tanks. The relatively low cost of a single sub makes building several Tigersharks viable in most situations, and clusters of these units can effectively engage most sea-going units, including even experimentals such as the Kraken.
Early game they are essential for sea superiority, as cruisers are weak in direct fights against mobile units. Mid game they are still an effective sea superiority unit and have a place beside battleships.

-The Tigershark can still be captured by an Illuminate Loyalty Gun when submerged.

- Submarines are extremely vulnerable to hostile torpedo bombers.
United Earth Federation Units (Part Five)

The Poseidon Battleship

The Poseidon is equipped with 3 batteries of direct-fire cannons, and 4 anti-air batteries. It can also be upgraded with anti-missile systems. Even though it seemingly has more anti-air batteries and health than the Mastadon Cruiser, the individual missiles are very weak, making the Mastadon a better choice for anti-air. The Poseidon is the most powerful non-experimental naval ship in the game.

Gauss Cannons
The Poseidon has a set of 3 triple barreled Gauss Cannons. When the Stacked Gauss Cannon research is unlocked, these will be replaced by a set of 3 6-barreled Gauss Cannons, effectively doubling the damage output of the Poseidon.

Tips

- The front and rear cannons can aim independently at two different targets, when firing at just one target the ship itself will turn so both sets of guns can aim.

- The radar and vision upgrades greatly improve the Poseidon's land bombardment capabilities.

-The weak anti-air make the Poseidon very vulnerable to Aircraft, particularly Eagle Eyes upgraded with Nanite Torpedos.

- The Poseidon will not survive a direct engagement with more than four Cybran Salem Class Destroyers.

- The sheer size of the Poseidon allows it to park itself between an enemy unit and its target, soaking up the damage with its own large health pool.


The Field Engineer

The Field Engineer may only be used when the DLC is enabled.
The UEF Mobile Repair and Support unit is a mobile engineer that has a basic direct fire turret as well as a repair arm. It is unable to build new structures, reclaim or capture, so its strength lies in its ability to accompany and quickly repair nearby allied units.

Field Engineers will attack targets and repair allies at the same time. When given an attack order, Field Engineers will always attack targets instead of repairing allies. (This removes some need to micromanage the Field Engineers as they will repair the nearest damaged object whenever standing still and will attack any enemies that come in range) To prioritize repairs over attacking, give your units move orders that are near the target, or, alternatively, assign every field engineer an "assist" order for a seperate attacking unit.

Tips

- Field Engineers can both assist and defend factories, making them more effective for supporting construction under certain circumstances.

- With full research, the Field Engineer will win a 1 v 1 with almost all fully upgraded UEF basic land units (assuming both have no Veterancy). But even with this factor, Field Engineers do not receive shields, Anti Aircraft abilities, or any of the short term enhanced stat abilities.

- Field Engineers work extremely well when paired with tougher, more focused units such as an ACU or a experimental unit as they can repair and attack at the same time.

Trivia

- The Field Engineer originated from Supreme Commander: Forged Alliance, where it fulfilled an identical role to the one it does in Supreme Commander 2.

UEF Experimentals


The Fatboy II Experimental Assault Vehicle

The Fatboy II is a UEF experimental land unit. It is equipped with 4 small triple gauss cannon platforms and a single large triple artillery based one, which it uses to shell targets from long range. It has no anti-air capabilities, and should be escorted by Wasps or Archanists. In theory it is possible for the Fatboy II to beat almost any other minor experimental land unit in a one on one situation. The UEF experimental transport can carry two Fatboy II's, where it can only carry one King Kriptor, making the Fatboy II more useful when experimentals are needed en-masse. The Fatboy II runs on 4 separate tracks, making it capable of easily turning around in case of an emergency retreat.

Tips

- The Fatboy II has a long range, so it's best to use it as a sort of artillery. Keep it back from your army and have it to perform a support role while your main assault force keeps the enemy occupied.

- The Fatboy II has no anti-air capabilities what-so-ever, therefore if the Fatboy II lacks escort, one bomber could take it out.

- The Fatboy II main guns have extremely long range and can pound enemies from far away without fear of retaliation.

- The Fatboy II is great at defense, but can be very poor at offense if used incorrectly as it is a wide target.

- The Fatboy II is amphibious the same way the ACU is, but it cannot fire its weapons when submerged. Escort it with Tigersharks to protect it.

- The Fatboy II can be used as an excellent base defender as it can attack an attack force before they come anywhere near your base. This is also useful for sieging a base as it has a longer range than turrets.

- The Fatboy II has more health than the Megalith II, but a single Fatboy can easily be overwhelmed by a few well micro-managed units, as the Fatboy II's shells cannot change directions while in the air and when fired attempt to lead the unit in whatever direction it is headed at the time of firing.

- The Fatboy II is capable of submersion.

Trivia

- The Fatboy II is a smaller, cheaper and much weaker version of the Fatboy from Supreme Commander/Supreme Commander: Forged Alliance. Unlike its predecessor, the Fatboy II has a much weaker armament, shorter range, lacks anti-air, cannot manufacture land units, and does not have a shield generator. Instead, it serves a role as disposable, mobile short-range artillery.
United Earth Federation Units (Part Six)

The C-230 Star King Extreme Experimental Air Transport

The C-230 Star King Extreme is an air transport, which can store 75 non-experimental units. It is able to transport land based experimentals and ACUs. ACUs count as 15 units. Minor Experimentals count as 30 units. Major Experimentals count as 50 units.

It has no defense that suffices to deal with anything stronger than the weakest air units, but its speed is extreme, which balances well against its weakness together with the ability to take a lot of damage, enabling it to rush into a enemy base, dropping off its passengers and pelt it away from most aircraft. Its rapid-firing SAMs should allow it to pick off weakened enemy fighters.

This aircraft's ability to hold 75 non-experimental units makes it deadly in ranged combat, and should not be underestimated if you are facing one. It takes lots of AA and air-to-air to take it down, so don't expect it to fall before it drops off its load.

Your enemy will not know if you have an Experimental on tow unless they see one at your base waiting to be loaded into the transport, so try to keep scouts out if you want to keep your power a secret. If a scout does indeed see your base, immediately load up the experimental and drop it at the base.

Tips

-The weapons equipped to this unit are of minimal strength, and should be escorted (with Wasps and/or Eagle Eyes) if you expect it to come under fire. Even then, while it can hold against a sustained assault for a good while, it should not be expected to return intact from a concentrated air assault.

- Great to use with the Noah Unit Cannon for a fast land base rush. Use in par with other transports for maximum results.

- The C-230 Star King Extreme is around 2x faster than the C18 Star Lifter Air Transport, making it incredibly fast for its size.


The AC-1000 Terror Experimental Assault Plane

The AC-1000 is armed with 3 heavy gunship weapons, along with a larger cannon launching explosive shells. Like the aircraft it was inspired by, most of its weapons are mounted on one side, meaning it engages its targets by circling around them in a clockwise manner. It has far longer range than many anti-air units.

Tips

- The AC-1000 is an extremely powerful weapon for its research cost. It can be used with only 2 prior upgrades and is one of the easiest experimentals to get out early game. Rush an un-upgraded enemy ACU early game with 2-3 for complete destruction.

- The AC-1000 is designed for ground assaults. For air units, it can engage gunships only and even then it may not use its main cannons. It's best to escort it with Wasps.

- It's very cost effective over regular gunships, and can deal heavy damage to experimentals if used properly.

- It can shell air defenses if micromanaged to stay out of range. This is difficult, however, as the default behavior is to circle target, which often brings it inside range of AA.

- The AC-1000 can engage other gunships and transports, however its main explosive cannon will not fire.

- The AC-1000, like the traditional gunship, is extremely effective against ground units. One or more AC-1000s will destroy large numbers of standard ground units, or deal heavy damage to all but the heaviest experimentals. Many experimentals cannot target aircraft making the AC-1000 a great counter to early experimentals.

- An enemy ACU makes an excellent target for the AC-1000. Without upgrades ACUs cannot even target the gunship, much less fight it effectively. A medium cluster of AC-1000s can charge into an enemy base after the enemy ACU and destroy it even if faced with heavy anti-aircraft fire.

- AC-1000s make excellent base defense. AC-1000's patrolling your frontline will make it very difficult for enemies to attack your base with land units, and for additional benefit, use upgraded Energy Generators to heal it as it defends.

- Use caution when assaulting a base with AC-1000s because even light/moderate Anti-Air can rip them apart. (5 or so Anti-Air guns spread out across a decent distance can destroy 4 AC-1000s.)

- The AC-1000 is not advised to use against heavy navy units unless you send 3 or 4 since the navy units have decent anti air.

- The AC-1000 is your best friend if your enemy decides to rush an experimental early-game.

- Despite the AC-1000's tendency to circle targets at a distance, it will, often, end up circling within the range of anti-air towers, especially long-range ones. With micromanagement, one can force the AC-1000 to move out of the firing range of anti-air, while still allowing it to unload its armament.


The Atlantis II Experimental Aircraft Carrier

The Atlantis II is an experimental unit designed to produce air units, engage submarines, and even bombard shore targets with battleship-class weaponry. However it does not have anti-air capabilities. Too big to be created from a Naval Gantry, the Atlantis, like it's Cybran counterpart, has to be built as a 'structure' by an engineer or the ACU in open waters.

As a Combat Unit
Contrary to popular belief, the Atlantis II is a very powerful unit, not just a "submersible movable factory". For almost the same price as the Poseidon, the Atlantis has more health, more weaponry, and is more combat capable than the Battleship. In direct combat with a Battleship, the Atlantis II will win. It is also equipped with relatively powerful torpedo weaponry, making it even more effective at naval combat. However, it lacks anti-air weaponry, but it can be easily protected by the Wasps it creates itself or simply submerging (unless you're up against torpedo bombing Eagle Eyes.) The fact that it can submerse makes it a very deadly assassin-type unit (it can destroy targets of opportunity, like naval factories). Its large size but sluggish speed also backs up its assassin and menacing shape.

The Atlantis II, however, has a very low range (50, compared to the Poseidon's 128). As such, the Atlantis II is only useful in direct combat, and cannot be used to shell land targets. If you need to bombard land, or destroy units from a distance, use Battleships. Since the Atlantis II is submersible, it can come to close range to a target submersed, and rise to destroy it. The Atlantis II can be used like the Kraken.

A powerful formation is to have an Atlantis II squad in your front lines, tanking for a larger line of Battleships in the rear line. This way, the Battleships can safely destroy anything from a distance, while the Atlantis II squad takes care of any naval threats.

Trivia

- The Atlantis II is based off of the much larger (and more expensive) Atlantis experimental in Supreme Commander/Supreme Commander: Forged Alliance. Unlike the original, the Atlantis II is much cheaper and manufactures air units at a ludicrously faster speed. However, it cannot hold as many units.
United Earth Federation Units (Part Seven)

The King Kriptor Experimental Assault Bot is considered more as a fortress on legs rather than a bot. It is armed with large arm-mounted 800mm DU Cannons, 3 Gauss cannons (2 shoulder-mounted turrets and a chest mounted), a spinning carousel of artillery cannons and pair of 2 tactical missile launchers as well as a rotating crown on its head, hence the name.

Tips/Strategy

- The King Kriptor, despite its impressive armament, has no anti-air, and so should be escorted with either Archanists or Wasps. It is also very formidable in direct combat with an enemy land force, though it is vulnerable to artillery.

- In comparison with the Fatboy II, the King Kriptor has much more firepower and more than 5 times the health. That said, it moves slowly and has half the range. It is intended as an offensive unit - an assault bot - while the Fatboy II can be either defensive or offensive.

- These units are most effective in groups of two or more with mobile anti-air to destroy attacking gunships.

- This experimental is amphibious the same way the ACU is; however, it is so tall that water will never go above its knees, allowing it its full weapon capability against surface targets. This can be a double-edged sword, however: Unlike a Fatboy II or ACU, it cannot retreat to water and use it as a shield from enemy aircraft.

- The King Kriptor is slow unless transported by an experimental air transport, so once committed to an engagement it is difficult to retreat - in general, if you don't think a King Kriptor can completely destroy its target in a single pass, don't plan on getting it back. Of course, the same can be said of other experimental assault units.

- The King Kriptor has much higher burst damage than dps, making this unit more effective against targets below 10,000 health.

- Unlike the Universal Colossus, its primary weapons (and, in fact, its entire body) can shoot backwards, so it can retreat to a reinforcing army for defense while shelling whatever's unfortunate enough to be chasing it.

- Just like the other major experimental assault units, the King Kriptor can step directly on buildings to destroy them. An effective strategy is to send a King Kriptor on a walk through the enemy base, taking out many of their buildings in the process.

- Provided the unit is close enough to use its entire arsenal, the King Kriptor can take on a Universal Colossus directly.


The Mega Fortress Experimental Mobile Factory

The Mega Fortress is an air-based Air Factory, capable of manufacturing any non-experimental air unit (including transports) at a faster rate and much lower cost than a land-based Air Factory, and can store up to 25 units in its hold. It is equipped with 4 anti-air weapons as well as 8 anti-ground weapons, making it reasonably effective against any attacker.

As a Gunship
While the Mega Fortress cannot defeat most air threats if its life depends on it (which, in most cases, it does), it boasts more than impressive anti-land weapons. It easily out damages an AC-1000, and can destroy a Fatboy II in a matter of seconds.

The Mega Fortress is much more costly than an AC-1000. It is also less mobile (unless flying in a straight line). While the Mega Fortress should not be used for assault purposes, it makes for excellent base defense.

Unit Production
The Mega Fortress can produce all basic air units (however, it cannot store the C18 Star Lifter Air Transport). Using the Mega Fortress is a cost-effective method of producing air units as it uses only 33% of the resources and takes 33% of the time of the standard Air Factory to produce a unit. This means that, for the same price, and in the same amount of time, the Mega Fortress will produce three times more units than a standard factory. It can also be assisted by engineers and the ACU just like a standard Air Factory, provided it isn't moving.

Tips

-The Mega Fortress isn't intended as a direct combat unit, and is too expensive to justify throwing straight into battle without a proper escort. Its most effective use is as a replacement for existing air factories.

- A good strategy is to park it right outside the enemy's range of AA defenses, and have a repeat build order and occasionally deploy all garrisoned units.

- As with all mobile construction units, it will not deploy constructed units until it receives an explicit unload order.

- It is a good idea to have an engineer assist the air fortress to increase its build speed further, and heal it if it becomes damaged. Two engineers for purposes of build speed is likely overkill, while three certainly is.

- Without engineers assisting or increased energy through research, the air fortress takes a little less than 6 energy generators (with mass convertion) to sustain constant construction.

- You can also use the Air Fortress as a node in a longer unit deployment chain. If you want to deploy units outside the Noah Unit Cannon's range, you can park the Air Fortress near where your land units land from the Cannon, then have C18 Star Lifters ferry them the rest of the way while using the Air Fortress to produce air escorts and additional transports if they get shot down. This can also effectively prevent your opponent from destroying the land units as they hit the ground, which is a common problem when using the Noah.

- Mid to late game it is possible to have several air fortresses creating a 'disposable' air force that can be sent against a superior army wave after wave, due to UEF bombers and fighters being cheap and fast to build.

- The Mega Fortress is one of the easiest (if not the easiest) major experimental to research.
United Earth Federation Units (Part Eight)

The 'Noah' Experimental Unit Cannon

The Unit Cannon is a combined factory and artillery installation (range equal to the Long Range Artillery) which launches the units it constructs across the map. It manufactures them into shells which are stored in large magazines (it can hold a total of 21 units at a time). When launched, the "projectiles" fly in a ballistic arc to just above the target location, then break open and deploy the unit contained unharmed.

Unit Production
Units produced with this structure are built with a third of the cost and 1/7th of the buildtime. This means that it should be utilized over factories for unit production, as it can take the place of several land factories.

Tips

- Defensive structures can, typically, destroy units as they land fast enough to mitigate the threat they pose. It would be wise to scout a decent landing spot, ideally one without any immediate defenses.

- The units can be fired through shields without a problem. However, since the units are fired in sequence, it is best to not launch them directly into the field of fire of a large number of enemy defenses.

- Single units produced by the cannon can be used as scouts.

- The Unit Cannon can block your opponent from escaping. Fire units behind an aggressive force and snare them in the cross-fire between the launched units and your base defenses.

- Unit Cannons are generally worthwhile replacements for standard factories, on account of their sheer superiority in building speed and cost.

- In theory, one Unit Cannon can field an army nearly seven times faster than one factory.

- The Unit Cannon requires significantly more micro-management than a land factory. Unit cannons can have a unit queue on repeat (exactly like a land factory), however, once a Unit Cannon has built its 21 units and is at capacity, units will not automatically be fired. You must manually instruct the Cannon to fire on a specific area.

- The Unit Cannon pays for itself (mass saved exceeds mass invested) by the end of the third full volley of rock heads.

- Engineers can be placed to assist Unit cannons just like factories. It takes 57 seconds to fill with rock heads, but only 43 seconds with a single engineer assisting. A second engineer decreases the time to only 40 seconds, and anymore is useless.

- A novel strategy is to load it with Field Engineers and deploy them to your army if things aren't going so well for a quick repair boost, or to shore them up during a break in the fighting. Particularly useful if you have some Fatboys or Kriptors to keep alive during an important assault.

- Anti-air defenses can hit units before they even hit the ground, so it's best to launch units away from anti-air defenses.

- Noah Unit Cannons are fantastic attrition units. Because you can land in the rear of your opponent's base instead of the front, you are almost guaranteed to destroy a sizeable number of buildings before your forces are eliminated. By the time your attack force is eliminated (especially with 3+ Noahs working together), you'll have another one.
United Earth Federation Units (Part Nine)

The Super Triton Experimental Dreadnought

This unit is included from the Infinite War Battle Pack DLC

The Super Triton Experimental Dreadnought is a naval experimental unit consisting of three large turrets on top of the vessel, as well as a whopping 24 gauss cannons mounted on its sides, 9 on either side and 6 on the front.

Tips

- The Triton will devastate anything in its path but has no defense against Air units, bring support to cover it.

- The Gauss cannons have a smaller range than its main cannons, so move closer to increase damage output.

- The Triton is vulnerable to teleporting groups of Yenzoo Tanks, especially if they have their torpedo upgrade.

- The Triton is generally useful for surprise attacks around the back of the hostile base, especially if used alongside Poseidons and Tigershark Submarines for cover.


The Jackhammer Experimental Unpacking Cannon

This unit was added with the Infinite War Battle Pack DLC

The Jackhammer Experimental Unpacking Cannon is a long-range cannon, being able to lock itself into position and unfold a large cannon used for arced bombardment.

While being used as a long-range cannon it is completely immobile, being vulnerable to incoming enemy units. Yet, while being mobile, it appears to have no form of weaponry what so ever, and cannot defend itself. Despite these major weaknesses, the Jackhammer boasts a formidable range and decent firepower.

Tips

- After all training upgrades, the Jackhammer has 60,000 health, more than some other Major experimentals. By comparison, the Fatboy II has just over 14,000 health after all training upgrades.

- Jackhammers cost roughly 20% more mass and energy to train than a Fatboy II, but with over 4 times as much health, they have a much better Mass to Health ratio.

- Jackhammers take only 30 seconds longer to build rather than Fatboy IIs if unassisted.


- Jackhammers move just as fast as tanks, slower than assault bots and considerably faster than the Fatboy II. When a large mass of enemy units is inbound, pack it up immediately and you may be able to get it back to cover before those units can catch it. Alternatively, turn the cannon against the units and hope for the best.

- The Jackhammer's gun fires a single projectile, 90% as far as the Fatboy II. Despite being a single shot, the Jackhammer's projectile does massive splash damage, enough to level 3 adjacent energy generators in a single shot.The Jackhammer fires once per 5 seconds. The Jackhammer's DPS is ~65% higher, but will actually work much better against buildings than the Fatboy II, due to the splash radius being so large. While the projectile cannot track its target, the sheer speed of the projectile compensates for the lack of tracking.

- Overall, the Jackhammer is a superior unit to the Fatboy II, with one notable exception. When trying to take out enemy Fortified Artillery, the range of the Fatboy II should take priority over all the advantages of the Jackhammer. The Jackhammer would have to park and stop within the enemy Fortified Artillery's range to fire at it, whereas the Fatboy II can stay at maximum range and keep moving, destroying it with little or no return fire. The same goes for Illuminate Tactical Missile Launchers - once parked or not moving, a Jackhammer is a sitting duck for Tactical Missile Launchers.

- Jackhammers do not have to be used offensively to be devastatingly effective. In fact, if parked near a forward base, they will serve quite well as turrets. Their range falls squarely between Fortified Artillery and Heavy Point Defense. Jackhammer range: 90, Fortified Artillery range: 115, PD range: 40, and they can be used to "thin out" even the heaviest ground force, lightening the load on your stationary defenses considerably. If placed within range of choke points with proper AA and repair support, 2 Jackhammers can easily destroy anything that attempts to pass through.

- The UEF Field Engineer and a few Wasps or Anarchists make excellent partners for Jackhammers in this role.

- When unpacked, the Jackhammer cannot be pulled in by a Magnetron, making it useful for shelling a Magnetron before you move your army in.
Aeon Illuminate Units

The Harvog Assault Bot

The Harvog Assault Bot is an Illuminate direct-fire land unit, and the only non-experimental Illuminate land unit not capable of hovering on water. It can be upgraded with shields and Anti-Air capabilities, making it a versatile combat unit. Assault bots are focused on speed and firepower rather than health, making the Harvog's teleportation ability a great way to use a hit-and-run tactic on your enemy.

Tips

- When used to jump into the middle of a base or out of combat, the teleport ability can confuse enemy commanders and give you a short period of time where you are receiving minimal fire. This can give you a head start on taking out a target or retreating from battle.

- It receives the most benefit of any land unit from research. The anti-air upgrade is a good first choice, followed by veterancy or damage upgrades.

- Don't be fooled into thinking that the Anti-Air weapon is a replacement for dedicated anti air like the Crahdow, its low DPS means that it's only useful for swatting small numbers of pesky aircraft or to compliment other forms of Anti-Air.

- While defensive upgrades are helpful, Harvogs are assault units and are designed to deal damage rather than take it. Thus, consider a high-speed deployment mechanism such as transports or the Space Temple.

- Unlike its slow firing, long range, reclaiming predecessor, the Harbinger Mark IV, the Harvog does not work well in typical combat on it's own, easily overwhelmed by Loyalists or Rockheads. They work best with guerilla tactics or when supported by Yenzoos. However, both units are quite good at escorting or destroying experimentals.


The Yenzoo Tank

The Yenzoo Tank is an Illuminate hover direct-fire unit and functions as a general purpose unit with a good balance of firepower and armor.

Off the bat it is equal to the UEF Rock Head in every attribute save a tiny speed advantage and the more important ability to traverse water. However, its upgrades fall behind its contemporary in terms of raw firepower and hitpoints. In spite of this there do exist various strategies exclusive to this unit and other Illuminate hovering units which can grant a tactical advantage over the simplistic Rock Head and similar units.

Tips

- On water-based maps, this is an invaluable tool for taking down early enemy ships as the Yenzoo boasts a small target and easily ducks under the Mastadon's and Salem's main weaponry, while also being perfectly safe from torpedo attacks. The second advantage is that the Yenzoo may turn around in the water much more quickly than the more cumbersome ships and thus quickly respond to new orders. Be aggressive and attack early when doing this, as the time it takes to reach the ships can be significant, during which time they could be bombarding your base.

- Use the water to your advantage whenever it is present. It can allow another access to an enemy base (forcing the enemy to divide their defenses to protect their base), and it can also allow a safe retreat area if a land battle is going awry.

- The teleport research allows for a great many tactical manoeuvres to be used:

- In its crudest sense, it functions as a speed upgrade, quickly moving your tanks and other units across the battlefield.

- It allows you to close the gap between you and the powerful point defences, experimentals and other long ranged threats, destroying them more easily and with fewer losses. Alternatively, it can be used to simply jump right past them or around the chokepoint they defend.

- It can jump through otherwise impassible barriers, often making it difficult for the enemy to engage, or even pursue, you if you can simply jump to the other side of the blockade.

- The teleport ability recharges remarkably quickly and can be used to perform feints, diversionary attacks and raids with relative ease.


The Fistoosh Mobile Missile Launcher

The Fistoosh Mobile Missile Launcher is the basic Illuminate Mobile Missile Launching unit. It launches salvos of fairly powerful and precise but slow-moving missiles capable of effectively destroying enemy structures.

Tips

- The Illuminate lack a traditional artillery unit. Using the Fistoosh against enemy vehicles is almost always a mistake: only the largest and slowest experimentals have even a chance of being hit by the Fistoosh's slow-moving missiles in combat. Instead, use the Fistoosh's high-power attacks against non-mobile targets: its range is large enough to allow easy and efficient harassment of enemy mass extractors and power plants, or bombardment of other structures/defenses.

- The Fistoosh is quite weak in combat. Protect your missile launchers with a mix of tanks and assault bots to draw fire and destroy hostile units. Without an escort, they are almost guaranteed to be destroyed unless up against only immobile units/buildings.

- Unlike its peers the Meteor and the Cobra, the Fistoosh has the added ability to hover, allowing it to bombard bases from the sea. Its range is rather limited in this regard, however, forcing you to come close to the shoreline to hit what you want.
Aeon Illuminate Units (Part Two)

The Crahdow Mobile Anti-Air Gun

The Crahdow Mobile Anti-Air Gun is an Illuminate hover anti-air unit. It has a comparatively low rate of fire and muzzle velocity, though its shots trace their targets. Seeing as it is capable of hovering, it is great for anti-air support over water.

Tips

- While an individual Crahdow is ineffective compared to an Anti-Air Tower, mass-for-mass the Crahdow is better. You can construct 6 Crahdows for a single anti-air tower, and at that point they have 262 base DPS compared to the Tower's 180. The Tower however possesses much greater range.

- The Crahdow is the cheapest unit in the game, equal to the UEF's analogue, the Archanist. - Building these for early game defense will level up your Factories cheaply so that you can make other units more efficiently as the game wears on.

- Swarms of Crahdows are easy to make, and are great for base defense. They are more effective at close range than an anti-air turret, making Soul Rippers an easy target. However, AC-1000s are a problem, as they have a far greater range than the Crahdow, and even long-range anti-air turrets may have difficulty hitting them.


The Bodaboom Mobile Armor Booster

The Bodaboom Mobile Armor Booster is an Illuminate hover defense unit. It provides 30% more health and gives a +200% Regeneration bonus to all units within it's range. This stacks additively with other regeneration bonuses. It can assist greatly with Experimental assaults/defense, as it gives you a far greater chance at victory due to being able to repair far faster than the enemy.

Tips

- The Bodaboom possesses no firepower of its own, much like the P-Shield.

- While the Bodaboom provides comparable health boosts to the mobile shield generators of other factions, it's bonuses do not stack. Thus, one should never add more than 5 to 10 (depending on army size) to your unit mix. Any more will simply increase the longevity of the health boost.

- Unlike shield generators, these units provide a non-renewable bonus. They have no damage blocking function.

- The combined effects of many Bodabooms can create large amounts of framerate drop when observed on low-end machines, due to excessive particle rendering.

- Airborne units can also benefit from the Bodaboom. Whilst this is seldom useful in battle, it can be useful to more rapidly repair aircraft that are damaged without using an Engineer to perform repairs.

- While it may appear that the P-shield is superior due to actually preventing damage, the Bodaboom can raise the hitpoints of nearby units to a cumulative amount much greater than a P-Shield or Adapter can provide. Add this to the very tough shields that only the Illuminate land units have access to and you will possess a highly durable army.


The Sliptack Mobile Anti-Missile

The Sliptack Mobile Anti-Missile is a mobile missile defense platform. The only other unit capable of countering tactical missiles is the Anti-Nuclear Missile launcher, which serves as an anti-tactical missile unit for no extra cost. The Anti-Nuclear Missile launcher is far more effective against tactical missiles, at the expense of immobility.

Tips

- The Sliptack has no defense of its own aside from its ability to destroy hostile tactical missiles.

- Tactical missiles are normally deployed to target your structures and not your mobile armies, therefore there is little reason to send these out with the rest of your army and should stay defending your base, particularly against the UEF Mastadon Cruiser.

- Unlike the Sharp Shooter, the Sliptack hovers and has access to the Teleportation upgrade, allowing swift deployment to wherever it is needed.

- The Sliptack research is a dead-end research and it is not advised you unlock this unit unless there is a clear and present need for it.

- Approximately two to three Sliptacks are required to destroy one salvo of tactical missiles from a Mobile Missile Launcher. They are also somewhat inaccurate; they will not always hit a missile when they fire. This presents an obvious need to eventually counterattack.


The Urchinow Experimental Assault Block

The Urchinow Experimental Assault Block is equipped with a large top-mounted cannon, several smaller front-mounted cannons, and two side-mounted artillery cannons.

Consistent with the other two minor land experimental units, this unit provides long range support fire, compared to a direct fire assault unit. It is notably better in direct combat than its UEF and Cybran equivalents.

The Urchinow possesses respectable self healing abilities, and the most health of any minor land experimental.

Comparison to Point Defense Turrets

It is sometimes recommended to use Urchinows for point defense roles later into the match, primarily for the mobility capability and the improved health. While this attribute may seem appealing, it is also important to note that Point Defenses provide a better DPS/Mass Ratio. Furthermore, the Urchinow is a larger unit, and much more bulky. It will take up a lot of room compared to Point Defense turrets, preventing them from being stacked close to one another. The Urchinow also takes slightly longer to re-target in case of a multi-front battle.

Tips

- The Urchinow proves to be most effective when escorted with a front line of Yenzoo Tanks to essentially 'soak up' damage, or to otherwise concentrate extra fire on some especially dangerous enemy units.

- While capable individually, Urchinows can be overrun by various smaller units. To be effective on maps with air units, Weedoboths, Crahdows, or an Airnomo are a must have for Anti-Air support.

- The Urchinow is a powerful unit in almost any situation. If an Illuminate commander finds themselves with surplus Mass and Energy mid-game, Urchinows are almost always a good choice for production. Their long range, hovering capabilities, and respectable health makes this a superb main-line combatant further into the game.

- The Urchinow is less ideal to build if the enemy has artillery, due to it having a large profile and slow movement speed. It is recommended to send other units as a bait for artillery while the Urchinow moves in.

- Although the Urchinow is somewhat powerful against land units, it is most effective for escorting larger experimentals such as the Universal Colossus or Airnomo.

- The Urchinow has slightly less range and considerably less speed than the Cybran Megalith II, though more health and roughly the same damage.

- The Urchinow has much less range, and a bit less speed, than a UEF Fatboy II, but has more health and deals more damage.
Aeon Illuminate Units (Part Three)

The Wilfindja Experimental Sea Hunter

The Wilfindja Experimental Sea Hunter is an experimental focused on naval support. While having no weapons attached to the body of the unit, it possesses a series of drones which attack land, naval, and submerged units by firing a direct-fire energy weapon at them. The Wilfindja is one of the few counters the Illuminate have against submerged units.

Tips

- As its weapons are mounted on drones (which are considered air units), it doesn't have any anti-air weaponry, so it is extremely susceptible to air units.

- Wilfindjas can be effective base defenses if placed under shields, giving the same DPS as 7 Illuminate point defenses, albeit at a slightly shorter range. The main benefit of doing this is that you can spend points in land unit training to boost your base defenses while also increasing the effectiveness of your attacking forces without wasting any points into the structure research tree. This method is also more cost effective than building point defenses.

- Wilfindjas are very useful when fighting a UEF opponent for naval dominance. Make sure that you keep the main frame back in your base, though, as ships will rip through it.

- A Wilfindja can easily take out a Poseidon, an Executioner, or even a Command Class with murderous ease, sinking these ships within seconds, with the Wilfindja taking no damage. It is also a more-or-less even fight for the Kraken, despite being roughly half the cost.

- The gun drones are not disabled if the core becomes disabled. This can be useful as it means releasing a Half-baked Wilfindja will not sacrifice any firepower.


The Airnomo Experimental Air Defense

The Airnomo Experimental Air Defense is designed to provide effective anti-air defense. It is equipped with 6 top-mounted heavy Anti-Air cannons, as well as 4 light gatling direct-fire cannons. Although it appears to have massive firepower, it is considerably less effective against swarms of bombers or gunships, due to each of its turrets being focused on one specific target at a time.

Tips

- While the Airnomo is very strong against air units, its slow speed makes it impossible to intercept any air unit or chase after them if they disengage. Therefore it is more useful to think of it as an area denial weapon, preventing your enemy's air units from approaching key targets.

- Like Urchinows in comparison to Point Defenses, it is a cheap alternative to Anti-Air Towers in the later game. However, the cost efficiency in this case is much more exaggerated in favour of the Airnomo, costing less mass than 3 AA towers with firepower equal to 4 towers, greater health and the massive advantage of actually being able to move.

- It has slow movement speed, and should be escorted by direct fire ground units if being used outside of your base.

- Do not try to mount a land attack with these as the primary weapon: its cannons are ineffective against anything close to an army.

- Its ground attack weapons are mounted in such a way that two guns may only fire forward whilst the other two may only fire backward.

- The Airnomo is good at hitting even the fastest air units, such as Intellitrons, as the projectiles it fires are much faster than projectiles from any other anti-air unit.


The Universal Colossus Experimental Assault Bot

The Universal Colossus Experimental Assault Bot is a massive assault bot designed for frontal assaults against fortified enemy positions. Its primary weapon shoots a powerful beam, and has two death claws which suck up enemy units and shoot them back at others as secondary weapons. It is also able to boost the health of other nearby land units. The Universal Colossus is the largest unit in the game by height.

Tips

- Because of a lack of air defense, the Universal Colossus is vulnerable to air, especially Darkenoids, AC-1000 Terrors, and Soul Rippers.

- The Cybran Bomb Bouncer can protect against the beam fired by the Universal Colossus, as the beam is fired from above the Bomb Bouncer's shield. As with most shields, however, the Colossus's beam will break through with relative ease if it remains concentrated on the shield.

- The Universal Colossus is rather slow, and unlike the King Kriptor and the Cybranasaurus Rex, it cannot use a Giant Transport. Instead, the Universal Colossus must use a Space Temple for faster travel.

- It increases the health and armor of nearby units, similar to a Bodaboom.

- Despite the heavy weaponry the Colossus possesses, a sustained barrage of fire from several heavy units (especially air-based ones) will take it down surprisingly quickly, similar to the King Kriptor.
Aeon Illuminate Units (Part Four)

The Weedoboth Fighter/Bomber

The Weedoboth Fighter/Bomber serves the roles of both a Fighter and a Bomber, and thus is both an Anti-Air and Anti-Ground unit, as implied by the name "We Do Both". It contradicts the usual Illuminate design philosophy of having highly specialized units with its multi-purpose weapon loadout.

Tips

- As a bomber, it falls a bit behind the Eagle Eye when un-upgraded, as the Eagle Eye is cheaper and possesses a damage-over-time bomb, but when upgraded surpasses it. The Eagle Eye will gain more bomb damage, shields and torpedoes, while the Weedoboth will gain defensive flares, much more bomb damage, bomb damage over time, and shielding.

- Conversely, this unit offers the benefit of being a multi-tasker, meaning less micro management is required than if you had an air force of half fighters, and half bombers. It also allows you to adapt to changing threats much more smoothly. The overall firepower you get from the Weedoboth is greater than a combined force of Eagle Eyes and Wasps of the same cost.

- Unlike the more specialized Vulthoo, the Weedoboth features a modest radar system and double the visual range, making it useful as an early game scout.

- Before research is taken into account, the Weedoboth is functionally identical to the Cybran Gemini. With research the Weedoboth will gain stronger bombing abilities and defensive flares, which negate some anti-air damage.


The Vulthoo Gunship

The Vulthoo Gunship is a standard Illuminate gunship with direct-fire weaponry that can only target things beneath it, as well as other gunships.

Tips

- The Vulthoo Gunship is a highly effective combatant against enemy ground units early on. Late-game almost any ground attack will include anti-air (Rock Head Tanks, Titans, Meteors, and Demolishers all gain anti-air upgrades, Cybran players will bring Adaptors, and Illuminate groups include Crahdows or even Airnomos), but early on few players will dedicate resources to traditionally weak mobile anti-air units. Keeping this in mind means that even a few gunships can easily and effectively level almost any early ground force, especially considering their high damage output.

- The Vulthoo, like all gunships, flies low enough to attack from inside enemy shields. Use their high attack power directly on the shield generators to quickly shut down enemy defenses.

- As gunships don't need to make sweeping passes to attack (unlike bombers) they make ideal units for attacking vulnerable parts of an enemy base with.

- Gunships pack a great deal of health and firepower for their cost, and can apply precision outside the scope of most other units. These traits make them incredibly effective against enemy ACUs when moving in groups. Swarms of gunships can destroy lightly guarded ACUs with ease.

- Approximately eight or nine Vulthoos can destroy an equally upgraded anti-air turret without suffering more than one casualty, none if upgraded with shields. Use this metric to limit losses to your air groups.

- Later on the Vulthoos gets a flare upgrade which will soak up damage, when used in great numbers included with flares they can take down any target which is not extremely turtled (20+ AA towers).


The HeeHola Air Transport

The HeeHola Air Transport can transport 15 land units to any position on the battlefield, and is equipped with an exceptionally weak anti-ground weapon.

Tips

- This unit is quite fragile, and cannot transport experimentals. Thus, it should be escorted, and/or used when there's no danger of being attacked.

- All contained units will be lost with the transport if it is shot down.

- Transports are better used in numbers and should not be sent directly over a base.

- Spreading units out in different HeeHolas will minimize losses when going over a defended position.

- While the HeeHola is neither tough nor quick enough to drop units in the heat of battle, it is usually capable of dropping units close enough to the front line for them to teleport to their final destination.

- Using the researchable teleportation ability, combined with shields, can allow one to move the transport directly on top of a base, even if it's defended, and drop its payload before being shot down.
Aeon Illuminate Units (Part Five)
The Darkenoid Experimental Giant Saucer

The Darkenoid Experimental Giant Saucer is heavily armed - boasting external plasma bomb bays, beam cannons and a central quantum-beam generator.

Despite its size, the Darknoid achieves astounding speeds, only second to the air-fighters. This means a shrewd commander can send these speedy rings over an enemy base and decimate it quickly.

Tips

- Due to its massive size, it is able to eliminate just about anything it crashes into.

- Darkenoids are surprisingly good at defense. They float above the rest of your base, thereby taking up no space, and offensive enemy forces tend to have considerably weaker AA than defensive ones. The Darkenoids can then hover out over the enemy army and laser them down in relative impunity.

- Sending them after experimentals is an excellent idea, as the quantum beam is very powerful.

- Darkenoids are very effective at taking out small forward bases.

- A well placed Darkenoid can intercept enemy nukes, sacrificing the Darkenoid and causing the enemy nuke to detonate within their own base or above your base.

The Sooprizer Experimental Gunship
This unit was included in the Infinite War Battle Pack 1 DLC

The Sooprizer is an Illuminate experimental gunship that dishes out surprisingly large amounts of damage with its concentrated weapons.

The Sooprizer relies on one main gun and two secondary lasers to destroy specific targets, as none of these weapons have any significant amount of area-of-effect damage. The Sooprizer also lacks anti-air weaponry, making it highly vulnerable to hostile air attacks.

Despite the rather streamlined appearance of the Sooperizer, it actually moves very, very slowly for a gunship. Considering the gunship is also exceedingly expensive, it attempts to make up for these flaws with its heavy, concentrated firepower.

The Sooprizer gets its name from the word 'Surprise', as this unit is capable of dishing out significant damage to individual targets in a very short period of time, while being completely invisible on radar.

Tips

- Being completely invisible on radar, the Sooprizer can easily sneak up on hostile forces undetected, provided they haven't been alerted to its existence.

- Due to its slow speed, the real advantages the Sooprizer offers are radar invisibility and high firepower. In short, this unit is best used for surprise attacks against a target that would be less than ideal to target with a more direct assault.

The Shotja Mobile Sniper Bot
This unit was included in the Infinite War Battle Pack 1 DLC

The Shotja is a very slow, long range mobile land unit that deals a large amount of damage on a per-shot basis. These units are essentially glass cannons: they are fragile, they are slow, and an army of these certainly won't win the game by itself, but they are exceptionally useful for picking off high-value targets, such as experimentals or ACUs, as well as sniping other hostile land units well before they get into range of one's defenses or an army's firing range.

These are best en masse against slow or immobile, high-mass value targets, especially ACUs and short-range experimentals such as the King Kriptor or Cybranasaurus Rex. Artillery or other long-range AoE damage sources will shred Shotjas very, very quickly, so scout ahead well before deploying them.

Tips

- Due to the teleportation ability of the Shotja, they can be used to take an enemy by surprise, outside of visual range.

- Teleportation, followed by sniping high-value targets, is one of the best uses for Shotjas, due to their slow movement speed and exceptional damage output.


The Illuminator Experimental Intel Gathering Station
This unit was included in the Infinite War Battle Pack 1 DLC

The Illuminator is a minor experimental radar installation which has exceptionally powerful sensors, which can be temporarily enhanced to full optical view of its entire radar range in exchange for energy.

Tips

- While the Illuminator has several times more range than a standard radar installation, it will rarely cover even close to the entire map in a 3v3+ map. With anything smaller, however, one can typically plop it down in their main base where it is well protected and still have coverage of the vast majority of the map.

- Standard radar installations are fragile, and this one is no different.

- The Illuminator will be a very obvious target if the enemy detects it via scouting. Shields are one option for protection, but the best method is preventing the enemy from seeing it at all, if possible.

- Similar to standard radar installations, the Illuminator is considerably less expensive than other structures and units of its class. This can make it somewhat disposable in lengthy matches where one has had ample time to reinforce their economy.

The 'Pulinsmash' Experimental Mobile Unit Magnet

The 'Pulinsmash' is a manually-deployed unit that attracts singular sub-experimental units in a wide radius around itself, shortly afterward destroying them them, ignoring their health and upgrades entirely.

Tips

- The Pulinsmash only draws in one unit at a time. Because of this, it is best used either behind beefy defenses, or for weakening (or destroying) smaller squads of units.

- The Pulinsmash is capable of tethering to any mobile unit that isn't an ACU or experimental, including naval units.

- The Pulinsmash will target units even if they are not visible on visual/optical sensors.

- The Pulinsmash can teleport using a Space Temple even when deployed.

- The Pulinsmash is, essentially, an area denial weapon. It is seldom used offensively.
Cybran Nation Units
The Loyalist Assault Bot


The Loyalist Assault Bot is the only basic direct-fire unit the Cybrans have - unlike the UEF and Illuminate, the Cybrans lack tanks. It is usually the backbone of Cybran land forces at any point in the game and remains important in the late game with defensive upgrades including Shields and Speed Reducing Mega Armor.

The Loyalist Assault Bot is fast moving, has a medium amount of health and is equipped with 2 rapid-fire pulse lasers with high DPS. Unlike the Titan and Harvog assault bots, the Loyalist cannot get an anti-air upgrade.

Tips

- Unlike other factions, the Cybrans start with Assault bots. Use aggressive rush tactics to slow enemy production and earn combat research.

- In the late game, research Speed Reducing Mega Armor, then use the Loyalist's speed to get into an enemy base, before using this ability to reduce their movement and increase their durability.

- Loyalists can Hunker once the ability is researched. This can help reduce losses when being harassed by air, buying time for anti-air reinforcements to arrive.

- Once the abilities Jump Jets and Power Detonate have been researched, Loyalists can be used as very effective suicide bombers; simply jump them into a group of enemy units and detonate them when they start to take too much damage. With effective use of this tactic 10 loyalists can conceivably be sacrificed to destroy 40 enemy units. This can seriously even the odds of an otherwise unfair battle.

- Due to the staggering amount of abilities available to them, Loyalists are one of the most flexible assault units in the game.

- With their slightly better DPS, Loyalists can reliably defeat Titans and (with speed reducing mega armor), Harvogs in a 1v1 fight.

The Brackman Mobile Artillery Unit


The Brackman Mobile Artillery Unit is named after Dr. Gustaf Brackman, the Cybran Nation's father and leader. It is an artillery unit that can be built without any research and is very effective early-game for harassing mass extractors and forward outposts just slightly out of range of hostile units (though it is far outranged by Point Defense). Its area of effect damage is also quite useful for taking out large blobs of units, much like the Demolisher.

Tips

- The Brackman, like most land artillery, is a powerful and effective weapon against enemy ground units, especially facing masses of lighter foes. Its shells have significant damage and area of effect, and can be fired while moving, making this an excellent choice for micromanagement against enemy tanks or assault bots.

- Unlike larger artillery units it lacks the range to efficiently bombard an enemy base from outside defensive lines: most defenders will reach this unit as it closes to firing range. If you wish to attack bases, research and utilize the Cobra instead.

- Supplemented by Adaptors for anti-air support, Brackmans make superior ground combatants until powerful experimentals supplant their dominance.

- Unlike the Demolisher, the Brackman is available to build without requiring research to unlock, making it valuable against early game rushes where you need an area of effect weapon quickly.

- The Brackman is unable to defend itself from enemy air units, as it is mainly used for artillery. It is possible to use other units, such as the Adaptor, or the Bomb Bouncer to counter this weakness.

The Cobra Mobile Missile Launcher


The Cobra Mobile Missile Launcher is an indirect firing, mobile missile launcher. It is the only mobile missile launcher requiring research. Rather than benefiting from speed, it utilizes rate of fire to overcome hostile defenses. Multiple anti-missile units/buildings are required to stop a single barrage of missiles from this unit.

Using this unit in conjunction with loyalists is a useful early rush tactic because of the unit's range and high damage. It can wipe out small bases while avoiding point defence.

Tips

- The Cobra is best used as an early/mid-game outpost/base hunter, as it can easily group together and blow up an entire base within minutes. Used en-masse with Adaptors and Loyalists, they can destroy an entire base with little assistance.

- The Cobra fires faster than any other mobile missile launcher. This can be used to easily destroy anti-missiles defenses, if you want to do even more damage.

- The Cobra has slightly greater range than Point Defense. Positioning them in areas where hostile ground fire cannot reach (top of a wall, mountain, etc), will make it possible for them, and possibly Brackman artillery units, to rain down fire on the hostile units before they can get within firing range.
Cybran Nation Units (Part Two)
The Adaptor Mobile Anti-Air, Anti-Missile and mobile Shield


The Cybran Adaptor Mobile Shield, Anti-Air and Anti-Missile (also known as ADV Adaptor) provides shields, anti-air, and anti-missile defenses. It is more cost-effective if used for at least two of its three roles than a standalone mobile anti-missile/mobile anti-air/mobile shield. Otherwise, it would cost more to use this unit for one role alone.

Tips

-The Adaptor is primarily a Mobile Anti-Air Gun. It has substantial Anti-Missile Defense, though not as powerful as that of the other factions. Its shield is very light for the price.

- As a purely anti-air unit the Adaptor is very competitive, with the same cost-to-damage ratio as the other factions with the shield to boost. As a purely anti-missile unit it is not as cost effective, but the addition of the shield generator makes it just about competitive in this role. The only role in which the Adaptor really fails is as a mobile shield generator, as the shield is much weaker than its counterparts in other factions, and if used primarily for this purpose it is not cost effective.

- The Adaptor's shield is able to stop roughly one shot each shield, which means, in sufficiently large quantities, they can still negate some very powerful units.

- While units are unable to fire while airborne from jump jets, the Adaptor`s shield remains active during the jump, providing valuable protection from anti-aircraft guns.

- The Adaptor always stays in the back of a platoon, even when jump-jetting. Unless you manually place them in the front of the platoon, it is best to use them alongside smaller squads to ensure maximum efficiency.

The Megalith II Experimental Mega-bot


The Megalith II Experimental Megabot is armed with dual laser beam cannons, a large molecular ripper cannon on top, and 4 rear-mounted light AA cannons. Megaliths are best used alongside Loyalists and Adaptors, to be used as a sniper for point defense. Once the point defense is down, your non-experimental units can move in.

Tips

- The Megalith is powerful and has a high range (64 meters), while the Fatboy II has a higher range (100 meters). Given that it is effectively a support unit, the Megalith works best when escorted by other land units.

- It is generally best to let the Megalith choose its own targets as the lasers use independent targeting systems and will not obey attack orders.

- The Megalith has a tendency to move to the front of assault groups, placing itself between the enemy and direct fire allies (which often causes them to do nothing). Micromanagement can help negate this issue. However, this can be a tactical advantage, as your opponent must first destroy the Megaliths to harm any other units.

- Lone Megaliths do not get very far in a battle, so build 2 or more for a better fighting chance - however, if your opponent is using a rush tactic with basic land units (Loyalist, Rockhead), one Megalith is a more cost-effective way of defending your base than Point defense.

- The Megalith appears to be best at destroying many standard units, as it rapidly eliminates three units at a time, from a longer range than a normal unit cannot even dream of.

- Although the AA cannons deal a fair amount of damage they are not very effective so either group with AA units or put them in groups to make them more effective.

- Two Megaliths escorted by two Bomb Bouncers and two engineers can easily destroy enemy units and air units due to the Bomb Bouncer's Anti-Air pulse ability. This can even be used to take on 2 Universal Colossi/King Kriptors at once, if done properly.

- Maps like Corvana Chasm are great places for Megaliths as they have long range and are able to do area effect very well considering the small walkways to get to where you drop them off at.

- The Megalith's range is long enough that they can blow up Commanders and avoid the explosion radius. Use this to your advantage when making base runs. Killing the ACU from outside the nuke radius takes out a lot of the base for you very quickly, to little disadvantage, especially as the rest of your army will typically be hiding behind the Megaliths.

- Megaliths can fire all three of their land weapon systems at a target directly behind them, allowing for them to cover their own retreat.

The Cybranasaurus Rex Experimental Lizardbot


The Cybranasaurus Rex Experimental Lizardbot was developed by Dr. Brackman and modeled on a piece of dinosaur DNA he had recovered. Its main weapon is a giant flamethrower, which is mounted in the mouth and gives it the appearance of breathing fire. It is also equipped with dual missile launchers and a ring of plasma grenade cannons that carpet the area around its flanks with micro-explosions.

Tips

- Unlike the other factions' flagship land experimentals, the Cybranasaurus Rex is stronger and significantly easier to research. Thus, a viable strategy is to focus all effort on researching it, then build and unleash it before your opponents are ready.

- The Cybranasaurus Rex is actually stat-per-stat very comparable to the Universal Colossus. The C. Rex has slightly less health, and it does around 200 higher DPS than the UC. In fact, when attacking structures it does nearly 500DPS more because the UC cannot use its arm weapons against structures. The C. Rex's primary weakness is its short range on all of its weapons - however, a well placed Experimental Transport quickly solves this problem.

- The C. Rex can defeat a UC in direct combat and can, in theory, take down a King Kriptor if it is airdropped directly on top of it. At close-range, it is the 2nd strongest experimental available to anyone, topped only by the Monkeylord.

- Note that this unit is capable of using its plasma grenade weaponry on units to its sides and behind it. While these weapons don't do as much damage as the main flamethrower, they offer some defense to the sides.

The Bomb Bouncer Experimental Reflector Shield


The Bomb Bouncer Experimental Reflector Shield is a minor Cybran experimental unit that projects a circular, flat shield above itself. The unit is mobile and the shield can withstand considerable punishment. As the shield is shelled, the unit absorbs the energy from the attacks that it can then discharge as a potent area-of-effect burst of damage around (and above) the unit.

Tips

- While the Bomb Bouncer's shield can withstand considerable punishment, it is far from invincible and will not last long against heavy fire or a direct assault. Grouping several together can mitigate this problem.

- The Bomb Bouncer's AoE weapon affects both air and land units, and can destroy most non-experimental units in a single hit, provided they aren't substantially upgraded.

- The AoE weapon can be manually charged for 250 energy, then discharged at will.

- There is a significant cooldown between manual recharge cycles. This does not apply for automated charging through projectile absorption.

- The AoE weapon deals exactly 2500 damage to each individual unit in range.

- The Bomb Bouncer cannot hold more than mega blast charge at a time.

- Bomb Bouncers are best used to defend armies against hostile air - especially gunships. It will not provide any protection from most direct-fire land units, but may hinder units such as the Fatboy or Jackhammer, which have an arced firing angle.

- The Bomb Bouncer can absorb the energy from an enemy air assault and use it to destroy the very air units that powered it.
Cybran Nation Units (Part Three)
The 'Cicada' Experimental Stealth Field


The 'Cicada' Experimental Stealth Field is a mobile stealth field generator that, when activated, completely obscures all units from optical and radar sensors in its effective vicinity, making only itself visible.

Tips

- The Cicada lacks the ability to cloak other Cicadas.

- The Cicada's stealth ability has a relatively short duration and must recharge between uses.

- Units inside the Cicada's stealth field, while cloaked, are completely invisible and impossible to automatically fire at. They can still fire back.

The 'Monkeylord' Experimental Spiderbot


This unit was included with the Infinite War Battlepack DLC

The Monkeylord is an enormous experimental spiderbot and is the only unit in SC2 that was also directly used in the previous two installments in this series.

The unit has a staggering 100,000 base health, almost twice as much as any other major experimental, and main cannon DPS of 2500, allowing it to survive heavy damage and destroy most units in less than a second. With full training and veterancy, this is expanded to an unrivaled 200,000 health and 5,000 DPS. A Monkeylord with 3/4 of its health with full veterancy and training is still capable of taking on 2 Universal Colossi. It can destroy a King Kriptor in 30 seconds. While it is not very maneuverable it can effectively attack units behind it due to the main turret being able to fully rotate, unlike some other land experimentals, such as the Universal Colossus.

Notes

- The Monkeylord will sometimes not fire at units behind it. Simply stop the monkeylord and turn it around if this problem persists.

- The Monkeylord's armament also includes 2 turrets that can shoot at enemies independent from the main laser. These turrets have a substantially longer range than the main laser.

- While the Monkeylord has basic anti-air, it barely pars that of a single Adapter.


The Gemini Fighter/bomber


The Gemini Fighter / Bomber is an adaptive air unit, capable of both bombing hostile buildings and firing on hostile air. It is more expensive, yet more cost-effective, than a UEF Wasp. When used en-masse, they can be an easy counter to even the strongest air or land experimentals.

Tips

- This unit offers the benefit of being a multi-tasker, meaning less micro management is required than if you had an air force of half fighters, and half bombers. It also allows you to adapt to changing threats much more smoothly.

- Unlike the more dedicated Renegade, the Gemini features a modest radar system and double the visual range, making it useful as an early game scout.

- Before research is taken into account, the Gemini is functionally identical to the Illuminate Weedoboth, save for faster shield regeneration of the Gemini. With research the Weedoboth will gain flares to redirect anti-aircraft fire, more health and a huge boost to its anti-ground ability, while the Gemini gains a considerable boost to its anti-air capability and a good buff to speed.

The Renegade Gunship


The Renegade is the basic Cybran gunship. Although it is smaller than the other gunships, it is the most powerful after its upgrades are applied. The Renegade fires faster than any other gunship, resulting in a slightly higher DPS and the ability to win against any gunship 1v1 with equal upgrades. When used in swarms, they are the most effective gunship when it comes to ACU-hunting.

Tips

- After being upgraded, this unit gains an 85% damage upgrade (including all levels of training) which is then multiplied by a 30% rate of fire improvement, to give a total of 140% additional damage output. Combined with a hefty health upgrade, this easily makes it the most powerful non-experimental gunship.

- Gunships in general make effective defensive units, since most ground based raids tend to feature few anti-air guns and therefore will be unable to stop your gunships ripping them apart.

- In addition to any ground target, gunships may fire at other gunships, air transport craft, units using Jump Jets and ACU Escape pods. This includes most experimentals except the Darkenoid as it simply flies too high. This also means that such units can fire on gunships.

- The Renegade features more firepower upgrades than other gunships but lacks the regeneration researches of the other two and the Flare decoy upgrade that the Vulthoo possesses. This makes the Renegade most suitable for quick strikes and raids on weak targets and escaping before taking too much damage.

- In comparison to the Soul Ripper II, seven Renegade gunships takes one fewer second and less resources to build. Combined, they also have more DPS, however, they have less combined health+shields (11200 vs 16500). Renegades are more useful for quick raids, however, if engaged in combat, their DPS will quickly fall due to casualties - after 2 are down, the DPS falls beyond that of the Soul Ripper II.
Cybran Nation Units (Part Four)
The Dragonfly Air Transport


The Dragon Fly Air Transport is capable of transporting up to 15 non-experimental land units. Unlike its UEF counterpart, it carries a weak and mostly concealed anti-personnel laser cannon, which is able to attack other air transports and gunships. However, it is weak, and it is used mostly to keep pests away.

Tips

- A little-known fact is that by ordering an air transport to assist a factory, any units produced will be automatically carried to the factory's target point.

- The Cybran transport can only carry 15 units and does not have the extra carrying capacity upgrade, unlike the other factions.

- As with the Illuminate standard air transport, the direct fire weaponry on the Dragon Fly deals a pathetic amount of damage - several times less than even a single un-upgraded assault bot. When it comes to "keeping pests away," this thing is designed more for literal pests, such as actual dragon flies, or other tiny obstacles (and, even then, it would probably struggle). In other words, standard transport weaponry is useless under almost all non-insect-related circumstances, even when used en masse.

The Experimental Giant Transport


The Giant Transport Experimental Air Transport is designed to transport up to 75 non-experimental land units. It is able to transport land based experimentals and ACUs. ACUs count as 15 units. Minor experimentals count as 30 units. Major experimentals count as 50 units. A major benefit of this unit over the standard transporter is a significantly greater speed and improved durability.

Tips

- Because of its outstanding speed, and ability to outrun fighters, the Giant Transport is also an effective suicide-unit. Dropping off its payload, then flying to a different part of the base before it blows up allows for further destruction, as it will damage, if not destroy, whatever it hits.

- The Giant Transport, unlike the Dragonfly, boasts AA of its own as well as decent ATG weaponry, but it would still need AA fighters to assist in its defense should swarms of enemy fighters appear.

- The Giant Transport, like all other experimental air units, deals a large amount of damage to anything they smash into should they be destroyed. However, major experimentals, such as the Soul Ripper II, or, (especially), the Darkenoid, deal substantially more collision damage.

- Unlike standard transports, the Giant Transport's weaponry actually deals noteworthy damage to hostile units. While not on par with a proper squad of gunships, the Giant Transport can be used in combat in a pinch, whereas the weapons on a standard transport literally wouldn't harm (insert something profoundly fragile here, maybe an ant? A fish? A sentient blob?)

The Intellitron Air Scout
This unit was included in the Infinite War Battle Pack 1 DLC

The Intellitron Air Scout is a fragile, unarmed, but exceptionally fast air unit with superior optical and radar range. Similar to its T3 counterpart in previous Supreme Commander installations, the Intellitron serves the role of a dedicated, extremely maneuverable spy plane.


Tips

- The Intellitron is capable of flying so fast that it can dodge or outrun projectiles from anti-air towers from some angles (often including flying directly over said towers). It is also capable of outrunning every other airborne unit.

- The Intellitron is intended for use as a mid-to-late game spy plane, replacing standard disposable fighters. No other faction has the privilege of a dedicated spy plane, which can be extremely valuable on larger maps.

- The Intellitron's radar and optical range drastically exceed that of any other non-experimental air unit, making it perfectly suited for its intended role as a dedicated spy plane.

- The Intellitron has no weapon systems of its own.

The Soul Ripper II Experimental Gunship

The Soul Ripper II is the strongest experimental gunship in the game. The name itself is enough to instill fear in the enemy, and it has the firepower to back this up. It is armed with three bottom-mounted heavy electron lasers firing a salvo a second as well as three bottom-mounted missile racks firing three salvos per second and two very strong anti-air lasers. All of the ground-based weaponry on this experimental deals a combined total of 1260 DPS to whatever's beneath it, half of a standard Monkeylord. Its anti-air batteries deal a combined total of 320 DPS.

The main downsides the Soul Ripper possesses are its (much) slower movement speed compared to AC-1000s and its rather short firing range.

Tips

- Soul Ripper IIs are tanky enough to ignore moderate quantities of anti-air turrets long enough to shred them, or destroy more important targets, such as ACUs;

- The Soul Ripper II's staggering DPS and heavy AoE damage makes it very effective at exterminating blobs of non-experimental land units;

- Despite its potent anti-air defenses, a Soul Ripper II cannot defend itself solo against a dedicated air assault. Fighter support, or just sending several at once, can mitigate this issue.
Cybran Nation Units (Part Five)
The Experimental Kraken Submarine


The Kraken Experimental Giant Submarine is equipped with 8 tentacles which fire laser beams that are effective at targeting naval, land, or air units. It is also equipped with 3 torpedo tubes which it uses to engage other submerged units. Because it is submersible, it can easily escape from an unbalanced enemy force.

Tips

- Use the fact that the ACU builds twice as fast to your advantage, allowing you to make these powerful units in 1:35 rather than 3:10.

- You can submerge the Kraken, which makes it vulnerable only to torpedo weaponry. In exchange, it cannot use its tentacle weaponry.

- It is ineffective against the IIluminate when submerged due to torpedos having no effect on hovering tanks and units. Conversely the only unit the Illuminate has to target submerged units is the Wilfindja, if the Illuminate player possesses one, It is a waste of resources to construct a Kraken as the Wilfindja will be an even fight for it for approximately half the resources and less than half the build time.

- If an opponent is amassing a powerful air force to counter your navy, a modest force of ships can be used to lure in an attack in which you can position a number of Kraken submarines to surface and quickly destroy a large airforce.

- The Kraken is somewhat useless in groups if attacking targets on land as usually only one will be able to attack and short range artillery or land units can easily deal with it. The Kraken is better off being used as a base defense for incoming naval or air units that try to go around your base.

The Salem-Class Destroyer


The Salem Class Destroyer is armed with a direct-fire weapon, an anti-air cannon, and torpedo tubes. The destroyer can gain the ability to move on land via the Land Emergence Galleon Systems upgrade.

The Salem Class is a very formidable unit with various features:
  • With a movement speed upgrade, it's fast enough to dodge some direct-fire attacks, and becomes good at chasing retreating enemy naval units.
  • It has torpedo tubes to catch subs and ACUs hiding in water.
  • Its cannon outranges Point Defenses and packs a punch.
  • The benefits of long-ranged weapons are considerable; the Salem enjoys bombarding coastal bases and short-ranged land units without retaliation, or retreating from incoming enemy forces then shelling them again from a distance.
  • The Cybran L.E.G.S technology allows it to retreat to the ground to escape a submarine attack, and retreat again from land to water to avoid massing land units, which in turn, can effectively raise veterancy levels quickly.

Unfortunately, its main gun can fire upon only targets in front of it, meaning that it cannot attack units chasing it or outflanking it. This is a major drawback for the Destroyer. It won't be able to kill units pursuing it before they catch up, so unless the chasers are crushed by other units or diverted to an alternate objective, the Salems will be caught.

Tips

- The destroyer makes an excellent main combat unit early-game. Its powerful combination of range, power, and versatility make it the backbone of most Cybran fleets.

- Though a powerful unit, the destroyer lacks health and armor. Using very large numbers of destroyers without other ships nearby is more expense than it's worth. Instead, add battleships for offensive or combat groups, aircraft carriers for support, and engineers for repair or expansion.

- With the Land Emergence Galleon System (LEGS) upgrade, the destroyer gains the ability to move on land alongside Cybran land units and the other walking ships. Commanders may be tempted to bring the seemingly large and powerful destroyer as a main assault unit, and in many cases this is a useful tactic: destroyers can effectively shell a base from outside the range of point defenses. However, in some cases, this is a very poor choice: moving a Cybran fleet onto land exposes it to fire from enemy land units, particularly tanks and assault bots. Instead, have destroyers (or, more ideally, battleships) bombard and destroy land forces and structures as much as possible from the water, where enemy tanks cannot pursue, before clamoring onto land to complete the battle once victory is guaranteed.

- Salem destroyers make effective defensive units in the early game. Shielded by Adaptors, they can be reasonably survivable, and have a good range as well as an anti-air attack, complementing point defenses nicely. A couple of them supplementing an existing fortification line or guarding an outlying base under construction are useful.

- While it does open them up to being assaulted by enemy land units, moving onto land is a good way for Cybran ships to escape subs. It also allows them to shelter from heavy enemy retaliation (such as gunships) amid an army or point defenses.

- Salems are great for taking out early UEF Mastadon rushes, due to the main cannon and torpedo launchers both being able to target surfaced ships at the same time.

The Executioner-Class Battleship


The Executioner Class Battleship is armed with heavy direct-fire proton cannons, anti-air cannons, and torpedo tubes. It has a massive range, and can easily destroy an enemy force before the force's radar even detects the Executioner.

Executioners share the same benefits as the Salem Class, but with added firepower and targeting range.

Tips

- The Executioner's proton cannons are a potent weapon. Their basic range is already significant enough, but with the Cybran naval range research upgrade, they essentially become mobile artillery, far outranging even Fatboys. They fire in a low arc, and travel reasonably quickly, meaning they can shoot over small undulations in terrain (combining well with the Executioner's size, especially on land), and aren't too inaccurate.

- Executioners make brilliant defensive units. Building a Naval Factory behind your base, then sending Executioners to the fortifications in front of it, allows them to cover almost all of your mass extractors, absorb firepower (especially when shielded) and blast away at enemy patrols long before they reach you.

- Naval factories can be upgraded, through research, to use the same proton cannons the Executioner uses, as a defensive weapon of their own, for zero extra mass or energy cost.
Cybran Nation Units (Part Six)
The Command-Class Aircraft Carrier


The Command Class Aircraft Carrier's main role is to manufacture, store, and launch air units - essentially acting as a mobile air factory. It also produces units at two thirds of their normal cost. Considering that this unit can go on land with the Cybran LEGS technology, it can act as a mobile air factory on land. Although the Command Class does have somewhat powerful guns (and no anti-air), it is not recommended to put this unit into battle due to its short firing range.

Tips
- Given its ability to move, a good strategy is to place 1-2 Aircraft Carriers to the edge of the map where they will not be detected and mass produce units. Opponents who scout your base and find no Air factories may not build adequate air defense against your surprise air force.

- Though able to walk on land, the Aircraft Carrier is best reserved for unit production as its weapons are somewhat insignificant due to their short ranges.

- Produced units will not launch until the explicit unload command is given. Any units still onboard when it is destroyed will be lost. For rapid launch, give the command on top of the unit; this will cause all aircraft to launch immediately.
Artillery
UEF Artillery


Fortified Artillery Light Artillery Installation

The Fortified Artillery installation is a short-range, low-cost, medium-damage artillery piece capable of shelling things beyond the reach of standard point defense turrets and some missile launchers. When upgraded, it is capable of 'hardening' its weaponry, reducing its range to that of a standard point defense turret while amplifying its area of effect and rate of fire several times.

This unit is generally used to shell hostile units before they get in range of standard point defenses, as well as to provide fire support on hostile bases where heavy artillery is either not in range or not economically feasible.


Long-range Artillery Installation

The UEF non-experimental artillery installation favors range over accuracy, rate of fire, and damage potential. While inaccurate and with somewhat lackluster damage, this artillery piece allows for decent suppression over very long distances. Multiple installations will be necessary to cause real damage.


Quantum Disruptor Station

The Quantum Disruptor Station is significantly more deadly than regular UEF heavy artillery. With a slightly longer range, heavier damage potential and EMP effect, for nearly the same research price as the regular heavy artillery, quantum artillery is a force to be reckoned with. Quantum arty can fire a charged shot, which will temporarily disable any units it rams into - this will NOT disable shields. The EMP effect varies by how many shots rammed into the unit per salvo. Around four seconds of EMP are applied per shot hit with each salvo. Other salvos do not stack with the original one.

The only downside to using quantum artillery is the low rate of fire and larger mass and energy cost over the regular heavy artillery installation. Early-mid game, this thing will wreck your economy if you are producing units actively. Due to its size, it is also significantly more vulnerable to bombing runs than smaller installations.


Noah Unit Cannon

The Noah Unit Cannon is capable of building units at a third of the regular cost and a seventh of the regular time, and can fire them across the map, at roughly the same maximum range as the quantum disruptor station. Late-game, these are an obvious complete replacement for land factories, as unit cannons are FAR more efficient with building and deploying units than regular land factories are.

Aiming directly into heavily fortified areas is ill-advised, as hostile defenses can shred the units one by one as they land. Shield and health upgrades can reduce this effect.


Cybran Artillery


Heavy Artillery Station

The Cybran Heavy Artillery Station does substantially more damage than other non-experimental artillery installations, and, when fully researched, also fires noticeably more quickly than all other artillery installations. That being said, it has a considerably smaller range than all artillery structures other than fortified artillery.

The Cybran artillery station does a substantial amount of damage - especially when upgraded - and offers certain tactical advantages, such as accurate shells, generous damage, and, when researched, shell cameras that provide direct vision around a shell's impact area for a few seconds following the impact. All of this is at the cost of a shorter firing range than other artillery.

Cybran artillery is best used for forcefully hammering structures in its effective range - Cybran artillery outputs excessive damage and allows for destroying nearby buildings/units very swiftly. In particular, it is very effective at focused destruction of specific units or structures due to its accuracy and rate of fire.
Unique UEF Units
The 'Aegis' Experimental Shield Generator


The Aegis projects a very large shield capable of enveloping a medium-sized base (with a radius slightly smaller than one of the four platforms between the spawn areas in Tourney Dome), with much more strength than a standard shield. However, the Aegis does not passively regenerate its shields over time at all, and requires an investment of 5,000 units of energy to manually recharge its shields, regardless of their remaining durability.

Tips

- The recharge ability has an extensive cooldown time completely independent of the actual amount of shields recharged. To maximize energy utilization, use this ability only when the shield is, or is near the point of, dropping.

- The Aegis is best used to protect large bases from small artillery barrages and other long-range units (e.g. jackhammers, fatboys, megaliths) late in the game. It will seldom provide protection from anything that isn't long-range due to its immense shield radius.

- The Aegis will not stop any projectiles that a regular shield will not.

- The Aegis's shield recharge ability will not be able to keep up with a concentrated artillery assault. Even five regular artillery structures centered on it at once can place heavy stress on the recharge limit.

- Similar to regular shield generators, the Aegis does not have much structural resilience for its size. It is especially prone to attacks from bombers, which can get in and drop payload much faster than gunships can. Regular shield generators are borderline necessary to protect this structure.

- The Aegis is best used as a preventative measure for artillery barrages (i.e. have it built before the shells start firing), buying time to develop a more direct countermeasure to whatever is bombarding your base. Because of the Aegis's low structural health, high price and extensive building time, it's usually not worth attempting to construct one if artillery is already dialed in.

The Research Converter


This unit was included in the Infinite War Battle Pack One DLC.

The Research Converter is a simple building that converts large quantities of mass into instant progress towards research point production, allowing an individual to progress research at a substantially faster rate than usual, at the expense of much lower mass-to-research efficiency.

Tips

- The Research Converter is a simple solution to an individual posed with the question: "what could I possibly do with this massive pile of excess mass I have?" This facility will let you bypass the normal wait times for producing research points at the expense of significantly higher quantities of mass required for said progress.

- This facility is best used in cases where one has neglected to unlock a unit type that would be an effective counter to a current or impending battlefield threat that one cannot afford to wait for normal research progress to unlock. While it's substantially more mass-effective to just produce regular research facilities instead, skipping the wait can, in certain situations, be crucial.

- In one-on-one or two-on-two matches, this structure consumes enough mass to put an individual at a major economical disadvantage. The research progress gained may not - and usually will not - outweigh the units that could have been produced instead.
Unique Aeon Units
The 'Illuminator' Experimental Intel Gathering Station


This unit was included in the Infinite War Battle Pack 1 DLC.

The Illuminator is a minor experimental radar installation which has very powerful radar sensors, which can be temporarily enhanced to full optical view of its entire radar range in exchange for energy.

Tips

- While the Illuminator has several times more range than a standard radar installation, it will rarely cover even close to the entire map in a 3v3+ map. With anything smaller, however, one can typically plop it down in their main base where it is well protected and still have coverage of the vast majority of the map.

- Standard radar installations are fragile, and this one is no different. Shields are a worthy investment around this structure.

- The Illuminator will be a very obvious target if the enemy detects it via scouting. Shields are one option for protection, but the best method is preventing the enemy from seeing it at all, if possible.
Similar to standard radar installations, the Illuminator is considerably less expensive than other structures and units of its class. This can make it somewhat disposable in lengthy matches where one has had ample time to reinforce their economy.

The 'Buhbledow' Experimental EMP Missile Launcher


The Buhbledow is a minor experimental, manually controlled missile launcher, similar to a nuclear missile launcher - the difference being this fires missiles that exclusively damage shield integrity, dissolving any in range of the explosion instantly, including experimental shields.

Tips

- EMP missiles do not disable structure functionality outside of shield projection. Turrets will not stop firing, factories will not stop producing and units will not stop moving even if they are within range of the detonation radius of an EMP missile.

- EMP missiles are not targeted by anti-nuclear missiles, but have similar pricing to a nuclear missile.

- The explosion radius of an EMP missile is similar to that of a nuclear missile.

- A maximum of one EMP missile can be held at any given time in a Buhbledow.

The 'Loyalty Gun' Experimental Conversion Ray


The Loyalty Gun is a major experimental turret with an exceptionally long range that is capable of rapidly capturing any vulnerable unit (anything other than ACUs and aerial units) in its range.

Tips

- The Loyalty Gun outranges every other direct-fire unit in the game, allowing it to capture most short-to-medium ranged units well before they can even fire on the structure.

- The Loyalty Gun captures small units in two seconds, minor experimentals in five seconds and major experimentals in ten seconds.

- Due to its range, this weapon can be used both offensively and defensively, be it targeting experimentals as they approach one's base or disarming that point defense wall that some fool had the naivety to construct.
Unique Cybran Units
The 'Boomerang' Nuke Redirector


The 'Boomerang' is a more costly Cybran alternative to the regular anti-nuclear missile defense system, but offers a much more potent countermeasure: instead of destroying the incoming missile, it redirects it back toward its launch silo, bypassing any nuclear missile defenses. Essentially, it guarantees a nuclear detonation if it successfully redirects a missile.

Tips

- Boomerang 'charges' are almost twice the cost of a standard anti-nuclear missile, and up to five can be stacked in a single redirector. They remain cheaper than an actual nuclear missile.

- Boomerangs take several seconds to redirect a missile. If the missile is already descending when it enters the Boomerang's area of effect, the missile may slam into the ground despite the Boomerang attempting to redirect it. This will consume one redirection charge.

- Boomerangs can, technically, be overwhelmed by launching a minimum of three to four missiles toward it, which will exceed its capacity for redirection. Whether this is worth the destruction of one's own structures is another question.

- Boomerangs are high-value targets due to the extreme threat they pose to players bearing strategic weaponry - be prepared for air assaults targeting structures like this to clear the way for a nuclear strike.

- The Boomerang can be countered by placing launch silos away from any valuable structures the player owns. Placing silos this far out may, however, expose them to strikes from the enemy. The cost of fortifications to defend the silos should be considered if this tactic is used.

The 'Magnetron' Experimental Unit Magnet


The 'Magnetron' is a stationary experimental unit with a very unique ability: it is capable of both magnetically repelling and attracting units in a wide radius around it, with a more potent effect the closer a unit is. It will consume units that get close enough to the structure, providing (somehow) even more mass than the base cost of the consumed unit.

Tips

- The Magnetron is capable of destroying most non-experimental land units in one second or less, especially if they are not upgraded.

- Stacking several Magnetrons in a confined area will amplify their effects when their activation is synchronized.

- Magnetrons can gain veterancy as any other combat unit can. This veterancy will increase both the durability and grinding speed of the structure. It will not affect magnetic radius, duration, effectiveness, or mass yield.

- Magnetrons are best employed around the edges of a fortified base, where it can consume attacking units (or repel them, if necessary) the easiest.

- Magnetrons do not affect units that are airborne.

- Magnetrons do not affect temporarily immobile units, such as hunkered ACUs or deployed Jackhammers.

- Teleportation-capable units can escape the Magnetron's grasp entirely if they are far enough away from it, provided quick reflexes are employed.

- Magnetrons are especially punishing to enemies that primarily use sub-experimental land units - be it due to game restrictions or preference.

The 'Proto-Brain' Experimental Research Facility


The 'Proto-Brain' is an experimental research station that generates research points much more rapidly, and efficiently, than a standard research station. The 'brain' part of the structure can also be independently controlled - converting the structure into a standard research facility - and can then fly around and boost the veterancy gains of units in a short radius around it.

Tips

- The Proto-Brain complex is slightly more cost-effective for producing research points than standard research stations are, clocking in at 112.5% more mass-effective and ~106.7% more research-effective than three standard research facilities.

- The Proto-Brain is typically unlocked mid-to-late game, limiting its usefulness as a research station, as, by this point, many of the more useful things to research will already have been unlocked. The usefulness of the brain itself should be considered here.

- The Brain of the structure is slow, but has light air-to-ground defenses, boosts veterancy gains of the units around it, does some damage when it slams into an enemy unit (after being destroyed), and is rebuilt for free at the station it launched from twenty seconds after destruction.

- Because it costs nothing to rebuild, the Brain does not offer any significant mass yield when its wreck is reclaimed.

- The Brain increases veterancy gain by 300% for all units in its effective range.

- The Brain's veterancy boost can, through veterancy/research yield mechanics, cause an increase in research points derived from destroyed units. This usually will not exceed the research yield from simply leaving the brain docked in the facility.

- The Brain should be used to support armies - ideally slow-moving ones - late-game, when research matters less.

- The Brain can be damaged when docked, especially by artillery shells. This can be used to reduce the damage to the actual structure by having the brain absorb the direct impact damage from a shell.
Credits
Nerd Boi - Essentially tossed the original guide into the incinerator by rewriting literally every section (and then added at least thirty other sections nobody even asked for). Maintains and updates the guide. Took all unit images under "Shields and You" and certain unit images.

Alex - Original creator of the guide. Handed it over to Badstormer at his request. Contributed the following text to the guide:

- Replaced "Badstormer" with "Nerd Boi" in the credits section

Supreme Commander 2 Wiki[supcom2.wikia.com] - Retrieved exact unit statistics from the wiki. Used unit information here as a starting point for the guide's more refined unit descriptions and tips. Most unit images and small faction icon images were derived from here. If you want more specific statistics for each unit, you can also find them here.

Snazzy faction wallpapers in the first few sections are by CB260.[www.deviantart.com]
Change log - 2
*Note: mm/dd/yyyy

2/4/2025
  • Revised the Standard Build Order section to use a less commanding tone

1/29/2025
  • Removed the chronically unfinished Common Strategies and ACU Rushing sections

1/25/2025
  • Minor update to Badstormer's contributions in the credits section

1/18/2025
  • Merged the "Units" and "Buildings" sections into a single "Common Wisdom" section and heavily revised the contents of both to give better advice with fewer words
  • Heavily revised the description of all three factions
  • Removed the "Thoughts on Factions" section
  • Minor revisions to the Standard Build Order section
  • Removed duplicate proto-brain complex entry in section 4 of Cybran units
  • Moderate revision to Soul Ripper II data
  • Minor revision to Intellitron data
  • Very minor revision to bullet list spacing under Nukes and You
  • Properly credited CB260 for the snazzy faction images

11/1/2024
  • Removed a redundant header in the Artillery section

4/27/2024
  • Minor revisions to the "Standard Build Order" section
  • Minor revisions to the "Nukes and You" section
  • Altered formatting of notes in the "Veterancy" section
  • Added spacing between notes in the "Shields and You" section
  • Major revisions to sections one and two of UEF units
  • Minor revisions to section three of UEF units
  • Added second change log section due to space limits in the first
Change log - 1
4/24/2024
  • Minor revisions to the "Shields and You" section
  • Further specified what units the Loyalty Gun is effective against in the "Unique Aeon Units" section

2/23/2024
  • Revised DLC-related differences list in the "Differences between DLC and non-DLC matches" section

12/1/2023
  • Added "Nukes and You" section

11/16/2023
  • Small shields and you section notes revisions

8/26/2023
  • Added UEF Research Converter to Unique UEF Units section (thanks Eridani)
  • Slightly revised the Illuminator formatting under Unique Aeon Units
  • Added advice to protect the Illuminator with shields due to its fragility

6/25/2023
  • Added a sentence to the section pertaining to differences between DLC vs. non-DLC matches emphasizing that mass extractors take significantly longer to repay the cost to build them with DLC enabled
  • Slightly clarified original guide author's contributions to the current iteration of the guide in the credits section

3/26/2023
  • Fixed missing Illuminator image

5/20/2022
  • Added a section detailing the differences between a game with/without DLC enabled

12/23/2021
  • Revised the Artillery section
  • Moved the Artillery section below the generic units sections

11/22/2021
  • Slightly altered advice regarding prioritization of mass extractor expansion to further encourage aggressively increasing mass income

11/5/2021
  • Added a line of credit near the start (instead of the end) due to frequent misconceptions of guide contribution

9/28/2021
  • Slight revisions to the Proto-Brain complex's tips in part six of the Cybran Nation Units section

9/23/2021
  • Removed some unnecessarily aggressive text from both the Buildings and Units sections
  • Slightly reduced bolding of text in both the Buildings and Units sections

8/16/2021
  • Added detail to Shields and You section regarding damage reduction for non-solid shields

6/22/2021
  • Added a Magnetron tip specifying immobile units are not affected by the magnet
  • Slight revisions to faction descriptions, especially the Cybran section
  • Readability pass across all Cybran units

6/15/2021
  • Removed Supreme Commander 2 Wiki abbreviation in Credits section
  • Added two commas and a space to part eight of UEF units
  • Fixed a spelling error in Unique Cybran Units

6/14/2021
  • Added a tip to the HeeHola air transport information panel (thanks KoenBarbarian)
  • Removed unintentional italics of everything beneath the Shotja in Aeon Illuminate Units (Part Five)
  • Revisions to all Illuminate unit sections
  • Finished readability pass in Illuminate unit sections

6/4/2021
  • Slight revision to Building section
  • Removed double Hunker entry under the Illuminate ACU's upgrades

4/19/2021
  • Beginning of readability pass on Aeon Illuminate Units sections

4/1/2021
  • Finished readability pass on all nine UEF Units sections

3/23/2021
  • Made some progress in making the Tips sections of units more readable
  • Fixed several grammatical errors across the guide
  • Removed unintentional bolding of everything beneath the Cicada in the Cybran Units (Part Three) section

3/13/2021
  • Clarified certain tips regarding the Proto-Brain Research Facility
  • Significant revisions to the Building section

12/5/2020
  • Added detail and minor clarification to the Veterancy section
  • Fixed an improperly line-spaced paragraph in the Building section

11/21/2020
  • Expanded standard build order section (no new orders yet, sorry gents)
  • Added proper paragraph spacing to Building and Units sections
  • Removed about six unnecessary words from Shields and You
  • Added Mass Extractor veterancy details to the Veterancy section

11/11/2020
  • Reorganized and slightly revised Credits section
  • Fixed a formatting issue in the Changelog section

11/01/2020
  • Small revisions to introduction section
  • Substantial revisions to "The United Earth Federation" section

10/22/2020
  • Updated headers in each unique unit section for more consistency and visual appeal
  • Removed generalized "Unique Units" sections in favor of faction-specific sections
  • Removed "(U.E.F)" abbreviation from The United Earth Federation section
  • Bolded initial sections for each faction-specific unit type
  • Swapped "Cybran Units" to "Cybran Nation Units" across all relevant sections to comply with the faction's official name
  • Fixed grammatical errors and added some clarification in the description of the Aegis
  • Added detail to the Supcom 2 reference in the Credits section specifying unit statistical information can be found there
  • Made the opening sentences in the Artillery section less condescending (sorry, people)

9/10/2020
  • Added introduction section
  • Minor edits to the formatting in the standard build order section

9/4/2020
  • Revised credits section
  • Further revised "Shields and You"

8/31/2020
  • Slight revisions to sections "Shields and You" and "Unique Units - Part Two"

8/30/2020
  • Added Veterancy section
  • Added "Shields and You" section

8/28/2020
  • Added (finished, really) the "Unique Units" section
  • Added proper header text to the Artillery section
  • Altered image settings in artillery section to avoid text appearing to the right of the image
  • Added Illuminate Pulinsmash unit to "Aeon Illuminate Units (Part Five)"
  • Added Cybran Cicada to "Cybran Units (Part Three)"
  • Revised part three of Cybran Units

3/29/2020
  • Major revision to "Common Strategies"
  • Preparations to add additional sections regarding strategies and countering
  • Removed unintended bolding of everything in the Change log

3/20/2020
  • Small revisions to early sections
  • Corrected one spelling error in the ACU rushing section
  • Used the remaining character limit in the ACU rushing section to add a 'universal' rushing strategy
  • Slightly revised credits section

02/07/2020
  • Revised several early sections further
  • Added some important information to early sections pertaining to build orders and strategies

11/12/2019
  • Added the Illuminator Experimental Intel Gathering Station to the Aeon Units - Part Five section
  • Added the Bomb Bouncer Experimental Reflector Shield to the Cybran Units - Part Two section

11/9/2019
  • Added more information to the "Building" section

11/8/2019
  • Added the Intellitron Air Scout to the Cybran Units - Part Four section
  • Removed more evil grammatically incorrect "it's" usage from various sections
  • Revised several Cybran unit sections
  • Revised credits section
  • Forcefully injected a vial of Humor™ to Cybran Units - Part Four

9/30/2019
  • Implemented changelog
  • Revised several sections
  • Fixed several spelling and grammatical errors (many likely remain)
  • Added some missing units
91 Comments
[N.C]-Lusche 1 Nov, 2024 @ 9:34am 
Ahh, ok. Ty for your answer!
Badstormer  [author] 1 Nov, 2024 @ 2:07am 
Regrettably, SC2 isn't as moddable as its predecessors - much more of it is hard-coded and not intended to be modified than the first two games. While there are at least a few unit packs out there, I can't think of any AI mods.
[N.C]-Lusche 1 Nov, 2024 @ 1:32am 
Agree! I just have bought it for me and a mate. In multiplayer it is fun and the Ai seems to be good/ ok. Ist there an Ai-Mod out you can recommend? Ty for your guide .... very helpful :-)!
Badstormer  [author] 6 Jul, 2024 @ 3:36pm 
Not heavily populated, but not dead either - since the game's priced cheap enough that virtually anyone can afford it on sale, you'll always have at least a few people online.
SigmaLigma 6 Jul, 2024 @ 12:40am 
This game still alive? used to play it a ton on my 360 after getting it free off gold pass
Badstormer  [author] 28 Nov, 2023 @ 5:26am 
Nuke spamming is a viable way to win, yes, but it tends to cost a disproportionate amount of resources compared to other methods that have better success rates.

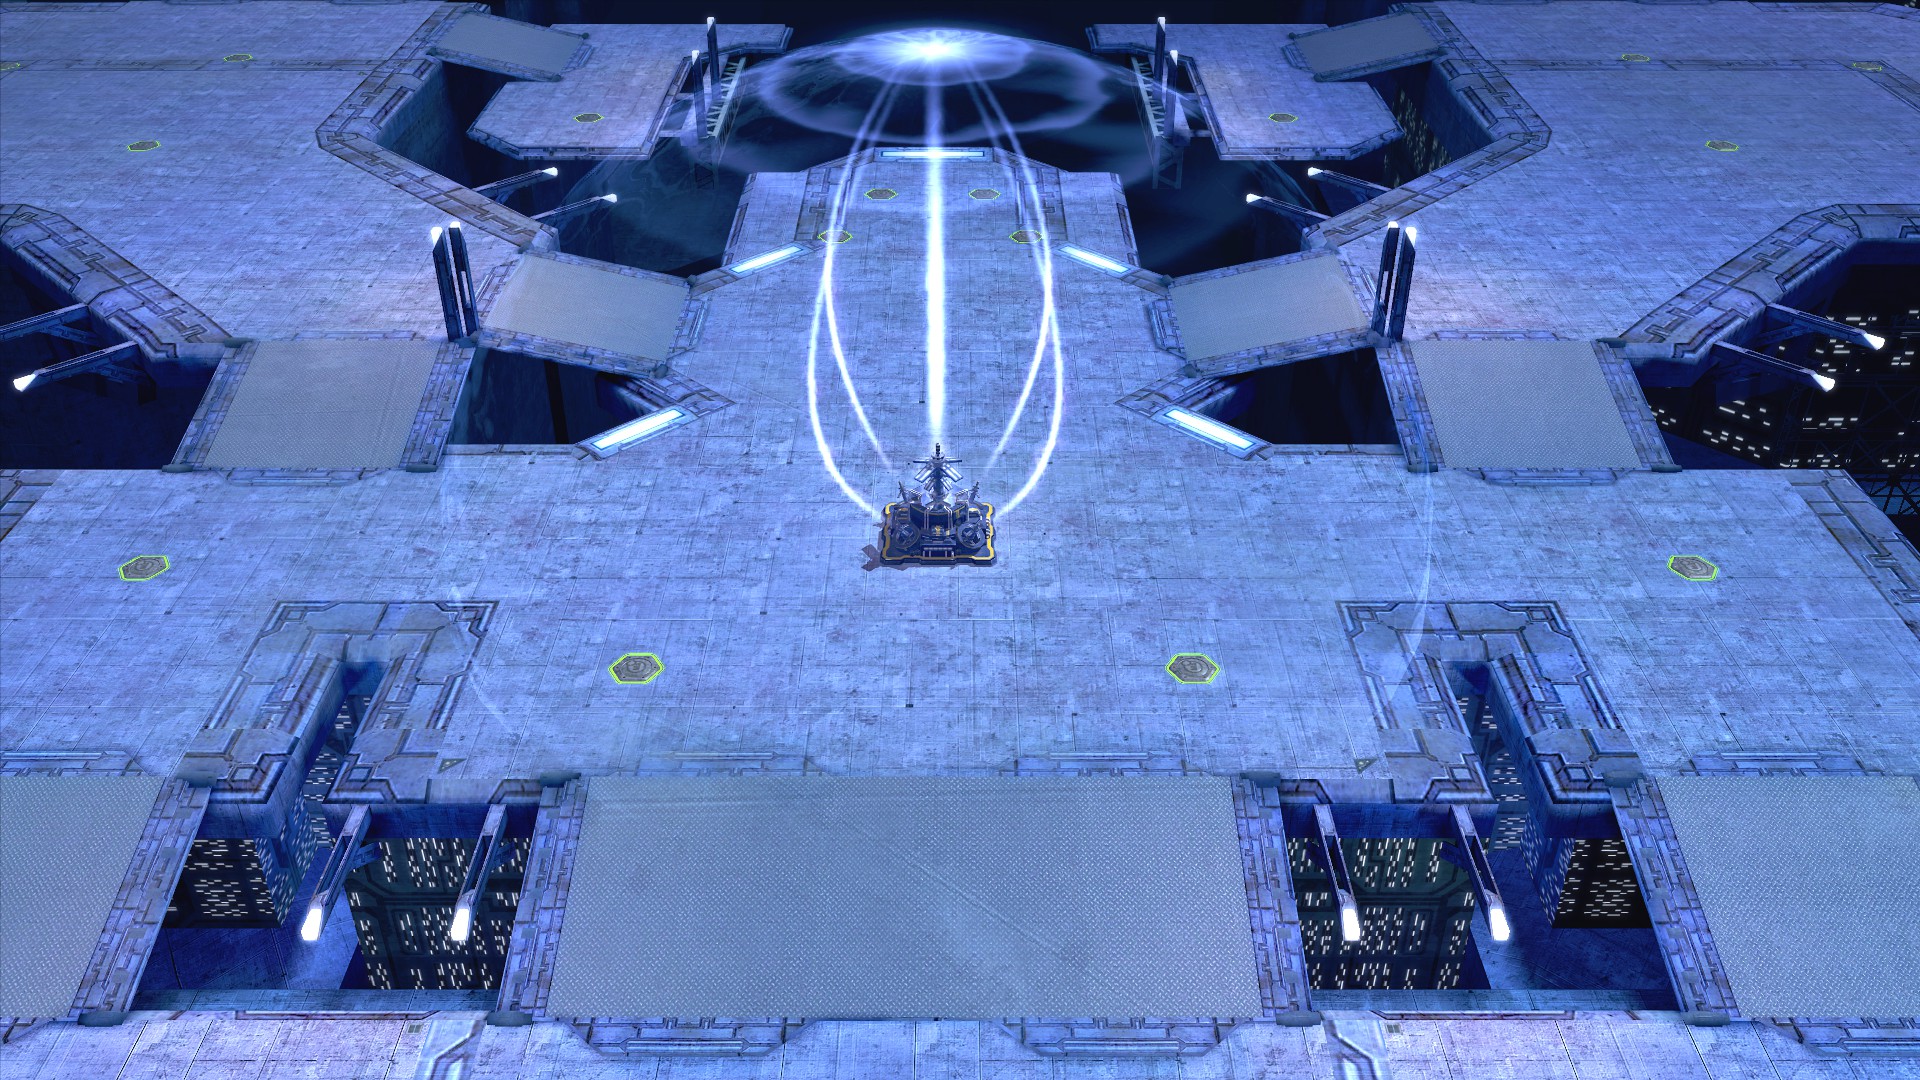
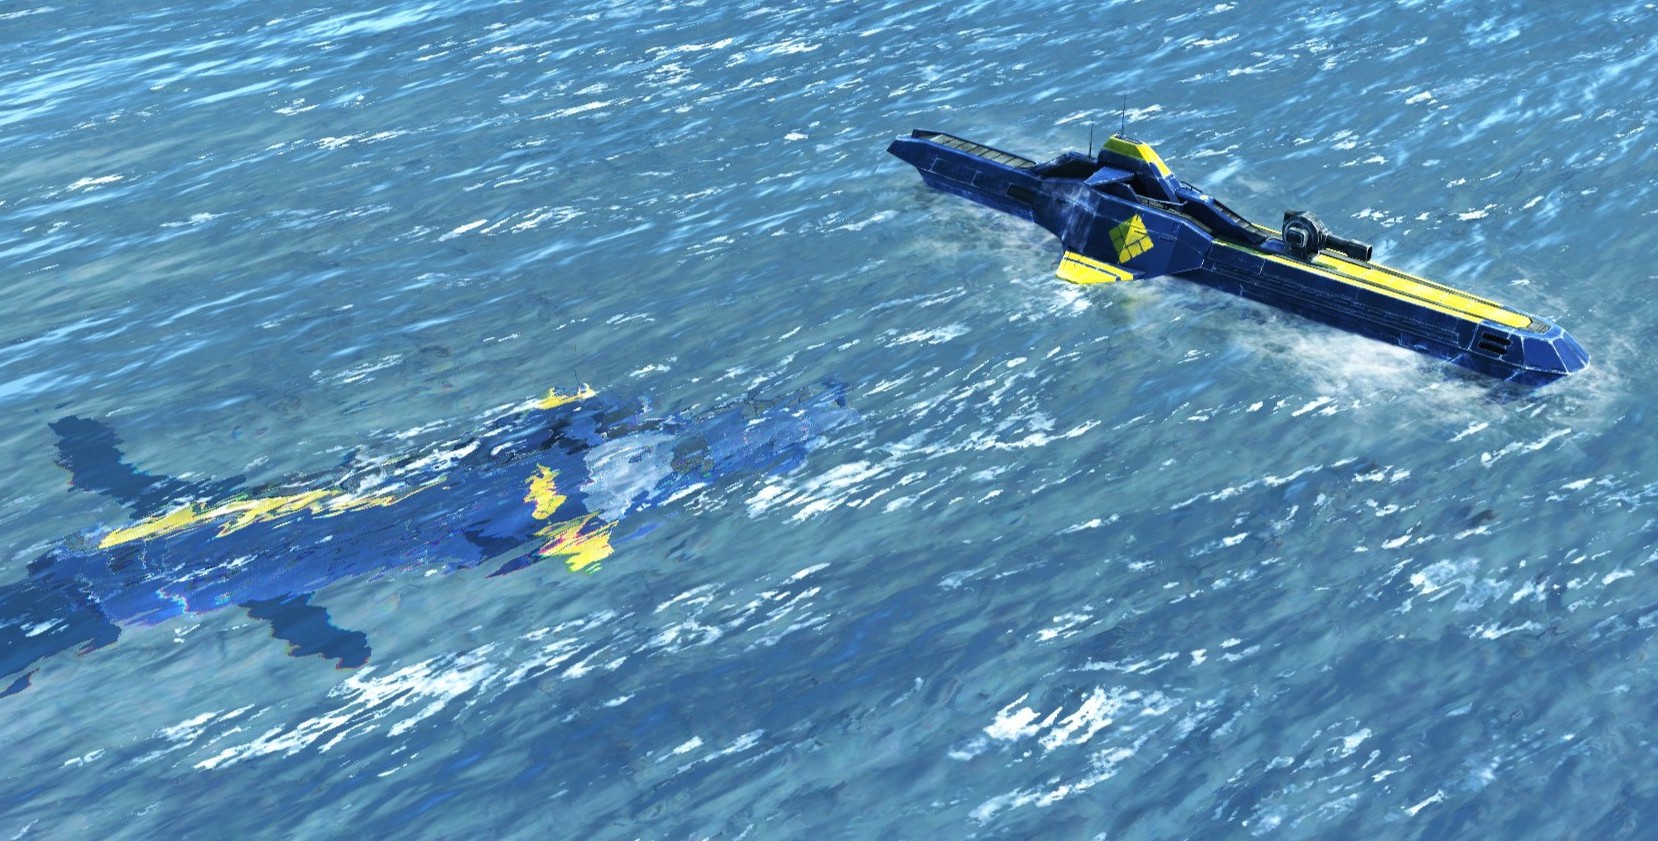
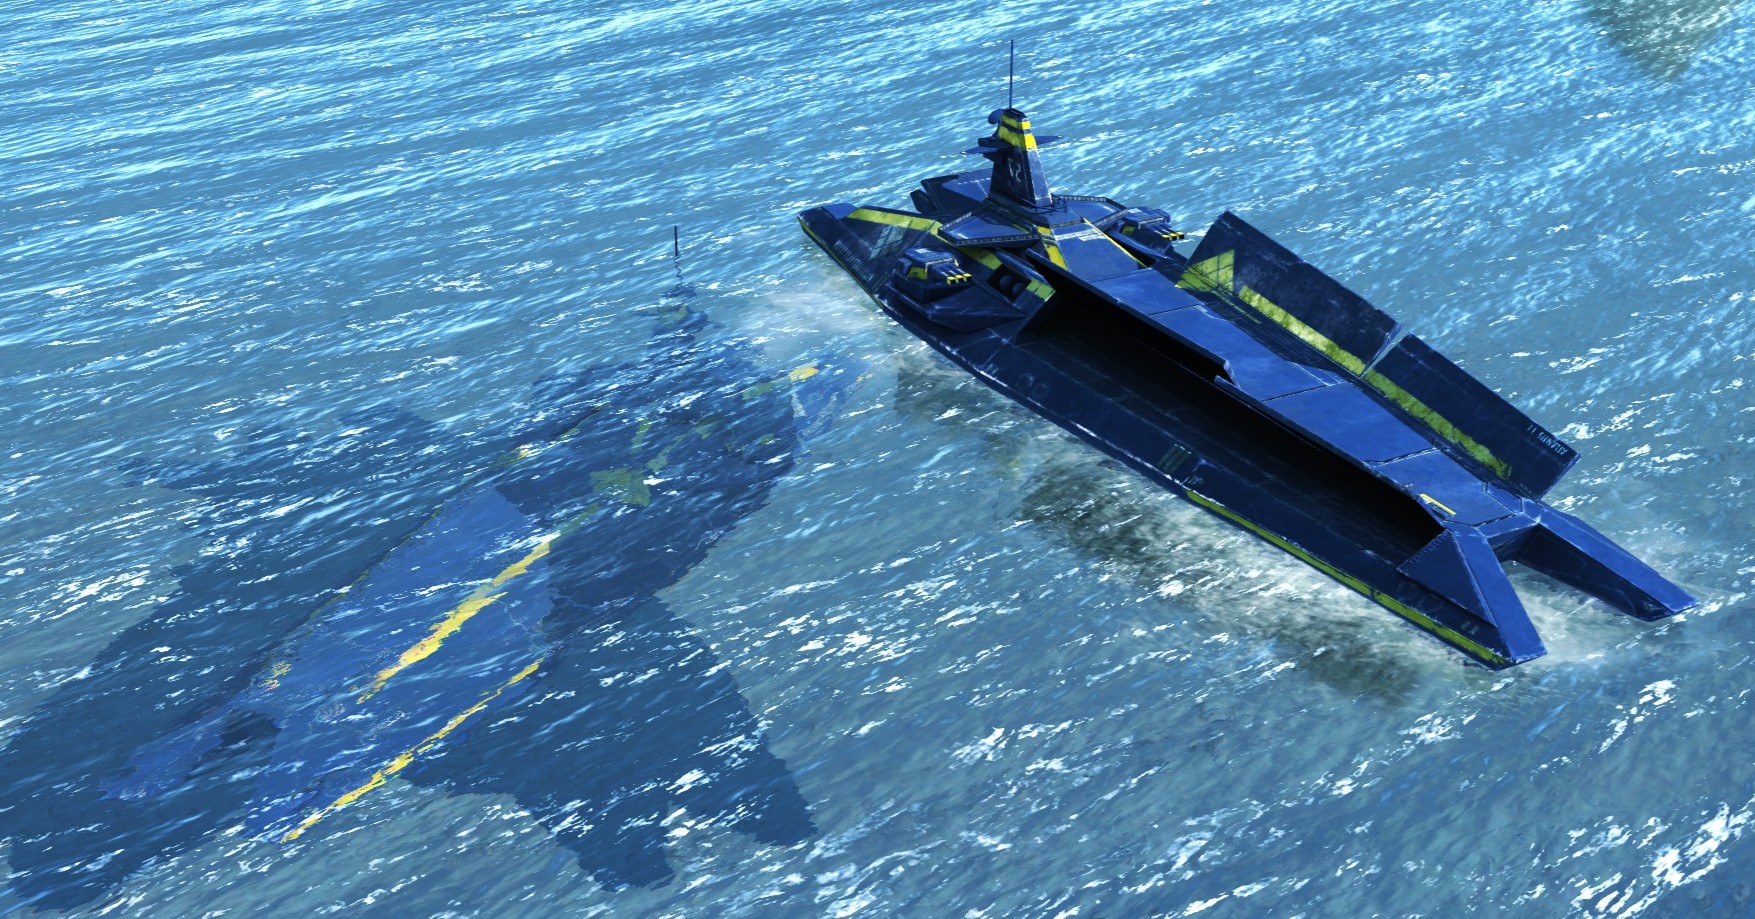
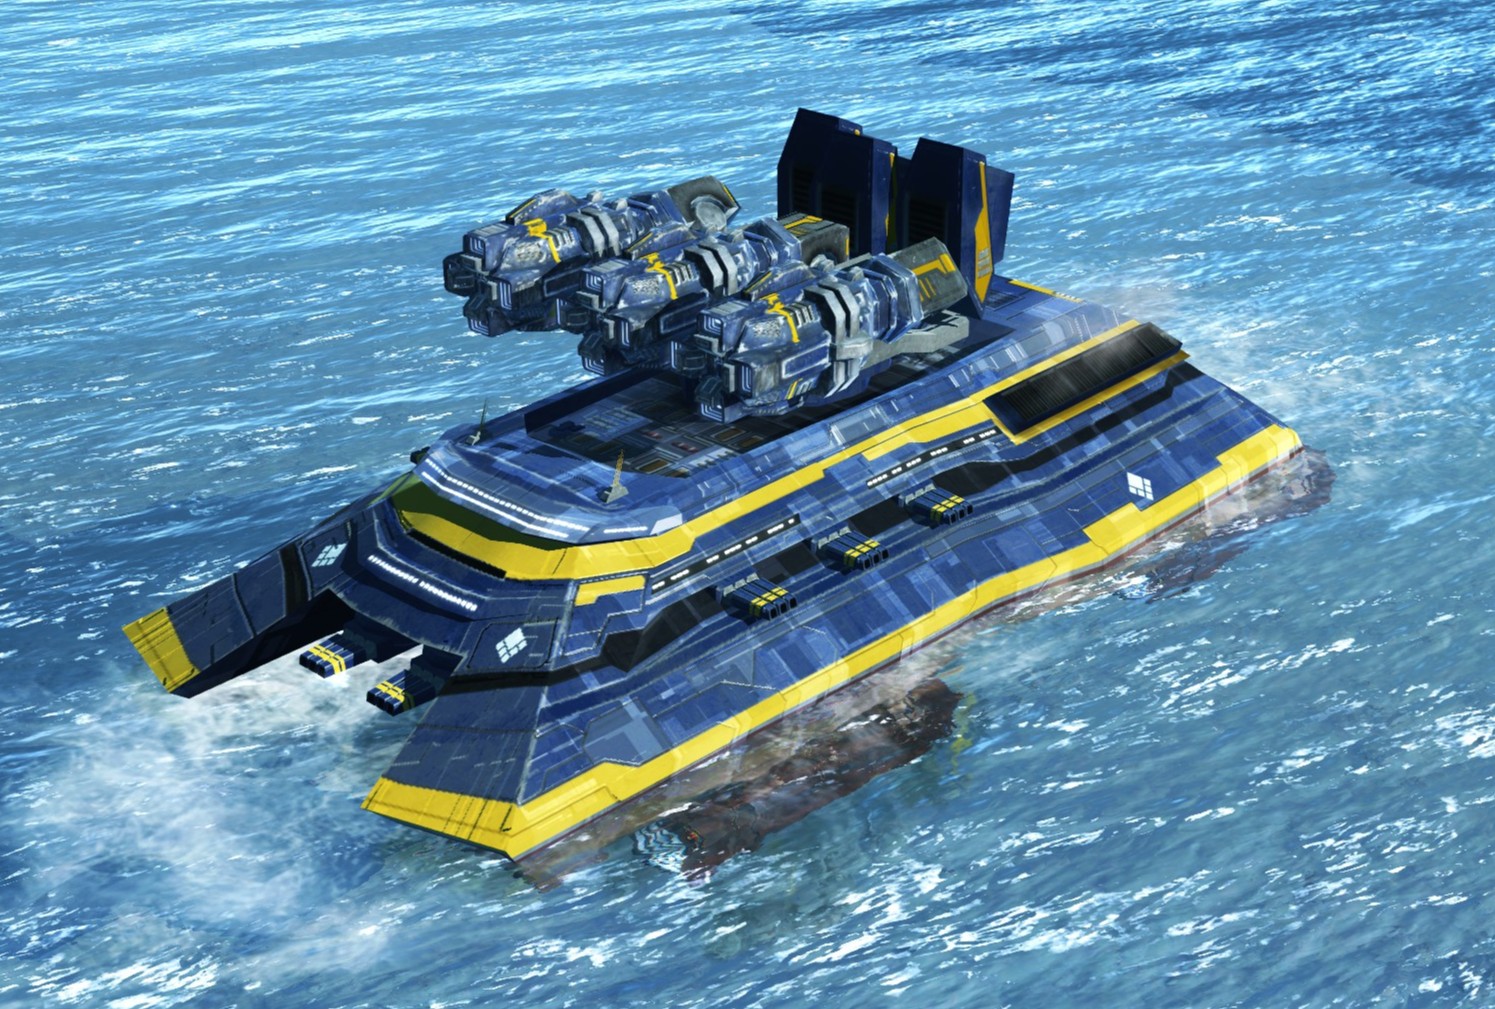
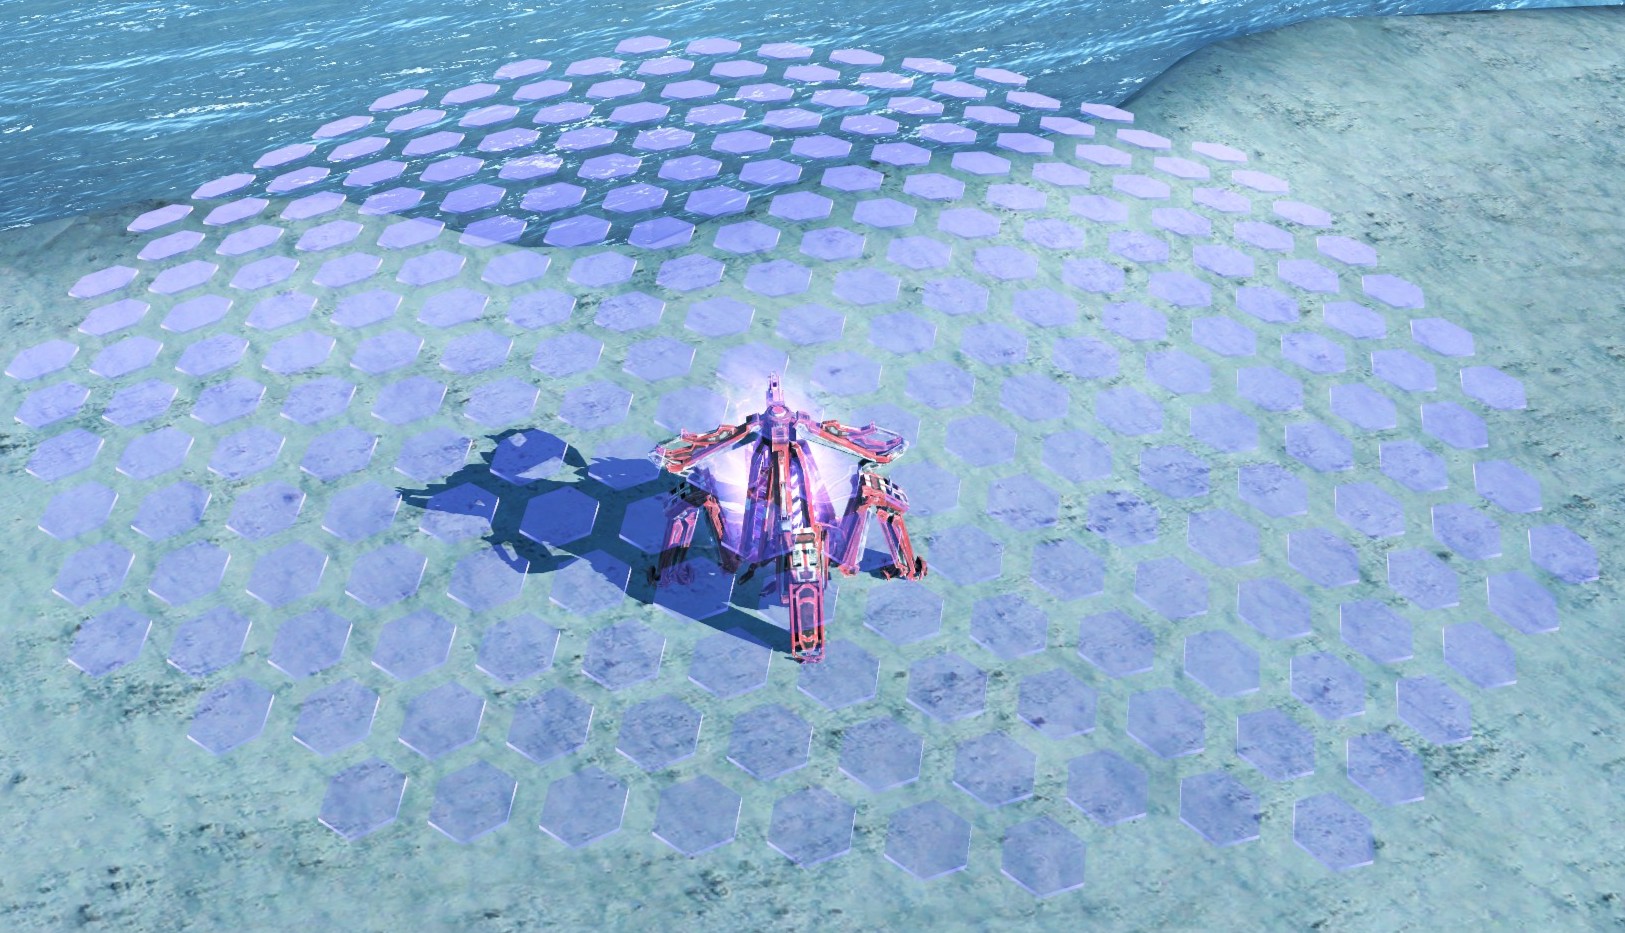
Anti-nuclear missiles can be built much faster than regular nukes, for half the price, and can fire much faster. You'd need to send a cluster of nukes - probably at least six, ideally more - in a single barrage to overcome a prepared nuclear defense. This same price can net you at least several experimental units which can't be defeated with a simple anti-nuclear missile and actually respond to commands.

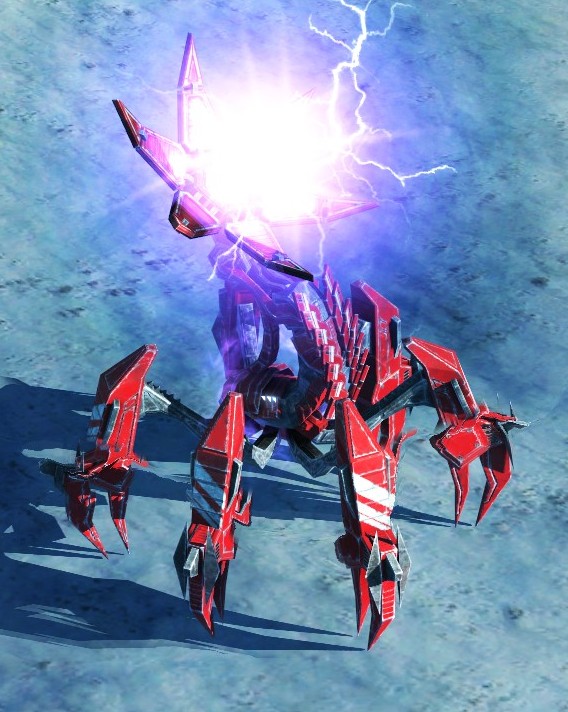
Nuclear missiles are more of a way to catch someone off-guard if they either don't have the resources for anti-nukes or don't anticipate you using them, such as if they neglect to scout.

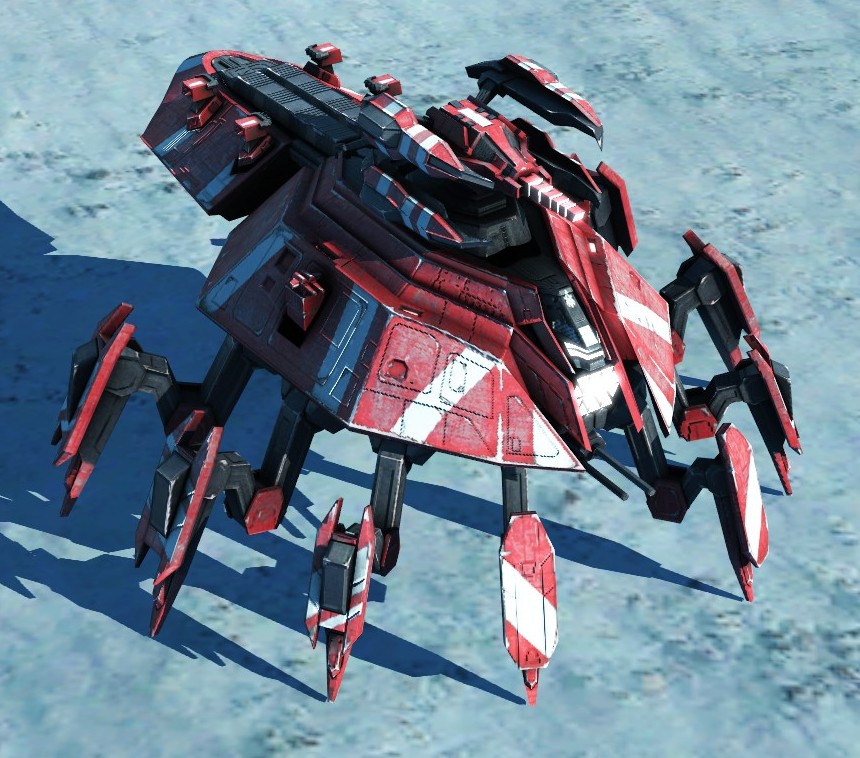
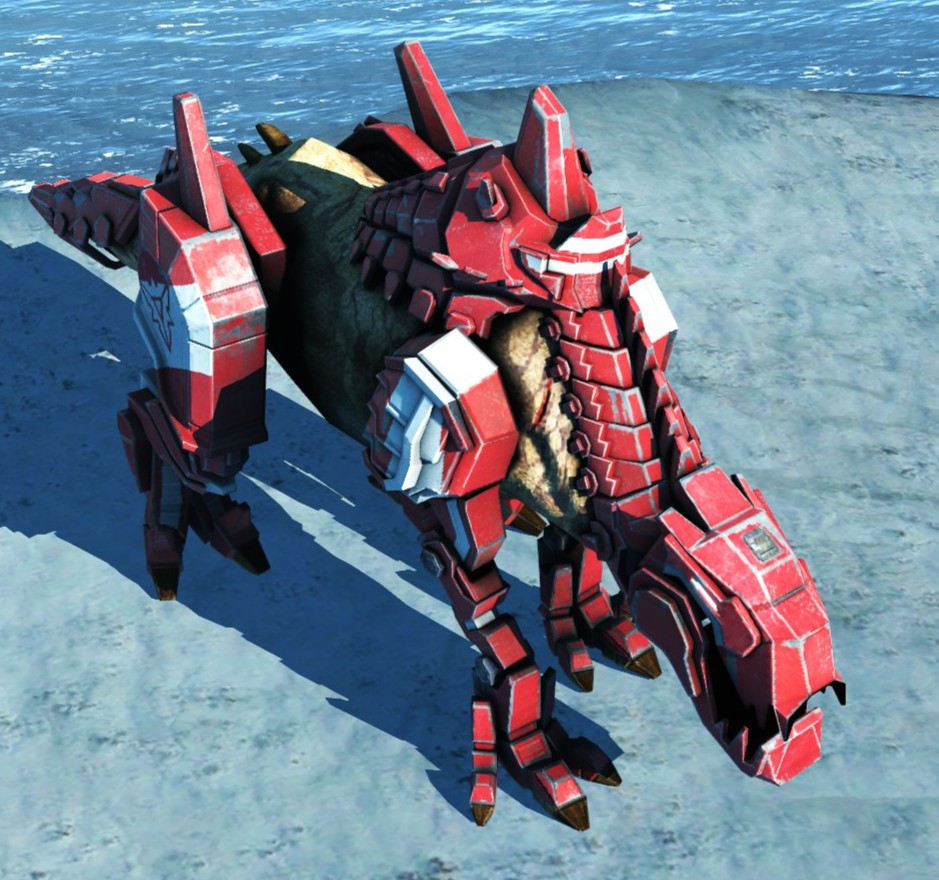
Personally, I'd just invest in experimental units - they usually cost less than a single nuclear missile and tend to cause more problems for the enemy.
Cunning Cunt 魔 27 Nov, 2023 @ 5:36pm 
Is Nuke spamming a viable endgame method? Didnt find anything here but great guide! :)
Badstormer  [author] 26 Aug, 2023 @ 11:33pm 
It seems I've overlooked that, yes.
Eridani 22 Aug, 2023 @ 12:56pm 
I think, the UEF research converter is missing :steamsad:
为让我心醉的你  [author] 25 Jun, 2023 @ 4:30pm 
he is kind of a nerd boi tho