Killing Floor

Killing Floor

244 ratings
How to Maim Zeds and Decapitate Zombies - The Working Man's Berserker Guide
By Capitalist Pig-Dog
The Working Man's Berserkers Guide is guaranteed to turn YOU, the average player, into the sword-swinging, stab-happy, insane axe murderer Mother always wanted! No matter your level of manual dexterity, tactical competence, or reading comprehension, you, yes YOU, can be a competent Berserker in no time at all.

Details within.
   
Award
Favorite
Favorited
Unfavorite
Introduction
The Working Man's Berserker Guide (or to use it's alternative title, the Proletariat's Guide to Simulated Knife-Crime) aims to turn you, the average player, into an effective Berserker by teaching you simple, lowest-common-denominator techniques that require minimal skill and tactical reasoning. This is not, and nor does it pretend to be, a be-all end-all guide to Killing Floor bladework, I cannot promise that readers of the guide will be able to solo HOE with level 0 berserkers. However what I can promise is that, should you follow all the tips and techniques listed in this guide, you should be able to survive at least 60% of your pub games without being vote-kicked for n00bness.

Hopefully, anyhow.

This guide covers
  • the various melee weapons avaliable to the berserker class
  • popular and effective off-perk weapon choices
  • techniques for dealing with the more dangerous zeds

In addition, to facilitate the dissemination of such information to the temporally or literally challenged masses, short, condensed versions of important sections will be provided, so those who don't want to wade through walls of text, despair not.

So, without further ado, let us begin.

Short Version: Welcome to zerk guide, read pls.
Main Arms
Accidentally bought Killing Floor when you meant to buy Skyrim? Feel like bringing a knife to a chainsaw/fireball fight? Then look no further, 'cause the Berserker class has all the sharp, pointy weapons you'll need to really stand out in next year's Renaissance Fair!

In this section we'll go over the various implements of misery and death available to the berserker class and discuss their properties and uses. For simplicity's sake (and not because, say, the guide author is lazy or anything) we will group similar weapons together and discuss them as such.

Trash Killers


Now, we at the Workingman's Guide understand that it might be politically incorrect to refer to certain classes of specimens as 'trash' and as such, feel free to think of this section as the "Homicidally-Disadvantaged Specimen Eutheniser" or whatever, it's a free world.

Having gotten that out of the way, let's look at the three weapons highlighted in this section, namely the knife, machete and katana. We can quickly dismiss the first two as nothing but cheap, sub-par equipment that should be used only by the poor or desperate. Whilst serviceable in a pinch and rather easy to use (just alt-fire heads), the lack of damage on these two will make facing anything tougher than a gorefast a dangerous and time consuming activity.

Now, on the other hand, the katana (or, as the Japanese call it: the katana), is the sexy, swinging single of the melee weapon world. Its primary fire is fast and deadly enough to cut through weaker zeds like a heated blade through margarine, and it's alt-fire can decapitate sirens and husks in 1 or 2 strikes. In addition, on Hard and lower difficulties, the katana is able to flinchlock (more on this in a later section) Scrakes, making it, really, the only melee weapon you need on these difficulty levels.

Those of you who play on Suicidal or HOE, however, will find even the katana inadequate for dealing with Scrakes and Fleshpounds, and for those, you'll need....

Giant Slayers


Many a berserker keeps one of these two axes on hand to deal with Scrakes and Fleshpounds. Their large damage output but low rate of fire mean that, while very much able to deliver high damage to single targets, the two suffer when used against large groups of weaker specimens. Do note that Scrakes spawns begin at wave 5 on a long game and Fleshpound spawns begin on wave 7, so you should really look into acquiring a weapon capable of dispatching these specimens by the appropriate time.

The dwarven axe's primary attack has the additional property of knocking back nearby zeds. You can use this to your advantage to, for example, temporarily keep a raging Scrake at arm's length or knock specimens off buildings, but its glacial rate of fire severely limits its usefulness.

The fire axe is often paired with the katana to turn the berserker into an unholy dual-classing samurai-fireman capable of handling all the different zed types by himself. For the man who wants it all in a single weapon however, we turn to...

Large Packages
Dear god, look at the size of them. You compensating for something, man?


What these two lack in subtlety they make up for in reach. Finally you, too, can make like Conan the Barbarian and lop off multiple heads in a single stroke. The claymore and scythe are a good middle ground between the various weapon types, giving you good trash clearing ability (on account of the wide swings) with the ability to deal with larger zeds as well.

Unfortunately, however, they tend to be abit on the slow side, both in terms of movement and attack speed. Whether you choose to use one of these two or a combination of other melee weapons is largely down to personal preference. Just pick whatever works for you and to hell with the critics.

Defensive Weaponry


Now the reason why these two are classed as such is because you don't get the melee speed bonus with them, meaning that running around the map dodging zeds left and right becomes decidedly unfeasible.

Where the chainsaw really shines, however, is in room defence. If you and your mates are holed up packed like sardines in some claustrophobic closet then you won't really be in a position to utilize any fancy tactics that require luxuries like space or movement. What you will be able to rely on, however, is the sky-high DPS of the chainsaw's alt-fire, by far the highest of any melee weapon. Very much a brutal weapon, although take note that, should your team wipe and you be forced to go it alone, a chainsaw as your primary melee weapon isn't going to be quite the best performer.

Now the author has very limited experience with the buzzsaw bow and therefore can't speak with any real authority, but it would seem from the weapon characteristics (penetrating, rebounding, recoverable ammunition) that it is best employed in narrow, enclosed areas. In such situations a buzzsaw-equipped berserker could probably fill in for a crossbow sharpshooter at short range, seeing as the buzzsaws are able to stun Scrakes and do good damage to Fleshpounds. Pairing the bow with a light melee weapon such as a katana, however, is highly advised.

Short Version: Buy Kat/Axe-> Axe Sc+Fp, Kat everything else.
Sidearms
What's this!? A section on firearms? In a berserkers guide? What is the world coming to? Back in my day all we had was rusty forks, and...etc.etc.

Yes, yes, you're playing a berserker because the poetic grace of a sword is far more majestic than crude firearms, I know, I know. However, not all the zeds you'll encounter will be easily dispatchable in melee. And in fact there are numerous situations in which you'll find a projectile-spewing sidearm to be a crucial asset in ensuring your survival.

To begin, ladies and gentlemen, fellow berserkers, meet the Crawler.


This little bugger (Ha! BUG-er, gedd-) is by far the most rage-inducing zed you'll encounter in the course of your Killing Floor games. He's fast, hard to hit with melee weapons, and has an annoying jump attack that's almost certain to damage you if you get too close.

While there do exist many advanced and mystical techniques for dealing with this critter in melee, such as the fabled Mid-Air Chop or the legendary Bait-And-Dodge, this Workingman's Guide is committed to providing you with the simplest, safest, most n00b-friendly technique and as such advises you to...

Just SHOOT the bugger.

Similiarily, berserkers should not shy away from shooting other tricky-to-melee zeds such as bloats, clustered sirens or entrenched husks. After all, no point eating damage if you don't have to.

Now, while ye old 9mm pistole is probably good enough to clear crawlers on lower difficulties, ideally what you want is a firearm that kills crawlers in 1 bodyshot (because headshots aren't always feasible) and also provides enough long-range accuracy to pick off sirens and husks at distance.

What you want, in fact, is the LAR.


The Lever-Action Rifle (or Lars, as he's known to friends) is cheap, accurate, and does enough damage to one-shot crawlers on all difficulties, making it the ultimate accessory for the discerning Berserker. It's got a slow but interruptable reload, however it's rate of fire is a little on the slow side, meaning that you might have a little trouble quickly clearing nearby zeds if you're suddenly swarmed.

Alternatively, you could try any of the other pistols such as the Handcannon or the Flare Revolver. This would give you better close-range capabilities at the expense of long-range accuracy. Take note however that the Handcannon only one-hits crawlers on a bodyshot up to Suicidal difficulty, and the MK23 only does so on Normal and below.

In addition, if you happen to be rolling in cash (not unusual in solo mode, or possibly even co-op, if you're the miserly type), consider buying Pipe Bombs. Much of berserker play consists of running away in gormless terror from the horde, and a well-placed pipe bomb (preferably in front of a welded door) can work wonders for your chances of survival. If at all possible, avoid using your final bomb so you can continue to scavenge pipes from ammo boxes.

There are, of course, many other weapons you could try, such as the M79 for crowd control or even a crossbow for picking off distant husks/sirens. Though they all have their uses, most of the time you'd probably be better off sticking to Lars and his pistol cousins.

Short Version: Buy LAR -> shoot crawler,siren,husks,bloat ->Profit.

Honourable Opponents
Not every zed is a mindless, deformed package of hunger and rage hell-bent on getting their little cannibal hands on your delicious, juicy innards. There are, in fact, select zeds who, true to the ancient warrior spirit of the vikings and the samurai, want nothing more than to face you, the Anglo-Saxon scion of Brittannia, in honourable, glorious single combat.

This section is about these venerable warrior zeds, and all the sneaky, backhanded, downright unfair methods you can use to bump them off.

The Scrake


The unraged Scrake is probably the most docile and (at least in wide open maps) the least dangerous zed you'll encounter, if only because it moves slower than a sleepwalking geriatric wearing cast-iron boots. For the most part, you can safely run circles around it, thinning out the weaker zeds to set the stage for your epic confrontation.

The simplest way to survive a Scrake attack on difficulties of Hard and lower is simply to switch to your katana and spam your primary fire. Through use of the ancient Japanese sword technique Unagi-bento the Berserker is able to lock the Scrake into a state of bemused confusion, and it will simply stand idly by while your katana makes sashimi out of it's face.

On Suicidal and up, however, this method ceases to work, and instead, Berserkers will have to rely on stunning the Scrake with an alt-fire attack to the head with the fire/dwarvern axes, the claymore or the scythe. A successful headbash will leave the Scrake lolling its noggin in confusion, and from there, you just rinse and repeat. Do note, however that you need to be (if I remember correctly) at least level 5 before you can stun Scrakes from the front using this method.

Of course there will come a time when you'll inevitably mess up your headshots, and you find the once placid Scrake charging you with the sole intention of rearranging your vital organs. In this situation it is important to remember not to run. Instead, stand your ground like a true warrior and face him mano a mano, as god intended. The Scrake, honourable bushido veteran that he is, will reward your bravery by using a less damaging version of his chainsaw attack on you, giving you (and hopefully your team) more time to repay his generosity with brutal, violent death.

Short Version: Hard and below: Use Katana, All Difficulties: Headshot with axe.

The Fleshpound


Ah, the fleshpound, probably the zed most responsible for team wipes on all difficulties. But worry not, young berserkers, for today you learn how to defend yourselves against this terrible warrior.

Like Scrakes, unraged fleshpounds are not all that deadly, however, unlike Scrakes, the petulant fleshpounds tend to rage easily and often, meaning that ignoring them is often not a viable strategy. The key to defeating the fleshpound, therefore lies in understanding and taking advantage of its rage mechanics.

Fleshpounds rage if they take more than a certain amount (roughly slightly more than 1 alt-fire head hit from the more damaging melee weapons) of damage in a three-second period. Thus the first rule of anti-fleshpound warfare is that you should never hit them more than once every 3 seconds (assuming you're using the recommended axe/claymore/scythe).

Fleshpounds also rage if a player remains in their line of sight for more than roughly 10 seconds without the fleshpound getting a chance to attack. Now breaking line of sight by rounding a corner or closing a door will reset this timer, but you won't always have such environmental features handy, so you'll have to rely on a slightly more dangerous method: Provoking an attack.

The concept is simple enough, get close enough to trigger an attack, then use your boosted speed to jump/run out of range. Viola, the fleshpounds expends an attack on empty air, and you get another 10 or so seconds of rage-free peace. Of course, in reality, some practice is required before this technique can be used as anything other than assisted suicide, but you'll get the hang of it eventually.

Short Version: Axe, wait 3 seconds, axe, wait 3 seconds, axe, wait 3 seconds, provoke attack. Repeat sequence until death.


The Patriarch


Right, the big grandaddy of zeds, ol' Patty himself. Tackling him with melee weapons is, whilst ill-advised, certainly possible, although you'll get much more mileage out of this tactics if you've got a team backing you up.

You'll have your best chance positioned in enclosed areas, as his chaingun and rockets will simply maul you in open terrain, although remember that a melee hit from any weapon will interrupt his ranged attacks. You'll mostly want to dart in and out of melee range provoking and dodging his attacks as well as scoring your own hits when possible. The best weapons for this are probably the katana (the extra speed can make all the difference when dodging his swings) or the claymore (the extra reach means you don't have to get as close). Killing him alone can be a true exercise in endurance and skill.

If, however, you happen to have teammates with you, then you'd do better to shift your strategy to simply keeping the Patriarch occupied while your buddies take potshots at him with whatever they've got. In this situation it can be enough just to provoke and dodge his attacks, giving your teammates more time to unload on the wanker.

Short Version: Close to melee, provoke/dodge, pray for deliverance.

Future Content
Sections on berserker mentality and teamwork tactics to follow in the near future. Watch this space.

Short Version: Nothing to see here, move along.
41 Comments
Shiro 15 Jul, 2015 @ 4:54am 
Important: BACKSTABS DEAL DOUBLE DAMAGE with melee weapons always.
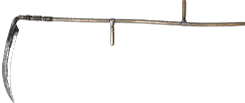
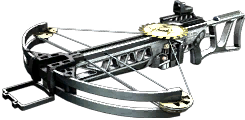
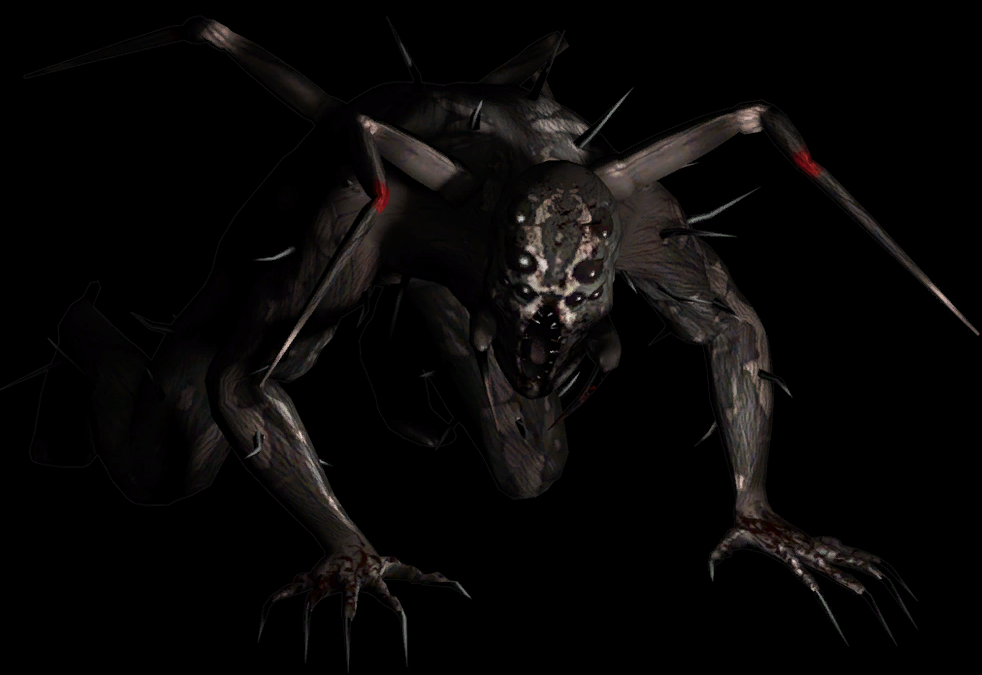
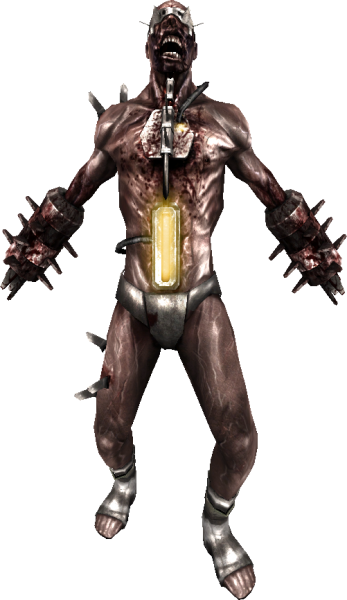
please add that. Its so easier to stun Scrake from behind (in teamplay, when they target other players), since to stun you need to deal 667+ damage in one hit
otherwise its great gude, it sure will help all newbs
Frontschwein 6 Jun, 2015 @ 2:32pm 
Great guide and hilarious.
Unagi bento XD I laughted my ass off
Arran 18 Nov, 2013 @ 9:41am 
Easely the best guide ive read. Shows some good tactics, awesome to read and everything. Good work! Get some pennys :penny::penny::penny::penny::penny::penny::penny::penny::penny::penny::penny::penny::penny::penny::penny::penny::penny::penny::penny::penny::penny::penny::penny:
rockyfunky 28 Jul, 2013 @ 8:04pm 
short version: great guide
ItsAll19 18 Jul, 2013 @ 9:06pm 
simply awesome -
makes me glad to love ther berzerker when all I see is people griping about it (granted, that griping is due to berzerkers that have no freakin' idea how to berzerk, which I've been puh-lenty guilty of myself just out of not knowing any better - I apologize)

right then - off to practice (glad you ok'd the handcannon and lar cause I love 'em both (can't resist a trenchgun too tho') I shall return as a learn-ed and useful lunatic :B1:

great read - keep doing that...
human resource 17 Jul, 2013 @ 2:15pm 
This is one of the best things I've read in a while, loved the paragraph about the Scrake rewarding my bravery with a less damaging attack
DΛЯK ΣXӨƬΛƬΉ 7 Jun, 2013 @ 4:36pm 
for the pat you can try zerg rush with a full team of chainsaws granted zerk lvl has to be a bit high...its just hard to surround him so he cant move
meltphace 6 May, 2013 @ 12:04am 
greit guide
PaperBearBot 16 Apr, 2013 @ 5:21pm 
I love the humor, and the advice was great too!
WalrusThunderTusk 13 Apr, 2013 @ 6:56pm 
Wow I had no idea you could interrupt the patriarch's ranged attacks, all i did was stay at a fair range and spammed grenades and the buzzsaw bow at him, thanks for the information.